푸시 알림
앱을 사용하다 보면 사용자에게 알림을 보내야 하는 경우가 생깁니다. 이때 쉽게 사용할 수 있는 로컬 푸시 알림을 보내는 방법에 대해 배워보도록 하겠습니다.
권한 요청
대부분의 앱에서 처음 실행할 때 사용자에게 권한을 요청하죠? 그래서 저는 AppDelegate 클래스의 didFinishLaunchingWithOptions에서 앱을 실행할 때 권한을 요청하도록 만들겠습니다.
먼저 UserNotifications을 import 해야 합니다.
import UserNotifications그리고 didFinishLaunchingWithOptions 메서드에서 권한을 요청해야 하는데 코드를 보면서 설명하겠습니다.
func application(
        _ application: UIApplication,
        didFinishLaunchingWithOptions launchOptions: [UIApplication.LaunchOptionsKey: Any]?
    ) -> Bool {
        userNotificationCenter.delegate = self

        let authorizationOption: UNAuthorizationOptions = [.alert, .badge, .sound]
        userNotificationCenter.requestAuthorization(options: authorizationOption) { allow, error in
            if let error = error {
                print("error: \(error.localizedDescription)")
            }
            print(allow)
        }
        return true
}UNAuthorizationOptions가 무엇인가? 하면 우리가 알림을 받을 때 여러 가지 옵션들이 있는데 공식 문서를 보면 아래와 같이 여러 가지 옵션들이 있습니다.
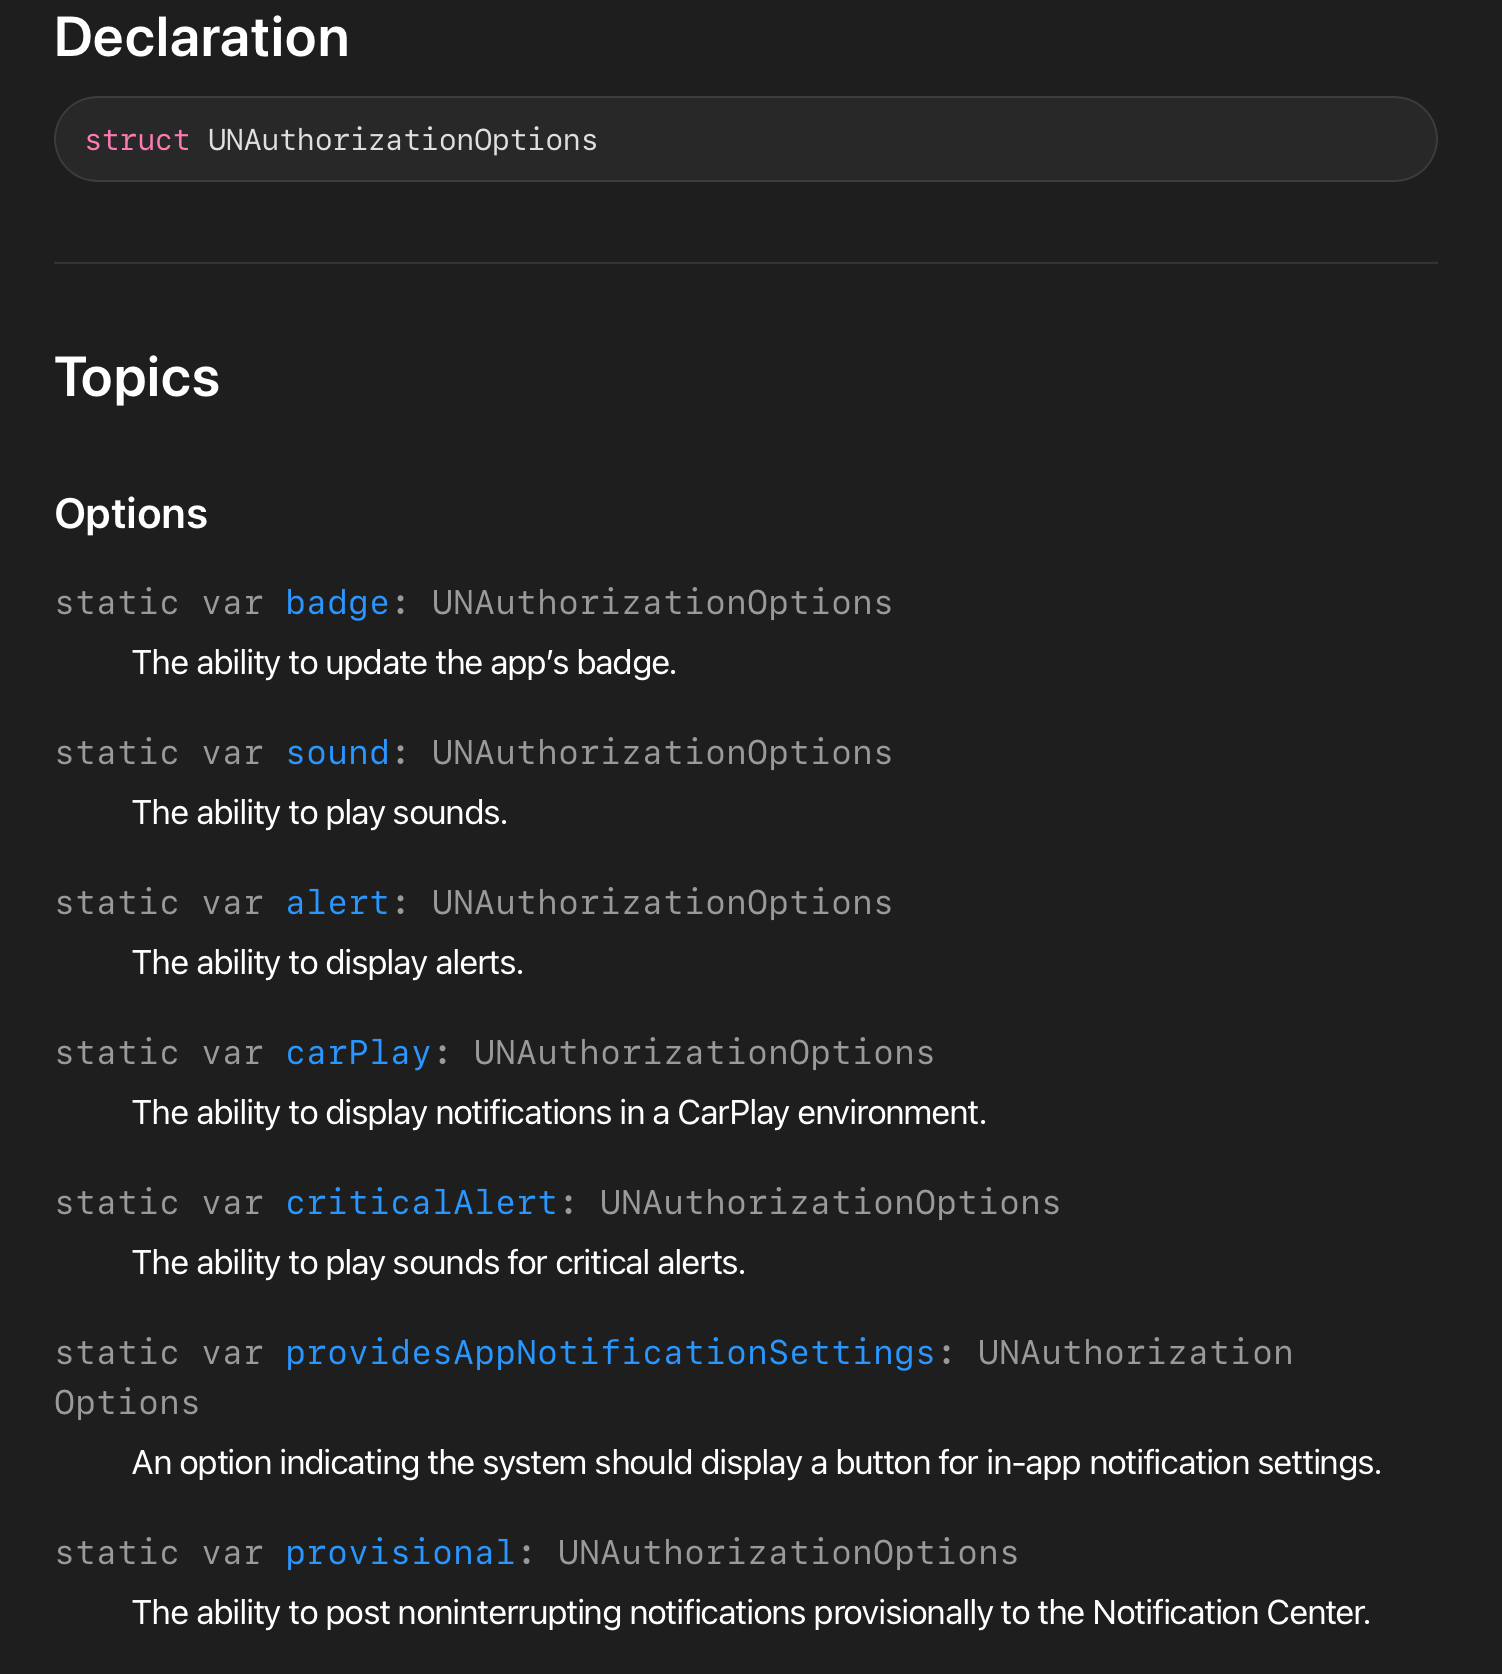
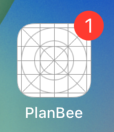
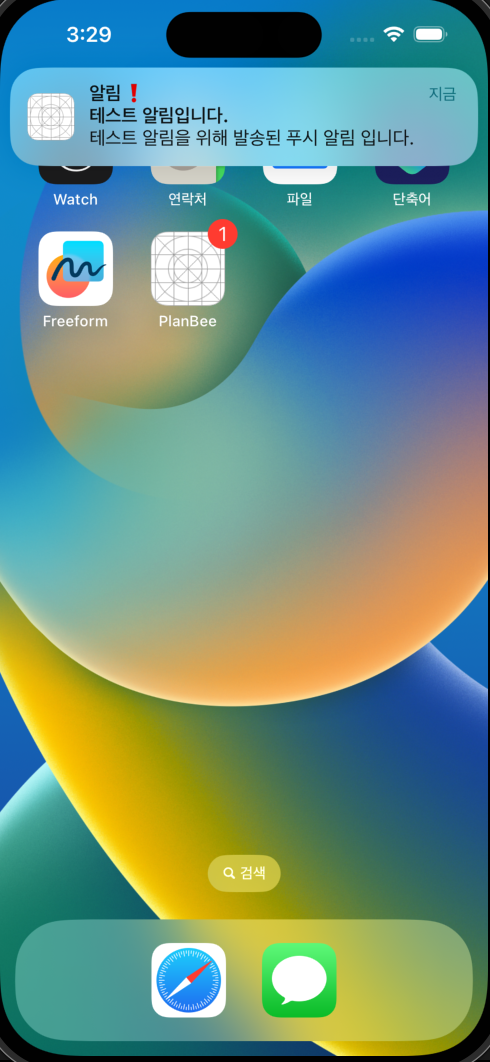
저는 여기서 badge, sound, alert를 사용했는데 sound와 alert는 의미 그대로이고 badge는 뭔가 하면.. 아래 사진과 같이 우측 상단에 빨간색으로 표시되는 것을 badge라고 합니다.
이렇게 옵션을 정하고 userNotificationCenter.requestAuthorization으로 권한을 요청하게 되고 사용자가 알림 요청을 허용하면 allow에 true, 거부하면 false가 들어가게 됩니다.
여기서 주의해야 할 점은 userNotificationCenter.delegate = self로 설정한 후에 아래와 같이 코드를 추가해 줘야 합니다.
extension AppDelegate: UNUserNotificationCenterDelegate {
    func userNotificationCenter(
        _ center: UNUserNotificationCenter,
        willPresent notification: UNNotification,
        withCompletionHandler completionHandler: @escaping (UNNotificationPresentationOptions) -> Void
    ) {
        if #available(iOS 14.0, *) {
            completionHandler([.banner, .list, .badge, .sound])
        } else {
            completionHandler([.badge, .sound])
        }
    }

    func userNotificationCenter(
        _ center: UNUserNotificationCenter,
        didReceive response: UNNotificationResponse,
        withCompletionHandler completionHandler: @escaping () -> Void
    ) {
        completionHandler()
    }
}
해당 코드에서 willPresent부분은 앱이 포그라운드에서 실행 중일 때 알림이 표시되기 전에 호출되는 메서드이고, didReceive는 사용자가 알림에 응답할 때 호출되는 메서드입니다.
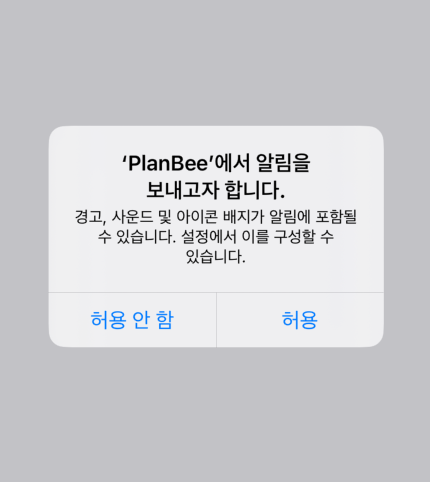
여기까지 코드를 작성한 후 앱을 실행하게 되면 아래와 같이 앱을 실행할 때 권한을 요청하게 됩니다.
권한 요청 전체 코드(AppDelegate)
import UIKit
import UserNotifications

@main
class AppDelegate: UIResponder, UIApplicationDelegate {

    let userNotificationCenter = UNUserNotificationCenter.current()

    func application(
        _ application: UIApplication,
        didFinishLaunchingWithOptions launchOptions: [UIApplication.LaunchOptionsKey: Any]?
    ) -> Bool {
        userNotificationCenter.delegate = self
        let authorizationOption: UNAuthorizationOptions = [.alert, .badge, .sound]
        userNotificationCenter.requestAuthorization(options: authorizationOption) { allow, error in
            if let error = error {
                print("error: \(error.localizedDescription)")
            }
            print(allow)
        }
        return true
    }
}

extension AppDelegate: UNUserNotificationCenterDelegate {
    func userNotificationCenter(
        _ center: UNUserNotificationCenter,
        willPresent notification: UNNotification,
        withCompletionHandler completionHandler: @escaping (UNNotificationPresentationOptions) -> Void
    ) {
        if #available(iOS 14.0, *) {
            completionHandler([.banner, .list, .badge, .sound])
        } else {
            completionHandler([.badge, .sound])
        }
    }

    func userNotificationCenter(
        _ center: UNUserNotificationCenter,
        didReceive response: UNNotificationResponse,
        withCompletionHandler completionHandler: @escaping () -> Void
    ) {
        completionHandler()
    }
}
알림 요청
방금까지는 알림 권한을 요청하는 부분이었고 이제 알림을 만들어서 보내야겠죠? 해당 부분도 코드를 보면서 설명하겠습니다.
import Foundation
import UserNotifications

extension UNUserNotificationCenter {
    func addNotificationRequest(date: Date) {
        let content = UNMutableNotificationContent()
        content.title = "알림❗️"
        content.subtitle = "테스트 알림입니다."
        content.body = "테스트 알림을 위해 발송된 푸시 알림 입니다."
        content.sound = .default
        content.badge = 1

        let component = Calendar.current.dateComponents([.hour, .minute], from: date)
        let trigger = UNCalendarNotificationTrigger(dateMatching: component, repeats: false)
        let request = UNNotificationRequest(identifier: UUID().uuidString, content: content, trigger: trigger)

        self.add(request, withCompletionHandler: nil)
    }
}
알림을 보내기 위해서 요청을 해야 하는데 이때 UNNotificationRequest을 사용합니다.
그리고 UNNotificationRequest의 구성 요소로 아래와 같이 ID, Content, Trigger 3가지 요소들이 필수적으로 필요합니다.
- ID : 알림의 고유한 값(알림 들을 구분하기 위해서 필요합니다.)
- Content : 알림의 내용
- Trigger : 조건 (Trigger 종류 3가지)
- UNCalendarNotificationTrigger(날짜 기준)
- UNTimeIntervalNotificationTrigger(시간 간격 기준)
- UNLocationNotificationTrigger(위치 / 장소 기준)
먼저 UNMutableNotificationContent을 사용해서 알림의 내용을 객체를 생성하고 UNCalendarNotificationTrigger로 알림 조건 객체를 만들어 줍니다. (저는 날짜를 기준으로 Trigger 조건을 설정했습니다.)
그다음으로 UNNotificationRequest 알림 요청 객체를 만들어 준 후에
마지막으로 UNUserNotificationCenter에 추가를 하면 끝입니다!
예제에서는 addNotificationRequest의 파라미터로 Date를 넘겨받도록 만들었는데 만드실 때 UIDatePicker의 Date를 아래의 코드처럼 넘겨주면 됩니다.
UNUserNotificationCenter.current().addNotificationRequest(date: alarmDatePicker.date)이렇게 알림을 설정하면 아래와 같이 로컬 푸시 알림이 온 것을 확인할 수 있습니다.
 알림이 도착한 후 앱을 실행했을 때 badge를 초기화하려면
 SceneDelegate의 sceneDidBecomeActive에 아래의 코드를 추가하면 됩니다.
UIApplication.shared.applicationIconBadgeNumber = 0 // 배지 초기화