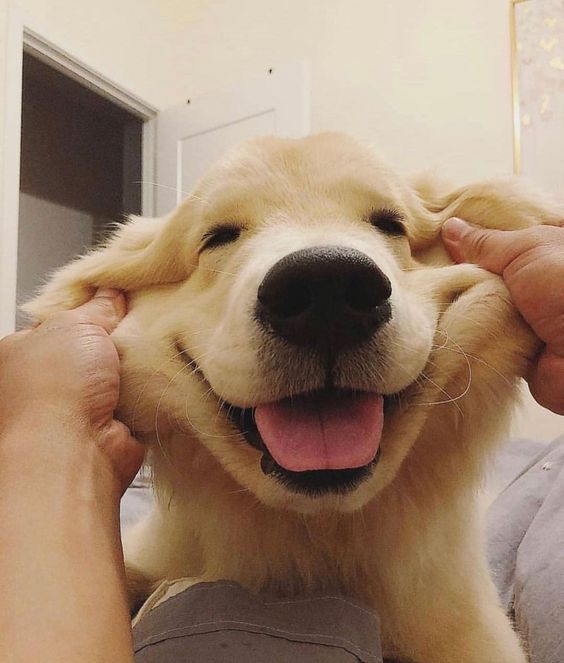
프로젝트: 고양이 수염 스티커 만들기
step1. 스티커 구하기, 만들기
step2. 얼굴 검출 & 랜드마크 검출하기
dlib을 이용해서 얼굴의 bounding box위치와 landmark 위치를 찾자.
# import module
import os
import cv2
import matplotlib.pyplot as plt
import numpy as np
import dlib
#얼굴 불러오기
my_image_path = os.getenv('HOME')+'/aiffel/camera_sticker/images/project_image.png' #원하는 이미지 경로를 지정한다
img_bgr = cv2.imread(my_image_path) # OpenCV로 이미지를 불러온다(절대/상대 경로 모두 가능)
img_show = img_bgr.copy() # 출력용 이미지를 따로 보관합니다
plt.imshow(img_bgr)
plt.show()
''' # RGB로 변경해보기
img_rgb = cv2.cvtColor(img_bgr, cv2.COLOR_BGR2RGB)
plt.imshow(img_rgb)
plt.show()'''
' # RGB로 변경해보기\nimg_rgb = cv2.cvtColor(img_bgr, cv2.COLOR_BGR2RGB) \nplt.imshow(img_rgb)\nplt.show()'bounding box 찾기
# detector, 얼굴찾기

detector_hog = dlib.get_frontal_face_detector()

# 변환
img_rgb = cv2.cvtColor(img_bgr, cv2.COLOR_BGR2RGB)
dlib_rects = detector_hog(img_rgb, 1)
print(dlib_rects) # 사각형 좌표값rectangles[[(194, 297) (656, 759)]]for dlib_rect in dlib_rects:
l = dlib_rect.left()
t = dlib_rect.top()
r = dlib_rect.right()
b = dlib_rect.bottom()
cv2.rectangle(img_show, (l,t), (r,b), (0,255,0), thickness=5, lineType=cv2.LINE_AA)
img_show_rgb = cv2.cvtColor(img_show, cv2.COLOR_BGR2RGB)
plt.imshow(img_show_rgb)
plt.show()
landmark 위치를 찾자.
model_path = os.getenv('HOME')+'/aiffel/camera_sticker/models/shape_predictor_68_face_landmarks.dat'
landmark_predictor = dlib.shape_predictor(model_path)
print("done")donelist_landmarks = []
# 얼굴 영역 박스 마다 face landmark를 찾아낸다
for dlib_rect in dlib_rects:
points = landmark_predictor(img_rgb, dlib_rect) # rgb image, rectangle
# 68개의 face landmark 좌표를 저장한다.
list_points = list(map(lambda p: (p.x, p.y), points.parts()))
list_landmarks.append(list_points)
print(len(list_landmarks[0]))68for landmark in list_landmarks:
for point in landmark:
cv2.circle(img_show, point, 5, (255, 0, 255), -1)
# cv2.circle(img, center, radius, color, thickness=None, lineType=None, shift=None) -> img
img_show_rgb = cv2.cvtColor(img_show, cv2.COLOR_BGR2RGB)
plt.imshow(img_show_rgb)
plt.show()
## 코끝 랜드마크 찾기
for dlib_rect, landmark in zip(dlib_rects, list_landmarks):
    print (landmark[33]) # 코끝의 index는 33 #설명에는 코끝보다 좋은 곳이 있다고 했는데, 잘 모르겠다.
    x = landmark[33][0]
    y = (landmark[33][1] + landmark[30][1])//2
    w = h = dlib_rect.width()
    print ('(x,y) : (%d,%d)'%(x,y))
    print ('(w,h) : (%d,%d)'%(w,h))
(441, 572)
(x,y) : (441,546)
(w,h) : (463,463)step3. 스티커 적용 위치 확인하기
## resize

sticker_path = os.getenv('HOME')+'/aiffel/camera_sticker/images/catfish.png'
img_sticker = cv2.imread(sticker_path) # 스티커 이미지를 불러옵니다
img_sticker = cv2.resize(img_sticker, (w,h)) # 스티커 resize
print (img_sticker.shape)
(463, 463, 3)# refine 해줌.
refined_x = x - w//2
refined_y = y - h//2
print ('(refined_x,refined_y) : (%d,%d)'%(refined_x, refined_y))(refined_x,refined_y) : (210,315)## 범위 밖의 스티커 이미지 영역을 잘라줌
if refined_x < 0:
img_sticker = img_sticker[:, -refined_x:]
refined_x = 0
if refined_y < 0:
img_sticker = img_sticker[-refined_y:, :]
refined_y = 0# 길어서 복잡해 보이지만 img_show[from:to] 형식입니다
sticker_area = img_show[refined_y:refined_y+img_sticker.shape[0], refined_x:refined_x+img_sticker.shape[1]]
img_show[refined_y:refined_y+img_sticker.shape[0], refined_x:refined_x+img_sticker.shape[1]] = \
np.where(img_sticker==255, sticker_area,img_sticker).astype(np.uint8)
print("Done")Doneplt.imshow(cv2.cvtColor(img_show, cv2.COLOR_BGR2RGB))
plt.show()
step4. 스티커 적용하기
1) np.where를 활용해서 적용하기
## bgr이미지에서 사용해서, landmark와 bounding box 없이 스티커만 출력
img_del = img_bgr.copy() # 2) 과제를 위해 미리 복사함.

sticker_area = img_bgr[refined_y:refined_y +img_sticker.shape[0], refined_x:refined_x+img_sticker.shape[1]]

img_bgr[refined_y:refined_y +img_sticker.shape[0], refined_x:refined_x+img_sticker.shape[1]] = \
    np.where(img_sticker==255, sticker_area,img_sticker).astype(np.uint8)
plt.imshow(cv2.cvtColor(img_bgr, cv2.COLOR_BGR2RGB))
plt.show()
## was hard: imshow할떄 이미 한 번 적용되어버린 건 지워지지 않고 떠버림 ㅠㅠ2) 자연스럽게 보이기 위해 cv2.addWeighted() 참고하기
# 사용할 이미지 체크
plt.imshow(img_del)<matplotlib.image.AxesImage at 0x7f9998259fd0>
# addWeight로 합성하기

img_crop = img_del[refined_y:refined_y +img_sticker.shape[0], refined_x:refined_x+img_sticker.shape[1]]
#img_sticker와 size가 동일하게 잘라줌

img_sticker_select = img_sticker[:,:] = \
    np.where(img_sticker==255, sticker_area,img_sticker).astype(np.uint8)

img_weighted = cv2.addWeighted(img_crop, 0.4, img_sticker_select, 0.6, 0.0) # 가중치를 부여함

plt.imshow(img_weighted)
plt.show()

img_del[refined_y:refined_y +img_sticker.shape[0], refined_x:refined_x+img_sticker.shape[1]] = img_weighted

plt.imshow(cv2.cvtColor(img_del, cv2.COLOR_BGR2RGB))
plt.show()

step5. 문제점 찾아보기
(1) 셀프 카메라를 다양한 각도에서 촬영하면서 스티커를 반복해서 적용해 보세요.
1. 각도에 따라 다른 얼굴
# 얼굴 불러오기- up, under, side

my_image_path = os.getenv('HOME')+'/aiffel/camera_sticker/images/up.png' #원하는 이미지 경로를 지정한다
img_up = cv2.imread(my_image_path)    # OpenCV로 이미지를 불러온다(절대/상대 경로 모두 가능)

my_image_path = os.getenv('HOME')+'/aiffel/camera_sticker/images/under.png'
img_under = cv2.imread(my_image_path)

my_image_path = os.getenv('HOME')+'/aiffel/camera_sticker/images/side.png'
img_side = cv2.imread(my_image_path)

 # 출력용 이미지를 따로 보관합니다
img_show_up = img_up.copy()
img_show_under = img_under.copy()
img_show_side = img_side.copy()

# check

plt.figure(figsize=(20,20))
plt.subplot(1,3,1)
plt.imshow(img_show_up)

plt.subplot(1,3,2)
plt.imshow(img_show_under)

plt.subplot(1,3,3)
plt.imshow(img_show_side)

plt.show()
앞에서 배운 내용을 토대로 함수를 만든다.
def draw_box(img_input):
    global l,t,r,b, dlib_rects
    #detector load
    detector_hog = dlib.get_frontal_face_detector()

    #변환
    img_re = cv2.cvtColor(img_input, cv2.COLOR_BGR2RGB)
    dlib_rects = detector_hog(img_re, 1)

    for dlib_rect in dlib_rects:
        l = dlib_rect.left()
        t = dlib_rect.top()
        r = dlib_rect.right()
        b = dlib_rect.bottom()


    # draw
    cv2.rectangle(img_input, (l,t), (r,b), (0,255,0), thickness=20, lineType=cv2.LINE_AA)
    print("bounding box is drawed")
    print(dlib_rects)
    return img_input


def draw_landmark(img_input):
    global points, list_landmarks, dlib_rects
    list_landmarks = []

    # 얼굴 영역 박스 마다 face landmark를 찾아낸다
    for dlib_rect in dlib_rects:
        points = landmark_predictor(img_input, dlib_rect) # rgb image, rectangle
        # 68개의 face landmark 좌표를 저장한다.

    list_points = list(map(lambda p: (p.x, p.y), points.parts()))

    list_landmarks.append(list_points)

    for landmark in list_landmarks:
        for point in landmark:
            cv2.circle(img_input, point, 5, (255, 0, 255), -1)
            # cv2.circle(img, center, radius, color, thickness=None, lineType=None, shift=None) -> img

    print("Drawing Finished")
    return None


def find_landmark(number):
    global x,y,w,h

    for dlib_rect, landmark in zip(dlib_rects, list_landmarks):
        print (landmark[number]) # 코끝의 index는 33 #설명에는 코끝보다 좋은 곳이 있다고 했는데, 잘 모르겠다.
        x = landmark[number][0]
        y = landmark[number][1]
        w = h = dlib_rect.width()
    return None


def get_sticker_area(img_input): #img_sticker가 있는 상태에서 진행
    global refined_x, refined_y, sticker_with_area, img_sticker

    sticker_path = os.getenv('HOME')+'/aiffel/camera_sticker/images/catfish.png'
    img_sticker = cv2.imread(sticker_path) # 스티커 이미지를 불러옵니다
    img_sticker = cv2.resize(img_sticker, (w,h)) # 스티커 resize

    refined_x = x - w//2
    refined_y = y - h//2

    if refined_x < 0:
        img_sticker = img_sticker[:, -refined_x:]
        refined_x = 0
    if refined_y < 0:
        img_sticker = img_sticker[-refined_y:, :]
        refined_y = 0

    sticker_with_area = img_input[refined_y:refined_y+img_sticker.shape[0], refined_x:refined_x+img_sticker.shape[1]]

    return None

def transparent_pic(img_input):

    img_cropped = img_input[refined_y:refined_y +img_sticker.shape[0], refined_x:refined_x+img_sticker.shape[1]]

    img_with_sticker_select = img_sticker[:,:] = \
        np.where(img_sticker==255, sticker_with_area,img_sticker).astype(np.uint8)

    img_with_weight = cv2.addWeighted(img_cropped, 0.4, img_with_sticker_select, 0.6, 0.0) # 가중치를 부여함

    img_input[refined_y:refined_y +img_sticker.shape[0], refined_x:refined_x+img_sticker.shape[1]] = \
        img_with_weight

    return img_input

def do_all(img_input, number):
    draw_box(img_input)
    draw_landmark(img_input)
    find_landmark(number)
    get_sticker_area(img_input)
    transparent_pic(img_input)
img_show_up = img_up.copy()
do_all(img_show_up,33)
plt.imshow(cv2.cvtColor(img_show_up, cv2.COLOR_BGR2RGB))
plt.show()
bounding box is drawed
rectangles[]
Drawing Finished
img_show_under = img_under.copy()

do_all(img_show_under,33)


plt.imshow(cv2.cvtColor(img_show_under, cv2.COLOR_BGR2RGB))
plt.show()
bounding box is drawed
rectangles[[(171, 357) (726, 911)]]
Drawing Finished
(454, 662)
img_show_side = img_side.copy()

do_all(img_show_side,33)

plt.imshow(cv2.cvtColor(img_show_side, cv2.COLOR_BGR2RGB))
plt.show()
bounding box is drawed
rectangles[[(245, 297) (707, 759)]]
Drawing Finished
(455, 578)
step5 - (1)에 대한 회고
각도가 바뀌니 인식을 잘 하지 못함을 알 수 있다.
up인 경우는 얼굴도 인식하지 못하고, landmark도 잡아내지 못했다.
그래도 under, side 경우는 bounding box, landmark, 스티커모두 잘 작동함을 알 수 있었다.
원본 사진에 사진이 정상적으로 잘 합성되고, 좌표값이 잘 주어져 출력되었다.
(2) 문제점이 무엇인지 최대한 자세하게 기록해 보세요. 여러분이 생각한 문제점을 해결하기 위한 방법은 분명 존재합니다!
오늘 만든 스티커앱에서 생각해볼 수 있는 문제점은 다음과 같습니다.
얼굴 각도에 따라 스티커가 어떻게 변해야할까요?
1) 3D 형태의 회전
정면으로 촬영했을 때의 landmark값이 정해져있다고 가정할 때, 그와 얼마나 다른지를 비교해서 회전을 시킬 수 있겠다는 생각이 들었다.
좌우 회전, 상하 회전 모두를 구현해야한다.
사람의 얼굴이 대칭이란 점을 아이디어로 착안했다.
이미지에서 보면 알 수 있다시피, 우리는 27과 29을 기준으로 좌우, 상하로 벌어진 (36,45), (28,30)을 찾아볼 수 있을 것이다.
그래서, 만약 사진의 방향이 정면이라면 27과 29을 기준으로
abs((36에 해당하는 좌표값)-(27에 해당하는 좌표값)) = abs((27에 해당하는 좌표값)-(45에 해당하는 좌표값))
abs((28에 해당하는 좌표값)-(29에 해당하는 좌표값)) = abs((29에 해당하는 좌표값)-(30에 해당하는 좌표값))
이 같을 것이다.
그렇기에, 회전이 발생한다면 이 계산값들 간에 차이가 발생할 것이고, 거기서 회전량을 판단할 수 있을 것이다.
그 회전량을 기준으로, 스티커 이미지를 회전시킨다면, 각도에 따라 반응하는 앱을 만들 수 있을 것이다.
이를 어떻게 구현할지 많은 생각을 해봤는데, 성공하지 못했다.
2) 2D 형태의 회전
정면인 상태에서 단순히 45도 회전, 90도 회전만 진행되는 경우가 있을 것이다.
이는 추후에 설명
from scipy import ndimage


my_image_path = os.getenv('HOME')+'/aiffel/camera_sticker/images/project_image.png' #원하는 이미지 경로를 지정한다
img_bgr = cv2.imread(my_image_path)    # OpenCV로 이미지를 불러온다(절대/상대 경로 모두 가능)
img_show = img_bgr.copy()      # 출력용 이미지를 따로 보관합니다

rotated_315 = ndimage.rotate(img_bgr, 45)
plt.imshow(rotated_315)
plt.show()

rotated_90 = ndimage.rotate(img_bgr, 90)
plt.imshow(rotated_90)
plt.show()


do_all(rotated_315,33)
plt.imshow(cv2.cvtColor(rotated_315, cv2.COLOR_BGR2RGB))
plt.show()

do_all(rotated_90,33)
plt.imshow(cv2.cvtColor(rotated_90, cv2.COLOR_BGR2RGB))
plt.show()
bounding box is drawed
rectangles[]
Drawing Finished
bounding box is drawed
rectangles[]
Drawing Finished
실행 속도가 중요할까요?
중요하다고 생각한다. 사용자 편의를 위해서 만드는 카메라 앱이고, 여러 가지 필터도 둘러보고, 좋은 사진이 나오기 위해 이리저리 각도를 돌려보고 했을 때 필터가 즉각적으로 반응해야 한다. 그래야 사용자들이 편리함을 느낄테고, 앱에 머무르는 시간이 길어질 것이다.
스티커앱을 만들 때 정확도가 얼마나 중요할까요?
정확도는 실행속도만큼 중요하다고 생각하지 않는다. 카메라앱을 가지고 장난을 치다보면, 생각치도 못한 곳에 인식이 돼서 오히려 더 재미있는 경우가 있다.
설사 한 번 오류가 나더라도 다시 카메라를 이리저리 돌리면 바로 원래 상태로 돌아오기 때문에, 상관없다고 생각한다.
이미지 밝기에 따른 영향
빛의 세기에 따라 픽셀 값이 변한다는 점을 깨달았다. 즉 같은 물체를 촬영했을지라도 빛이 적은 상태에서 찍었을 때 픽셀들의 값이 전체적으로 작아진다. 같은 이미지를 어둡다는 이유로 다른 물체로 분류할 수는 없으니 각 벡터의 원소의 합을 1로 만들어주는 normalizaton 과정을 수행한다.
따라서, 이미지 밝기가 낮은 경우는 밝기가 높은 경우에 비해 인식이 안되는 것 같다.
촬영거리에 따른 영향
멀리서 촬영한 이미지는 얼굴의 선이나 특징들을 잘 찾아내지 못하는 것 같다.
회고
- 이번 프로젝트에서 어려웠던 점,
- 이미지의 shape를 맞추는 게 어려웠다. 그리고, bounding box와 landmark, 그리고 sticker가 지워지지 않는다는 것을 이해하지 못해서 오류가 난 줄 알고 한참 헤맸다.
- 이미지를 회전시키면 인식이 되지 않는데, 이 점도 해결하려 했다가 많은 시간을 쓰고 포기했다.
- 프로젝트를 진행하면서 알아낸 점 혹은 아직 모호한 점.
-
bounding box와 landmark, 그리고 sticker가 지워지지 않는다는 것은
어떻게 이미지를 그리는가에 대한 작동원리를 정확히 몰랐기 때문이었다. 평소에 사용하던 카메라 앱에 스티커가 붙는다고 생각을 했는데, 픽셀값을 바꿔준다는 사실을 처음 알았다. -
어떻게 하면 3D회전이 됨에 따라 스티커 사진이 바뀔 수 있는지, 회전이 되면 어떻게 얼굴을 인식하는지는 아직 모호하다.
- 루브릭 평가 지표를 맞추기 위해 시도한 것들.
- 구글링을 정말 많이 했다. 1,2번은 상대적으로 쉽게 달성되었고,
- detector_hog의 detection이 이미지 밝기에 따라 영향을 받는다는 걸 구글링을 통해 알아내었다.
- 만약에 루브릭 평가 관련 지표를 달성 하지 못했을 때, 이유에 관한 추정.
- 3번째 평가문항에서 달성하지 못할 것 같다. 많은 변수들에 따른 영향도를 깊게 분석하지는 못한 듯하다 ㅠㅠ
- 자기 다짐
- 저번 다짐에서는 질문하는 습관을 들이겠다고 했다. 아직도 그 습관이 들지 않았다.
- 다만 블로그를 꾸미는 습관은 잘 들여진 것 같다!