
📗목차
지난 시간에 마무리 지었던 전체 코드를 다시 한번 살펴보자.
LoginBox.js
import React, { useState, useEffect } from 'react';
import '../style/LoginBox.css';

const LoginBox = () => {
    const [ isActive, setIsActive ] = useState(false);
    const [ form, setForm ] = useState({
        id: '',
        password: ''
    });
    const { id, password } = form;

    useEffect(() => {
        // id와 password 값의 유무에 따른 활성화 상태 변수
        setIsActive(id !== '' && password !== '');
    }, [id, password]);

    const handleInputChange = useCallback(e => {
        setForm(prevForm => ({
            ...prevForm,
           [e.target.name]: e.target.value
        }));
    }, []);

    return (
        <>
            <section className="login-form">
                <h1>추억을 로그인</h1>
                <form action="">
                    <div className="int-area">
                        <input
                            type="text"
                            name="id"
                            value={id}
                            onChange={handleInputChange}
                            id="name-input"
                            required
                        />
                        <label>Username</label>
                    </div>
                    <div className="int-area">
                        <input
                            type="password"
                            name="password"
                            value={password}
                            onChange={handleInputChange}
                            id="password-input"
                            required
                        />
                        <label>Password</label>
                    </div>
                </form>

                <button
                    id="btn-login"
                    type="submit"						 // 노란색 : 회색
                    style={{ backgroundColor: isActive ? "#d8db31" : "rgba(209, 206, 206, 0.733)" }} // style 동적으로 변경

                    LOGIN
                </button>
                <div id="hint">
                  <a href="hint.html" target='_blank'>Click to get a hint</a>
  				</div>
            </section>
        </>
    )
};

export default LoginBox;
이 코드에서 button 밑의 hint 부분부터 먼저 수정해줄 것이다.
"Click to get a hint"를 누르면 특정 주소의 컴포넌트로 연결되도록 하기 위해서 리액트 라우팅 라이브러리가 필요하다.
Route 컴포넌트로 특정 주소에 컴포넌트 연결
리액트 라우팅 라이브러리인 react-router-dom을 설치하도록 하겠다.
다음 코드를 터미널에 입력하고,
npm i react-router-dom
LoginBox 컴포넌트에 import 하면 아래와 같다.
import React, { useState, useEffect } from 'react';
import { Routes, Route, Link } from 'react-router-dom';
import '../style/LoginBox.css';

const LoginBox = () => {
	(...) // 생략

    return (
        <>
            <section className="login-form">
            	(...) // 생략
                <button
                    id="btn-login"
                    type="submit"						 // 노란색 : 회색
                    style={{ backgroundColor: isActive ? "#d8db31" : "rgba(209, 206, 206, 0.733)" }} // style 동적으로 변경
                >
                    LOGIN
                </button>
                <div id="hint">
                  <a href="hint.html" target='_blank'>Click to get a hint</a>
  				</div>
            </section>
        </>
    )
};

export default LoginBox;
여기서 <a href="hint.html" target='_blank'>Click to get a hint</a>
이 부분을 보면 a태그로 감싸져 있다.
SPA 형태로 개발할 것이기 때문에 a 태그를 사용하지 않고 Link 컴포넌트를 사용할 것이다.
그리고 Hint 컴포넌트를 새로 생성하고, Hint 컴포넌트로 이동할 수 있는 주소까지 설정해보곘다.
Link 컴포넌트로 다른 주소로 이동
Hint 컴포넌트 생성
import React from 'react';

const Hint = () => {
    return
}

export default Hint;
LoginBox.js
import React, { useState, useEffect } from 'react';
import { Routes, Route, Link } from 'react-router-dom';
import Hint from './Hint';
import '../style/LoginBox.css';

const LoginBox = () => {
	(...) // 생략

    return (
        <>
            <section className="login-form">
            	(...) // 생략
                <button
                    id="btn-login"
                    type="submit"						 // 노란색 : 회색
                    style={{ backgroundColor: isActive ? "#d8db31" : "rgba(209, 206, 206, 0.733)" }} // style 동적으로 변경

                    LOGIN
                </button>
                <div id="hint">
                  <Link to="/hint">Click to get a hint</Link>
  				</div>
            </section>
          	<Routes>
                <Route path="/hint" element={<Hint />}></Route>
            </Routes>
        </>
    )
};

export default LoginBox;
이 상태에서 App.js 파일도 경로를 지정해줘야 한다.
현재 App.js 파일에는 아래와 같을 것이다.
import React from 'react';
import LoginBox from './Component/LoginBox';

const App = () => {
  return (
    <>
      <LoginBox />
    </>
  );
}

export default App;
이 코드를 다음과 같이 변경하자.
import React from 'react';
import { Routes, Route } from 'react-router-dom';
import LoginBox from './Component/LoginBox';
import Hint from './Component/Hint';

const App = () => {
  return (
    <>
      <Routes>
        <Route path="/" element={<LoginBox />}></Route>
        <Route path="/hint" element={<Hint />}></Route>
      </Routes>
    </>
  );
}

export default App;
LoginBox 컴포넌트의 경로를 "/"로 해주었기 때문에 LoginBox 컴포넌트가 메인 홈이 된다.
LoginBox 전체 코드
import React, { useState, useEffect } from 'react';
import { Routes, Route, Link } from 'react-router-dom';
import Hint from './Hint';
import '../style/LoginBox.css';

const LoginBox = () => {
    const [ isActive, setIsActive ] = useState(false);
    const [ form, setForm ] = useState({
        id: '',
        password: ''
    });
    const { id, password } = form;

    useEffect(() => {
        // id와 password 값의 유무에 따른 활성화 상태 변수
        setIsActive(id !== '' && password !== '');
    }, [id, password]);

    const handleInputChange = useCallback(e => {
        setForm(prevForm => ({
            ...prevForm,
            [e.target.name]: e.target.value
        }));
    }, []);

    return (
        <>
            <section className="login-form">
                <h1>추억을 로그인</h1>
                <form action="">
                    <div className="int-area">
                        <input
                            type="text"
                            name="id"
                            value={id}
                            onChange={handleInputChange}
                            id="name-input"
                            required
                        />
                        <label>Username</label>
                    </div>
                    <div className="int-area">
                        <input
                            type="password"
                            name="password"
                            value={password}
                            onChange={handleInputChange}
                            id="password-input"
                            required
                        />
                        <label>Password</label>
                    </div>
                </form>

                <button
                    id="btn-login"
                    type="submit"						 // 노란색 : 회색
                    style={{ backgroundColor: isActive ? "#d8db31" : "rgba(209, 206, 206, 0.733)" }} // style 동적으로 변경

                    LOGIN
                </button>
                <div id="hint">
                  <Link to="/hint">Click to get a hint</Link>
  				</div>
            </section>
          	<Routes>
                <Route path="/hint" element={<Hint />}></Route>
            </Routes>
        </>
    )
};

export default LoginBox;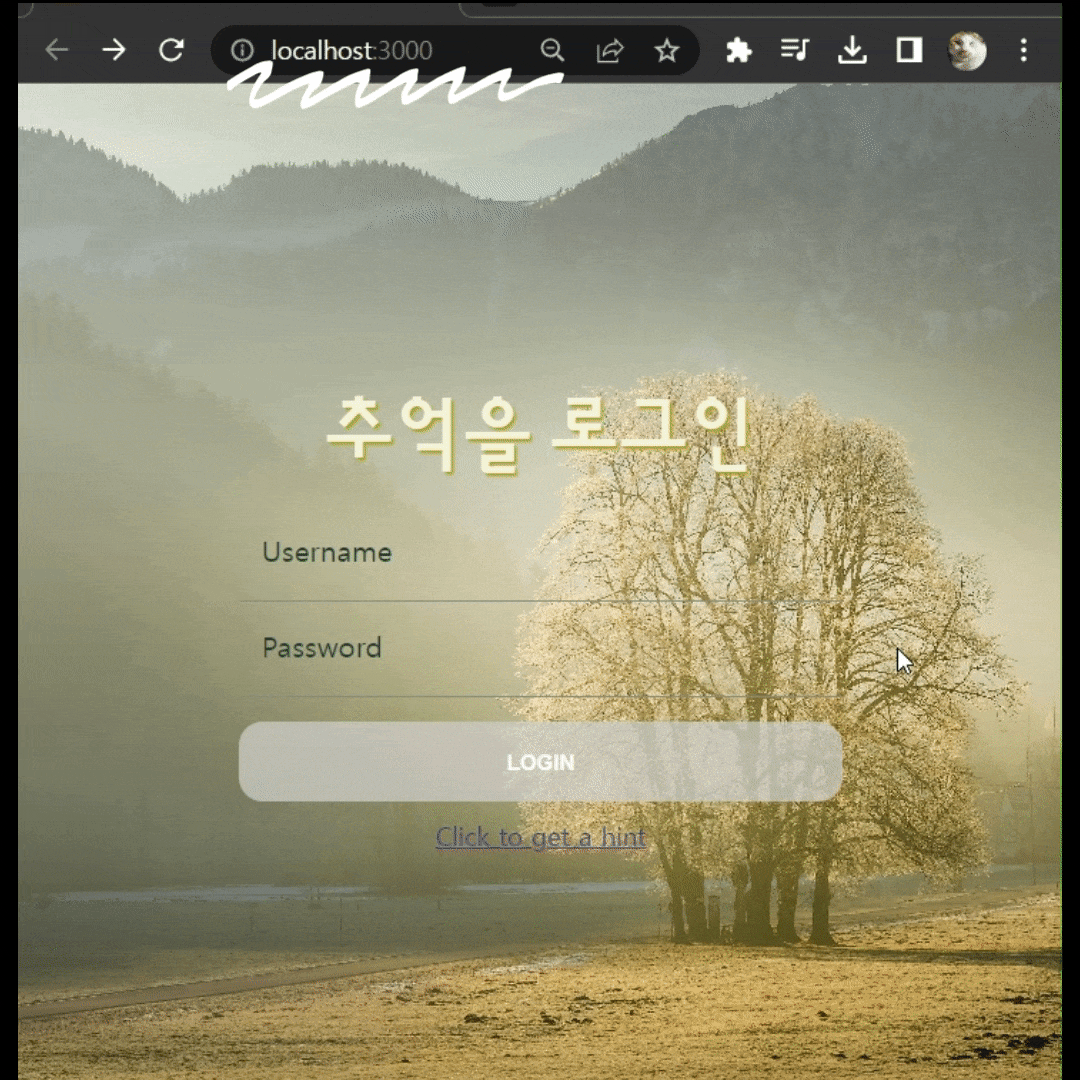
이제 "Click to get a hint"를 누르면 Hint 컴포넌트로 이동된다.
다음에는 Login 버튼을 누를 때의 페이지 이동을 구현해보겠다.

프론트엔드 개발자입니다.