- cli 사용해서 controller 만들기
nest g co(이름만 설정해주면 자동으로 컨트롤러 모듈 생성 + module.ts에 자동으로 생성까지 해줌!!)

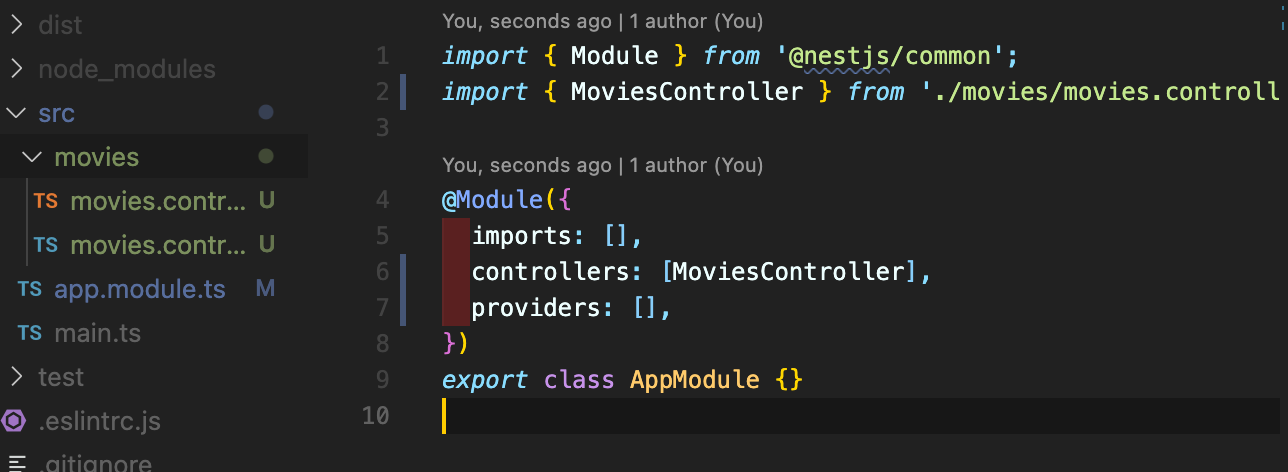
- controller 설정
import { Controller,Get } from '@nestjs/common';

@Controller('movies') // entry point를 관리하는 부분 /movies경로 들어가야함
export class MoviesController {

    @Get()
    getAll(){
        return "This will return all movies"
    }
}
- 제너레이터의 ()안에는 경로가 들어간다고 생각하면될듯하다.
- controller 제네레이터에는 '/' 가 생략된다
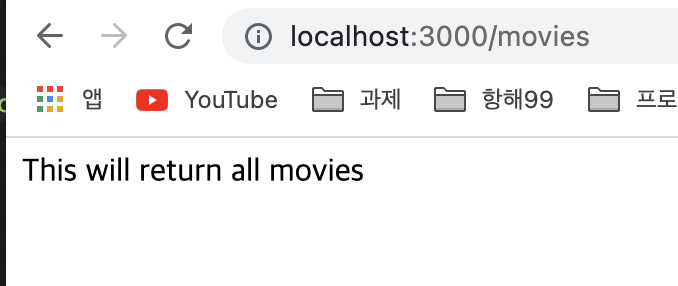
import { Controller,Get } from '@nestjs/common';

@Controller('movies')
export class MoviesController {

    @Get()
    getAll(){
        return "This will return all movies"
    }

    @Get('/:id')
    getOne(){
        return "This will return one movie"
    }
}

- 필요로 한다면 요청해라
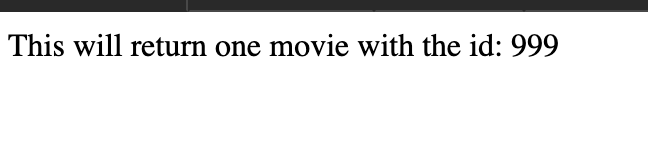
import { Controller,Get, Param } from '@nestjs/common';

@Controller('movies')
export class MoviesController {

    @Get()
    getAll(){
        return "This will return all movies"
    }

    @Get('/:id')
    getOne(@Param('id') movieId: string){
        return `This will return one movie with the id: ${movieId}`
    }
}
getone에서 인자로 파라미터를 필요로 한다면, @Param을 이용해 요청하고(여기서는 id, 두 id값은 같은 이름을 가져야함), 인자로 사용해라(movieId라는 인자 이름을 붙임, 어떤 이름을 사용해도 무방함)
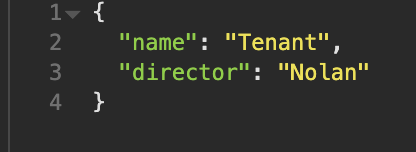
import { Controller,Delete,Get, Param, Post, Patch, Body } from '@nestjs/common';
@Controller('movies')
export class MoviesController {
@Get()
getAll(){
return "This will return all movies"
}
@Get('/:id')
getOne(@Param('id') movieId: string){
return `This will return one movie with the id: ${movieId}`
}
@Post()
create(@Body() movieData: string){
console.log(movieData)
return movieData
}
@Delete('/:id')
remove(@Param('id') movieId: string){
return `This will remove a movie with the id: ${movieId}`
}
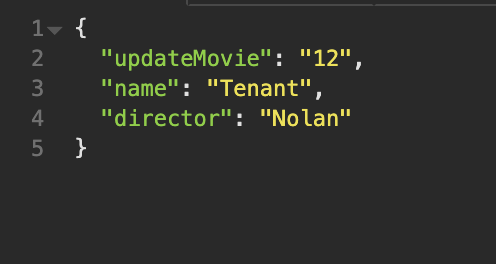
@Patch('/:id')
patch(@Param('id') movieId: string, @Body() updateData){
return {
updateMovie: movieId,
...updateData
}
}
}
- post, patch method를 쓰기위해서 @Body 데코레이터를 사용한다
- patch에서는 스프레드문법을 사용했다
- 기본적으로 json 형식을 리턴한다.


- express와 마찬가지로, search가 get보다 밑에 있으면, nestjs는 기본적으로 search를 id로 인식한다. 때문에 search를 사용하고 싶으면 get(id)위로 올려야한다
import { Controller,Delete,Get, Param, Post, Patch, Body, Query } from '@nestjs/common';

@Controller('movies')
export class MoviesController {

    @Get()
    getAll(){
        return "This will return all movies"
    }

    @Get('search')
    search(@Query('year') searchingYear: string){
        return `We are searching for a movie made after ${searchingYear}`
    }

    @Get('/:id')
    getOne(@Param('id') movieId: string){
        return `This will return one movie with the id: ${movieId}`
    }

    @Post()
    create(@Body() movieData: string){
        console.log(movieData)
        return movieData
    }

    @Delete('/:id')
    remove(@Param('id') movieId: string){
        return `This will remove a movie with the id: ${movieId}`
    }

    @Patch('/:id')
    patch(@Param('id') movieId: string, @Body() updateData){
        return {
            updateMovie: movieId,
            ...updateData
        }
    }


}
- Query 데코레이터를 이용해 query의 값을 요청할 수 있다.

개발 로그