- java 프로젝트 생성
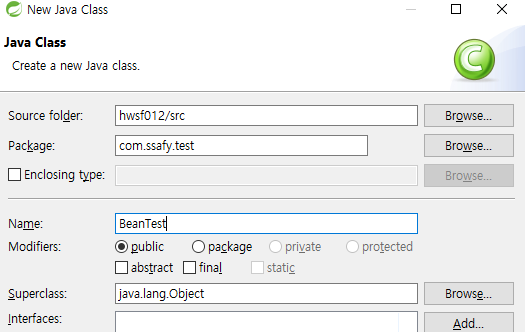
- BeanTest 생성
- dto Product 생성
package com.ssafy.model.dto;

public class Product {
	private String id;
	private String name;
	private int price;
	private String description;

	public Product() { }
	public Product(String id, String name, int price, String description) {
		super();
		this.id = id;
		this.name = name;
		this.price = price;
		this.description = description;
}- service ProductService,ProductServiceImpl 생성
package com.ssafy.model.service;

import java.util.List;

import com.ssafy.model.dto.Product;
import com.ssafy.model.repository.ProductRepo;

public interface ProductService {
	ProductRepo getRepo();
	List<Product> selectAll();
	Product select(String id);
	int insert(Product product);
	int update(Product product);
	int delete(String id);
}- dao ProductRepo, ProductRepoImpl 생성
package com.ssafy.model.repository;

import java.util.List;

import com.ssafy.model.dto.Product;

public interface ProductRepo {
	List<Product> selectAll();
	Product select(String id);
	int insert(Product product);
	int update(Product product);
	int delete(String id);
}- 프로젝트 우클릭 > spring > add Spring Project Nature
==> spring 프로젝트로 인식된다! - 프로젝트 우클릭 > configure > convert to Maven Project
==> pom.xml이 추가된다!pom.xml 사용하는 이유?
library를 일일이 추가하지 않고, dependency태그로 추가하면 원격지에서 다운로드에서 사용한다. => 프로젝트가 가벼워진다 - pom.xml에 dependency 추가한다
<dependencies>
  <!-- https://mvnrepository.com/artifact/org.springframework/spring-context -->
  <dependency>
    <groupId>org.springframework</groupId>
    <artifactId>spring-context</artifactId>
    <version>5.2.6.RELEASE</version>
  </dependency>
  <!-- https://mvnrepository.com/artifact/org.springframework/spring-jdbc -->
  <dependency>
    <groupId>org.springframework</groupId>
    <artifactId>spring-jdbc</artifactId>
    <version>5.2.6.RELEASE</version>
  </dependency>
  <dependency>
    <groupId>mysql</groupId>
    <artifactId>mysql-connector-java</artifactId>
    <version>8.0.23</version>
  </dependency>
</dependencies>- bean등록하기
- xml로 등록 (bean일일이 등록 / context scan으로 자동등록)
- java로 등록
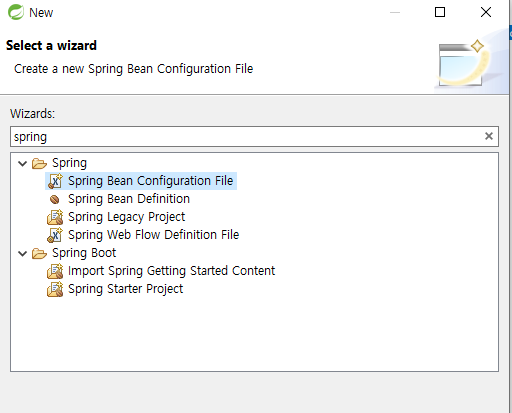
9-1-1. bean을 등록하는 applicationContext.xml 생성
<?xml version="1.0" encoding="UTF-8"?>
<beans xmlns="http://www.springframework.org/schema/beans"
xmlns:xsi="http://www.w3.org/2001/XMLSchema-instance"
xsi:schemaLocation="http://www.springframework.org/schema/beans http://www.springframework.org/schema/beans/spring-beans.xsd">
<bean id="ds" class="org.springframework.jdbc.datasource.SimpleDriverDataSource">
<property name="driverClass" value="com.mysql.cj.jdbc.Driver"></property>
<property name="url" value="jdbc:mysql://127.0.0.1:3306/ssafy_test?serverTimezone=UTC&useUniCode=yes&characterEncoding=UTF-8"/>
<property name="username" value="ssafy"/>
<property name="password" value="ssafy"/>
</bean>
<bean id="productRepo" class="com.ssafy.model.repository.ProductRepoImpl"></bean>
<bean id="productService" class="com.ssafy.model.service.ProductServiceImpl">
<property name="repo" ref="productRepo"></property>
</bean>
</beans>--> xml에서 productService 생성시 "repo"이름으로 productRepo를 만들엇다 ==> ProductServiceImpl에서 setRepo 설정해야한다
package com.ssafy.model.service;

import java.util.List;

import com.ssafy.model.dto.Product;
import com.ssafy.model.repository.ProductRepo;

public class ProductServiceImpl implements ProductService {

	ProductRepo repo;

	public void setRepo(ProductRepo repo) {
		this.repo = repo;
	}

	@Override
	public ProductRepo getRepo() {
		// TODO Auto-generated method stub
		return repo;
	}
bean이 많아지면 관리하기 어렵다 => 자동으로 bean 등록
9-1-2. context applicationContext.xml 생성
<?xml version="1.0" encoding="UTF-8"?>
<beans xmlns="http://www.springframework.org/schema/beans"
xmlns:xsi="http://www.w3.org/2001/XMLSchema-instance"
xmlns:context="http://www.springframework.org/schema/context"
xsi:schemaLocation="http://www.springframework.org/schema/beans http://www.springframework.org/schema/beans/spring-beans.xsd
http://www.springframework.org/schema/context http://www.springframework.org/schema/context/spring-context-4.3.xsd">
<bean id="ds" class="org.springframework.jdbc.datasource.SimpleDriverDataSource">
<property name="driverClass" value="com.mysql.cj.jdbc.Driver"></property>
<property name="url" value="jdbc:mysql://127.0.0.1:3306/ssafy_test?serverTimezone=UTC&useUniCode=yes&characterEncoding=UTF-8"/>
<property name="username" value="ssafy"/>
<property name="password" value="ssafy"/>
</bean>
<context:component-scan base-package="com.ssafy"></context:component-scan>
</beans>--> 자동으로 스캔되도록 service, repo에 annotation 해주기
따로 이름 설정 안해두면 클래스소문자이름으로 이름 할당된다
@Service    ==> 이름설정x ==> productServiceImpl
public class ProductServiceImpl implements ProductService {
	@Autowired
	ProductRepo repo;
    ...
@Repository
public class ProductRepoImpl implements ProductRepo {
@Autowired
DataSource dataSource;
...9-2. ApplicationConfig.java 생성
package com.ssafy.model.configuration;

import javax.sql.DataSource;

import org.springframework.context.annotation.Bean;
import org.springframework.context.annotation.ComponentScan;
import org.springframework.context.annotation.Configuration;
import org.springframework.jdbc.datasource.SimpleDriverDataSource;

@Configuration //설정파일임을 명시
@ComponentScan(basePackages= {"com.ssafy"})
public class ApplicationConfig {
	@Bean
	public DataSource dataSource() {
		SimpleDriverDataSource ds = new SimpleDriverDataSource();
		ds.setDriverClass(com.mysql.cj.jdbc.Driver.class);
		ds.setUrl("jdbc:mysql://127.0.0.1:3306/ssafyweb?serverTimezone=UTC&useUniCode=yes&characterEncoding=UTF-8");
		ds.setUsername("ssafy");
		ds.setPassword("ssafy");
		return ds;
	}
} - beanTest에서 xml을 받아와 context에 할당한다
public class BeanTest {
	public static void main(String[] args) {
		//1. 설정파일 등록
		//ApplicationContext context = new ClassPathXmlApplicationContext("com/ssafy/configuration/applicationContext.xml"); //xml에서 읽어오기
		//2. java 파일로 설정파일작성
		ApplicationContext context = new AnnotationConfigApplicationContext(ApplicationConfig.class);


		ProductService service = context.getBean("productServiceImpl",ProductService.class);
		Product product = new Product();
		System.out.println(service.insert(product));
	}
} // end of main
참고
uml 다이어그램에서 동그라미는 public, 세모는 private
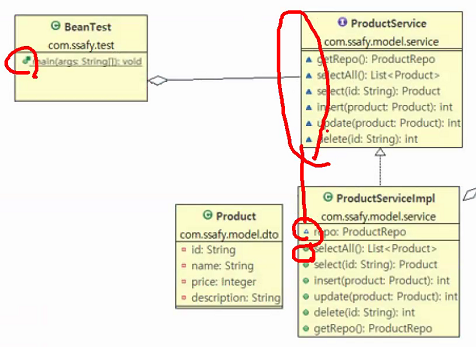

에국은 에구구구...