[1] DB 구조 생각해보기
User DB
POST DB
- id
- title
- content
- date
- countRead
- author
- countLike
[2] 기타 개념
1) fk
- 외래키
- ex)
: User에서 한 column을 Post에게 column을 참조하게 해주는 키
2) uk
- 유니크키
2) one to many
: 하나에서 여러 개와 연결이 된 구조
- ex)
: User과 Post 구조
[3] 고려해야 할 테이블
1) Like 테이블
: 참조 키로 두 개의 값을 선언
- u_id
- p_id
2) Image 테이블
- image_id
- p_id
-> Post과 Image는 one to Many 구조를 갖는다.
3) Comment 테이블
: 참조 키로 두 개의 값을 선언
- p_id
- u_id
- 유니크 키..?
4) Read 테이블
- p_id
- u_id
- readDate
-> 세 개 묶어서 unique
--
2. User, Faq 테이블 같이 사용하기
: 로그인 후 u_id를 저장하고, 해당 u_id를 faq 테이블에 column으로 사용하기
[1-1] login.html
1) 전체 코드
function login(){
    $.ajax({
        url : "/api/user/login",
        type : "POST",
        contentType : 'application/json; charset=utf-8',
        data : JSON.stringify({
            username : $("#login_username").val(),
            password : $("#login_password").val(),
        }),
        cache : false,
        success : (obj_data, status, xhr) => {
            const name = obj_data.name;

            if(obj_data.result == "login_fail_username"){
                alert("잘못된 아이디입니다");
            }
            if(obj_data.result == "login_fail_password"){
                alert("잘못된 비밀번호입니다");
            }

            if(name != null){
                sessionStorage.setItem("u_id", obj_data.id);
                alert(name + "님 반갑습니다.");
                window.location.href = "/user/list";
            }
        },
        error: (obj_data, status, error) => {
            alert("로그인 실패!!");
            alert(JSON.stringify(obj_data));
        }

    })
  }
2) 특정 부분
if(name != null){
    sessionStorage.setItem("u_id", obj_data.id);
    alert(name + "님 반갑습니다.");
    window.location.href = "/user/list";
}
: sessionStorage에 u_id 값을 저장한다. (Faq를 생성할 때 u_id를 저장하기 위함)
[1-2] UserDto.java
public static class LoginResDto {
    private String name;        // 로그인한 사용자의 이름
    private Long id;
    private String result;      // 처리 결과 (성공/실패 여부)
}
: u_id값을 Loin 타입으로 Response DTO에 추가해준다.
[1-3] UserServiceImpl.java
@Override
public UserDto.LoginResDto login(UserDto.LoginReqDto params) {
    User user = userRepository.findByUsername(params.getUsername());
    UserDto.LoginResDto resDto = new UserDto.LoginResDto();

    // 사용자 존재 여부 확인
    if(user == null){
        resDto.setResult("login_fail_username");
        return resDto;
    }

    // 비밀번호 확인
    if(!user.getPassword().equals(params.getPassword())){
        resDto.setResult("login_fail_password");
        return resDto;
    }

    resDto.setName(user.getName());
    resDto.setId(user.getId());
    resDto.setResult("로그인 성공");
    return resDto;
}
: user에 있는 id값을 response DTO의 id로 저장한다. (로그인 후에 user의 id값을 전달하기 위함이다.)
[1-4] 결과
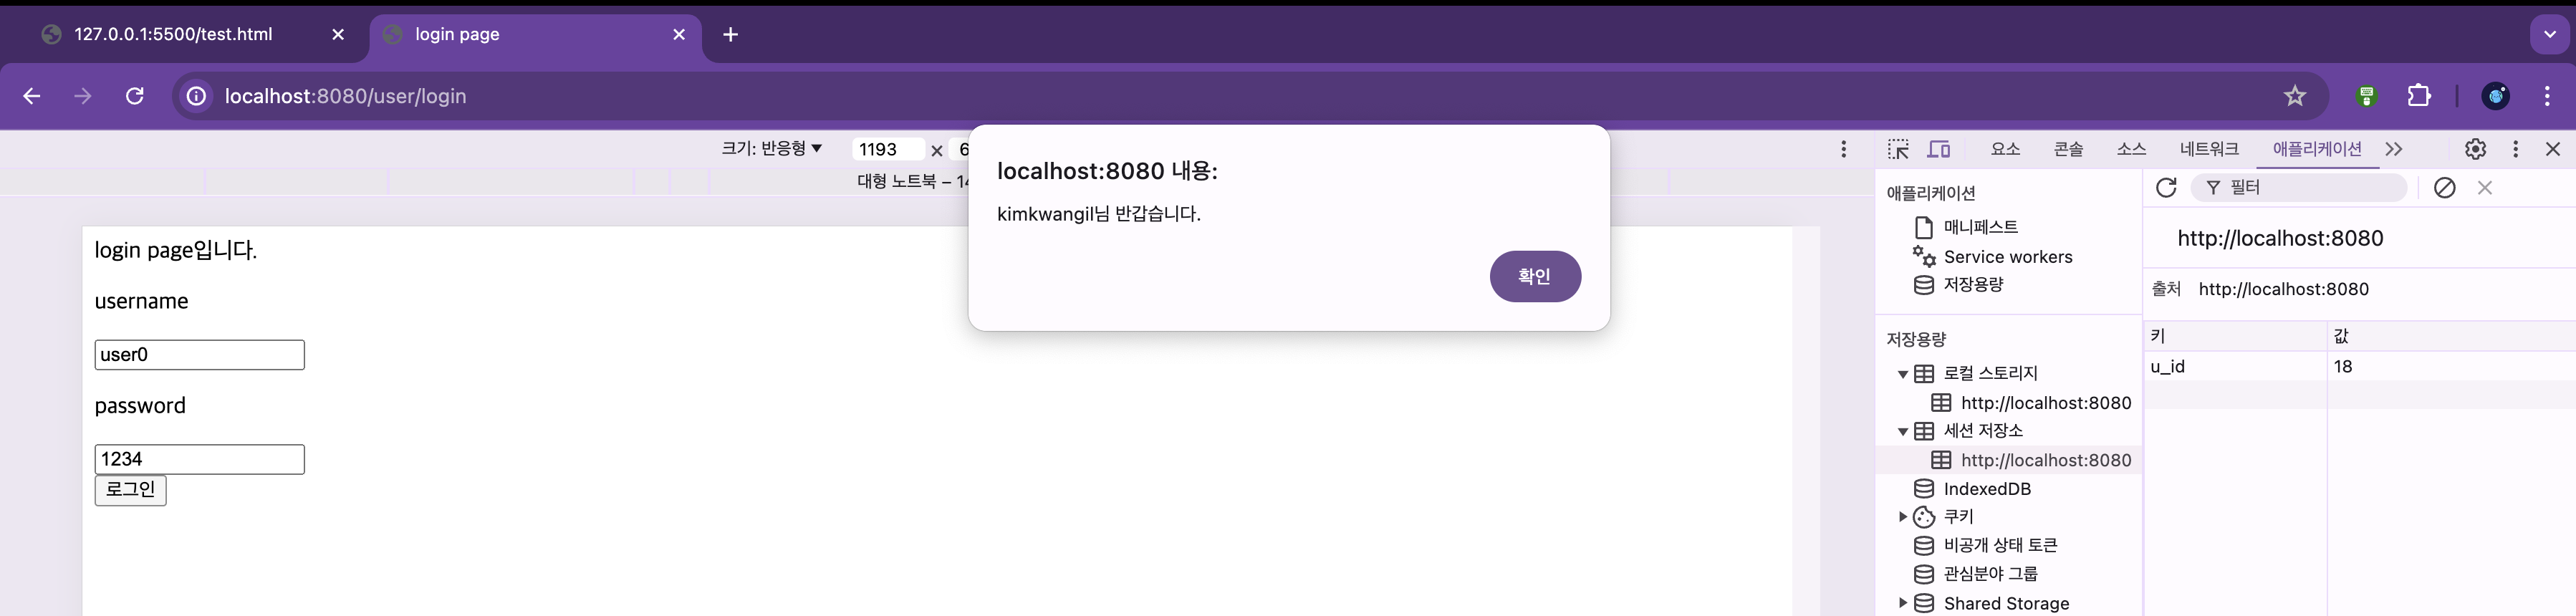
: 로그인 후 성공적으로 u_id값이 sessionStorage에 저장된 것을 볼 수 있다.
[2-1] create.html
function create_faq(){

    const data1 = JSON.stringify({
        title : $("#create_faq_title").val(),
        content : $("#create_faq_content").val(),
        u_id : sessionStorage.getItem("u_id"),
    })

    $.ajax({
        url : "/api/faq/create",
        type : "POST",
        contentType : 'application/json; charset=utf-8',
        data : data1,
        cache : false,
        success : (obj_data, status, xhr) => {
            alert(JSON.stringify(obj_data));
            $("#create_faq_title").val("");
            $("#create_faq_content").val("");
            console.log(obj_data);
        },
        error: (obj_data, status, error) => {
            alert("error!!");
            alert(JSON.stringify(obj_data));
        }

    })
}
: data1 값에 u_id값을 추가하여, faq를 create할 때 작성한 사람의 u_id 값을 추가해서 post한다.
[2-2] Faq.java
1) u_id 선언
Long u_id;: Long 타입의 u_id 변수를 선언한다.
2) 생성자에 u_id 추가
private Faq(Long u_id, String title, String content){
    this.title = title;
    this.content = content;
    this.u_id = u_id;
    this.readCount = 0;

}

public static Faq of(Long u_id, String title, String content){
    return new Faq(u_id, title, content);
}
: u_id를 추가하여 작성해준다.
[3-1] list.html
1) 전체 코드
function list(){
    $.ajax({
        url : "/api/faq/list",
        type : "GET",
        contentType : 'application/json; charset=utf-8',
        data : {},
        cache : false,
        success : (obj_data, status, xhr) => {
            // alert(JSON.stringify(obj_data));
            for(let each of obj_data){
                $("#div_list").append("<a href = '/faq/detail/" + each["id"] + "'>" + each["id"] + " | " + each["title"] + " | " + each["content"] + " | " + each["u_id"]+ "<br/>" + "<a/>");
            }
        },
        error: (obj_data, status, error) => {
            alert("error!!");
            alert(JSON.stringify(obj_data));
        }

    })
}
2) 특정 부분
for(let each of obj_data){
    $("#div_list").append("<a href = '/faq/detail/" + each["id"] + "'>" + each["id"] + " | " + each["title"] + " | " + each["content"] + " | " + each["u_id"]+ "<br/>" + "<a/>");
}
: list를 추가할 때 u_id까지 작성하여 추가한다.
[3-2] Faq.java
public FaqDto.DetailResDto toDetailResDto() {
    FaqDto.DetailResDto dto = new FaqDto.DetailResDto();
    dto.setId(id);
    dto.setTitle(title);
    dto.setContent(content);
    dto.setReadCount(readCount);
    dto.setU_id(u_id);
    return dto;
}
: u_id값을 set하여 dto를 return한다.
[4-1] detail.html
<input type = "text" id = "detail_faq_name" readonly/>: faq를 작성한 사람의 name을 보여주기 위한 input을 추가한다.
function detail_faq(){
    $.ajax({
        url : "/api/faq/detail",
        type : "GET",
        contentType : 'application/json; charset=utf-8',
        // data : { order : $("#detail_board_order").val()},
        data : { id : final_id},
        cache : false,
        success : (obj_data, status, xhr) => {
            console.log(JSON.stringify(obj_data));

            // alert(obj_data["resultCode"]);
            // alert(obj_data["id"]);
            // alert(obj_data["title"]);
            // alert(obj_data["content"]);
            // alert(obj_data["author"]);

            // $("#detail_board_title").val(obj_data.order); // 이렇게도 표현 가능
            $("#detail_faq_id").val(obj_data["id"]);
            $("#detail_faq_title").val(obj_data["title"]);
            $("#detail_faq_content").val(obj_data["content"]);
            $("#detail_faq_readCount").val(obj_data["readCount"]);
            $("#detail_faq_name").val(obj_data["name"])

        },
        error: (obj_data, status, error) => {
            alert("error!!");
            alert(JSON.stringify(obj_data));
        }

    })
  }
: $("#detail_faq_name").val(obj_data["name"])을 통해 name의 input에 name을 지정한다.
[4-2] FaqServiceImpl.java
1) 1단계
private final UserRepository userRepository;

public FaqServiceImpl(FaqRepository faqRepository, UserRepository userRepository){
    this.faqRepository = faqRepository;
    this.userRepository = userRepository;
}
: UserRepository를 선언해준다. 이는 user의 name을 얻기 위함이다.
: 그리고 생성자를 통하여 이를 할당해준다.
2) 2단계
@Override
public FaqDto.DetailResDto detail(Long id) {
    // 특정 공지사항의 상세 정보 조회

    FaqDto.DetailResDto resDto = faqRepository.findById(id).orElse(null).toDetailResDto();

    User user = userRepository.findById(resDto.getU_id()).orElse(null);
    if(user != null){
        resDto.setName(user.getName());
    }
    return resDto;
}
: userRepository를 통해 검색하여 얻은 user 정보 중 'name'을 resDto의 setName 메소드로 저장한다.
[4-3] FaqDto.java
@Getter
@Setter
public static class DetailResDto {
    private Long id;            // 공지사항 ID
    private String title;       // 공지사항 제목
    private String content;     // 공지사항 내용
    private Integer readCount;  // 조회수
    private Long u_id;
    private String name;
    private String result;      // 처리 결과 (성공/실패 여부)
}- DetailResDto에 String 타입의 'name' 값을 추가한다.
public Faq toEntity() {
//            Faq fag = new Faq();
//            fag.setTitle(getTitle());
//            fag.setContent(getContent());
//            fag.setReadCount(getReadCount());
//            return fag;
    return Faq.of(getU_id(), getTitle(), getContent());
}
: Faq.of의 파라미터에 getU_id() 메소드로 넘겨준다.
[4-4] 결과 화면
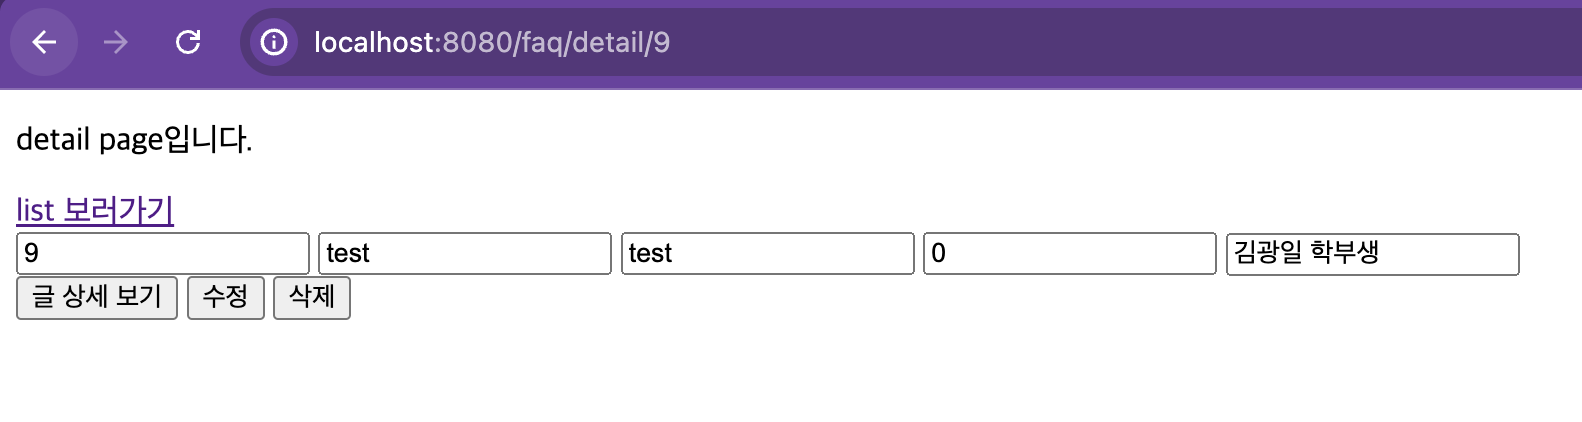
: 작성한 사용자의 name이 보여지는 것을 볼 수 있다.