
인프런 "한 입 크기로 잘라먹는 Next.js" 수강
1. 사전 렌더링과 데이터 패칭
리액트 앱에서는 보통 아래와 같이 데이터를 패칭한다.
export default function Page() {
  const [state, setState] = useState();

  const fetchData = async () => {
    const response = await fetch("...");
    const data = await response.json();
    setState(data);
  };

  useEffect(() => {
    fetchData();
  }, []);

  if (!state) return "Loading...";

  return <div>...</div>;
}
동작 순서
state생성- 데이터 패칭 함수 정의
- 컴포넌트 마운트 시점에 호출
- 로딩 중이면 예외처리
👉 문제는 컴포넌트가 마운트된 이후에 호출되기 때문에, 데이터가 화면에 뜨기까지 시간이 오래 걸린다는 점.
즉, 리액트의 느린 FCP(First Contentful Paint) 문제
Next.js로 느린 FCP 해결하기
Next.js는 사전 렌더링(Pre-Rendering)을 통해 느린 FCP 문제를 해결한다.
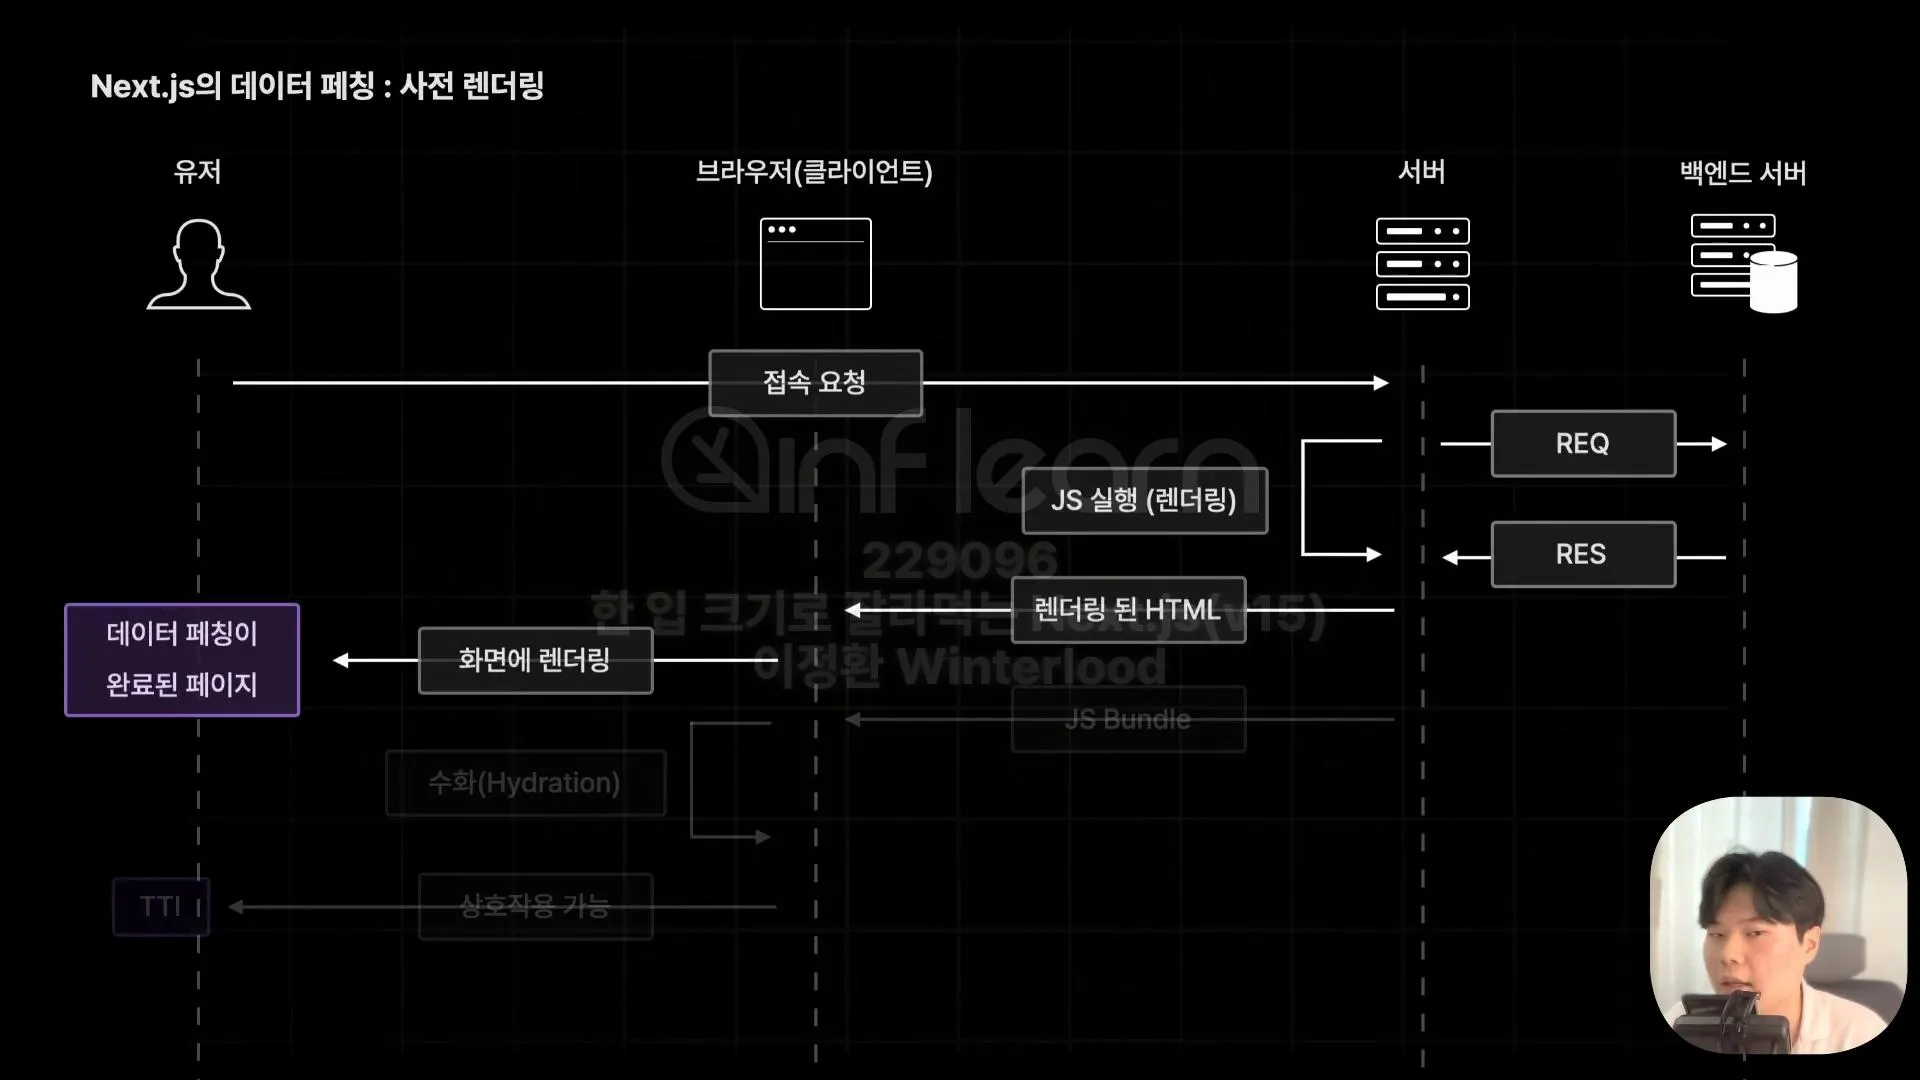
- 초기 요청 시 서버가 HTML을 완성해 전달
- 이때 필요한 데이터를 서버에서 미리 불러와 함께 전달 가능
덕분에 화면 로딩이 훨씬 빨라짐!
😎: 서버 요청 자체가 오래 걸리면 사전 렌더링도 그만큼 지연되지 않나유?
✍️: 넥스트는 이러한 점까지 고려하여, 빌트 타임에 미리 렌더링하거나, 서버 요청 시점에 렌더링하도록 설정할 수 있게 도와준다. (아래에서 알아보자!)
사전 렌더링의 종류
1. SSR(Server Side Rendering)
- 요청이 들어올 때마다 서버에서 렌더링
- 가장 기본적인 방식
2. SSG(Static Site Generation)
- 빌드 타임에 미리 렌더링
- 요청 시에는 완성된 정적 페이지 제공
3. ISR(Incremental Static Regeneration)
추후 강의에서 진행한다고 함!
- SSG + 주기적 갱신
2. SSR 실습: getServerSideProps
Next.js는 페이지 안에 약속된 이름의
getServerSideProps라는 함수를 작성하고export하면, 자동으로 SSR 모드로 전환된다.
getServerSideProps 함수
- 페이지 컴포넌트보다 먼저 실행되어, 필요한 데이터를 미리 불러올 수 있다.
- 이때, 반환 객체 안에서 반드시
props객체가 포함되여야 한다.
// pages/index.tsx
import type { ReactNode } from 'react';
import SearchableLayout from '@/components/searchable-layout';

export const getServerSideProps = () => {
  const data = "hello";
  return {
    props: { data },
  };
};

export default function Home({ data }: { data: string }) {
  console.log(data)
//...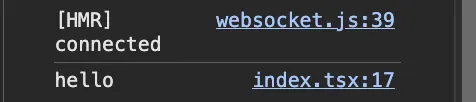
콘솔을 확인해보면 props로 전달받은 데이터가 잘 출력되는 걸 확인할 수 있다.
⚠️ 서버 전용 코드 주의
getServerSideProps는 서버에서 실행되므로 window 같은 브라우저 객체는 사용이 불가하다.
// pages/index.tsx
//...
export const getServerSideProps = () => {
  const data = 'hello';
  window.location;
  return {
    props: {
      data,
    },
  };
};
//..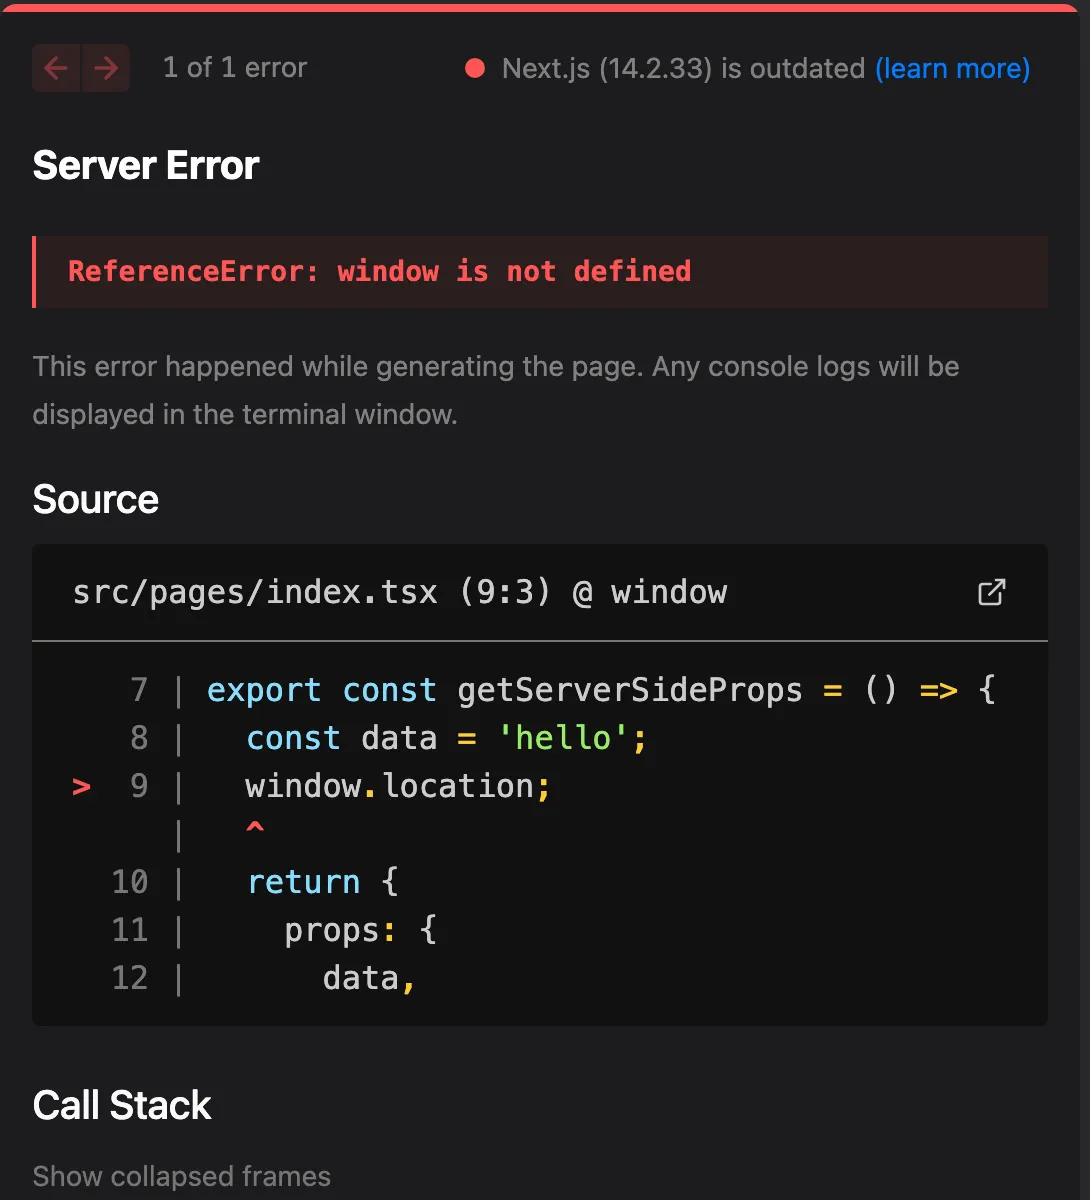
추가로 페이지 컴포넌트의 경우에는 서버에서 한 번, 브라우저에서 한 번 총 2번이 실행되기 때문에, 위의 window 객체를 똑같이 페이지 컴포넌트에서 사용해보면 동일한 오류가 발생한다.
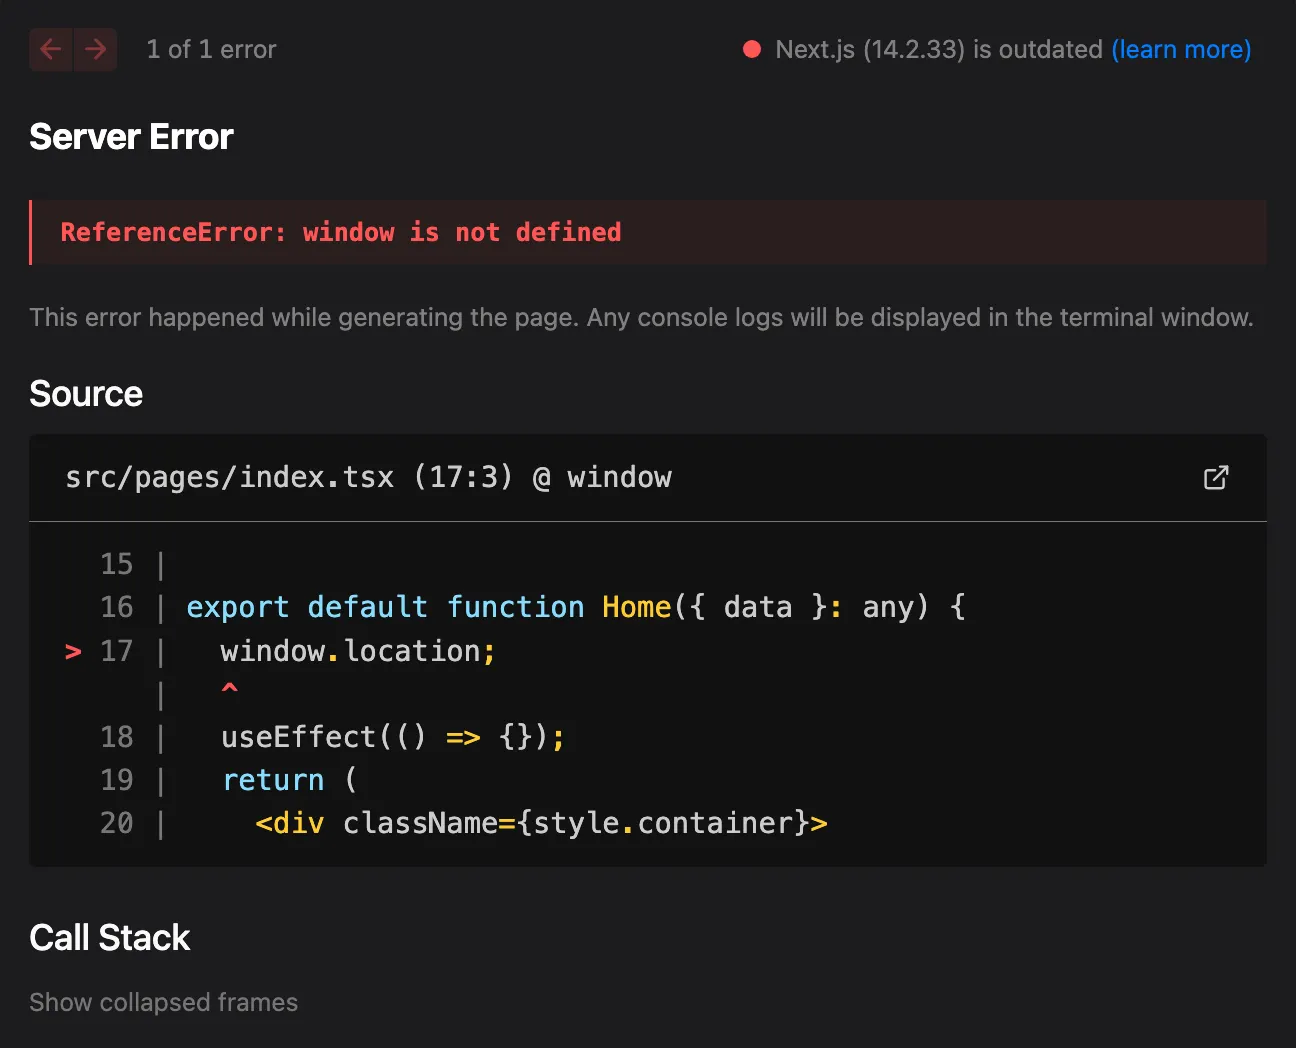
😎: 그러면 브라우저에서만 실행되는 건 어떻게 해야하나요~?
✍️: 만약 브라우저 전용 코드를 사용해야 한다면, 페이지 컴포넌트의 useEffect에 넣어서 사용해야 한다.
컴포넌트 마운트 시점 이후에 출력 즉, 사전 렌더링 과정 중 서버에서 실행되지 않는 코드이기 때문에 ReferenceError: window is not defined가 발생하지 않는다.
// pages/index.tsx
//...
export default function Home({ data }: any) {
  useEffect(() => {
    console.log(window.location);
  }, []);
//...
타입 안전하게 사용하기: InferGetServerSidePropsType
Next.js는 InferGetServerSidePropsType으로 반환 타입을 자동 추론할 수 있다.
//...
export const getServerSideProps = () => {
  const data = 'hello';
  return {
    props: {
      data,
    },
  };
};

export default function Home({ data }: InferGetServerSidePropsType<typeof getServerSideProps>) {
  useEffect(() => {
    console.log(window.location);
  }, []);
//...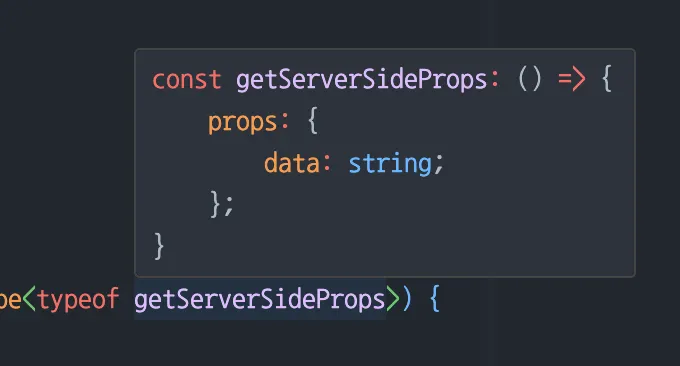
타입이 잘 추론된 것을 확인할 수 있다.
SSR + API 연동
API 호출 파일을 따로 관리하기 위해 src에 lib라는 폴더를 생성해준다.
// /src/lib/fetch-books.ts
import { BookData } from '@/types';

export default async function fetchBooks(): Promise<BookData[]> {
  const url = `http://localhost:12345/book`;

  try {
    const response = await fetch(url);
    if (!response.ok) {
      throw new Error();
    }
    return await response.json();
  } catch (err) {
    console.error(err);
    return [];
  }
}getServerSideProps에서 호출은 아래와 같다.
//...
export const getServerSideProps = async () => {
  const allBooks = await fetchBooks();
  return {
    props: {
      allBooks,
    },
  };
};

export default function Home({ allBooks }: InferGetServerSidePropsType<typeof getServerSideProps>) {
//...
			<section>
        <h3>등록된 모든 도서</h3>
        {allBooks.map((book) => (
          <BookItem key={book.id} {...book} />
        ))}
      </section>
//...
이때, 여러 API를 동시에 호출하려면 Promise.all을 활용하면 된다!(당연)
export const getServerSideProps = async () => {
  const [allBooks, randomBooks] = await Promise.all([fetchBooks(), fetchRandomBooks()]);
  return {
    props: {
      allBooks,
      randomBooks,
    },
  };
};
쿼리와 URL 파라미터 사용하기
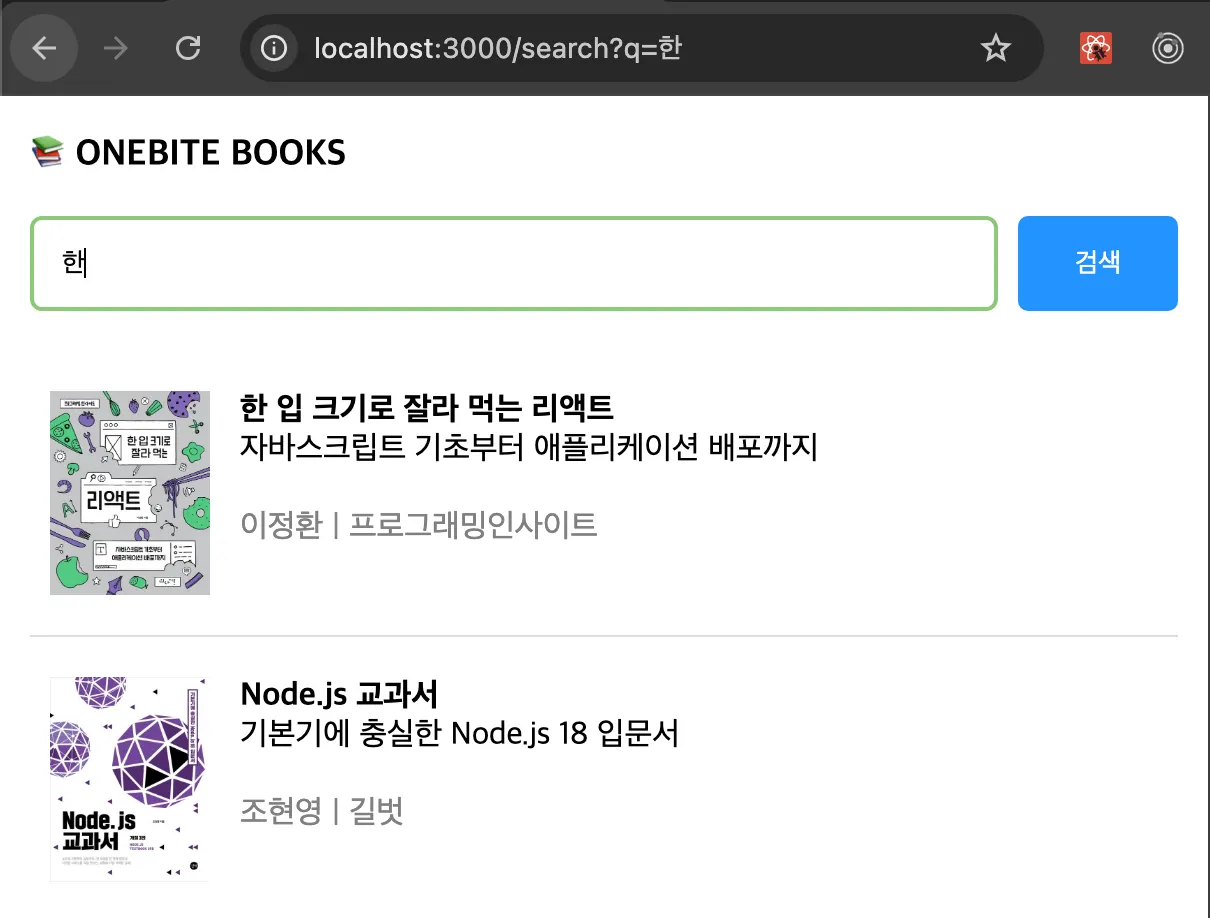
쿼리 사용하기
getServerSideProps의 인수로 context를 받아 사용할 수 있다.
export const getServerSideProps = async (context: GetServerSidePropsContext) => {
  return {
    props: {},
  };
};
이때 context라는 매개변수에 Next.js가 제공하는 GetServerSidePropsContext를 사용한다.
context라는 매개변수는 현재 브라우저로부터 받은 요청에 대한 모든 정보가 다 포함되어 있다. 콘솔로 확인해보자!
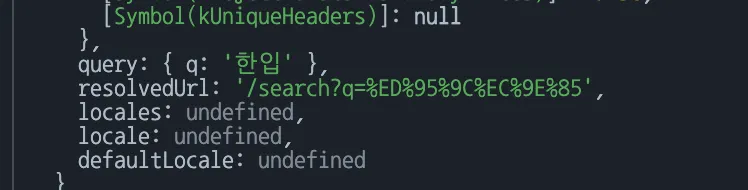
context에는 전달한 query 값이 있기 때문에 꺼내서 사용햐면 된다.
import type { GetServerSidePropsContext } from 'next';

export const getServerSideProps = async (context: GetServerSidePropsContext) => {
  const q = context.query.q;
  return {
    props: {
      q,
    },
  };
};
URL 파라미터 사용하기
마찬가지로 context의 params를 이용하여 가져오면 된다.
export const getServerSideProps = async (context: GetServerSidePropsContext) => {
  const id = context.params!.id;
  return {
    props: {},
  };
};
✅ 정리하며
- CSR의 느린 데이터 로딩 문제를 서버에서 미리 해결할 수. 있다.
getServerSideProps덕분에 데이터 + UI를 한번에 전달 가능하다.- 브라우저 전용 코드는
useEffect에 넣기! - 타입 추론은
InferGetServerSidePropsType으로 안전하게 처리 가능하다. - 쿼리/파라미터를 쉽게 활용 가능하다.