
앵귤러에 대한 이야기
이 글을 앵귤러를 공부하면서 투두리스트를 간단히 개발해보는 목적이긴 하지만, 앵귤러에 대한 설명은 별도로 하기로 하였다. (추후 작성 예정)
필요한 컴포넌트
먼저 투두리스트를 만들기 위해 필요한 컴포넌트를 생각해보자면 다음 네 가지를 생각할 수 있다.
- 텍스트 (Text)
- 버튼 (Button)
- 체크박스 (CheckBox)
- 텍스트필드 (TextField)
이 기본 단위를 먼저 구성하고 나서 화면을 구성할 생각이다.
텍스트 컴포넌트
가장 기본이 되는 텍스트 컴포넌트를 만들기 위해서는 최소 다음과 같은 속성이 필요하다.
- 폰트 패밀리 (Font Family)
- 폰트 크기 (Font Size)
- 폰트 굵기 (Font Weight)
- 자간 (Letter Spacing)
간단한 실습이므로 디자인 시스템을 새로 구성하기는 무리다. 따라서 Material Design의 Typography를 참조하여 만들고자 한다.
Typography 클래스
먼저 타이포그래피를 관리하는 객체를 하나 만들었다. 위에서 언급한 4개의 속성을 상태값으로 가지도록 하였고, 머터리얼 디자인의 타이포그래피 값들을 static으로 미리 선언한다.
static으로 선언한 getTypography() 메서드에 대한 설명은 아래에서!
// typography.ts

export class Typography {
  fontFamily: string;
  fontSize: number;
  fontWeight: number;
  letterSpacing: number;

  constructor(
    fontFamily: string,
    fontSize: number,
    fontWeight: number,
    letterSpacing: number,
  ) {
    this.fontFamily = fontFamily;
    this.fontSize = fontSize;
    this.fontWeight = fontWeight;
    this.letterSpacing = letterSpacing;
  }

  static headline1: Typography = {
    fontFamily: 'Roboto',
    fontSize: 96,
    fontWeight: 300,
    letterSpacing: -1.5
  };

  static headline2: Typography = {
    fontFamily: 'Roboto',
    fontSize: 60,
    fontWeight: 300,
    letterSpacing: -0.5
  };

  // (... 생략 ...)

  static getTypography(typoName: string) {
    switch (typoName) {
      case 'headline1':
        return Typography.headline1;
      case 'headline2':
        return Typography.headline2;
      // (... 생략 ...)
      case 'body1':
      default:
        return Typography.body1;
      // (... 생략 ...)
    }
  }
}
텍스트 컴포넌트
텍스트 컴포넌트의 HTML 구조는 하나의 HTML 요소만 가지므로 별도의 HTML이나 CSS 파일을 빼지 않고 template 내부에 작성했다.
typoName 속성을 받으면 컴포넌트 렌더링 시 앞쪽에서 실행되는ngOnInit() 단계에서 위에서 선언한 getTypography()를 통하여 타이포그래피 값을 얻어온다.
// text.component.ts

import { Component, Input } from '@angular/core';
import { Typography } from '../common/typography';

@Component({
  selector: 'text-atom',
  template: `
    <p
      [style.font-size.px]="typography.fontSize"
      [style.font-weight]="typography.fontWeight"
      [style.letter-spacing.px]="typography.letterSpacing"
      [style.font-family]="typography.fontFamily">
      {{ text }}
    </p>
  `,
})
export class TextComponent {
  @Input() text: string = '';
  @Input() typoName: string = 'body1';

  typography: Typography = Typography.body1;

  ngOnInit() {
    this.typography = Typography.getTypography(this.typoName);
  }
}
결과 확인
가장 메인이 되는 HTML 페이지 app.component.html 에서 다음과 같이 위에서 개발한 텍스트 컴포넌트를 사용한다.
<!-- app.component.html -->

<text-atom text="Headline 1" typoName="headline1" />
<text-atom text="Headline 2" typoName="headline2" />
<!-- 생략 -->
<text-atom text="OVERLINE" typoName="overline" />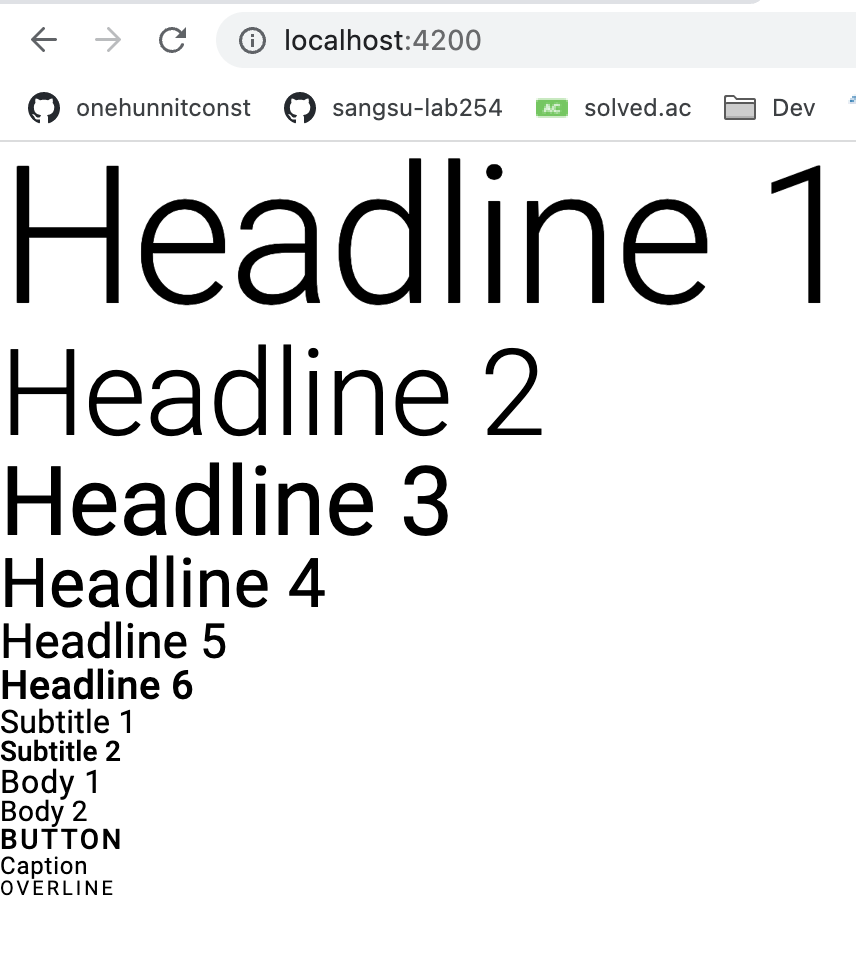
다음 단계
다음 단계로 체크박스 컴포넌트를 개발하고자 한다.

Dart와 TypeScript를 다룹니다.