참고 : [Next.js] Test
위의 사이트를 참고하였고, 대략적인 번역글이다!(오역, 임의 판단 개많음)
나는 이미 하고 있는 프로젝트에서 시작하므로 Create Next.js 는 생략하겠다.
TypeScript 을 기반으로 하며 Next.js v13 이다.
Install Jest and React Testing Library
TypeScript 기반의 Next.js 프로젝트의 테스트 코드를 작성하기 위해서는 Jest 와 React Testing Library 가 필요하다. 설치방법은 아래의 명령어를 실행하자!
npm install --save-dev jest @testing-library/react @testing-library/jest-dom jest-environment-jsdomConfigure Jest
Jest configure이 필요한데, 파일 두개를 그냥 최상위 폴더(root 폴더)에 만들면 된다.
이 파일은 모든 Jest 테스트 코드 또는 Mocks를 정의의 configuration으로 사용된다!
./jest.setup.js
import '@testing-library/jest-dom/extend-expect'./jest.config.js
const nextJest = require("next/jest");

const createJestConfig = nextJest({
  dir: "./",
});

const customJestConfig = {
  rootDir: ".",
  setupFilesAfterEnv: ["<rootDir>/jest.setup.js"],
  moduleNameMapper: {
    "^@/app/(.*)$": "<rootDir>/app/$1",
    "^@/pages/(.*)$": "<rootDir>/pages/$1",
  },
  moduleDirectories: ["node_modules", "<rootDir>/"],
  testEnvironment: "jest-environment-jsdom",
};

module.exports = createJestConfig(customJestConfig);
원래 문서와 설정이 조금 추가되었는데, 추후 있을 cannot find module 을 해결하기 위해서는
  moduleNameMapper: {
    "^@/app/(.*)$": "<rootDir>/app/$1",
    "^@/pages/(.*)$": "<rootDir>/pages/$1",
  },
부분이 필수이다.
내 프로젝트에서 해당 부분이 없어서 오류가 떴는데, 이유로는 tsconfig.json에서 내가 절대경로를 설정했다는 것이다.
	...
    "baseUrl": ".",
    "paths": {
      "@/*": ["./*"]
    }
	...
따라서 jest 는 나의 절대경로를 모를것이고, 모듈을 못찾겠어요! 라고 뿜어내는 것이었다.
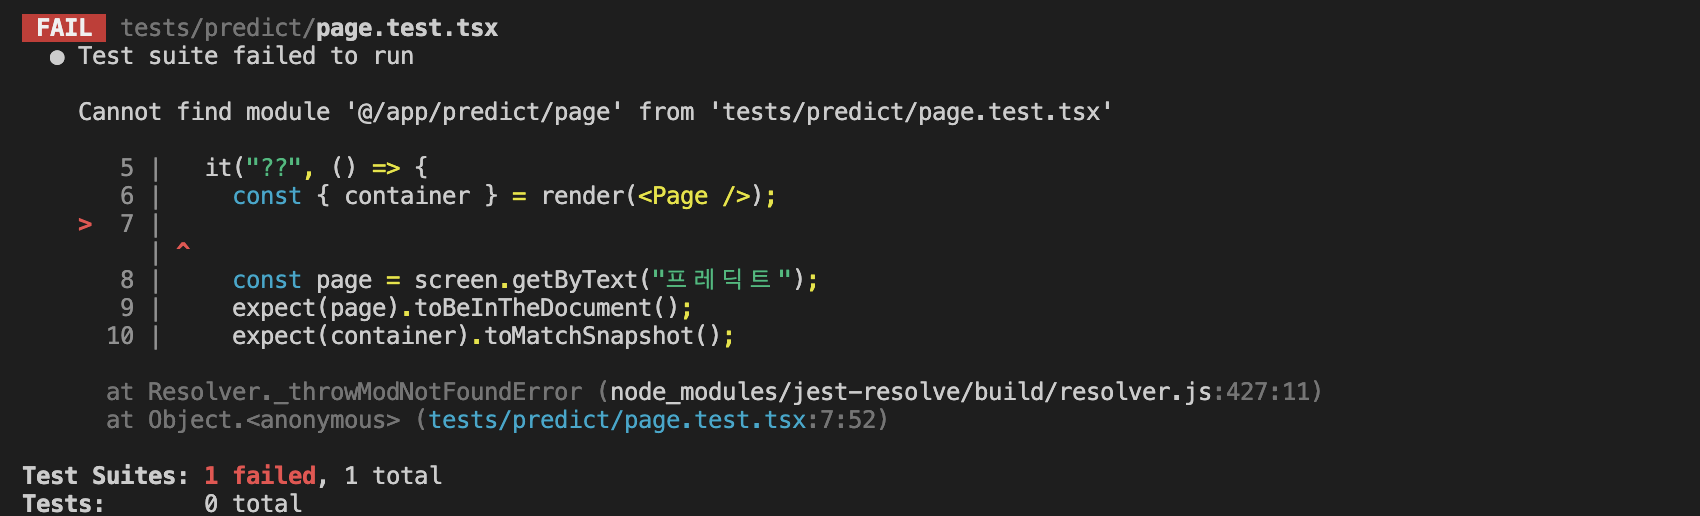
따라서 moduleNameMapper 설정에서 오류가 난 부분의 절대경로를 똑같이 따라갈 수 있도록 jest Config 을 통해서 알려주면 끝난다!
마저 설명하자면, Next.js 는 v12 부터 Jest을 default configuration을 제공한다!
이 Configuration은 Jest에서 Next.js feature을 사용할 수 있게 해준다!
Write test code
Jest 와 React Testing Library 활용해서 테스트 코드 작성 시작!
./tests/predict/page.test.tsx 만들고,
import { render, screen } from "@testing-library/react";
import Page from "@/app/predict/page";

describe("predict page", () => {
  it("이건 프레딕트 글자가 잘 나오는지 체크", () => {
    const { container } = render(<Page />);

    const page = screen.getByText("이건 프레딕트");
    expect(page).toBeInTheDocument();
    expect(container).toMatchSnapshot();
  });
});
테스트 코드가 내가 만든 <Page /> component를 렌더하고 이건 프레딕트 글자가 있는지 체크하는 것이다.
또, 우리는 toMatchSnapshot() 을 통해서 렌더링된 HTML 스냅샷도 쓸 수 있다?!
Script
package.json
"scripts": {
  "dev": "next dev",
  "build": "next build",
  "start": "next start",
  "lint": "next lint",
  "test": "jest --watch",
  "test:ci": "jest --ci"
},- test : 무언가 변화하면,
Jest가 자동으로 테스트 코드 돌려줄거야! - test:ci : CI/CD 할 때 테스트코드가 작동할거야~
Execute
npm run test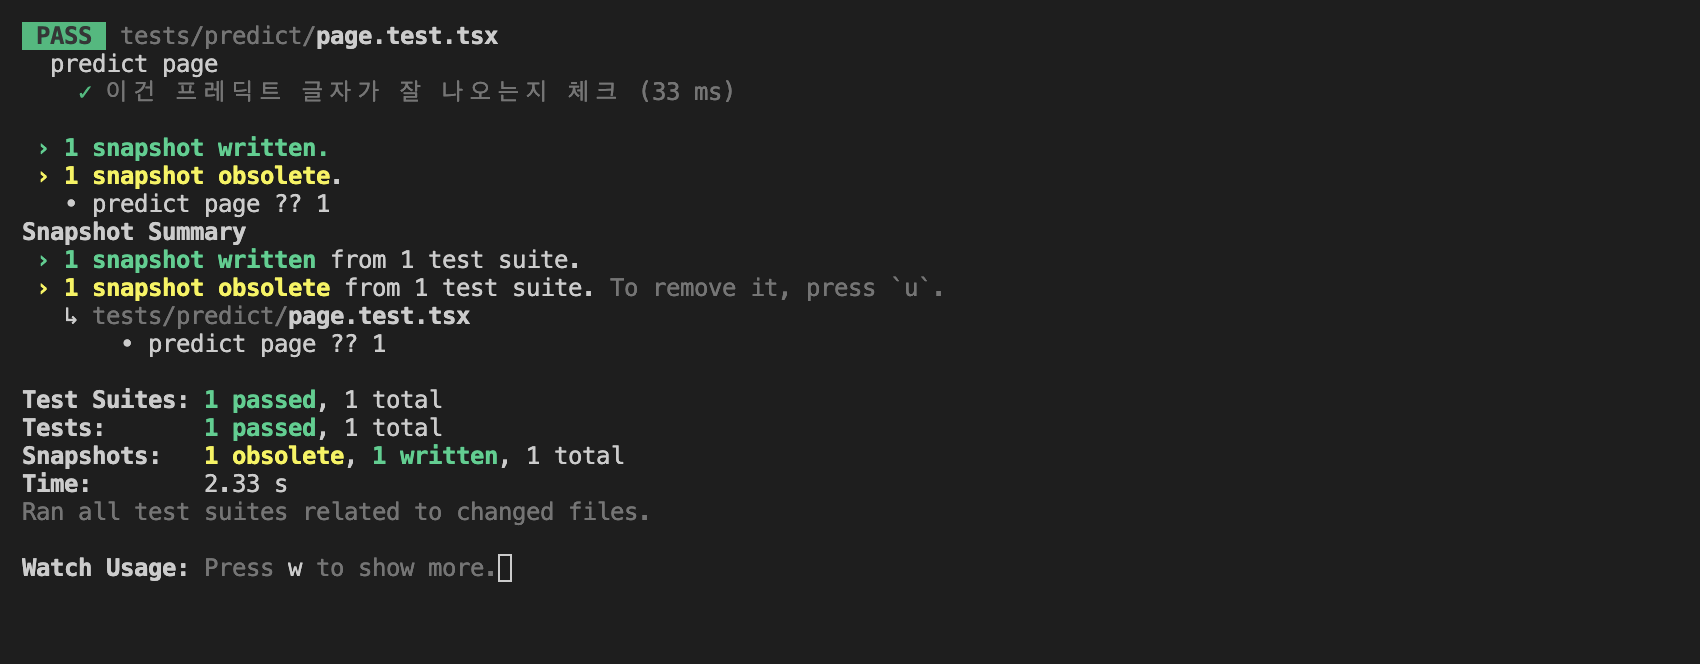
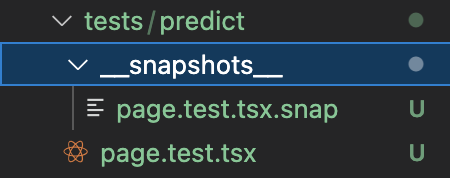
스냅샷이 만들어 진것도 볼 수 있을거야!
야무지네