지금까지 튜토리얼에서 사용하여 모델 속성의 값을 읽고 표시했다.
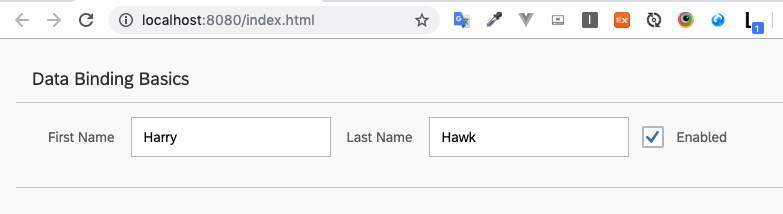
sap.m.Input 필드를 사용하여 성 및 이름 필드가 표시되도록 사용자 인터페이스를 변경하고 두 입력 필드를 모두 활성화 또는 비활성화하는 데 추가 확인 컨트롤을 사용한다.
이번 튜토리얼에선양방향 데이터 바인딩기능을 알아보고 뷰 정의를 XML 파일로 한다.
Preview
Coding
webapp/view/App.view.xml (New)
<mvc:View xmlns="sap.m" xmlns:mvc="sap.ui.core.mvc">
  <Panel headerText="{/panelHeaderText}" class="sapUiResponsiveMargin" width="auto">
    <content>
      <Label text="First Name" class="sapUiSmallMargin" />
      <Input value="{/firstName}" valueLiveUpdate="true" width="200px" enabled="{/enabled}" />
      <Label text="Last Name" class="sapUiSmallMargin" />
      <Input value="{/lastName}" valueLiveUpdate="true" width="200px" enabled="{/enabled}" />
      <CheckBox selected="{/enabled}" text="Enabled" />
    </content>
  </Panel>
</mvc:View>
~/webapp/view 경로에 해당 xml 파일을 생성하고 Label, Input, CheckBox 컨트롤에 데이터들을 바인딩 한다.
webapp/index.html
<!DOCTYPE html>
<html>
<head>
	<meta charset="utf-8">
	<meta name="viewport" content="width=device-width, initial-scale=1.0">
	<title>Data Binding Tutorial</title>
	<script id="sap-ui-bootstrap"
		src="https://openui5.hana.ondemand.com/resources/sap-ui-core.js"
		data-sap-ui-theme="sap_belize"
		data-sap-ui-libs="sap.m"
		data-sap-ui-resourceroots='{
			"sap.ui.demo.db": "./"
		}'
		data-sap-ui-compatVersion="edge"
		data-sap-ui-async="true">
	</script>
	<script src="index.js"></script>
</head>
<body class="sapUiBody" id="content"></body>
</html>
index.html에서 data-sap-ui-resourceroots='{"sap.ui.demo.db": "./"}' 속성을 추가해서 sap.ui.core.mvc.View컨트롤을 상속받아
ViewName을 sap.ui.demo.db을 접두어로 붙여 앞으로 view 폴더에 있는 xml을 부를때 자동으로 viewName을 sap.ui.demo.db.view.<xml file name>으로 설정한다.
webapp/index.js
sap.ui.require([
	"sap/ui/model/json/JSONModel",
	"sap/ui/core/mvc/XMLView"
], function (JSONModel, XMLView) {
	"use strict";

	// Attach an anonymous function to the SAPUI5 'init' event
	sap.ui.getCore().attachInit(function () {
		// Create a JSON model from an object literal
		var oModel = new JSONModel({
			firstName: "Harry",
			lastName: "Hawk",
			enabled: true,
			panelHeaderText: "Data Binding Basics"

		});
		// Assign the model object to the SAPUI5 core
		sap.ui.getCore().setModel(oModel);

		// Display the XML view called "App"
		new XMLView({
			viewName: "sap.ui.demo.db.view.App"
		}).placeAt("content");

	});
});
종속성으로 있던 sap.m.Text 컨트롤을 삭제하고 sap/ui/core/mvc/XMLView을 추가한다.
이제 npm run serve를 통해 응용프로그램을 확인한다. Enable 체크박스에 따라 입력 필드의 활성화 값이 바뀜을 알 수 있다.

UI5/Fiori/BTP 도큐먼트 번역 및 관련 정보 공유합니다.