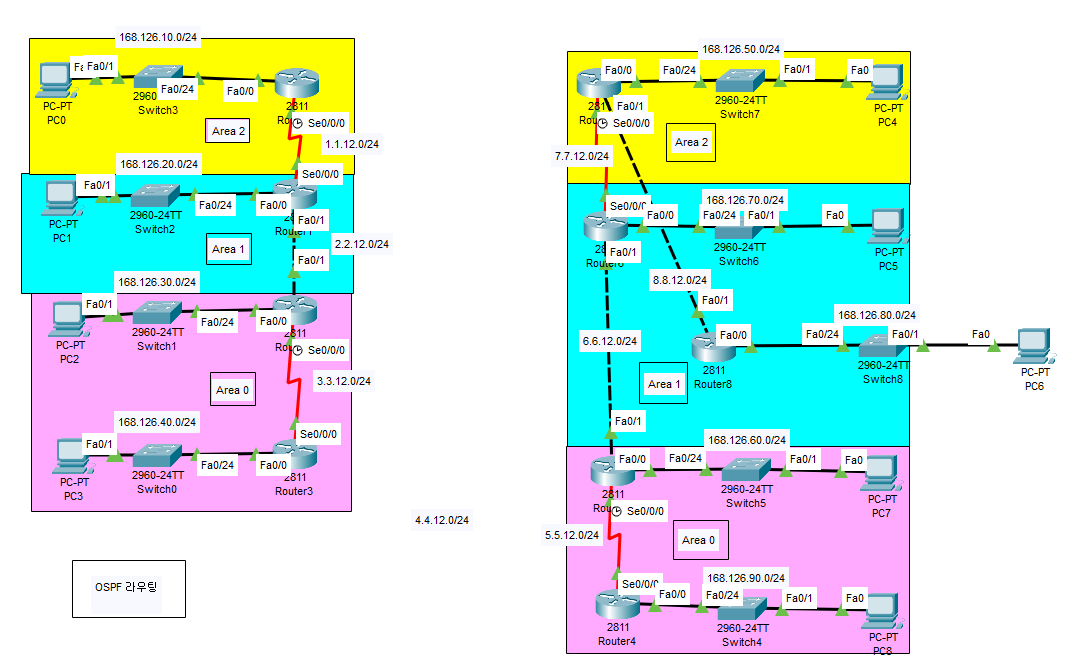
OSPF
- 동적 라우팅의 대표적인 링크상태 프로토콜
cf)
링크상태 프로토콜? = 인터넷에서 연결된 링크의 상태를 감시하여 최적의 경로를 선택
설정
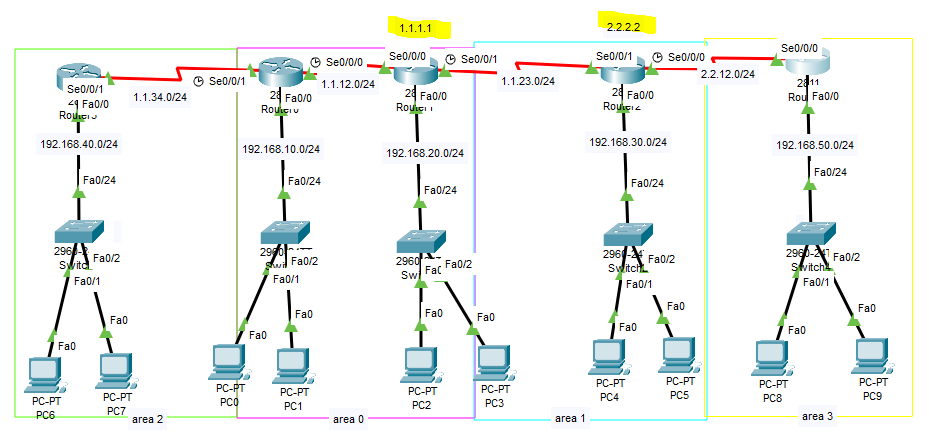
[area0에 대해서]
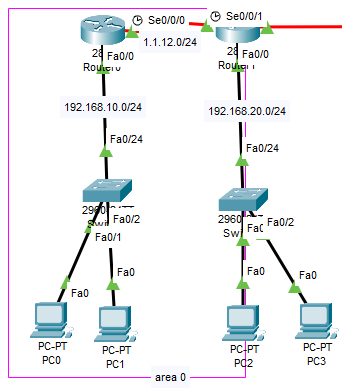
<Router 1>
Router(config)#router ospf 7
- router ospf [프로세스ID]
Router(config-router)#network 192.168.10.0 0.0.0.255 area 0
- network [IP 주소] [와일드카드 마스크] area [번호]
Router(config-router)#network 1.1.12.0 0.0.0.255 area 0
- network [IP 주소] [와일드카드 마스크] area [번호]- 한쪽에 설정해주었으면 반대쪽도 설정해줘야함.
<Router 2>
Router(config)#router ospf 7
Router(config-router)#network 192.168.20.0 0.0.0.255 area 0
Router(config-router)#network 1.1.12.0 0.0.0.255 area 0
[area 1에 대해서]
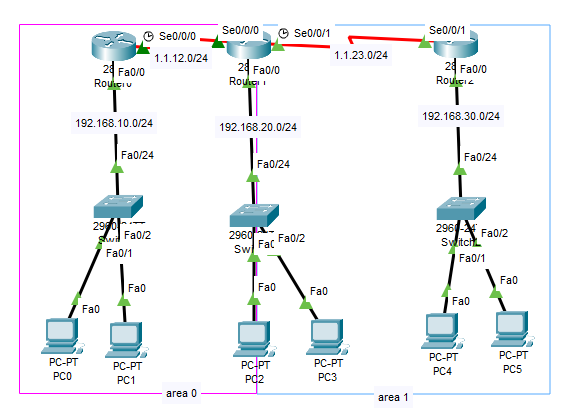
<Router 2>
Router(config)#router ospf 7
Router(config-router)#network 1.1.23.0 0.0.0.255 area 1
<Router 3>
Router(config)#router ospf 7
Router(config-router)#network 192.168.30.0 0.0.0.255 area 1
Router(config-router)#network 1.1.23.0 0.0.0.255 area 1- area 1 구역에 대해서 라우팅을 잡아줄 때 area 1로 잡아줌.
area가 두 구역으로 나뉠때는 area 0(백본 area)로 물리적으로 연결이 되어야함.
- 즉, area 0이 아닌 구역(non 백본 area)는 area 0(백본area)를 통해 통신이 이루어져야 한다.
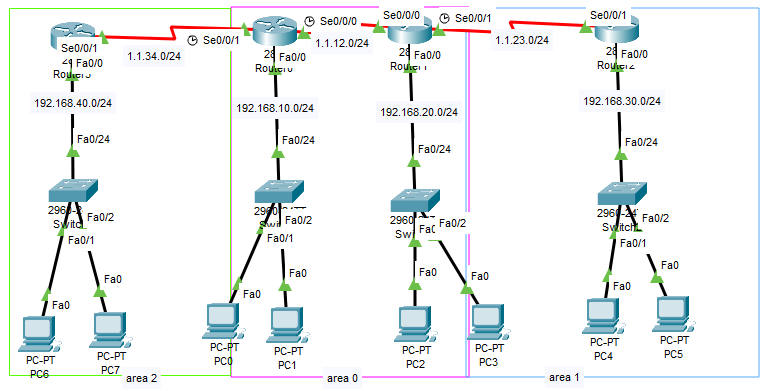
[area 3에 대해서]
- area 1과 2는 area0과 물리적인 연결이 되어있지만 area 3같은 경우엔 area0과 물리적 연결이 되어있지않아서 라우팅을 해주어도 통신이 되지않는다
{Virtual Link}
- ospf 라우팅을 할 때에는 area 0과 연결이 되어야 하는데 area 3같은 경우엔 물리적 연결이 되어있지 않다.
- area 0에는 물리적 포트가 더 이상 없는 상태인데 이럴때는 가상 연결 통로를 생성해주어야 통신이 가능하다.
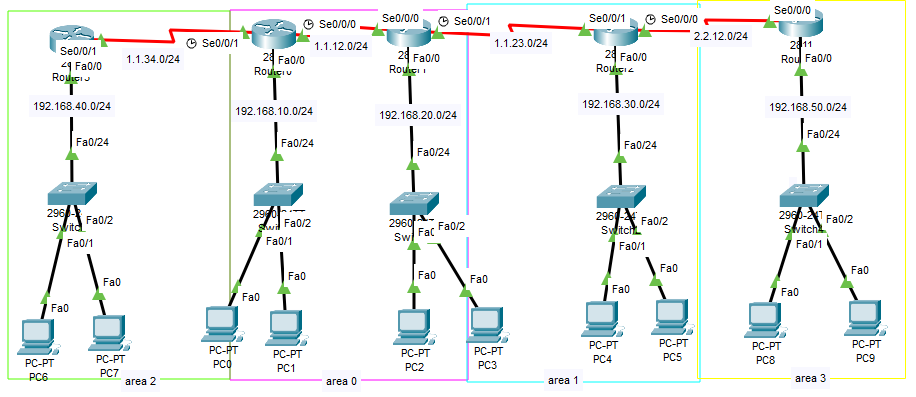
-
이때 가상 링크에서 기준을 잡아줄 IP주소는 물리적인 주소로 잡는게 좋겠지만 추후 네트워크 상태가 어떻게 바뀔지 모른다. 그러므로 물리적 주소가 아닌 논리적 주소(loopback)를 잡아주면 네트워크 변화에 따른 걱정이 없음.
-
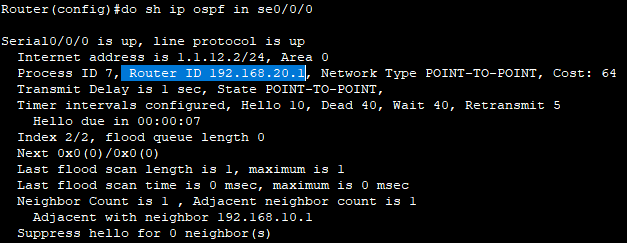
ospf의 통신은 Router ID를 기준으로 통신하게 되는데 192.168.20.0/24 주소는 물리적인 주소이다. 그래서 이것을 논리적 주소, Loopback 주소로 바꿔 주어야함.
<Router 1>
<루프백 주소 생성>
Router(config)#int lo0
Router(config-if)#ip add 1.1.1.1 255.255.255.0
<가상 링크 설정>
Router(config)#router ospf 7
Router(config-router)#area 1 virtual-link 2.2.2.2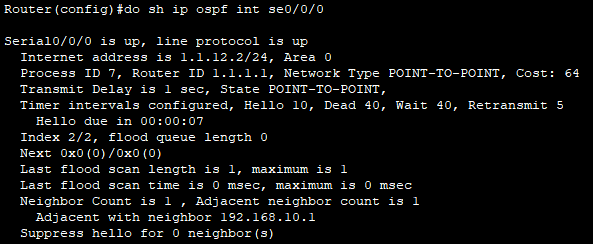
- 주소 생성 및 가상 링크를 설정해주었으면 Router ID가 1.1.1.1로 변경됨.
<Router 2>
<루프백 주소 생성>
Router(config)#int lo0
Router(config-if)#ip add 2.2.2.2 255.255.255.0
<가상 링크 설정>
Router(config)#router ospf 7
Router(config-router)#area 1 virtual-link 1.1.1.1- 나머지 반대쪽도 설정해주면 가상 링크가 생성 되었고 모든 area에서 통신이 가능하다.
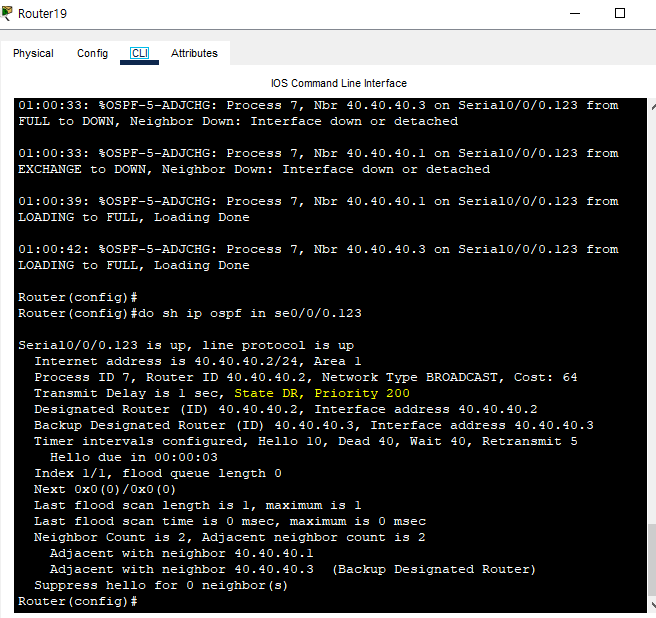
실습
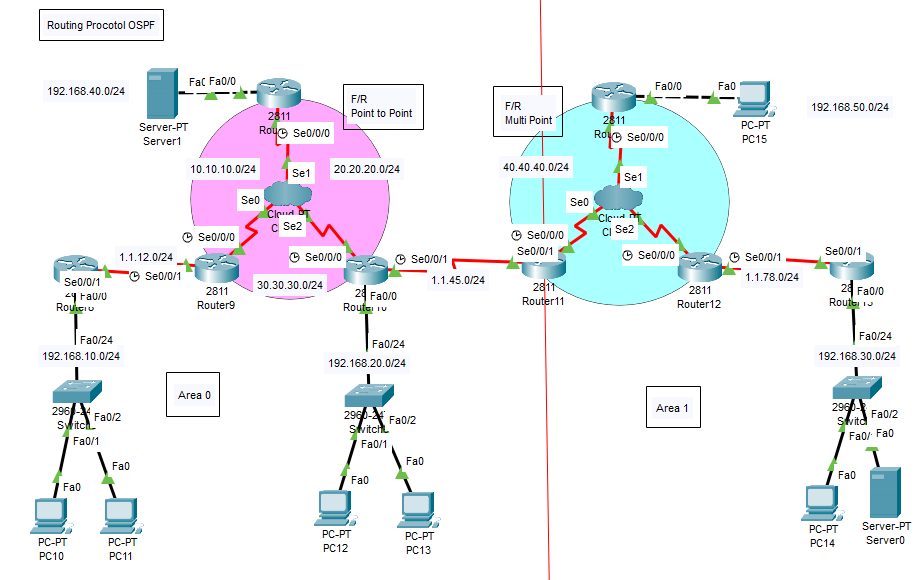
- 멀티 포인트에서 ospf 라우팅을 하려면 DR/BDR/DRother(priority 선정)를 잡아주어야함.
- F/R은 non-broadcast이므로 ospf의 타입 또한 이것처럼 바꾸어주어야함.
<Router 1>
Router(config)#int se0/0/0
Router(config-if)#ip ospf network broadcast
- 타입 바꿔주기
<Router 2-중계 역할>
Router(config)#int se0/0/0.123 mu
Router(config-if)#ip ospf network broadcast
- 타입 바꿔주기
Router(config-if)#ip ospf pri 200
- 중계 역할을 하는 라우터가 DR을 잡아야하므로 Pri값 수정.
<Router 3>
Router(config)#int se0/0/0
Router(config-if)#ip ospf network broadcast
- 타입 바꿔주기
cf)
만약 타입과 Pri값을 수정했는데 DR이 적용이 안된다면Router(config)#do clear ip ospf process =====> Reset ALL OSPF processes? [no]: yes
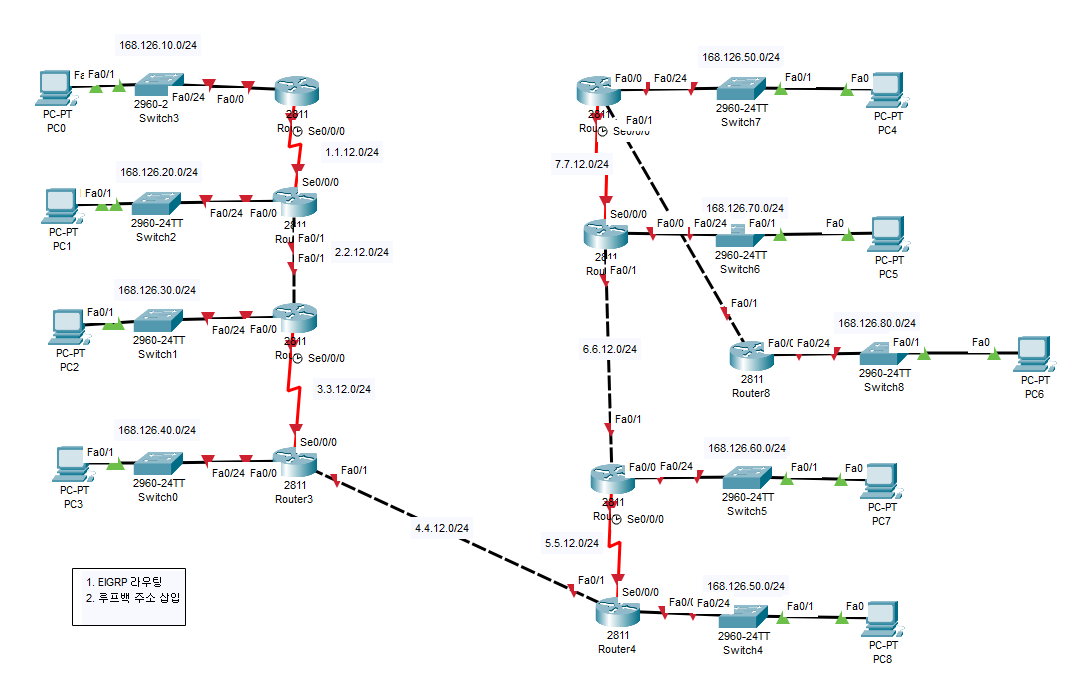
EIGRP 실제 장비 실습
OSPF 실제 장비 실습
주의점)
OSPF 설정 후 Virtual Link 설정시 자신이 Loopback 인터페이스에 설정한 주소와show ip ospf 7 int fa0/0에서 나오는 RouterID 주소값이 서로 동일해야 라우팅이 된다.
clear ip ospf 7 process명령어를 이용하여 RouterID를 맞춰주기

처음 시작하는 사람