🙋♀️ Controller와 DTO
본 프로젝트에서 서버는 REST API를 제공한다. Swagger를 통해 클라이언트에 API 정보를 전달했다.
Service단에서는 비즈니스 로직만을 다루도록 관심사를 분리하기 위해 DTO는 Controller단에서 구성했다.
📔 개념
1. REST API
- Representational State Transfer Application Programming Interface
- 두 컴퓨터 시스템이 인터넷을 통해 정보를 안전하게 교환하기 위해 사용하는 REST 스타일 아키텍쳐를 사용하는 인터페이스
- REST 스타일 아키텍쳐의 제약조건 : 인터페이스 일관성, 무상태(Stateless), 캐시 처리 가능(Cacheable), 계층화(Layered System), Code on demand (optional), 클라이언트/서버 구조
2. @RestController
@RestController는 @Controller에 @ResponseBody가 결합된 것이다.
@Controller는 기본적으로 View를 반환하기 때문에 Json 데이터를 반환하기 위해서는 각 메서드에 @ResponseBody를 붙여줘야 한다.
3. 요청 파라미터를 받는 다양한 방법
- @RequestParam : Get 요청에서 URI에 포함된 파라미터를 받을 수 있다. (required 속성으로 필수 설정을 할 수 있다.) Form-data도 받을 수 있다. 받은 파라미터의 이름을 바꿔서 사용할 때 사용한다.
- @PathVariable : Get 요청에서 파라미터 name을 제외해 깔끔하게 받을 수 있다. ex) /{id}
- @RequestBody : Json 데이터를 받을 수 있다.
- 어노테이션을 생략하는 경우 : Form-data를 받을 수 있다. (MultipartFile 포함 시 필수로 사용해야 한다.)
- 파라미터로 받는 VO와 같은 객체는 setter가 있어야 작동한다.
4. Swagger
- 스웨거는 개발자가 REST 웹 서비스를 설계, 빌드, 문서화, 소비하는 일을 도와주는 대형 도구 생태계의 지원을 받는 오픈 소스 소프트웨어 프레임워크이다.
👩💻 구현
🤔 HttpServletRequest 활용
JWT 토큰을 발급할 때 accountId, email 등의 클레임을 담아서 발급했다. 클라이언트가 토큰을 제출하면 Spring Security 필터에서 토큰으로부터 클레임을 꺼내 사용자 정보를 HttpServletRequest에 담아준다.
이후 Controller에서 HttpServletRequest로부터 사용자 정보(accountId, profileId 등)를 추출해 service단에서 사용자 확인 및 예외 설정 시에 사용했다.
🤔 API 경로 네이밍
API 경로 네이밍에도 신경썼는데, 위와 같은 규칙들을 지켜보고자 했다.
@PostMapping("/api/v1/communities")
@GetMapping("/api/v1/communities")
@GetMapping("/api/v1/communities/me")
@GetMapping("/api/v1/communities/{id}")
@PutMapping("/api/v1/communities/{id}")
@DeleteMapping("/api/v1/communities/{id}")
CRUD 함수명을 사용하는 대신 HTTP 메서드로 구분하도록 했고, 리소스 컬렉션에 대해서 복수형으로 사용했다.
🤔 응답 구조
클라이언트의 API 요청에 대하여 보다 간편한 구조로 응답 데이터를 전송하기 위해서 ResponseEntity를 바로 사용하는 대신 직접 커스텀해서 사용했다.
public class ApiUtil {

    public static <T> ApiSuccessResult<T> success(T response) {
        return new ApiSuccessResult<>(response);
    }

    public static <T> ApiErrorResult<T> error(int code, T message) {
        return new ApiErrorResult<>(code, message);
    }

    public static class ApiSuccessResult<T> {
        private final T response;
        ...
    }

    public static class ApiErrorResult<T> {
        private final int statusCode;
        private final T message;
		...
    }
}
성공적인 응답에 대해서는 상태코드 200을 제외하고 필요한 데이터만 바로 전달했고, 실패 응답에 대해서는 ReponseEntity를 사용해서 에러코드가 함께 전송되도록 했다.
exception과 exception handler를 다루는 패키지도 따로 분리해서 관리했다.
다음 프로젝트에서는 상태코드를 모듈화해서 사용해보면 좋을 것 같다.
🤔 응답 데이터 구성하기
기본적으로 @RestController를 이용했기 때문에 Json 형태로 데이터가 반환된다. 따라서 DTO 클래스에 원하는 데이터를 선언해주면 되는데, 객체 자료형으로 만들기 위해서는 아래처럼 객체를 만들어서 그 자료형으로 선언해주면 된다. 본 프로젝트에서는 DTO 클래스에 내부 클래스로 만들었다.
public class CommunityDTO {

    private Long id;
	...
    private Writer writer;
    ...

    @Data
    @AllArgsConstructor
    private static class Writer {
        Long id;
        String name, lineName, houseName;
    }
}
그리고 null 값이 들어갈 경우를 위해 기본 자료형 대신 클래스형을 써주는 것이 좋다.
🤔 Entity 리스트를 DTO 리스트로 변환하기
우선 DTO 클래스들에서는 사용성을 위해 모든 종류의 생성자와 Getter, Setter를 모두 열어두었다.
@Data
@NoArgsConstructor
@AllArgsConstructor
public class CommunityDTO {}
특히, Entity 리스트를 DTO 리스트로 변환할 일이 많았는데, DTO 클래스 내에서 static 메서드를 만들고 Controller에서 호출해서 사용했다.
나는 정직하게 for문으로 DTO 생성자를 호출했지만, 다음과 같은 멋진 코드로 할 수 있다!
public static List<CommunityDTO> entityListToDTOList(List<Community> communities) {
	return communities.stream()
        .map(CommunityDTO::new)
        .collect(toList());
}
🤔 Swagger 사용하기
@Operation(summary = "커뮤니티글 상세 조회 (id)", description = "account token이 필요합니다.")
@ApiResponses({
    @ApiResponse(responseCode = "200", description = "커뮤니티글 상세 조회 성공", content = @Content(schema = @Schema(implementation = CommunityDTO.class))),
    @ApiResponse(responseCode = "400", description = "접근 권한이 없습니다.", content = @Content(schema = @Schema(implementation = ApiErrorResult.class))),
    @ApiResponse(responseCode = "404", description = "커뮤니티글이 존재하지 않습니다.", content = @Content(schema = @Schema(implementation = ApiErrorResult.class)))
})
@GetMapping("/api/v1/communities/{id}")
public ApiSuccessResult<CommunityDTO> findById(...) {...}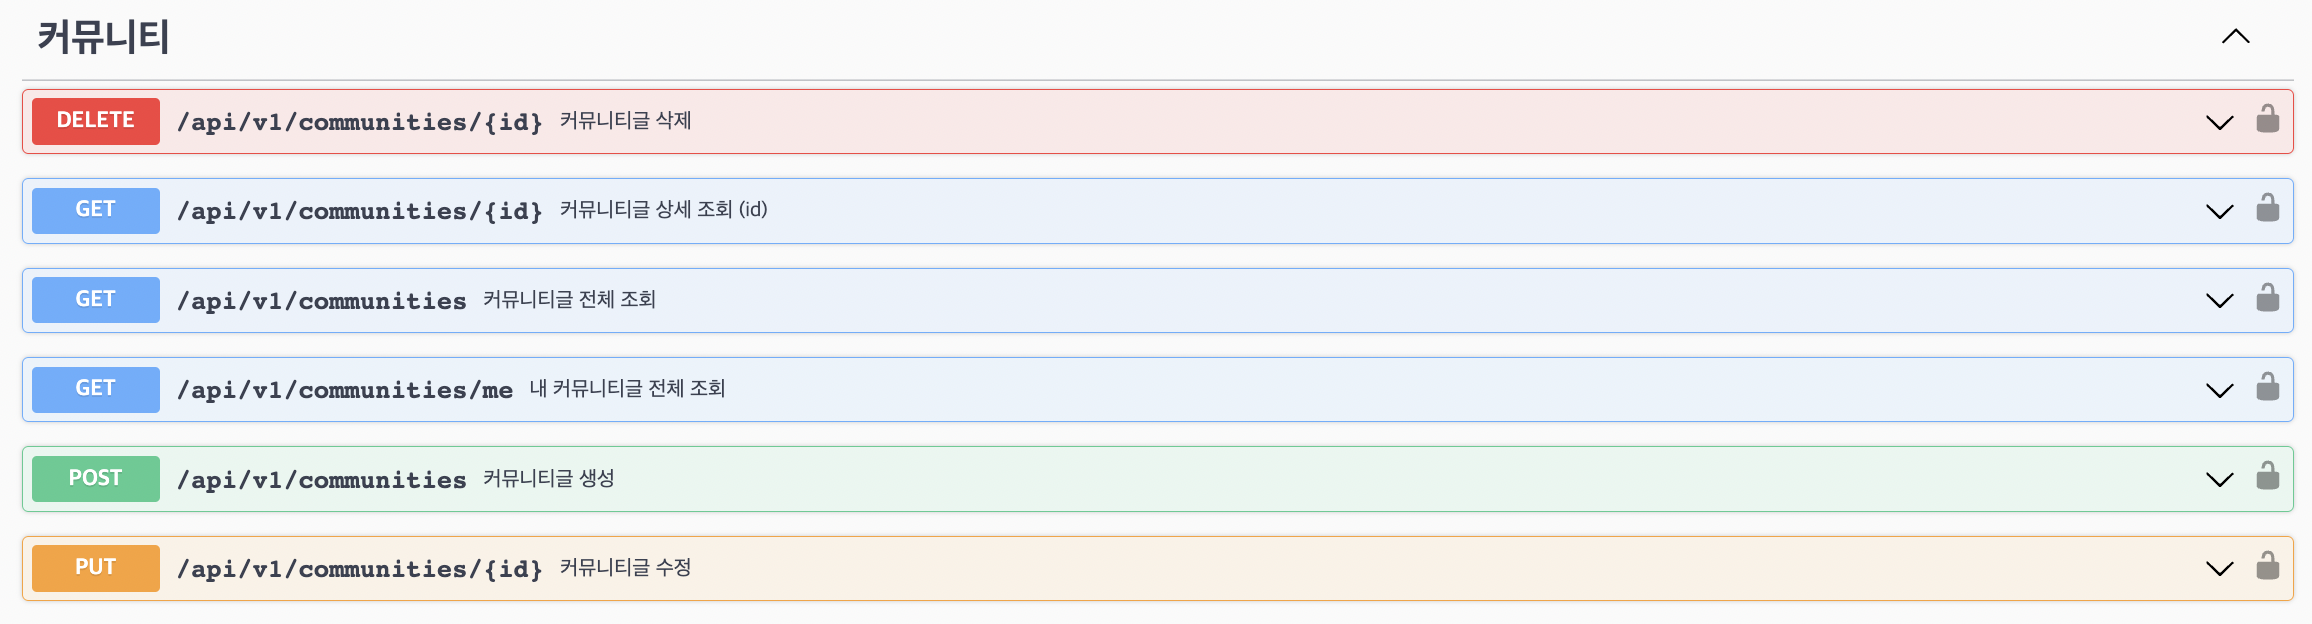
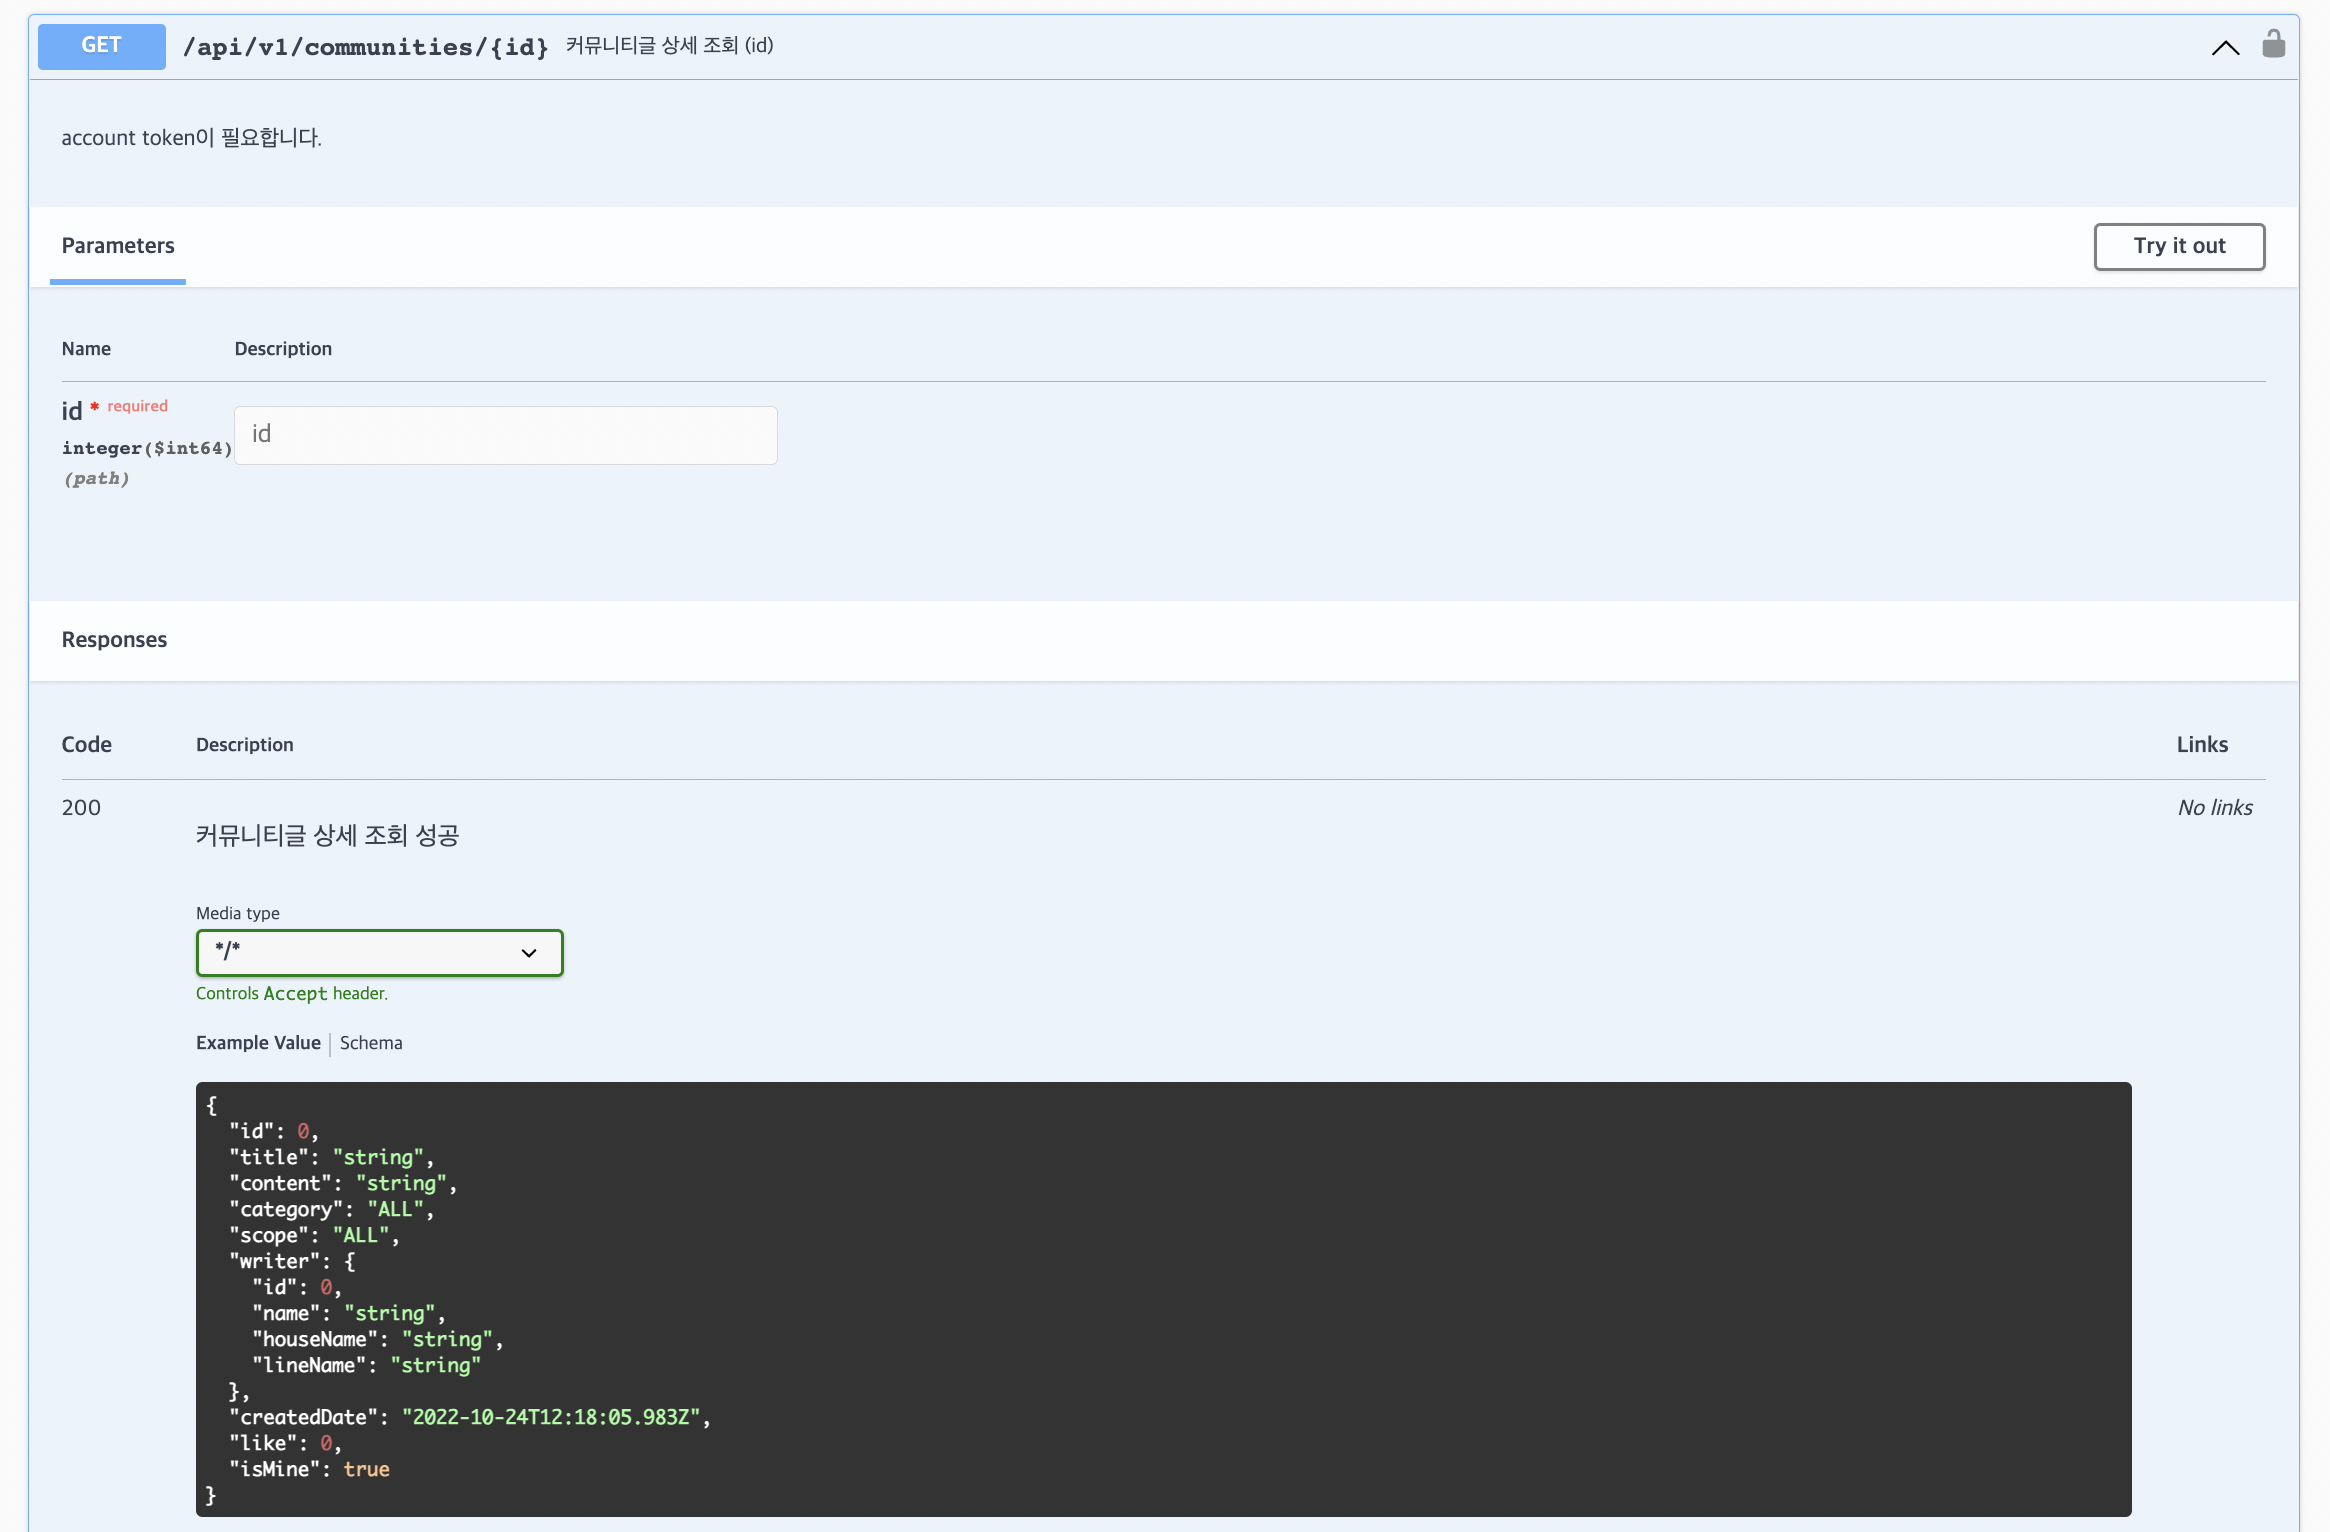
위와 같이 Controller 메서드마다 Swagger를 이용해 API 정보를 적어주었다.
- 본 서비스에서는 Access Token의 종류가 두 가지이기 때문에 어떤 토큰이 필요한지에 대한 정보를 description에 명시했다.
- 각 응답별 정보를 명시했다. (응답코드, 설명, 예시 등)
참고 문헌
- [ REST API ]
https://aws.amazon.com/ko/what-is/restful-api/
https://ko.wikipedia.org/wiki/REST- [ RestController ] https://doctorson0309.tistory.com/664
- [ 요청 파라미터를 받는 다양한 방법 ]
https://takeknowledge.tistory.com/39
https://hyeonjiwon.github.io/spring%20boot/spring(6)/- [ RequestMapping ] https://mungto.tistory.com/436