DB 연동법
기본 연결 방법
public Connection con;

public JDBCConnect() {
		try {
			// JDBC 드라이버 로드
			Class.forName("org.mariadb.jdbc.Driver");


			//DB 연결
			String url = "jdbc:mariadb://localhost:3306/green01";
			String id = "root";
			String pw = "1234";
			con = DriverManager.getConnection(url, id, pw);

			System.out.println("DB 연결 성공1");
		}catch(Exception e) {
			e.printStackTrace();
		}
	}
server, context.xml 이용한 방법
server.xml
-
코드 위치 - GlobalNamingResources 또는 Context 태그 안에 입력
-
기능 - db 연결과 dbcp 설정
-
dbcp 설정 이유 - 클라이언트에서 웹, 웹서버, 디비 까지 한번 왔다갔다할 때
가장 시간이 많이 소요되는 곳은 웹서버에서 DB서버에 최초로 연결되어
Connection 객체를 생성하는 부분이다.
  <Resource auth="Container"
    		  driverClassName="org.mariadb.jdbc.Driver"
    		  type="javax.sql.DataSource"
    		  initialSize="0"
    		  minIdle="5"
    		  maxTotal="20"
    		  maxIdle="20"
    		  maxWaitMillis="5000"
    		  url="jdbc:mariadb://localhost:3306/test"
    		  name="dbcp.mydb"
    		  username="root"
    		  password="1234"/>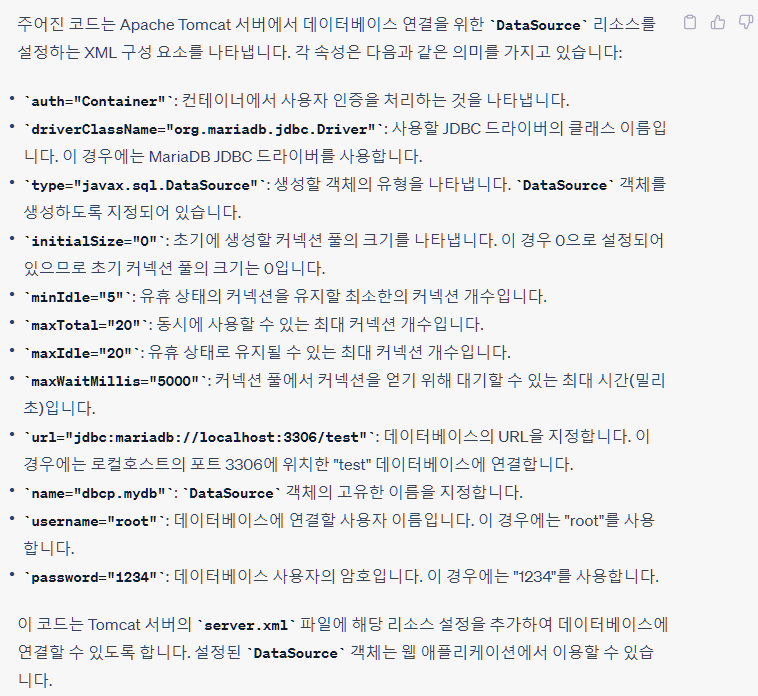
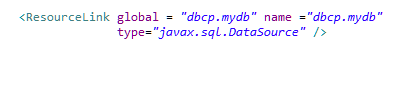
jndi
- 위치 - context.xml
- 기능 - 이름으로 db연결, 메시지 큐, 이메일 서버에 접근할 수 있다.
- 저장장소 - 일반적으로 was같은 서버 영역
Class
@Data
public class DBConnPool {

	public Connection con;

	public DBConnPool() {

		try {
			// 커넥션 풀(DataSource) 얻기  javax.naming.Context;
			InitialContext initCtx  = new InitialContext();
			Context ctx = (Context)initCtx.lookup("java:comp/env");
			DataSource source = (DataSource)ctx.lookup("dbcp.mydb");

			//커넥션 풀읉 통해 커넥션 객체 얻기
			con = source.getConnection();

			System.out.println("DB 커넥션 풀 연결 성공");
		}catch(Exception e) {
			e.printStackTrace();
		}
	}
	public void close() {
		try {
			if(rs != null)
				rs.close();
			if(stmt != null)
				stmt.close();
			if(pstt != null)
				pstt.close();
			if (con !=null)
				con.close();
		}catch (Exception e) {
			e.printStackTrace();
		}
	}
}

server.xml에서 dbcp 설정 -> context.xml에서 jndi 설정으로 이름 매칭
-> class에서 매칭된 이름을 통해 db 연결 -> DBcon 에서 사용 -> dao 호출로 db값 꺼내기
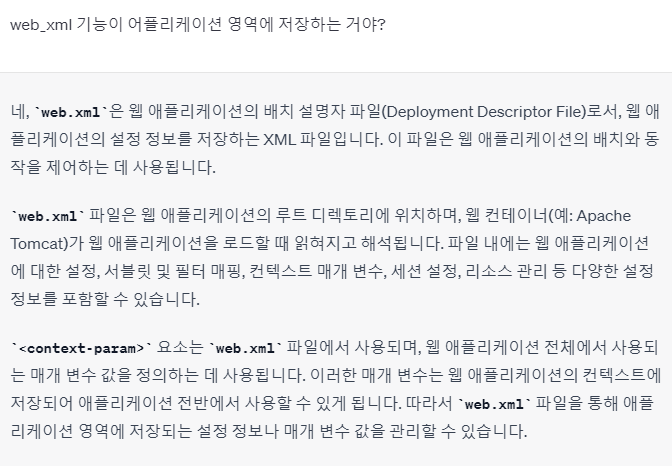
web_wml을 이용한 방법
- 추가 코드
web_wml
- 저장 위치 - application 영역
- 기능 - application 영역에 저장
<context-param>
  	<param-name>MariaDriver</param-name>
  	<param-value>org.mariadb.jdbc.Driver</param-value>
  </context-param>
  <context-param>
  	<param-name>MariaUrl</param-name>
  	<param-value>jdbc:mariadb://localhost:3306/green01</param-value>
  </context-param>
  <context-param>
  	<param-name>MariaId</param-name>
  	<param-value>root</param-value>
  </context-param>
  <context-param>
  	<param-name>MariaPw</param-name>
  	<param-value>1234</param-value>
  </context-param>
DBcon.class
 	public Connection con;

	public JDBCConnect(ServletContext application) {
			String driver = application.getInitParameter("MariaDriver");
			String url = application.getInitParameter("MariaUrl");
			String id = application.getInitParameter("MariaId");
			String pw = application.getInitParameter("MariaPw");

			try {
				Class.forName(driver);
				con = DriverManager.getConnection(url, id, pw);
				System.out.println("DB 연결 성공3");
			}catch(Exception e) {
				e.printStackTrace();
			}
		}
DAO
public class TestDAO {

	ArrayList<BorderVO> blist = new ArrayList<>();
	public ArrayList<BorderVO> get() {
		DBConnPool db = new DBConnPool();
		Connection con = db.getCon();
		String query = "SELECT * FROM border;";
		try {
			PreparedStatement pstt = con.prepareStatement(query);
			ResultSet rs = pstt.executeQuery();

			while(rs.next()) {
				BorderVO b = new BorderVO();
				b.setNum(rs.getInt("bnum"));
				b.setTitle(rs.getString("title"));
				b.setWriter(rs.getString("writer"));
				b.setContent(rs.getString("content"));
				blist.add(b);
			}

		} catch (SQLException e) {
			// TODO Auto-generated catch block
			e.printStackTrace();
		}
		return blist;

	}
}

WebContent/ web.xml에서 db값 설정 -> DBcon 작성(application 영역에서 값 가져옴)
-> DAO에서 사용 -> dao 호출을 통한 db값 사용
개발자가 되기 위해 페달을 밟아가는 과정