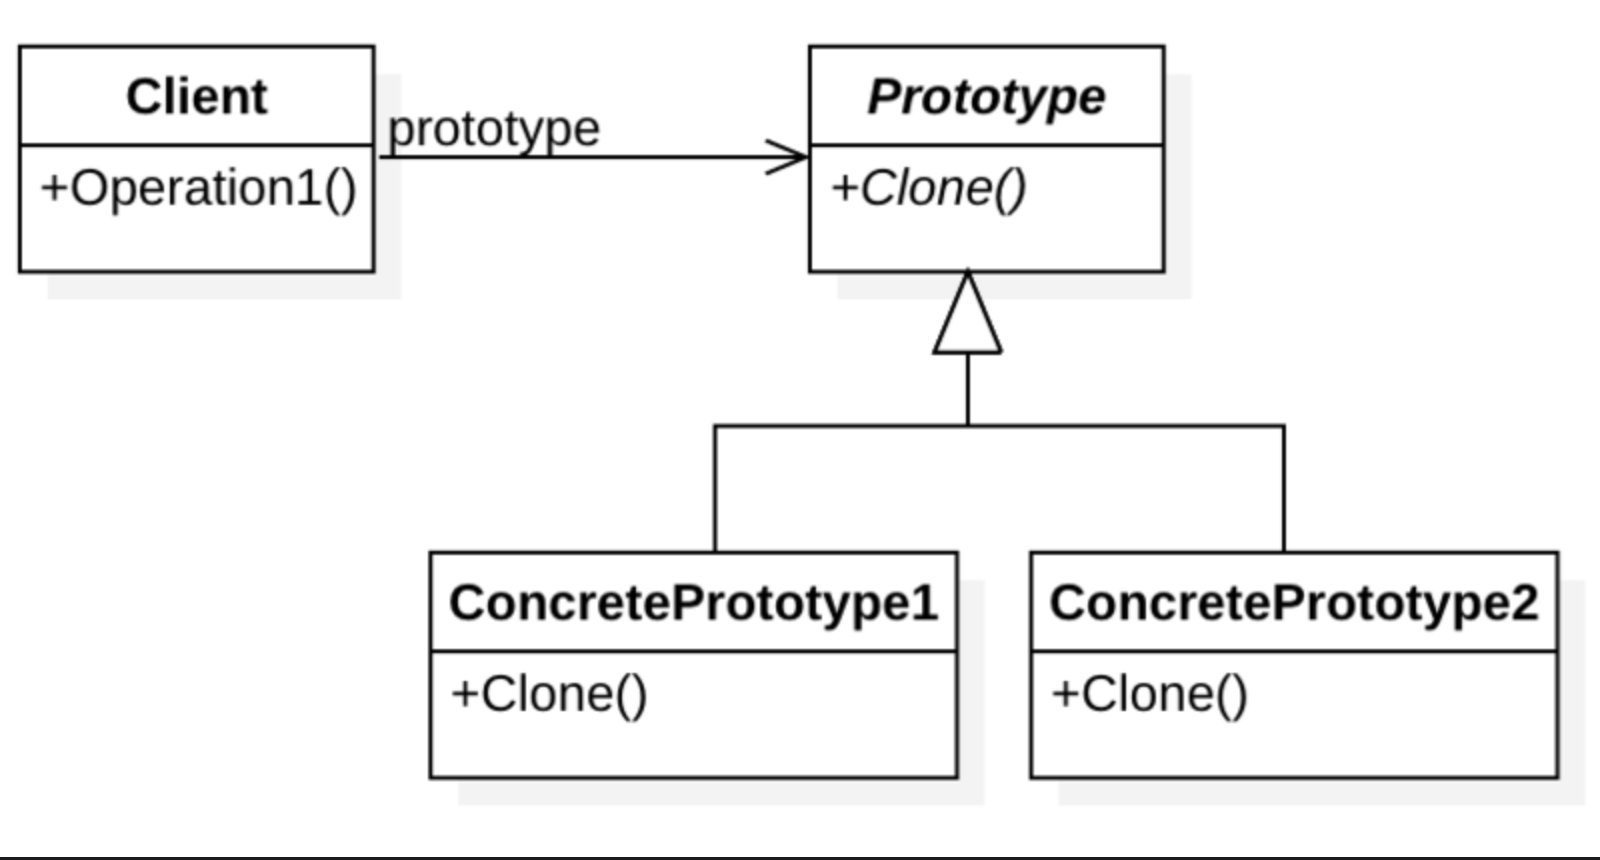
프로토타입(Prototype) 패턴
프로토타입 패턴이란?
프로토타입은 실제 제품을 만들기에 앞서 대략적인 샘플정도의 의미로 사용되는 단어입니다.
프로토타입 패턴은 객체를 생성하는 비용이 많이 들고, 비슷한 객체가 이미 있는 경우 사용되는 생성패턴 중 하나입니다.
즉, 프로토타입 패턴은 원본 객체를 새로운 객체에 복사하여 필요에 따라 수정하는 메커니즘을 제공한다.

자바에서는 프로토타입패턴에서 사용하는 복사를 위해 clone메소드를 사용합니다.
구현전 코드
@Getter
@Setter
public class GithubIssue {
    private int id;

    private String title;

    private GithubRepository repository;

    public GithubIssue(GithubRepository repository){
        this.repository = repository;
    }

    public String getUrl(){
        return String.format("https://github.com/%s/%s/issues/%d",
                repository.getUser(),
                repository.getName(),
                this.id
        );
    }
}

@Getter
@Setter
public class GithubRepository {
    private String user;
    private String name;
}
public class App {
public static void main(String[] args) {
GithubRepository repository = new GithubRepository();
repository.setUser("namookk");
repository.setName("design-pattern-study");
GithubIssue githubIssue1 = new GithubIssue(repository);
githubIssue.setId(1);
githubIssue.setTitle("1주차 과제 : 싱글톤 패턴은 무엇인가?");
String url = githubIssue1.getUrl();
System.out.println(url);
//1.
GithubIssue githubIssue2 = new GithubIssue(repository);
githubIssue.setId(2);
githubIssue.setTitle("2주차 과제 : 팩토리메소드 패턴은 무엇인가?");
String url2 = githubIssue2.getUrl();
System.out.println(url2);
}
}먼저 구현전 코드를 보자면 GithubIssue2를 만들려면 githubIssue1를 만드는 과정을 똑같이 수행해야합니다.
여기서는 Id, Title모두 변경해야하므로 새로생성해도 문제없어보이지만 객체의 필드가 많고, 변경되야할 부분이 적다면 또는, 객체 생성에 비용이 너무 크다면 이 방법은 비효율적입니다.
여기서 프로토타입 패턴을 이용해서 변경해봅시다.
@Getter
@Setter
public class GithubIssue implements Cloneable{
    private int id;

    private String title;

    private GithubRepository repository;

    public GithubIssue(GithubRepository repository){
        this.repository = repository;
    }

    public String getUrl(){
        return String.format("https://github.com/%s/%s/issues/%d",
                repository.getUser(),
                repository.getName(),
                this.getId()
        );
    }

    @Override
    protected Object clone() throws CloneNotSupportedException {
        return super.clone();
    }
}
public class App {
    public static void main(String[] args) throws CloneNotSupportedException {
        GithubRepository repository = new GithubRepository();
        repository.setUser("namookk");
        repository.setName("design-pattern-study");

        GithubIssue githubIssue = new GithubIssue(repository);
        githubIssue.setId(1);
        githubIssue.setTitle("1주차 과제 : 싱글톤 패턴은 무엇인가?");

        String url = githubIssue.getUrl();
        System.out.println(url);

        GithubIssue clone = (GithubIssue) githubIssue.clone();
        String url2 = clone.getUrl();
        System.out.println(url2);

        System.out.println(clone == githubIssue);
        System.out.println(clone.equals(githubIssue));
        System.out.println(clone.getClass() == githubIssue.getClass());
        System.out.println(clone.getRepository() == githubIssue.getRepository());
    }
}
먼저 clone()메소드를 사용하려면 Cloneable 인터페이스에 있는 clone()메소드를 구현해야합니다.
여기서 clone()메소드의 특징을 살펴보자면
Object object = new Object(); //원본데이터
Object clone = object.clone(); //복사한 데이터

System.out.println(object == clone); // false
System.out.println(object.equals(clone)); // true
System.out.println(object.getClass() == clone.getClass()); //true
위와같이 동등성은 있지만 동일성은 없는것이 특징입니다.
따라서 equals메소드를 Override하여 동등성을 보장해주어야합니다.
@Override
public boolean equals(Object o) {
    if (this == o) return true;
    if (o == null || getClass() != o.getClass()) return false;
    GithubIssue that = (GithubIssue) o;
    return id == that.id && Objects.equals(title, that.title) && Objects.equals(repository, that.repository);
}

@Override
public int hashCode() {
    return Objects.hash(id, title, repository);
}
또 하나 특징은 기본적인 clone()메소드는 얇은 복사입니다. 따라서 원본객체인 githubIssue의 repository와 clone의 repository가 참조하는 객체는 같습니다.
깊은복사를 하려면 clone()메소드를 변경해주어야합니다.
@Override
protected Object clone() throws CloneNotSupportedException {
    //기본기능은 얕은 복사를 사용하게 됨
    //return super.clone();

    GithubRepository repository = new GithubRepository();
    repository.setUser(this.repository.getUser());
    repository.setName(this.repository.getName());

    GithubIssue githubIssue = new GithubIssue(repository);
    githubIssue.setId(this.id);
    githubIssue.setTitle(this.title);
    return githubIssue;
}
이렇게 복제하여 사용한다면 객체를 생성하는 비용이 비싼( DB를 거쳐야한다던지, Http통신을 통해서 가져와야하는 객체)객체를 재사용할 수 있습니다.
그럼 프로토타입 패턴의 장단점을 살펴보자면
장점
- 복잡한 객체를 만드는 과정을 숨길 수 있다.
- 기존 객체를 복제하는 과정이 새 인스턴스를 만드는 것보다 비용적인 측면에서 효율적일 수도 있다.
- 추상적인 타입을 리턴할 수 있다.
단점
- 복제한 객체를 만드는 과정 자체가 복잡할 수 있다.(특히, 순환 참조가 있는 경우)

