Nextjs Image 컴포넌트를 사용해서 보여지는 이미지들은 자동 또는 수동으로 최적화할 수 있었지만 Quill 에디터 내부에 삽입하는 이미지들은 그렇지 않았다.
이들을 가능한만큼 최적화해봤던 경험을 기록했다.
문제상황1 - alt text가 없음
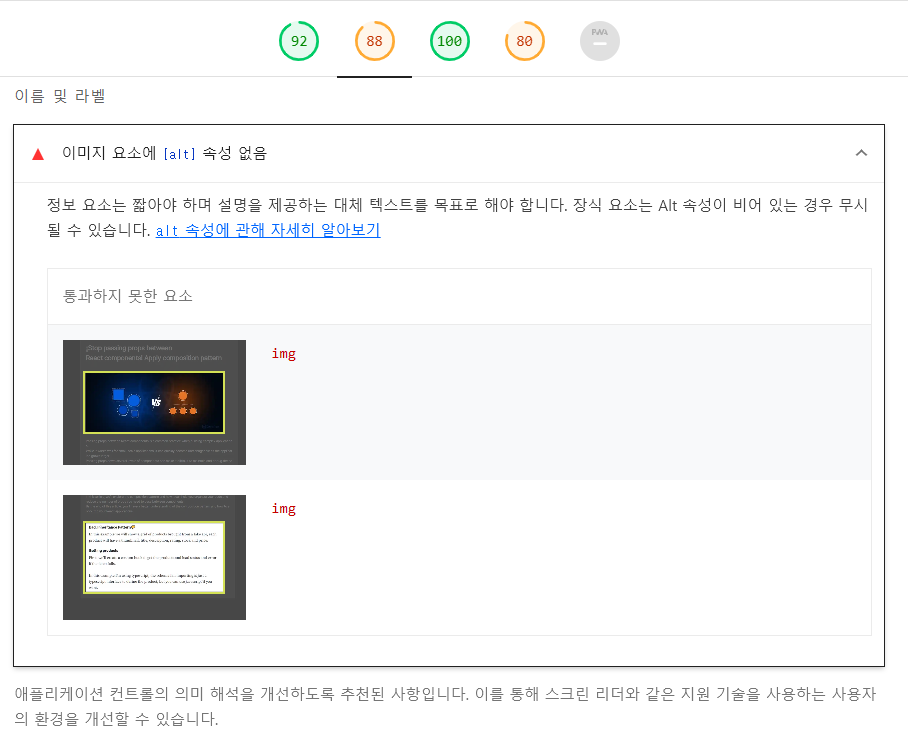
alt 속성없이 이미지가 에디터에 첨부되어 웹 바이탈의 접근성과 SEO에서 경고를 받았다.
alt text가 없으면?
-
이미지가 표시되지 못했을 때 대체 텍스트가 없어 사용자 콘텐츠 이해도를 저하시킨다.
-
네트워크 문제로 인한 이미지 로드 불가 또는 리더기를 사용하는 사용자에게 유용한 정보를 제공할 수 없다.
-
검색엔진이 이미지의 정보를 적절하게 얻지 못해 검색엔진 노출 순위가 저하된다.
해결1
alt text가 사용지 이미지 업로드 시 삽입되게 하면 된다.
매우쉽게 하는 방법
      const delta = quill.insertEmbed(index, 'image', `${getRemoteImage(imageFileUrl)}`);
      quill.removeFormat(index, index + 1);
      const newOps = delta.ops?.map((op) => {
        if (op.insert && typeof op.insert === 'object' && op.insert.image) {
          const imageAttributes = {
            ...op.attributes,
            alt: 'your alt text',
          };
          return {
            ...op,
            attributes: imageAttributes,
          };
        }
        return op;
      });
      delta.ops = newOps;
quill.updateContents(delta);insertEmbed될 때 얻는 deltaStatic을 이용해 attribute로 alt text를 삽입해주면 된다.
또는 clipboard의 dangerouslyPasteHTML을 사용해 직접 alt-text와 함께 img 태그를 삽입해주는 방법도 있다.
하지만 아래에 언급할 또다른 문제들을 같이 해결하기 위해 다른 방법을 사용했다.
위 두가지 방법으로는 기본적으로 loading, class, data-src 등의 유용한 attribute들을 삽입할 수 없다.
formats/image 사용하기
내부적으로 quill editor는 Parchment라는 라이브러리를 사용해 텍스트를 처리하고 편집할 수 있게 하는 API를 제공한다고 한다.
Blot(블록)은 에디터에서 텍스트의 서식,콘텐츠 및 동작을 나타낸느 개념으로 스타일링,형식 지정, 이벤트 처리 등을 담당한다.
Parchment는 Blots 개념을 기반으로 동작한다고 하는데 formats/image는 Quill에 내장되어있는 이미지 처리 Blot이라고 한다.
따라서 이 ImageBlot을 에디터를 띄울 때 커스텀해서 attribute를 넣던 이벤트를 넣던 하면 되는 것이다.
ImageBlot custom하기
async function getCustomImageBlot(QuillComponent: typeof ReactQuill) {
  const ImageBlot = await QuillComponent.Quill.import('formats/image');
  class CustomImageBlot extends ImageBlot {
    static create(value: CustomImageBlotProps) {
      const node: HTMLElement = super.create(value);
      node.setAttribute('alt', value.alt);
      node.setAttribute('src', value.src);
      node.dataset.src = value.dataSrc;
      return node;
    }

    static value(domNode: HTMLElement): CustomImageBlotProps {
      return {
        alt: domNode.getAttribute('alt') || '',
        src: domNode.getAttribute('src') || '',
        dataSrc: domNode.dataset.src || '',
      };
    }
  }
  return CustomImageBlot;
}

//.. Editor
export const QuillNoSSRWriter = dynamic(
  async () => {
    const { default: QuillComponent } = await import('react-quill');
    //.. import dynamic some modules..
    const ImageBlot = await getCustomImageBlot(QuillComponent);
    //.. register some modules
    QuillComponent.Quill.register(ImageBlot);
    const Quill = ({ forwardedRef, ...props }: ForwardedQuillComponent) => (
      <QuillComponent ref={forwardedRef} {...props} />
    );
    return Quill;
  },
  { loading: () => <LoadSpinner width="100%" size="4rem" />, ssr: false },
);
nextjs 기준이라 에디터가 서버사이드에서 뜰 수 없기 때문에 에디터 컴포넌트 포함 모든 모듈들을 dynamic import 해주었고
writer 뿐만 아니라 reader에도 적용해야해서 재정의 클래스를 따로 분리했다.
일반적인 형태로 사용한다면 시중? 에 나와있는 대로 register해서 사용하면 될 것 같다.
Blot의 경우 기본적으로 클래스형으로 재정의하게끔만 구현된 것 같아 클래스로 ImageBlot을 상속해서 재정의 해주었다.
이를 Quill Editor에 register해주면 된다.
이렇게되면 에디터의 image handler에서 이미지를 첨부하는 방식에는 차이가 거의 없다.
//기존
quill.insertEmbed(index, 'image', 'image_url);
// 변경
quill.insertEmbed(index, 'image', {
        src: 'imageUrl',
        alt: 'your alt',
        dataSrc: 'data-src-url',
});ImageBlot에서 재정의했을 때 value props대로 value 매개변수에 적절한 값을 넣어주기만 하면 된다.
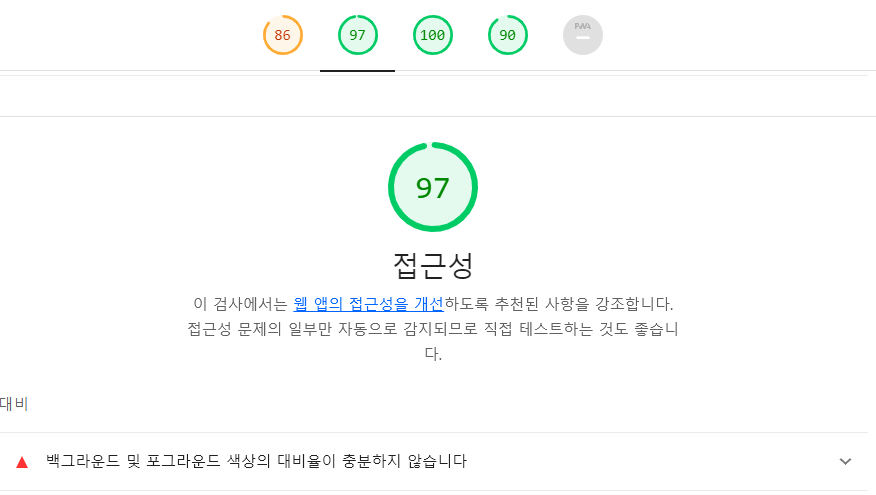
alt text 텍스트만 넣어주었을 뿐인데 접근성과 SEO 점수가 개선되었다.
문제상황2 - 이미지에 width,height가 명시되어 있지 않음
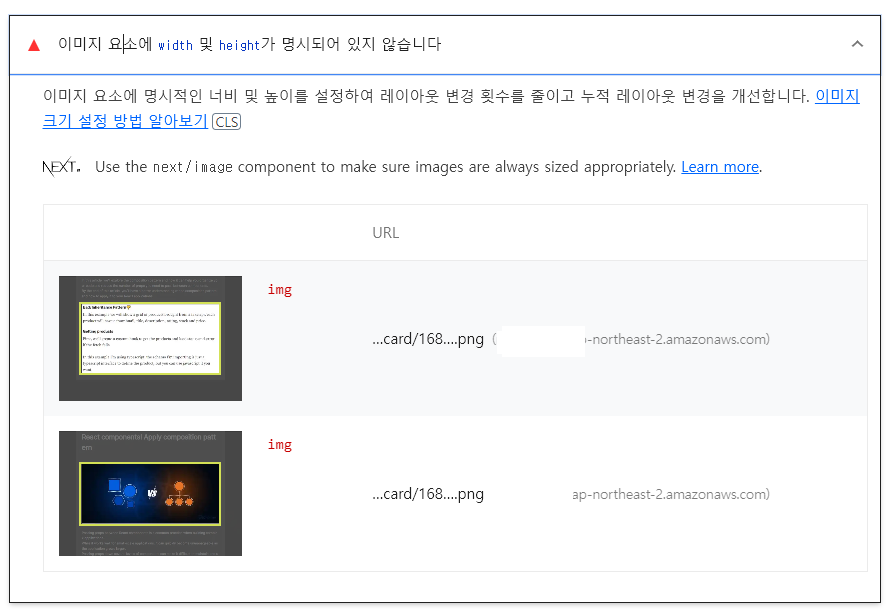
성능 항목에서 다음과 같은 경고를 보여준다.
width, hegiht 명시하는 이유
- 레이아웃 계산을 최적화하여 브라우저가 이미지 로드 전 공간을 확보해 레이아웃 시프트 방지
- 크기가 명시되지 않을 경우 브라우저의 이미지 로드를 위한 추가적인 계산으로 로드 속도가 저하됨
해결 2
이미지 업로드 시, 그리고 이미지 리사이징 시 width, height를 얻어와 설정해주기로 했다.
위에서와 마찬가지로 ImageBlot 커스텀 클래스를 통해 초기 업로드 시 사이즈를 얻어왔고 MutationObserver를 활용해 사이즈 변경도 감지해 사이즈를 얻어와 설정했다.

사용해도 크게 문제없을 것 같다고 판단했다.
async function getCustomImageBlot(QuillComponent: typeof ReactQuill, readOnly?: boolean) {
  const ImageBlot = await QuillComponent.Quill.import('formats/image');
  class CustomImageBlot extends ImageBlot {
    static create(value: CustomImageBlotProps) {
      const node = super.create(value) as HTMLImageElement;
      node.setAttribute('class', 'lazy-image');
      node.setAttribute('loading', 'lazy');
      node.setAttribute('alt', value.alt);
      node.setAttribute('src', value.src);
      node.setAttribute('width', value.width);
      node.setAttribute('height', value.height);
      !readOnly &&
        node.addEventListener('load', () => {
          node.setAttribute('width', node.width.toString());
          node.setAttribute('iHeight', node.height.toString());
          node.setAttribute('height', 'auto');
          let timer: NodeJS.Timeout;
          const observer = new MutationObserver((mutationsList) => {
            const mutationRecord = mutationsList.find(
              (mutation) =>
                (mutation.type === 'attributes' && mutation.attributeName === 'style') ||
                mutation.attributeName === 'width',
            );
            if (mutationRecord) {
              node.getAttribute('height') !== 'auto' && node.setAttribute('height', 'auto');
              clearTimeout(timer);
              timer = setTimeout(() => {
                const { height } = mutationRecord.target as HTMLImageElement;
                node.setAttribute('height', height.toString());
              }, 200);
            }
          });
          observer.observe(node, { attributes: true });
        });
      return node;
    }

    static value(domNode: HTMLElement): CustomImageBlotProps {
      return {
        alt: domNode.getAttribute('alt') || '',
        src: domNode.getAttribute('src') || '',
        dataSrc: domNode.dataset.src || '',
        width: domNode.getAttribute('width') || '100%',
        height: domNode.getAttribute('height') || 'auto',
        iHeight: domNode.getAttribute('iHeight') || 'auto',
      };
    }
  }
  return CustomImageBlot;
}
image-resize 모듈의 경우 img 태그의 height가 고정되어있으면 리사이징이 되지 않기 때문에 쓰기 에디터일 경우에는 실제 height값을 임시 attribute에 저장해두고 height를 auto로 두었다.
onLoad 후의 처리이기 때문에 실제로 쓰기 에디터에서 이미지를 로드해올때는 width, height 정보가 있었을 것이라 문제 없을 것이다.
쓰기 에디터에서 이미지가 로드 된 후에 MutationObserver를 활용해 width 변경을 감지하여 이미지 사이즈를 수정하게끔 구현했다.
수정이 감지되는 즉시에는 height를 auto로 변경해 리사이징이 원활하게 동작하게 했고 debouncing을 활용해 리사이징이 끝날 경우 실제 height값을 다시 저장했다.

alt-text의 경우는 읽기 에디터에 따로 해당 커스텀 ImageBlot 클래스를 등록하지 않아도 식별되지만 loading, class등 커스텀 attribute는 에디터에서 인식하지 못하기 때문에 읽기 에디터에도 등록해주어야 한다.
async () => {
    const { default: QuillComponent } = await import('react-quill');
    const ImageBlot = await getCustomImageBlot(QuillComponent, true);
    QuillComponent.Quill.register(ImageBlot);
    return () => <QuillComponent theme="bubble" readOnly value={content} />;
    },
width height가 명시되어있지 않다는 경고도 더 이상 식별되지 않는다!
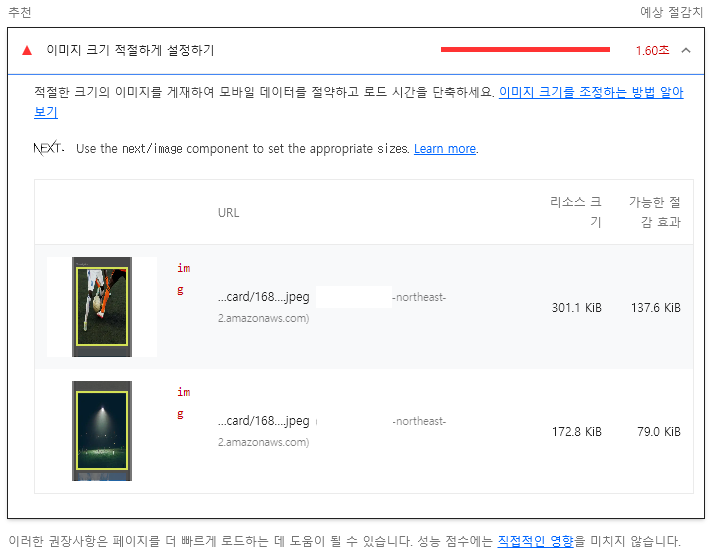
문제상황3
불필요하게 큰 이미지를 로드할 수 있다
예를 들어 740px인 이미지여도 360px인 기기에서는 360px만큼 또는 더 작은 크기로 보여질 것이다.
next/image로 관리되고 로드되는 이미지가 아니기 때문에 뷰포트와 상관없이 실제 크기의 이미지를 로드하기 때문에 불필요한 다운로드 시간과 용량을 사용하게 될 것이다.
next/image의 Image 컴포넌트는 width, height가 지정되어있어도 알아서 지정된 srcset에 맞춰서 이미지를 로드하여 최적화해주는데 Image컴포넌트를 사용할 수 없는 상황이다!
해결3
srcset 지정하기
next의 Image 컴포넌트를 직접 사용할 수는 없지만 next를 활용해 이미지를 최적화 할 수 있을 것이라 생각했다.
srcset을 활용해 불필요한 크기의 이미지 로드 문제를 해결할 수 있을 것이라 판단했다.
과정은 다음과 같다
(1) image 업로드 시 실제 이미지의 `width`, `height`를 지정한다.

(2) `_next/image`를 활용하는 적절한 `srcset`을 지정한다.

(3) 리사이징 시 style 속성으로 `width`를 설정해 사용자가 조절한 사이즈를 UI에 반영한다.
이렇게 하면 실제 이미지 width, height 비율을 사용하면서도 srcset을 통해 적절한 사이즈의 이미지를 브라우저가 로드할 것이고 리사이징시에는 style 속성을 활용해 그만큼의 크기를 보여줄 수 있을 것 같다.
function createSrcSet(imageSrc: string) {
  const viewport = ['400w', '700w', '1000w'];
  const widthParams = [{ w: '384' }, { w: '576' }, { w: '732' }];
  return widthParams.reduce(
    (prev, width, i) =>
      `${prev} /_next/image${createQueryString({ url: imageSrc, ...width, q: '75' })} ${viewport[i]},`,
    '',
  );
}
먼저 srcSet을 생성해주는 함수를 만들었다.
위 값들로 생성되는 src는 대략 다음과 같다.
srcSet="/_next/image?url=yourimage.png&w=384 400w, /_next/image?url=yourimage.png&w=576 700w, ..."주의해야할 것은 w 파라미터는 반드시 nextjs 설정을 따라야한다!
next에 srcSet을 통한 이미지 관리를 위임하기 때문에 next 설정을 따라야 한다.
기본적으로 deviceSizes, imageSizes로 설정된 값을 사용하거나 커스텀했다면 거기 있는 값을 사용해야 한다.

async function getCustomImageBlot(QuillComponent: typeof ReactQuill, readOnly?: boolean) {
  const ImageBlot = await QuillComponent.Quill.import('formats/image');
  class CustomImageBlot extends ImageBlot {
    static create(value: CustomImageBlotProps) {
      const node = super.create(value) as HTMLImageElement;
      node.setAttribute('loading', 'lazy');
      node.setAttribute('alt', value.alt);
      node.setAttribute('src', value.src);
      node.setAttribute('width', value.width);
      node.setAttribute('height', value.height);
      node.style.width = value.clientWidth;
      node.setAttribute('srcSet', createSrcSet(value.src));
      !readOnly &&
        node.addEventListener('load', () => {
          const originWidth = value.width;
          node.setAttribute('width', originWidth);
          node.setAttribute('height', value.height);
          node.setAttribute(
            'temp-width',
            !node.style.width || node.style.width === '100%'
              ? node.clientWidth.toString()
              : parseInt(node.style.width, 10).toString(),
          );
          let timer: NodeJS.Timeout;
          const observer = new MutationObserver((mutationsList) => {
            const resolvedRecord = mutationsList.find((mutation) => mutation.attributeName === 'resolved');
            if (resolvedRecord) {
              node.removeAttribute('resolved');
              return;
            }
            const mutationRecord = mutationsList.find(
              (mutation) =>
                mutation.type === 'attributes' &&
                (mutation.attributeName === 'style' || mutation.attributeName === 'width'),
            );
            if (mutationRecord) {
              const attributeWidth = node.getAttribute('width');
              const tempWidth = node.getAttribute('temp-width');
              node.style.width = `${attributeWidth === originWidth ? tempWidth : attributeWidth}px`;
              clearTimeout(timer);
              timer = setTimeout(() => {
                node.setAttribute('resolved', '');
                node.setAttribute('width', originWidth);
                node.setAttribute('temp-width', parseInt(node.style.width, 10).toString());
              }, 200);
            }
          });
          observer.observe(node, { attributes: true });
        });
      return node;
    }

    static value(domNode: HTMLElement): CustomImageBlotProps {
      return {
        alt: domNode.getAttribute('alt') || '',
        src: domNode.getAttribute('src') || '',
        width: domNode.getAttribute('width') || '100%',
        height: domNode.getAttribute('height') || 'auto',
        clientWidth: domNode.style.width || '100%',
      };
    }
  }
  return CustomImageBlot;
}
ImageBlot 클래스도 수정해주었다.
많이 복잡한데 quill-image-resize 모듈 자체가 에디터 내부 다른 위치에 변경 UI를 넣고 이벤트로 이미지 width를 직접 변경하는 방식으로 동작해서 이미지 리사이징이 완료된 후에 다시 원본 이미지 width로 attribute를 변경해주고
style:width 값을 사용자가 조절하는 크기에 맞게 mutationObserver를 통해 설정하여 기존 리사이징 동작과는 똑같이 동작하게끔 구현했다.

이제 기기 크기에 상관없이 이미지 크기가 적절하게 보이고 지정된 사이즈로 이미지를 로드한다.
물론 아직 리사이징한 이미지의 크기만큼 가져오는 것은 아니다.
예를 들어 실제 사이즈가 큰 이미지를 150px까지 줄였어도 디바이스 크기에 따라 지정된 이미지 사이즈로 로드해온다.
이 부분은 sizes 속성을 또 리사이징한 크기에 맞게 따로 설정해주면 될 것 같고 추후에 결과를 보며 적용해볼만한 것 같다.
결과 비교하기

이 3개의 이미지들을 PC환경에서 등록하고 적용 전/후 모바일 환경에서 브라우저에서 로드하는 이미지 사이즈와 로드하는 속도를 비교해보기로 했다.
적용전


모바일 환경에서 테스트한 결과이다.
에디터에 이미지를 등록할 때 어느정도는 압축하게끔 설정해둬서 실제 크기만큼 반영은 안되는 것 같다.
무엇보다 이미지 크기가 부적절하다는 결과가 식별되는 것이 크다.
적용후

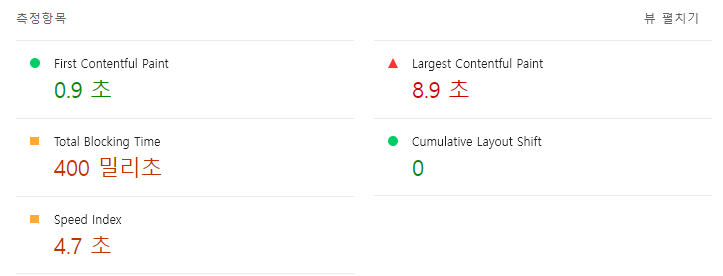
브라우저가 다운로드 할 때의 이미지 사이즈가 매우 줄었고 그에 따라 걸리는 시간도 같이 개선되었다.
그리고 nextjs로 이미지 최적화를 하기때문에 webp로의 변환까지 꽁으로 얻었는데 이런 점들이 매우 크게 작용했을 것이다.
정확하진 않겠지만 뷰포트내의 콘텐츠가 눈에 띄게 채워지는 속도를 나타내는 지표인 speed-index 시간이 반으로 줄었고 LCP도 개선되었다.
이미지 크기의 적절성이나 크기가 큰 컨텐츠 지연로딩과 같은 경고도 더이상 식별되지 않았다!
이미지 품질에 크게 문제 없이 잘 보여지는 것에 비해 사용자의 시간과 자원을 조금이라도 더 아꼈다!
여전히 남은 문제들
lazy load 커스텀하고 싶다
어지간한 브라우저에서 다 제공해주는 loading = lazy 설정을 통해 보여질 때 로드되도록 설정하였지만
감지되는 범위가 좀 넓기도 하고 지원되지 않는 브라우저도 있다고는 한다.
Intersection Observer를 사용해 노출되는 이미지를 lazy loading하고 그전에는 사이즈가 작은 blur image를 placeholder로 넣어두어 이미지 로드가 느려저도 레이아웃 시프트나 빈 레이아웃 없이 보여주고 싶었다.
Intersection Observer를 사용해 data-src에 원본이미지를 저장하고 src에 blur 이미지를 저장해뒀다가 화면에 감지되면 src로 교체하는 방법을 계획했다.
하지만 에디터로 추가/수정이 이루어지고 특정 페이지에서 보여지는 구조인데 보여지기만 하는 부분에서는 src, data-src의 교체가 특별히 상관없지만 추가/수정 페이지에서 해당 attribute가 교체되면 그대로 db에 저장되기 때문에 읽는 페이지에서 동작시킬 수 없게 된다.
수정/삭제 하는 페이지에서도 사용자가 업로드한 이미지가 보여져야하기때문에 발생하는 문제인 것 같다.
우선은 브라우저의 loading=lazy를 활용하기로 했다.
추가적인 데이터베이스 공간 사용
srcSet이 꽤 길고 지금은 이 정보를 DB에 그대로 저장하는 형태라 비효율적인 저장공간 활용이 될 수도 있다고 생각한다.
DB에 저장하지 않고 동적으로 srcset을 적용해 적절한 사이즈의 이미지를 로드할 방법이 없을지 찾아보고 삽질해봐야 할 것 같다.
요약
얻은 것
- alt text를 삽입해 웹 접근성과 검색엔진최적화에 좋은 영향을 주었다.
- 사용자 환경에 맞게 적절한 사이즈의 이미지를 로드시켜 리소스를 절약하고 로드 성능을 개선했다.

정리 감사합니다!