서론
Redux는 리액트의 전역 상태를 관리해주는 라이브러리이다. React로 개발을 하다보면 수 많은 상태 관리의 늪에 빠지게 된다. 예를 들면 다양한 컴포넌트 사이에서 동일하게 이용되는 상태들을 관리할 때 useState로 정해진 상태들을 props로 자식 컴포넌트에 내려주며 개발을 하게 된다. 정말 간단한 어플리케이션이면 상관이 없지만 실제 개발에 있어서는 수 많은 컴포넌트들이 복잡하게 얽혀있기 때문에 props만으로 상태 관리를 하는 것은 무리가 된다.
따라서 React에는 이런 문제를 해결하기 위한 여러가지 대안이 있다. 대표적으로 Redux가 있고 또 이와 비슷한 MobX라는 라이브러리도 존재한다. 최근에는 GraphQL을 많은 곳에 도입하면서 Apollo를 통한 상태 관리도 많이 한다고 한다. 간단하게 GraphQL을 공부하며 Reactive Variable을 사용해본적이 있지만 아직 대부분의 경우에는 Redux를 통한 상태 관리를 하는 것으로 알고 있다.
이 글은 공부를 하며 정리한 내용으로 글에 오류가 있을 수 있습니다. 그리고 React, Typescript, Redux, Javascript Generator에 대한 기본적인 이해가 필요합니다.
Redux Saga가 필요한 이유
Redux를 이용하면 store 내에 모든 상태를 넣어놓고 어떤 컴포넌트에서든 꺼내서 사용할 수 있다. 일반적인 React의 state처럼 상태가 변하면 컴포넌트도 재 렌더링이 된다.
여기까지는 알겠는데, React에서 서버에 ajax를 통해 데이터를 요청하고 받아오는 데이터는 어떻게 store에 적용할 수 있을까? 일반적으로는 데이터를 가져오는 함수를 실행하고 그 결과를 setState를 통해 저장을 한다. 하지만 Redux에서는 이게 안된다. 따라서 여기서 우리는 Redux-saga가 필요하다. 다른 대안으로 Redux-Thunk라는 방식도 있는데 이 라이브러리는 콜백 함수를 통해 비동기를 처리하지만 Saga는 Javascript의 제너레이터라는 특징을 이용하여 비동기 처리를 한다.
Redux Saga의 작동
일반적으로 Redux는 action, reducer를 통해 동작하는데, 먼저 메인 어플리케이션에서 action를 dispatch한다. 그러면 Redux가 지켜보다가 action에 맞는 reducer를 실행시켜서 action의 타입에 따라 store 내의 상태를 변화시킨다.
store 내의 어떤 상태를 변화시키기 위해 하나의 action, 그리고 하나의 reducer를 필요로 한다. 하지만 Redux-Saga는 조금 다르다.
먼저 Saga를 트리거시키는 요청 action를 실행한다. 그러면 saga에서 이 요청 action에 맞는 제너레이터 함수를 실행하고 그 제너레이터 함수에서reducer를 트리거시켜서 상태를 저장한다. 이 때 제너레이터를 통해서 데이터가 정상적으로 올 때 까지 기다렸다가 reducer를 트리거 시켜준다.
일반적인 Redux
- action
- reducer
- store 상태 변화
Redux Saga
- 데이터를 요청하는 action
- saga가 action에 맞는 제너레이터 함수를 실행
- 제너레이터 함수에서 또 다른 reducer를 실행
- 이 reducer에 따른 store 상태 변화
이런식으로 동작한다.
코드
아래는 redux-saga와 관련된 코드만 있고 전체 코드는 글 가장 아래쪽에 깃허브 링크를 남기도록 하겠습니다.
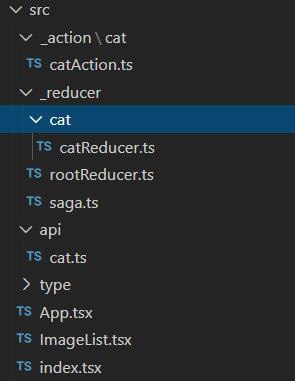
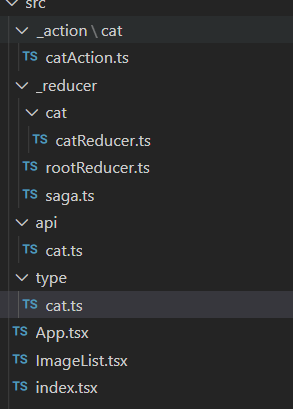
전체 폴더 구조는 아래와 같다.
import React from 'react';
import ReactDOM from 'react-dom';
import App from './App';
import { createStore, applyMiddleware } from "redux";
import { Provider } from "react-redux";
import createSagaMiddleware from "redux-saga";
import rootReducer from "./_reducer/rootReducer"
import mySaga from "./_reducer/saga"

const sagaMiddleware = createSagaMiddleware();
const store = createStore(rootReducer, applyMiddleware(sagaMiddleware))

sagaMiddleware.run(mySaga);

ReactDOM.render(
  <React.StrictMode>
    <Provider store={store}>
      <App />
    </Provider>
  </React.StrictMode>,
  document.getElementById('root')
);
// index.tsx
먼저 Redux-Saga를 store에 적용시켜준다. store에 applyMiddleware를 통해 sagaMiddleware를 넣어줄 수 있다.
import axios from "axios";
import CatImageType from "./../type/cat";

function formatData(data: any): CatImageType {
  return {
        breed: data.breed,
        id: data.id,
        url: data.url,
        width: data.width,
        height: data.height
 };
}

type getCatImageType = () => Promise<CatImageType>

export const fetchCatImage: getCatImageType= async () => {
       const res = await axios.get("https://api.thecatapi.com/v1/images/search")
       const formatted = formatData(res.data[0]);
       return formatted;
}
// api/cat.ts
그리고 이 코드가 API 데이터를 가져는 코드이다. 고양이 사진을 가져올 수 있는 무료 API이고 가져온 다음 우리 어플리케이션에 맞는 타입으로 변환 시켜준다.
import CatImageType from "../../type/cat";

export const REQUEST_DATA = "REQUEST_DATA" as const;
export const RECEIVE_DATA = "RECEIVE_DATA" as const;

// triggered by application
export const requestData = () => ({
    type: REQUEST_DATA,
})

// triggered by saga
export const receiveData = (data: CatImageType) => ({
    type: RECEIVE_DATA,
    data
})

export type CatActionType = ReturnType<typeof receiveData>
// _action/cat/catAction.ts
위 코드는 요청하는 액션과 데이터를 받는 액션을 지정하는 Redux의 action 코드이다. requestData는 어플리케이션에서 직접 호출할 action이고 receiveData는 Saga가 호출해줄 것이다.
import CatImageType from "../../type/cat";
import {CatActionType, RECEIVE_DATA} from "./../../_action/cat/catAction";

const initialState: Array<CatImageType> = [];

export default (state:Array<CatImageType>=initialState, action:CatActionType) => {
    switch(action.type){
        case RECEIVE_DATA:
            return [...state, action.data];
        default:
            return state;
    }
}
// _reducer/catReducer
위 코드는 reducer 코드이다. 요청하는 액션은 상태를 변화시키는 것이 아니고 saga만 트리거 할 것이기 때문에 REQUEST_DATA 액션에 의한 reducer 코드는 없다.
import { call, put, takeLatest } from "redux-saga/effects";
import { fetchCatImage } from "./../api/cat";
import { REQUEST_DATA, receiveData } from "./../_action/cat/catAction";

function* getCatData() {
    const data = yield call(fetchCatImage);
    console.log("from saga : ", data);
    yield put(receiveData(data))
}

export default function* mySaga() {
    yield takeLatest(REQUEST_DATA, getCatData);
}
// _reducer/saga.ts
마지막으로 saga 코드이다. 먼저 mySaga()는 REQUEST_DATA 액션을 기다렸다가 dispatch 되면 takeLastest가 getCatData 함수를 실행한다. getCatData는 api 코드의 fetchCatImage 함수를 실행해서 yield put을 통해 또 다른 reducer인 receiveData를 실행해준다. call은 일반 함수를 실행해주고 put은 reducer 함수를 실행해준다고 보면 되겠다.
제너레이터의 yield를 통해 getCatData는 먼저 fetchCatImage가 data에 담길 때 까지 기다렸다가 정상적으로 응답된 값이 data에 들어가면 그 다음 yield인 reciverData를 실행하게 된다.
function App() {
  const dispatch = useDispatch();

  const catDataState = useSelector((state: RootReducerType) => state.catReducer);
  const getCatImageDataWithReduxSaga = () => {
    dispatch(requestData());
  }

  return (
  <div className="App">
      <button onClick={getCatImageDataWithReduxSaga}>Get Cat Image</button>
      <ImageList data={catDataState} />
    </div>
  );
}
이렇게 useSelector와 useDispatch를 이용하여 store의 값을 업데이트하고 가져와서 <ImageList /> 컴포넌트에 넣어주었다. 전체 코드는 여기에서 확인할 수 있다.