1.패키지 설치
$ yarn add @nestjs/graphql graphql-tools graphql apollo-server-express- 최근(2021-10-27)에 위와 같이 설치를 진행해보니 ts-morph 가 설치되어 있지 않아 정상적으로 동작하지 않는 문제가 발생
-> https://github.com/nestjs/graphql/issues/1621 깃헙이슈에 등록되어 있는 건이였고, 아래와 같이 모듈을 직접 설치하는 방법으로 해결
$ yarn add ts-morph @apollo/gateway2.tsconfig.json 설정
tsconfig.json 파일에 "allowSyntheticDefaultImports": true 를 추가합니다. (이 설정값을 추가하지 않으면 WebSocket 모듈이 제대로 import 되지 않아서 어플리케이션이 실행되지 않습니다.)
tsconfig.json
{
  "compilerOptions": {
    "module": "commonjs",
    "declaration": true,
    "removeComments": true,
    "emitDecoratorMetadata": true,
    "experimentalDecorators": true,
    "target": "es2017",
    "sourceMap": true,
    "outDir": "./dist",
    "baseUrl": "./",
    "incremental": true,
    "allowSyntheticDefaultImports": true
  },
  "exclude": ["node_modules", "dist"]
}
3. AppModule 설정
import { Module } from "@nestjs/common";
import { AppController } from "./app.controller";
import { AppService } from "./app.service";
import { GraphQLModule } from "@nestjs/graphql";
import { UserModule } from "./module/user/user.module";

@Module({
  imports: [
    GraphQLModule.forRoot({
      typePaths: ["./**/*.graphql"]
    }),
    UserModule
  ],
  controllers: [AppController],
  providers: [AppService]
})
export class AppModule {}
AppModule에 GraphQLModule을 import 합니다.
"typePaths" 프로퍼티는 GraphQL 스키마의 위치를 나타냅니다.
위와 같이 path를 설정하면 src/module/에 module별로 graphql 스키마 파일을 관리할 수 있습니다.
4.app.graphql 파일 추가
*.graphql 파일이 하나도 없으면 셋팅이 완료되지 않으므로 하나 추가합니다.
(여기서는 app.graphql이라는 이름으로 추가했지만 이름은 상관없습니다.)
이 때 해당 파일에 Query가 적어도 하나 존재해야 하기 때문에 쿼리도 하나 추가해 주어야 합니다.
app.graphql
type Query{
    getAll: [User]
}

type User{
    id: String!
    name: String!
    age: Int!
}
5.resolver 추가
스키마를 생성했으니, 해당 스키마를 resolve할 resolver가 추가되어야 합니다. nest cli 명령어로 간단하게 user module, resolver를 추가합니다.
$ nest g module module/user
$ nest g resolver module/user
UserResolver
import {Query, Resolver} from '@nestjs/graphql';

@Resolver('User')
export class UserResolver {

    @Query()
    async getAll(){
        return [
            {
                id: '1',
                name: 'Peter',
                age: 36
            },
            {
                id: '2',
                name: 'Grace',
                age: 34
            },
        ]
    }
}
간단하게 getAll Query를 resolver를 작성했습니다.
이제 graphql로 getAll query를 요청하면 위 getAll() 메소드의 실행 결과가 리턴됩니다.
6. playground
1~5번 기본 설정을 마친 후, 로컬에서 어플리케이션을 실행 한 뒤 웹브라우져에서 http://localhost:3000/graphql 로 접속하면 graphql playground가 실행됩니다.
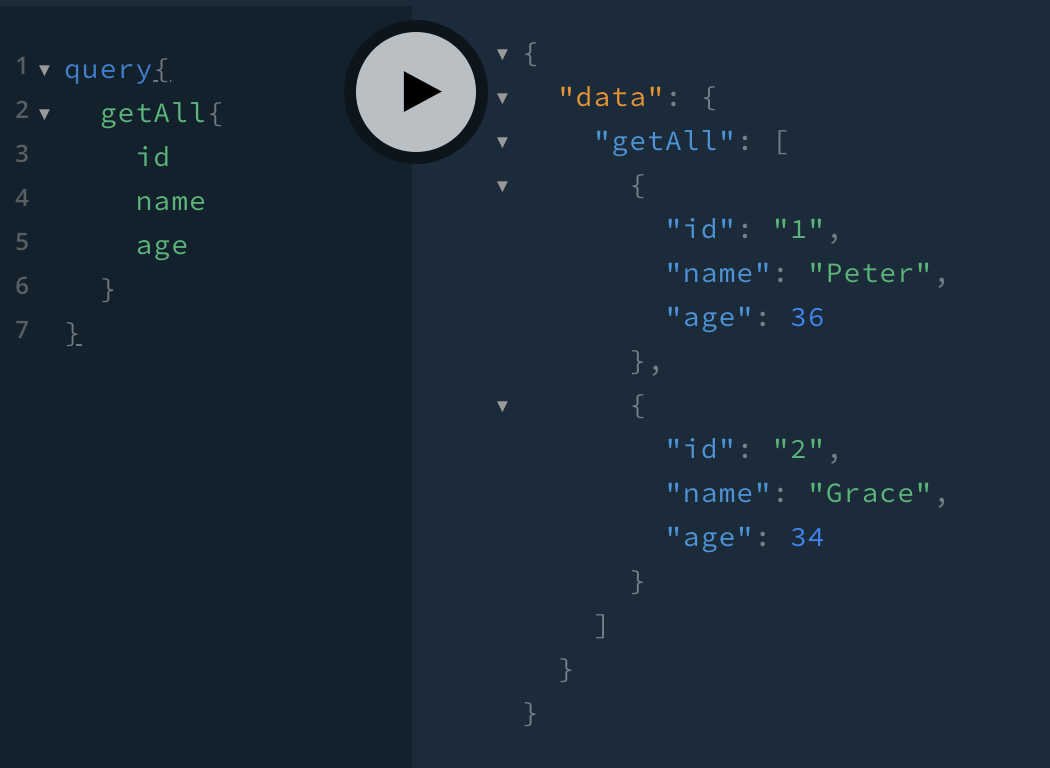
위와 같이 playground에서 간단하게 graphql 쿼리를 테스트할 수 있습니다.