API 명세서를 일일이 작성하기 번거롭다.
API를 만들면 자동으로 명세서가 만들어지는 Swagger를 설정하는 과정에 대해 작성하고자 한다.
Spring Boot에서 Swagger
build.gradle
// swagger
implementation group: 'org.springdoc', name: 'springdoc-openapi-starter-webmvc-ui', version: '2.1.0'
testImplementation group: 'org.springdoc', name: 'springdoc-openapi-starter-webmvc-api', version: '2.1.0'
먼저, 의존성을 설정해준다.
Springfox와 Springdoc 두 가지가 있는데, 2020년 7월에 마지막 업데이트 후 업데이트가 되고 있지 않다고 한다. 그렇기에, 비교적 최근까지 업데이트가 이루어진 Springdoc로 설정했다.
또한, 상대적으로 설정이 쉽고 사용이 간편하여 Springdoc를 선택했다.
application-swagger.yml
# Swagger
springdoc:
  default-consumes-media-type: application/json
  default-produces-media-type: application/json
  api-docs:
    groups:
      enabled: true
  swagger-ui:
    operations-sorter: alpha # alpha(알파벳 오름차순), method(HTTP메소드순)
    tags-sorter: alpha # 태그 정렬 기준
    path: /swagger # html 문서 접속 경로
    disable-swagger-default-url: true
    display-query-params-without-oauth2: true
    doc-expansion: none # tag, operation 펼치는 방식
  paths-to-match:
    - /**
.yml에도 적용시켜줘야 한다.
나는 배포를 위해 .yml을 나눠놓았으므로, 따로 파일을 만들어서 위와 같이 작성해줬다.
스웨거 문서 접속 경로, 보여지는 API 순서 등을 여기서 설정할 수도 있다.
SwaggerConfig.java
@Configuration
public class SwaggerConfig {
@Bean
public OpenAPI openAPI() {
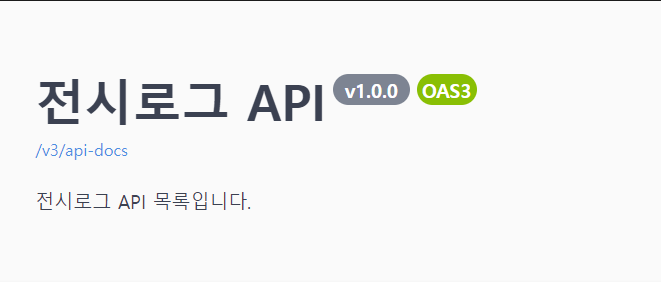
Info info = new Info()
.version("v1.0.0")
.title("전시로그 API")
.description("전시로그 API 목록입니다.");
return new OpenAPI()
.info(info);
}
}이제 이렇게 쓰고 싶은 말을 써주면 설정은 끝이다.
Spring Security와 Swagger
저렇게 설정했는데, 화면이 나타나지 않는 문제가 생겼다.
도움을 요청했는데, 다행히도 비슷한 에러를 겪어봤다기에 빠르게 해결할 수 있었다.
SecurityConfig.java
@Bean
public SecurityFilterChain filterChain(HttpSecurity http) throws Exception {
    http
            .cors(withDefaults())
            .sessionManagement(session -> session.sessionCreationPolicy(SessionCreationPolicy.STATELESS))
            .csrf(AbstractHttpConfigurer::disable)
            .formLogin(AbstractHttpConfigurer::disable)
            .httpBasic(AbstractHttpConfigurer::disable)
            .exceptionHandling(exception -> exception.authenticationEntryPoint(new CustomAuthenticationEntryPoint()))
            .authorizeHttpRequests(authorize -> authorize
                    .requestMatchers("/swagger", "/swagger-ui.html", "/swagger-ui/**", "/api-docs", "/api-docs/**", "/v3/api-docs/**")
                    .permitAll()
                    .requestMatchers("/login/**","/auth/**", "/oauth2/**")
                    .permitAll()
                    .requestMatchers("/", "/error", "/favicon.ico", "/**/*.png", "/**/*.gif", "/**/*.svg", "/**/*.jpg", "/**/*.html", "/**/*.css", "/**/*.js")
                    .permitAll()
                    .anyRequest()
                    .authenticated());

    http.addFilterBefore(customOncePerRequestFilter(), UsernamePasswordAuthenticationFilter.class);
    return http.build();
}
경로(path ~~~) 문제가 발생했다. 클래스의 filterChain 함수를 눈여겨 보자
.authorizeHttpRequests(authorize -> authorize
                        .requestMatchers("/swagger", "/swagger-ui.html", "/swagger-ui/**", "/api-docs", "/api-docs/**", "/v3/api-docs/**")
                        .permitAll()
                        .requestMatchers("/login/**","/auth/**", "/oauth2/**")
                        .permitAll()
                        .requestMatchers("/", "/error", "/favicon.ico", "/**/*.png", "/**/*.gif", "/**/*.svg", "/**/*.jpg", "/**/*.html", "/**/*.css", "/**/*.js")
                        .permitAll()
                        .anyRequest()
                        .authenticated());
이 부분에서 requestMatchers의 순서를 의심해보자
swagger와 auth가 맨 마지막에 있으면 우리는 실패를 했었으니..
swagger를 담은 requestMatchers가 맨 위로 가니 문제가 해결되었다.
security에 대한 공부가 필요하다고 느낀 시점이었다..
Swagger에서 List형 response의 표현
ExhibitionController.java
// Description : 전시회 상세 정보 조회
@Operation(summary = "전시회 상세 정보 조회", description = "전시회 상세 정보를 조회합니다.")
@ApiResponses(value = {
        @ApiResponse(responseCode = "200", description = "조회 성공", content = {@Content(mediaType = "application/json", schema = @Schema(implementation = ExhibitionResponseDto.ExhibitionDetailRes.class))}),
        @ApiResponse(responseCode = "400", description = "조회 실패", content = {@Content(mediaType = "application/json", schema = @Schema(implementation = ErrorResponse.class))}),
})
@ApiResponse(responseCode = "200", description = "조회 성공", content = {@Content(mediaType = "application/json", schema = @Schema(implementation = ExhibitionResponseDto.ExhibitionDetailRes.class))}),@Schema를 사용하여 이런 식으로 성공, 실패 시 응답 타입을 설정해놓을 수 있다.
하지만 List 타입의 경우는 조금 달라진다.
@Operation(summary = "전시회 목록 조회", description = "전시회 목록을 조회합니다. 관리자가 미리 설정해 둔 10개의 전시회와 그 뒤로 저장 순서대로 전시회 목록을 조회합니다.")
@ApiResponses(value = {
        @ApiResponse(responseCode = "200", description = "조회 성공", content = {@Content(mediaType = "application/json", array = @ArraySchema(schema = @Schema(implementation = ExhibitionResponseDto.ExhibitionRes.class)))}),
        @ApiResponse(responseCode = "400", description = "조회 실패", content = {@Content(mediaType = "application/json", schema = @Schema(implementation = ErrorResponse.class))}),
})
@ArraySchema를 사용하여 나타낼 수 있었다.
