
내 블로그에서 가장 조회수가 높은 포스팅은 react 모달 포스팅이다. ([react] 모달 팝업창 만들기)
전에 만들었던 Modal은 트랜지션이 적용되지 않았었다. 최근 프로젝트를 만들면서 트랜지션이 적용된 Modal을 만들어야 했었기에 트랜지션이 적용된 react Modal을 만들어 보기로 했다.
(* Modal은 이전에 만들었던 코드에 트랜지션을 추가 적용한다.)
트랜지션이 적용된 Modal 컴포넌트 (함수형)
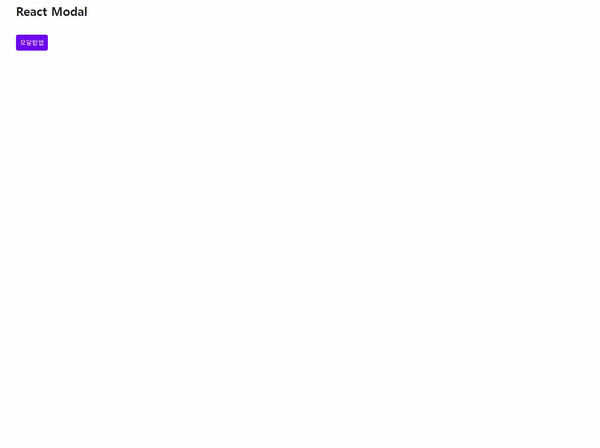
-완성된 모습-
*파일구조

- CSS
.modal {
  position: fixed;
  top: 0;
  right: 0;
  bottom: 0;
  left: 0;
  z-index: 99;
  background-color: rgba(0, 0, 0, 0.6);
  animation-duration: 0.25s;
  animation-timing-function: ease-out;
  animation-name: fadeIn;
  animation-fill-mode: forwards;
  display: flex;
  justify-content: center;
  align-items: center;
}
.modal.close {
  animation-name: fadeOut;
}
.modal button {
  outline: none;
  cursor: pointer;
  border: 0;
}
.modal > section {
  width: 90%;
  max-width: 450px;
  margin: 0 auto;
  border-radius: 0.3rem;
  background-color: #fff;
  overflow: hidden;
  animation-duration: 0.25s;
  animation-timing-function: ease-out;
  animation-name: slideUp;
  animation-fill-mode: forwards;
}
.modal.close > section {
  animation-name: slideDown;
}
.modal > section > header {
  position: relative;
  padding: 16px 64px 16px 16px;
  background-color: #f1f1f1;
  font-weight: 700;
}
.modal > section > header button {
  position: absolute;
  top: 15px;
  right: 15px;
  width: 30px;
  font-size: 21px;
  font-weight: 700;
  text-align: center;
  color: #999;
  background-color: transparent;
}
.modal > section > main {
  padding: 16px;
  border-bottom: 1px solid #dee2e6;
  border-top: 1px solid #dee2e6;
}
.modal > section > footer {
  padding: 12px 16px;
  text-align: right;
}
.modal > section > footer button {
  padding: 6px 12px;
  color: #fff;
  background-color: #6c757d;
  border-radius: 5px;
  font-size: 13px;
}

@keyframes modal-bg-show {
  from {
    opacity: 0;
  }
  to {
    opacity: 1;
  }
}

@keyframes fadeIn {
  from {
    opacity: 0;
  }
  to {
    opacity: 1;
  }
}
@keyframes fadeOut {
  from {
    opacity: 1;
  }
  to {
    opacity: 0;
  }
}
@keyframes slideUp {
  from {
    transform: translateY(-100px);
  }
  to {
    transform: translateY(0px);
  }
}
@keyframes slideDown {
  from {
    transform: translateY(0px);
  }
  to {
    transform: translateY(-100px);
  }
}
- Modal.js
import React, { useState, useEffect } from 'react';
const Modal = (props) => {
// 열기, 닫기, 모달 헤더 텍스트를 부모로부터 받아옴
const { open, close, header } = props;
// 현재 트랜지션 효과를 보여주고 있는 중이라는 상태 값
const [animate, setAnimate] = useState(false);
// 실제 컴포넌트가 사라지는 시점을 지연시키기 위한 값
const [visible, setVisible] = useState(open);
useEffect(() => {
// open 값이 true -> false 가 되는 것을 감지 (즉, 모달창을 닫을 때)
if (visible && !open) {
setAnimate(true);
setTimeout(() => setAnimate(false), 250);
}
setAnimate(open);
}, [visible, open]);
if (!animate && !visible) return null;
return (
// 모달의 open close클래스로 css animation을 구현
<div className={open ? 'modal open' : 'modal close'}>
<section>
<header>
{header}
<button className="close" onClick={close}>
×
</button>
</header>
<main>{props.children}</main>
<footer>
<button className="close" onClick={close}>
close
</button>
</footer>
</section>
</div>
);
};
export default Modal;- App.js
import React, { useState, useEffect } from 'react';

const App = () => {
  // useState를 사용하여 open상태를 변경한다. (open일때 true로 만들어 열리는 방식)
  const [modalOpen, setModalOpen] = useState(false);

  const openModal = () => {
    setModalOpen(true);
  };
  const closeModal = () => {
    setModalOpen(false);
  };

  return (
    <React.Fragment>
      <button onClick={openModal}>모달팝업</button>
      <Modal open={modalOpen} close={closeModal} header="Modal heading">
        함수형 모달 팝업창입니다. 쉽게 만들 수 있어요. 같이 만들어봐요!
      </Modal>
    </React.Fragment>
  );
};

export default App;
이전코드와 달라진점은 animate, visible 상태값을 추가하고 모달창을 열때와 닫을때의 상태를 체크하여 그에 맞는 css animation 값을 준다는 것이다. 특히, 모달창을 닫을때의 상태를 체크해서 setTimeout으로 애니메이션을 보여준다음 모달창을 사라지게 해야한다는 것이다.

4년차 퍼블리셔에서 프론트엔드 개발자로 이직 성공한 신입 개발자 입니다-*