Prom + Grafana 실습
개요
- Kubernetes Monitoring 툴로써 거의 표준화 되어있는 Prometheus와 시각화 툴인 Grafana를 연동하는 실습을 진행해보았다.
- yaml 템플릿 파일들은 아래 깃허브 페이지에 있음
YAML 파일 보기 (My Github)
Prerequisites
- Host OS : Ubuntu 18.04
- Hypervisior : KVM
- 가상머신
- k-master
- 192.168.100.10/24, RAM : 3GB, 2 vCPU
- k-worker01
- 192.168.100.20/24, RAM : 2GB, 2 vCPU
- k-worker02
- 192.168.100.21/24, RAM : 2GB, 2 vCPU
- k-master
- Kubernetes Cluster Version : 1.19.3
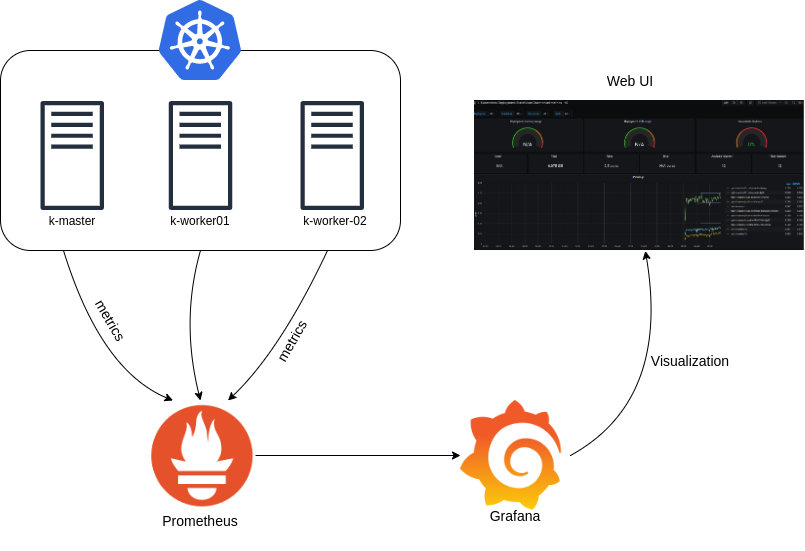
Architecture
- Kubernetes 클러스터의 Metric 값 → Prometheus가 수집 → Grafana로 시각화 (Web UI)

전체적인 순서
-
Prometheus
-
namespace 생성
⇒ prometheus 만의 논리적인 공간을 할당해준다.
-
ClusterRole, ClusterRoleBinding, ServiceAccount 생성
⇒ Kubernetes Cluster 내의 api에 접근할 수 있는 권한을 Prometheus가 부여받기 위한 작업
⇒ ClusterRole ↔ ClusterRoleBinding ↔ ServiceAccount
⇒ ClusterRoleBinding은 바인딩만 해주는 api 리소스이므로 namespace를 지정하지 않음
-
ConfigMap 생성
⇒ Configuration File 정의
⇒ prometheus.rules : Metric에 대한 Alarm 조건을 지정, 특정 조건 달성 시 AlertManager로 알람을 보냄
⇒ prometheus.yml : Metric의 종류, 수집 주기
-
Deployment 생성
-
Service 생성
-
-
node exporter
→ Kubernetes 기본 System metric 외의 것들을 수집하기 위해 Agent를 따로 둠
→ 각각 하나씩 DaemonSet으로 띄워줌
- DaemonSet 생성
- Service 생성
-
kube-state-metrics
→ 쿠버네티스 클러스터 내 Object (Pod, ..)에 대한 지표 정보를 생성하는 서비스
→ Pod 상태 정보를 Monitoring하기 위해 kube-state-metrics가 있어야 함
- ClusterRole, ClusterRoleBinding, ServiceAccount 생성
- Deployment, Service 생성
-
Grafana
- Deployment, Service 생성
-
Prometheus - Grafana 연동
Grafana Dashboard에서 Prometheus의 정보를 넣어주어야 한다.
Endpoint는 Prometheus Service의 ClusterIP를 기입해주어야 서로 파드 간의 통신이 가능하다.
-
Dashboard 추가
설치
- yaml 디렉터리 내부에 grafana, kube-state, prometheus 디렉터리가 있다.
- 각각 yaml 파일로 정의해주고 kubectl create -f << ~~.yaml >> 해주면 된다.
## prometheus directory
kubectl create -f prometheus-cm.yaml
kubectl create -f prometheus-crb.yaml
kubectl create -f prometheus-cr.yaml
kubectl create -f prometheus-deployment.yaml
kubectl create -f prometheus-svc.yaml
kubectl create -f prometheus-node-exporter.yaml

## kube-state directory
kubectl create -f kube-state-crb.yaml
kubectl create -f kube-state-cr.yaml
kubectl create -f kube-state-sa.yaml
kubectl create -f kube-state-deployment.yaml
kubectl create -f kube-state-svc.yaml

## grafana directory
kubectl create -f grafana-deployment.yaml
kubectl create -f grafana-svc.yaml- tree로 yaml 파일 확인
[root@k-master monitoring]# tree
.
├── grafana
│   ├── grafana-deployment.yaml
│   └── grafana-svc.yaml
├── kube-state
│   ├── kube-state-crb.yaml
│   ├── kube-state-cr.yaml
│   ├── kube-state-deployment.yaml
│   ├── kube-state-sa.yaml
│   └── kube-state-svc.yaml
└── prometheus
    ├── prometheus-cm.yaml
    ├── prometheus-crb.yaml
    ├── prometheus-cr.yaml
    ├── prometheus-deployment.yaml
    ├── prometheus-node-exporter.yaml
    └── prometheus-svc.yaml

3 directories, 13 files
Test
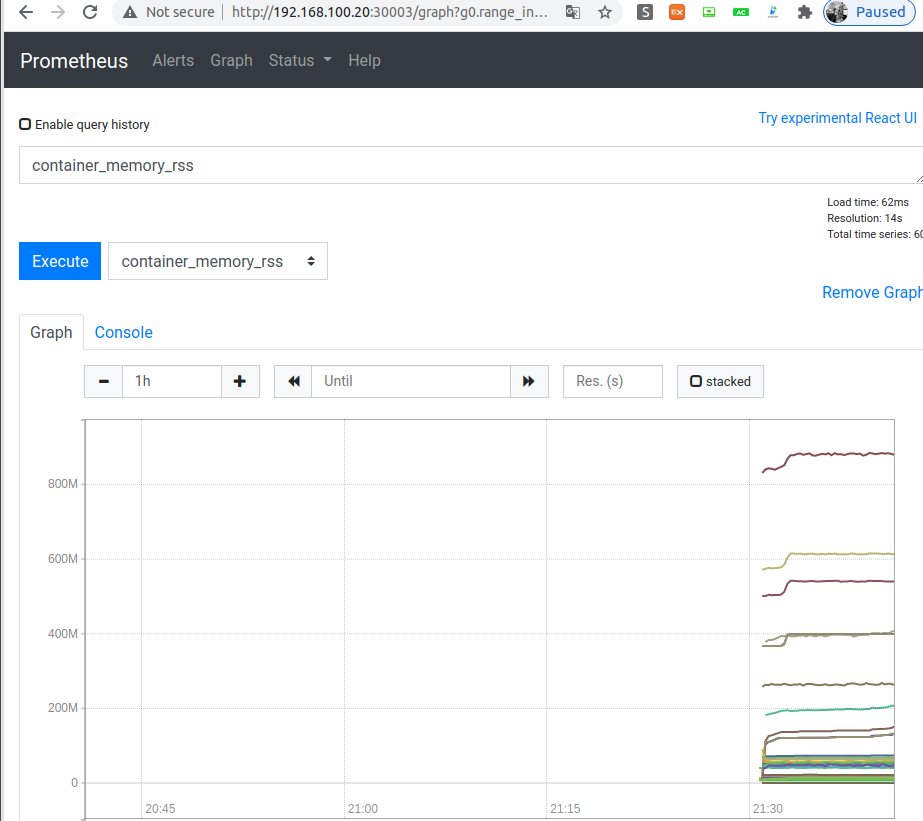
- Prometheus server 접속
nodePort를 통해 접속
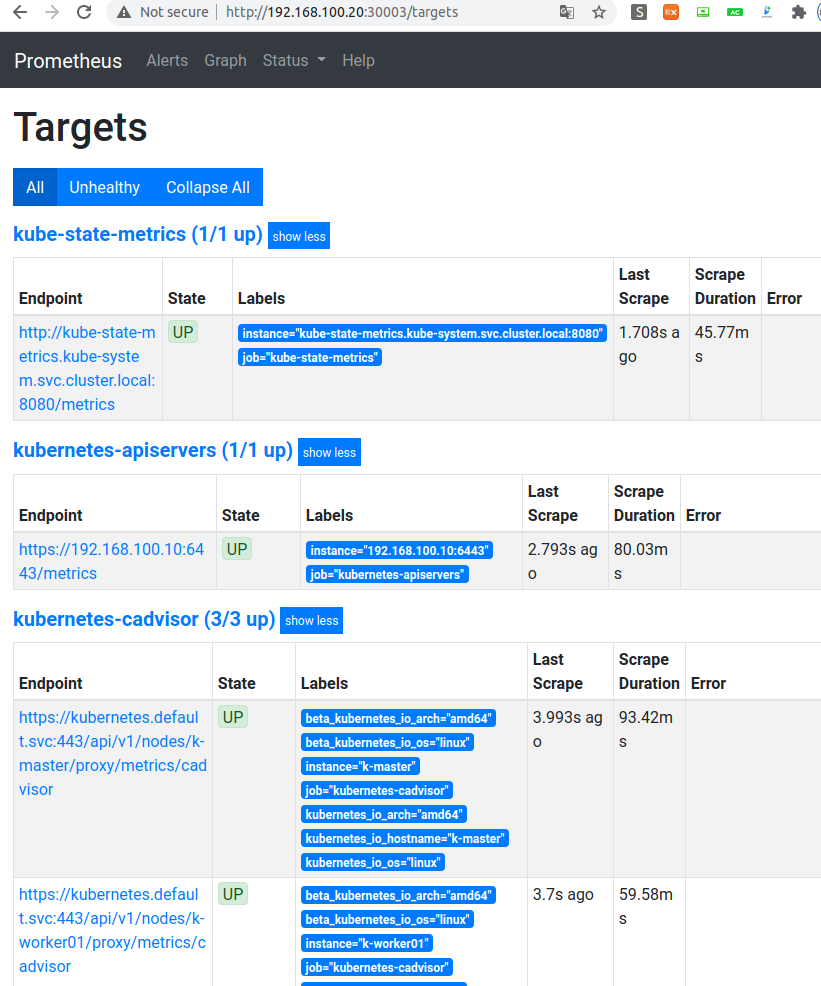
- kube-state-metrics
Prometheus 서버 상단 메뉴 → Status → Target
kube-state-metrics Healthy 한 것을 확인
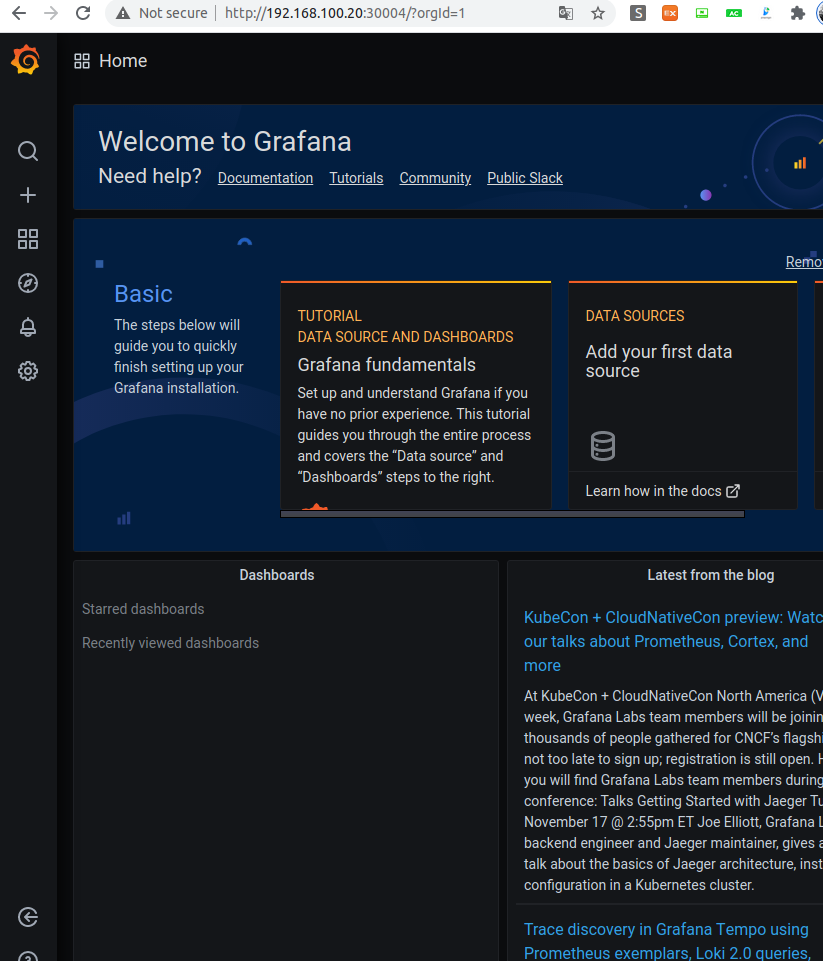
- Grafana
nodePort를 통해 접속
- Grafana - Prometheus 연동 작업
연동은 Grafana의 Dashboard에서 Prometheus의 Endpoint를 기입해주면 된다.
Pod와 Pod 간의 통신이므로 ClusterIP를 기입해주어야 한다
[root@k-master monitoring]# kubectl get svc -n monitoring
NAME                 TYPE       CLUSTER-IP       EXTERNAL-IP   PORT(S)          AGE
grafana              NodePort   10.111.13.96     <none>        3000:30004/TCP   14m
prometheus-service   NodePort   10.104.146.174   <none>        8080:30003/TCP   35m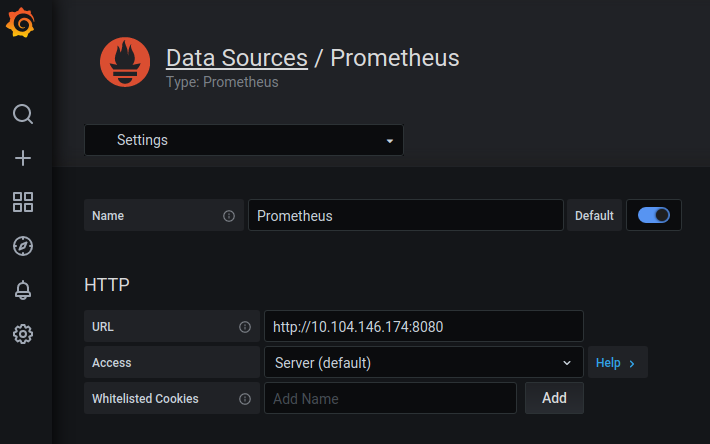
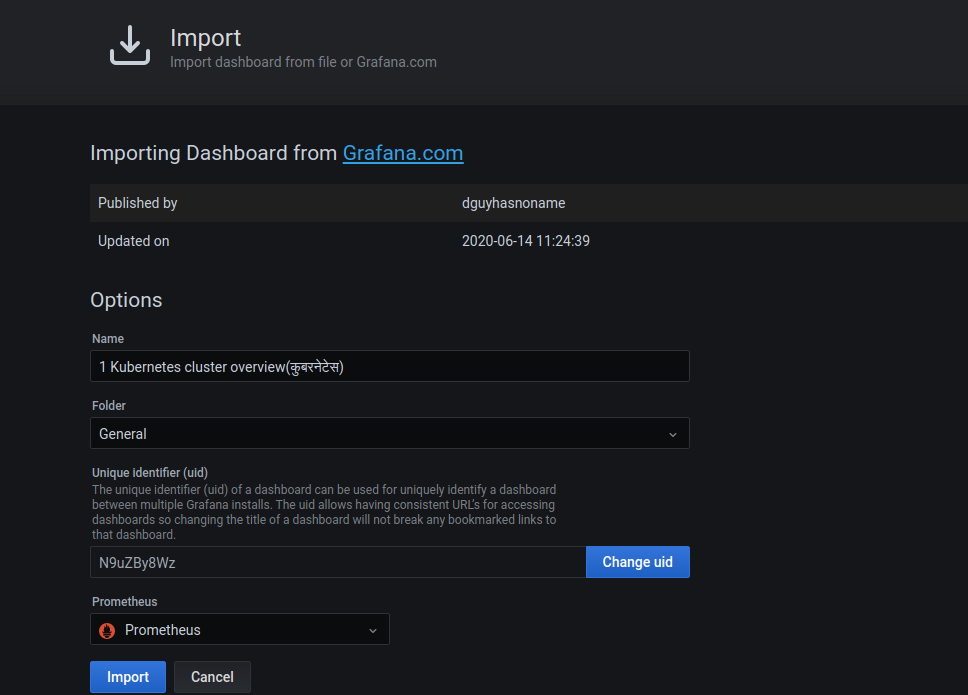
- Dashboard를 Import해주자.
Grafana 홈페이지 >> Dashboard로 이동하여 마음에 드는 Dashboard를 가져옴.
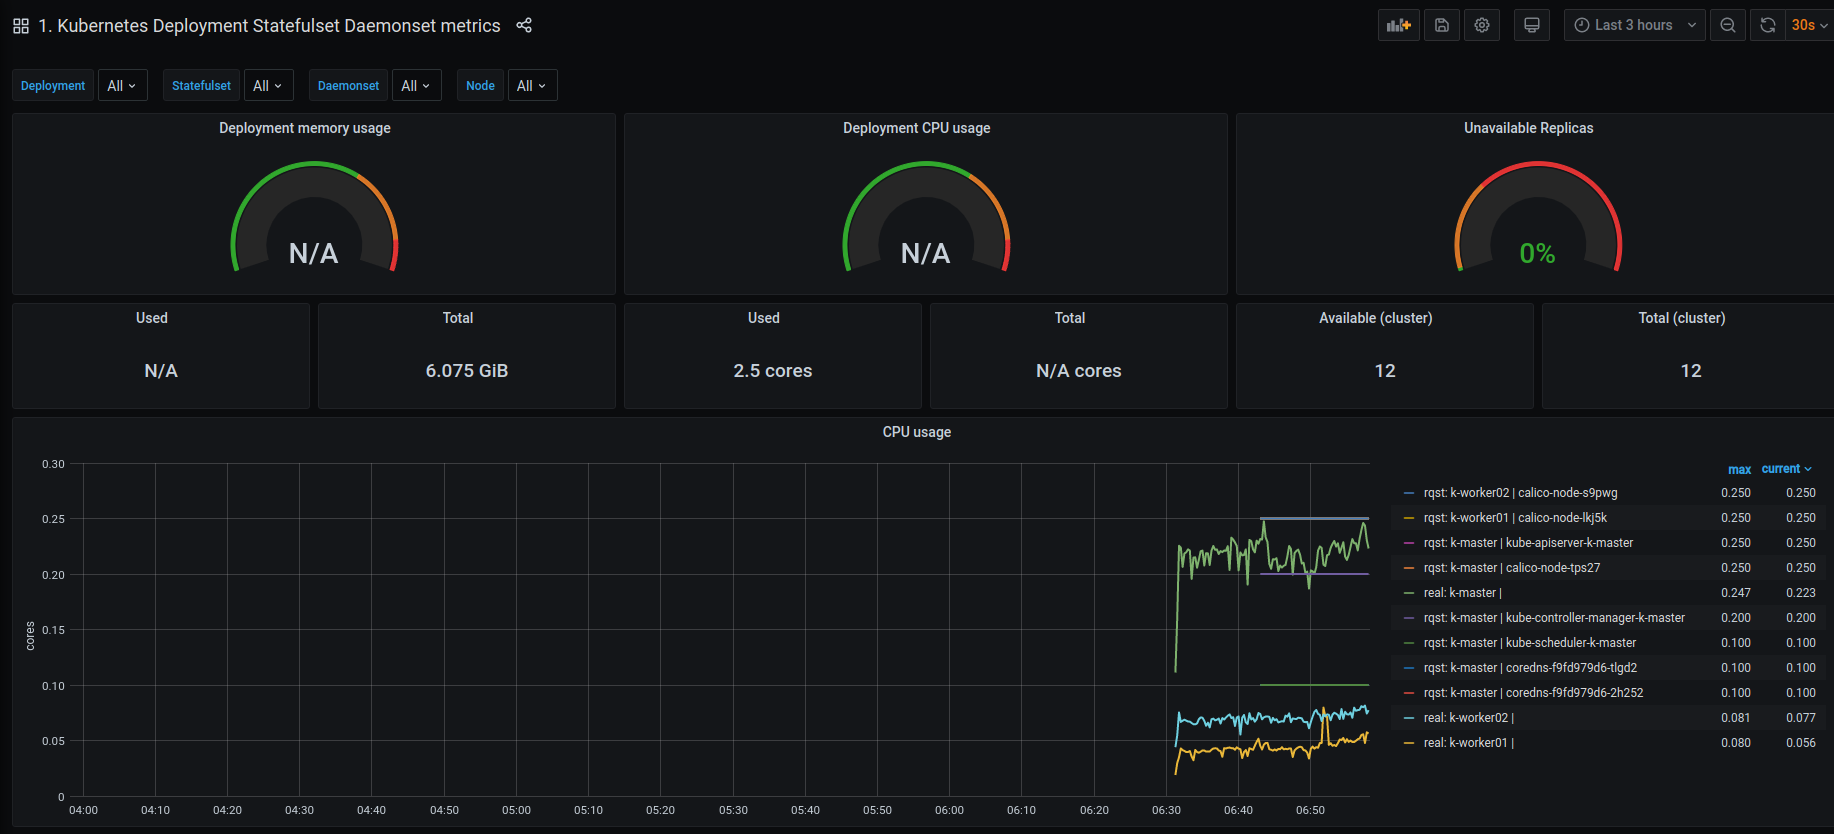
- 최종 Test
- Reference