NodeMailer는 NodeJS 서버에서 쉽게 메일(Email)을 보낼 수 있는, NodeJS 전용 모듈입니다.
예를 들어 사용자가 사이트 관리자에게 문의메일을 보낸다던지, 아니면 회원 인증 관련해서(비밀번호 초기화, 계정 잠김 등...) 서버에서 사용자에게 결과를 메일로 전송해야할 때 사용하는 유용한 라이브러리입니다.
저는 TypeScript를 활용해서 작업해보았습니다. 참고로 TypeScript는 마이크로소프트가 직접 개발, 관리하기 때문에 VScode에서 기본으로 지원하므로 따로 설치할 필요가 없습니다.
프로젝트 준비
-
프로젝트 생성 파일 디렉토리 찾기
이부분은 원하는 디렉토리 안에서 진행합니다.`cd .....` -
프로젝트 폴더 생성
`mkdir Mails` `cd Mails` -
package.json,tsconfig.json생성
vscode 터미널 혹은 운영체제의 터미널을 활용해 프로젝트 폴더 내에서 다음을 입력해줍니다.
npm init
npm init

Press ^C at any time to quit.
package name: (mails) nodemail
version: (1.0.0)
description:
entry point: (index.js)
test command:
git repository:
keywords:
author:
license: (ISC)
About to write to /Users/elitebook/project/-TEST-PostBoard/NodeJS/Mails/package.json:

{
  "name": "nodemail",
  "version": "1.0.0",
  "description": "",
  "main": "index.ts",
  "scripts": {
    "test": "echo \"Error: no test specified\" && exit 1"
  },
  "author": "",
  "license": "ISC"
}


Is this OK? (yes)
package.json
{
  "name": "nodemail",
  "version": "1.0.0",
  "description": "",
  "main": "index.ts",
  "scripts": {
    "start": "npm run build:live",
    "build": "tsc --project ./",
    "build:live":  "nodemon --exec 'ts-node' index.ts",
    "test": "echo \"Error: no test specified\" && exit 1"
  },
  "author": "",
  "license": "ISC",
  "dependencies": {
    "dotenv": "^16.0.1",
    "express": "^4.18.1",
    "nodemailer": "^6.7.5"
  },
  "devDependencies": {
    "@types/dotenv": "^8.2.0",
    "@types/express": "^4.17.13",
    "@types/node": "^17.0.42",
    "@types/nodemailer": "^6.4.4",
    "nodemon": "^2.0.16",
    "ts-node": "^10.8.1"
  }
}
tsc --init
tsc --init

Created a new tsconfig.json with:
                                                                                                                     TS
  target: es2016
  module: commonjs
  strict: true
  esModuleInterop: true
  skipLibCheck: true
  forceConsistentCasingInFileNames: true
tsconfig.json
{
  "compilerOptions": {
    "target": "es2020",
    "module": "commonjs",
    "rootDir": ".",
    "outDir": "./dist",
    "moduleResolution": "node",
    "esModuleInterop": true,
    "forceConsistentCasingInFileNames": true,
    "strict": true,
    "skipLibCheck": true
  }
}
라이브러리 설치
express: 말이 필요없습니다. 쉽게 API를 구성가능한 nodeJS 최고의 프레임워크입니다.dotenv:.env파일에 환경변수를 저장하고 가져오기 위한 모듈입니다.nodemailer: 메일을 전송하기 위한 Node전용 모듈입니다.nodemon:.js스크립트 파일을 수정 시 자동으로 새로고침을 해줍니다.ts-node:TypeScript를JavaScript로 컴파일 없이 바로 실행할 수 있도록 도와줍니다.@types:@types붙은 모듈은TS로 개발 시 반드시 필요한 모듈들을 정의합니다.
-express:express를 사용하기 위해 필요한 타입들을 가진 모듈입니다.
-node:.ts파일을 실행하기 위한node의 타입들을 가진 모듈입니다.
-dotenv: 마찬가지로.ts파일에서 환경변수를 사용하기위해선 받아야하는 모듈입니다.
npm i express dotenv nodemailer
npm i -D nodemon ts-node @types/express @types/node @types/dotenv @types/nodemailer
디렉토리 구조
디렉토리 구조는 간단합니다.
.
├── index.ts
├── package-lock.json
├── package.json
├── public
│   ├── css
│   │   └── mail.css
│   ├── js
│   │   └── mailform.js
│   └── view
│       └── mail.html
└── tsconfig.json
구글의 정책 변경
nodemailer를 사용하면서 구글의 새로운 정책변경으로 인한 수정할 내용이 생겼습니다. 구글에 로그인 되어있으면 https://myaccount.google.com/security 이곳에 접속해보세요.
기존
- 2차인증을 꺼놔야합니다.
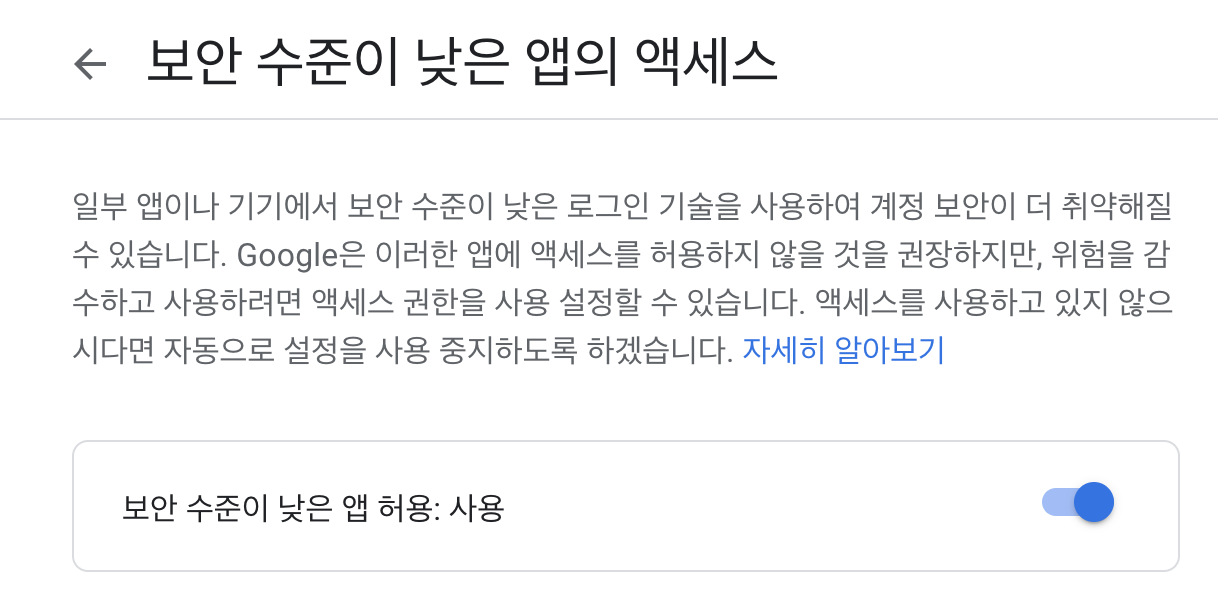
- 보안수준이 낮은 앱 허용을
Enable로 바꿔야합니다.
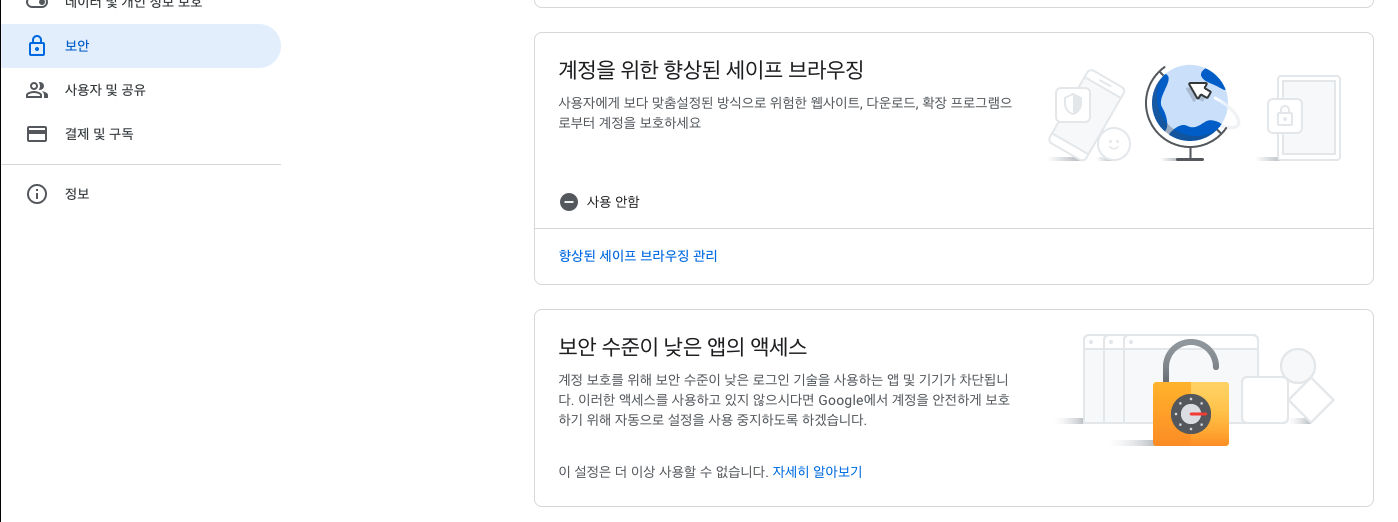
하지만 2022년 5월 30일 정책이 변경되었습니다.
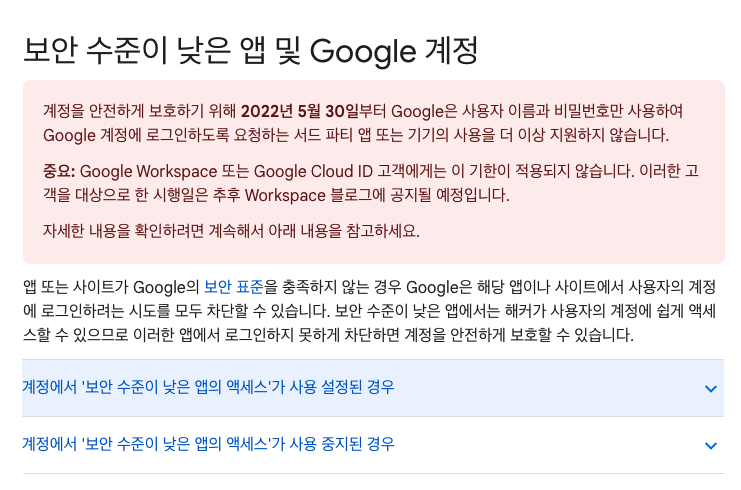
변경후
-
2차인증을 켜야합니다.

-
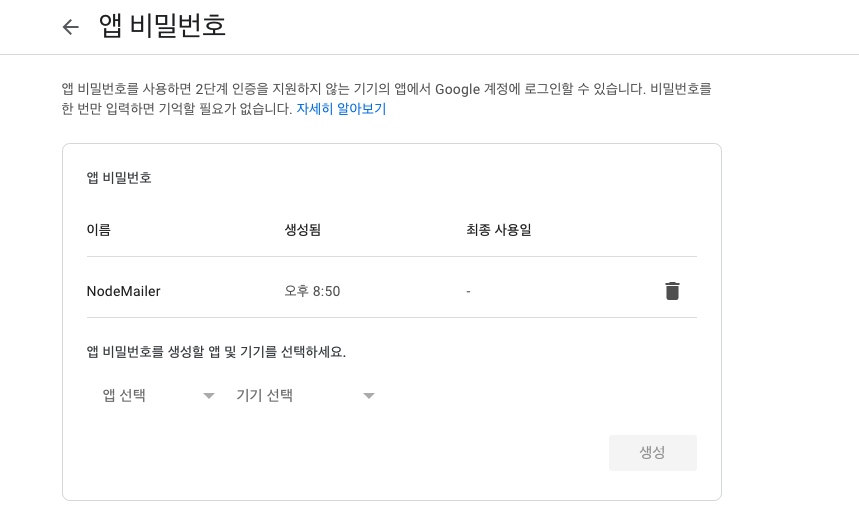
앱 비밀번호를 생성해야합니다.
프로젝트에 구글 계정Password가 필요하다면 앱 비밀번호를 통해 서비스를 이용할 수 있습니다.

앱 비밀번호를 클릭해줍니다.
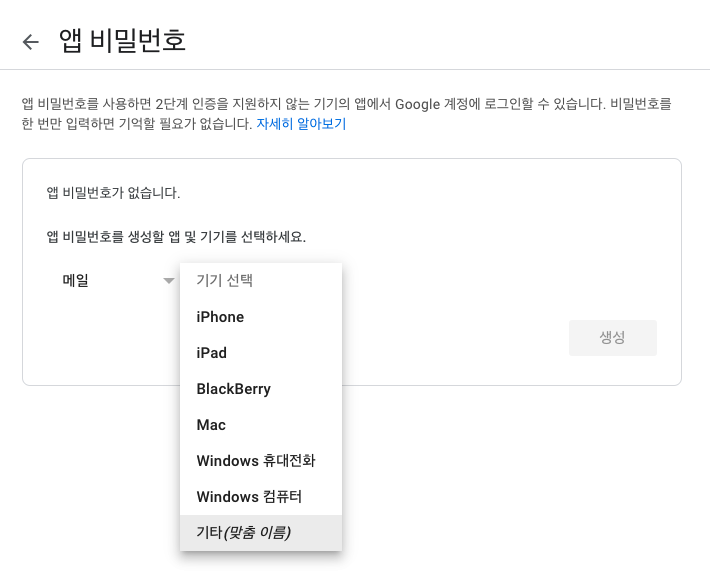
첫번째 옵션은 메일을 선택하고, 기기 선택에서는 아무거나 해줘도되는데 저는 기타로 하겠습니다.
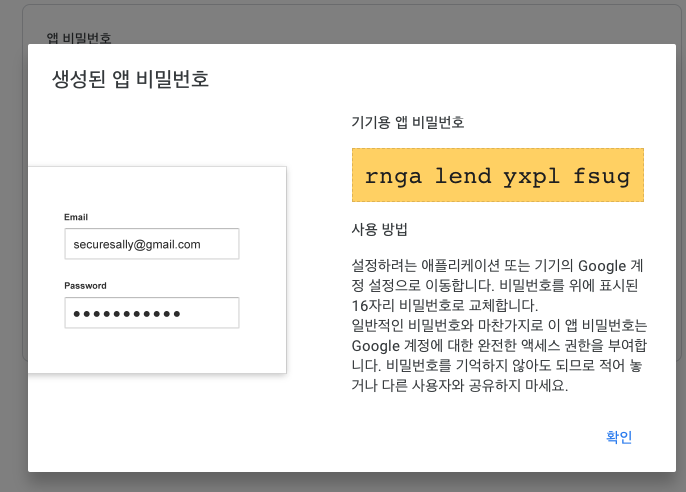
기기용 앱 비밀번호입니다. 유출되지 않도록 주의해야합니다.
프로젝트 시작
.env 생성
프로젝트에 상용 할 환경변수를 생성해줍니다. 저는 GMAIL로 다룰 예정이기 때문에 Google Email과 App Password가 필요합니다.
MAILS_EMAIL= 'youremail'  // example@gmail.com
MAILS_PWD= 'your App password' // rngalendyxplfsug
public
정적인 파일들을 담아놓을 폴더입니다. node.js에서 express를 활용해 html,css,js파일을 이 폴더에 접근할것입니다.
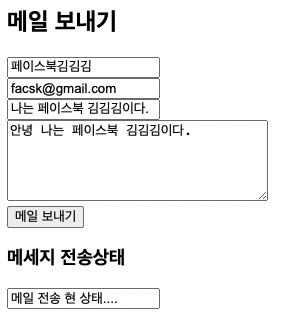
/views/mail.html
<!DOCTYPE html>
<html>
  <head>
    <title>메일 서버</title>
    <meta charset="utf-8" />
    <meta name="viewport" content="width=device-width, initial-scale=1.0" />
    <link rel="stylesheet" type="text/css" src="/css/mail.css" />
    <script defer type="text/javascript" src="/js/mailform.js"></script>
  </head>
  <body>
    <main>
      <header><h2>메일 보내기</h2></header>
      <form name="mailForm" method="post" id="mail_form">
        <input
          class="input username"
          id="username"
          name="username"
          type="text"
          placeholder="userName"
        /><br />

        <input
          class="input email"
          id="email"
          name="email"
          type="email"
          placeholder="email"
        /><br />

        <input
          class="input subject"
          id="subject"
          name="subject"
          type="text"
          placeholder="메일 제목"
        /><br />

        <textarea
          class="textarea message"
          id="message"
          name="message"
          placeholder="메일 내용"
          rows="5"
          cols="30"
        ></textarea
        ><br />
        <input type="submit" class="submit" value="메일 보내기" />
      </form>

      <span>
        <h3>메세지 전송상태</h3>
        <input
          type="text"
          class="status_space"
          value="메일 전송 현 상태...."
          readonly
        />
      </span>
    </main>
  </body>
</html>
/js/mailform.js
메일 전송 기능을 구현할 스크립트 파일입니다.Script에는.ts파일은 적용이 안되기에.js로 작성했습니다.
let mailForm = document.getElementById('mail_form');
let username = document.querySelector('.username');
let email = document.querySelector('.email');
let subject = document.querySelector('.subject');
let message = document.querySelector('.message');
let submit = document.querySelector('.submit');
let status_space = document.querySelector('.status_space');

mailForm.addEventListener('submit', (e) => {
  e.preventDefault();

  let formData = {
    name: username.value,
    email: email.value,
    subject: subject.value,
    message: message.value,
  };
  status_space.value = '메세지 보내는중....';

  let xhr = new XMLHttpRequest();

  //메일 작성 을 위한 Post 메소드,
  //두번쨰는 url주소
  xhr.open('POST', '/');

  // 문자열이 json형식이므로 content-type 헤더를 application/json
  xhr.setRequestHeader('content-type', 'application/json');
  xhr.onload = () => {
    console.log('성공여부', xhr.responseText);

    //서버에서 응답한 (res.send())결과가 일치하면 input value초기화
    if (xhr.responseText === 'success') {
      username.value = '';
      email.value = '';
      subject.value = '';
      message.value = '';
      status_space.value = '메일이 정상적으로 전송완료';

      setTimeout(() => {
        status_space.value = '메일 전송 현 상태....';
      }, 3000);
    } else {
      status_space.value = '뭔가 오류로 메세지 전송 실패';
    }
  };

  xhr.send(JSON.stringify(formData));
});
axios나 fetch만 사용하면 정말 간결하게 할 수 있는걸 목격해왔었는데... xhr을 보니 정말 가슴이 답답하고 미치는줄 알았습니다.
index.ts
- 모듈 가져오기
import nodemailer, { Transporter } from 'nodemailer';
import 'dotenv/config';
import express, { Application, Request, Response, NextFunction } from 'express';- MiddleWare
const app: Application = express();
const port: number = Number(process.env.PORT) || 7100;

/* 미들웨어 */
app.use(express.static('public'));
app.use(express.json());
app.use(express.urlencoded({ extended: false }));- transporter 생성
/* 메일 전송 대상(Gmail) */
let transporter: Transporter = nodemailer.createTransport({
  /* Gmail Host */
  host: 'smtp.gmail.com',
  /* Mail port */
  port: 465,
  /* your Mail Service Accounts */
  auth: {
    /* Gmail EMAIL */
    user: process.env.MAILS_EMAIL,
    /* Gmail PWD */
    pass: process.env.MAILS_PWD,
  },
  secure: true,
});
메일을 전송할 때 첨부파일을 보낸다던지 아니면 개발자에게 보낸다던지 여러가지 방법이 존재합니다. 그 중 일부분을 작성하고자 합니다.
- 일반 메일 전송
/* 일반 전송 */
const defaultServer = () => {
app.get('/', async (req: Request, res: Response) => {
res.sendFile(__dirname + '/public/view/mail.html');
});
app.post('/', async (req: Request, res: Response) => {
console.log(req.body);
try {
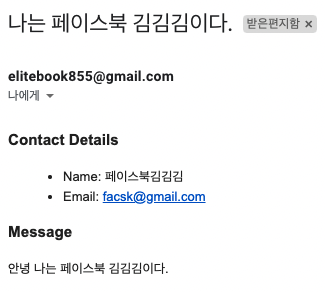
let { name, email, subject, message } = req.body;
const mailhtml = `
<h3>Contact Details</h3>
<ul>
<li>Name: ${name}</li>
<li>Email: ${email}</li>
</ul>
<h3>Message</h3>
<p>${message}</p>
`;
const mailOption: SendMailOptions = {
from: email, //your or my Email(발송자)
to: process.env.NODEMAIL_EMAIL, //your or my Email(수신자)
subject: subject, // title (발송 메일 제목)
text: message, // plain text (발송 메일 내용)
html: mailhtml, // HTML Content (발송 메일 HTML컨텐츠)
};
const info: SentMessageInfo = await transporter.sendMail(mailOption);
console.log('메세지 전송됨: %s', info.messageId);
console.log('프리뷰 URL: %s', nodemailer.getTestMessageUrl(info));
res.send('success');
} catch (error) {
res.send(error).redirect('/');
}
});
app.listen(port, () => {
console.log(`이 서버는 해당 포트로 연결되었습니다. ${port}`);
});
};
defaultServer();- 첨부 파일 첨가 시
이 부분은 나중에 작성하겠습니다.
Result
ref: nodemailer,waystoweb,베타맨 웍샾