🚀 Start
이제 graphQL을 실제 서버에서 구현해보도록 하기위해 BFF형식의 서버를 생성해보자.
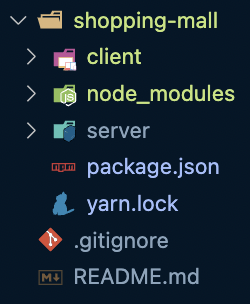
그 전에 해야할 것은 shoppingmall 폴더에 monorepo형식을 기반으로 client, server 폴더를 나눌 것이다.
✅ 폴더구조
✅ workspace 설정
root/package.json
{
  "name": "shopping-mall",
  "version": "1.0.0",
  "main": "index.js",
  "license": "MIT",
  "private": true,
  "workspaces": [
    "client",
    "server"
  ],
  "scripts": {
    "client": "yarn workspace client run dev",
    "server": "yarn workspace server run dev"
  }
}
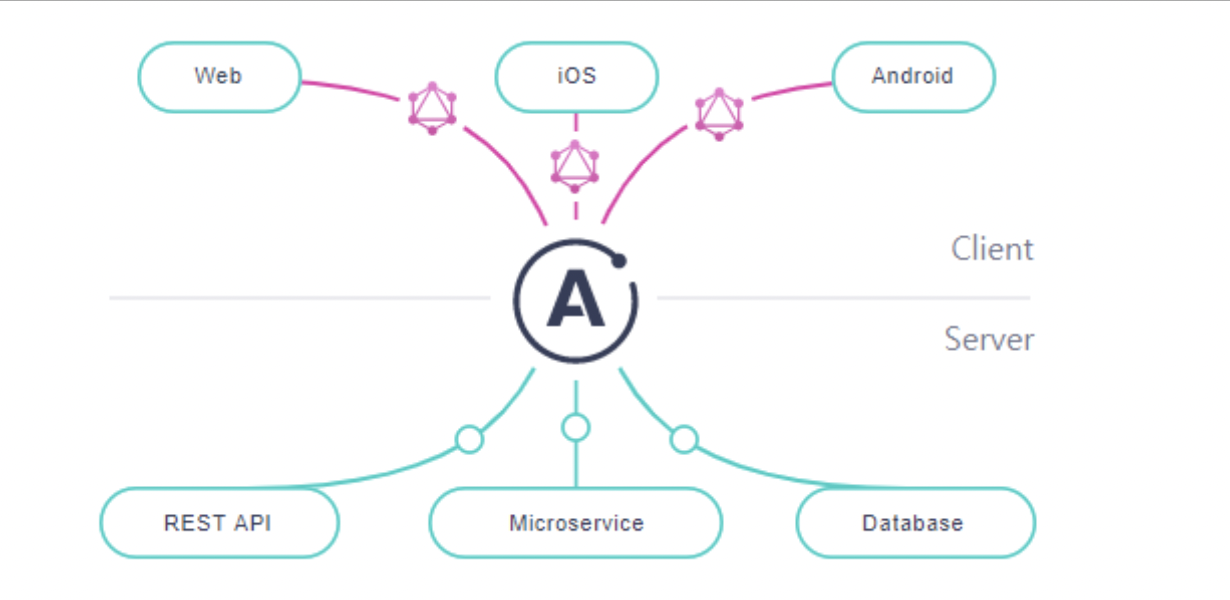
💡 BFF(BackEnd For FrontEnd)
: 프론트엔드를 요구사항에 맞게 구현하기 위해 도움을 주는 보조 서버 정도의 개념
참고하자!
👉 BFF(BackEnd-For-FrontEnd)란?
👉 BFF란
👉 Backend For Frontend는 무엇인가?
💡 monorepo workspace
workspace
Workspaces는 단일 최상위 루트 패키지 내에서 로컬 파일 시스템의 여러 패키지를 관리할 수 있도록 지원하는 npm cli의 기능 집합을 가리키는 일반 용어
Workspace를 통해 로컬 파일 시스템에서 연결된 패키지를 훨씬 더 효율적으로 처리할
참고하자!
👉 팀워크 향상을 위한 모노레포(Monorepo) 시스템 구축
👉 모던 프론트엔드 프로젝트 구성 기법 - 모노레포 도구 편링크텍스트
📡 Apollo Server
✅ Apollo는 GraphQL을 편하게 사용할 수 있도록 도와주는 라이브러리이다.
Apollo Server는 GraphQL API를 제공하는 서버를 개발할 수 있게 도와주는 패키지로 Node.js에서 사용하는 Express와 비슷한 역할 을 한다.
- 서버리스 환경을 포함한 독립형 GraphQL Server
- Application의 기존 Node.js 미들웨어에 대한 추가 기능 (Express)
- 연합 데이터 그래프를 위한 게이트웨이
Apllo Server는 GraphQL을 사용하는 모든 클라이언트와 호환되며 오픈 소스로된 GraphQL Server이다.
✅ 설치
// server
yarn add express apollo-server apollo-server-express graphql
✅ 기타 설치 및 설정
- typescript
// server
yarn add --dev ts-node @types/node
yarn add typescript
// server/tsconfig.json
{
"compilerOptions": {
"target": "ES5",
"module": "commonjs",
"allowJs": true,
"skipLibCheck": true,
"esModuleInterop": true,
"allowSyntheticDefaultImports": true,
"strict": true,
"forceConsistentCasingInFileNames": true,
"moduleResolution": "Node",
"resolveJsonModule": true,
"isolatedModules": true,
"noEmit": false,
"outDir": "dist"
},
"include": ["src/**/*"],
"exclude": ["node_modules"]
}- nodemon
// server
yarn add --dev nodemon
// server/package.json
"scripts": {
"dev": "nodemon --exec 'ts-node ./src/index.ts'",
...
}// server/nodemon.json
{
"watch": ["src"],
"ignore": ["db/**/*"],
"env": {
"NODE_ENV": "development"
}
}
- index.ts
import express from "express";

...

const port = 8000;
const app = express();
await server.start();
server.applyMiddleware({
  app,
  path: "/graphql",
  cors: {
    origin: ["http://localhosts:3000"],
    credentials: true,
  },
});
await app.listen(port, async () => {
  console.log(`server listening on ${port}`);
});
참고하자!
👉 강추) 얄팍한 GraphQL & Apollo 강좌
👉 Build better apps, faster(apollo 메인사이트)
👉 Apollo Server를 이용한 초간단 GraphQL 서버 개발
👉 Apollo, GraphQL 알아보기
👉 [GraphQL] Apollo Server를 이용한 GraphQL 사용 방법 - 쿤즈랜드
✔️ Schema 정의
✅ 스키마는 서버에서 어떻게 데이터를 요청할지 정의한 파일
요청시 어떤 데이터를 얼마나 요청할지, 각각의 데이터의 자료형이 무엇이고, 어떤 데이터를 필수로 요청할지에 대한 정보가 담긴다.(참고)
즉, 사용자는 반드시 스키마에 정의된 형태로 서버에 요청해야한다.
✅ 스키마에는 Query, Mutation 과 같이 2가지 요청이 존재
Query: 데이터베이스에서 데이터를 읽는 요청Mutation: 데이터베이스를 수정하는 요청
이렇게 구분을 하는 이유는 데이터베이스 읽기 요청은 무한정으로 동시에 수행 가능하지만, 데이터베이스 수정 요청은 순차적으로 수행되어야하기 때문이다.
👉 Product
// server/src/schema/product.ts
import { gql } from "apollo-server-express";

const productSchema = gql`
  type Product {
    id: ID!
    imageUrl: String!
    price: Int!
    title: String!
    description: String
    createdAt: Float
  }

  type Query {
       products : [Product!]
       product(id: ID!): Product!
  }

  type Mutation {}
`;

export default productSchema;
💡 FrontEnd Mocking 작업
✅ graphql
export type Product = {
  id: string;
  imageUrl: string;
  price: number;
  title: string;
  description: string;
  createdAt: number;
};
✅ MSW Handler
export const handlers = [
  graphql.query(GET_PRODUCTS, (req, res, ctx) => {
    return res(ctx.data({ products: mockProducts}));
  }),

  graphql.query(GET_PRODUCT, (req, res, ctx) => {
    ...
    return res();
  })
}
👉 Cart
// server/src/schema/cart.ts
import { gql } from "apollo-server-express";

const cartSchema = gql`
  type CartItem {
    id: ID!
    amount: Int!
    product: Product!
  }
  type Query {
    cart: [CartItem!]
  }
  type Mutation {
    addCart(productId: ID!): CartItem!
    updateCart(cartId: ID!, amount: Int!): CartItem!
    deleteCart(cartId: ID!): ID!
    executePay(ids: [ID!]): [ID!]
  }
`;

export default cartSchema;
💡 FrontEnd Mocking 작업
✅ graphql
export type CartType = {
  id: string;
  imageUrl: string;
  price: number;
  title: string;
  amount: number;
};
✅ MSW Handler
export const handlers = [
  graphql.query(GET_CART, (req, res, ctx) => {
    return res(ctx.data(cartData));
  }),

  graphql.mutation(ADD_CART, (req, res, ctx) => {
    ...
    return res(ctx.data(newData));
  }),

  graphql.mutation(DELETE_CART, ({ variables: { id } }, res, ctx) => {
    ...
    return res(ctx.data(id));
  }),
  }
  graphql.mutation(EXECUTE_PAY, ({ variables: ids }, res, ctx) => {
  	 ...
    return res(ctx.data(ids));
  }),
👉 index
cart 스키마와product 스키마를 합쳐준다.
// server/src/schema/index.ts
import { gql } from 'apollo-server-express'
import productSchema from './product'
import cartSchema from './cart'

const linkSchema = gql`
  type Query {
    _: Boolean
  }
  type Mutation {
    _: Boolean
  }
`

export default [linkSchema, productSchema, cartSchema]
✔️ Resolver 정의
✅ resolver는 사용자가 쿼리를 요청했을 때 이를 서버가 어떻게 처리할지 정의하는 파일
⭐️ 프론트엔드 작업시 생성한 MSW 핸들러로 요청에 대한 처리와 같은 것이다.
resolver는 요청에 대해 단순히 데이터를 반환할 수도 있고, 직접 데이터를 찾거나, 메모리에 접근하거나, 다른 API에 요청해서 데이터를 가져올 수 있다.(참고)
👉 Product
// server/src/resolvers/product.ts
const mockProducts = Array.from({ length: 20 }).map((_, i) => ({
  id: i + 1 + "",
  imageUrl: `http://placeimg.com/640/480/${i + 1}`,
  price: 50000,
  title: `임시상품-${i + 1}`,
  description: `임시상세내용-${i + 1}`,
  createdAt: new Date(1646745501883 + i * 1000 * 60 * 60 * 10).toString(),
}));

const productResolver = {
  Query: {
    products: async (parent, args, context, info) => {
      return mockProducts;
    },
    product: async (parent, { id }) => {
      const found = mockProducts.find((item) => item.id === id);
      if (found) return found;
      return null;
    },
  },
};

export default productResolver;
👉 Cart
// server/src/resolvers/cart.ts
const mockProducts = Array.from({ length: 20 }).map((_, i) => ({
  id: i + 1 + "",
  imageUrl: `http://placeimg.com/640/480/${i + 1}`,
  price: 50000,
  title: `임시상품-${i + 1}`,
  description: `임시상세내용-${i + 1}`,
  createdAt: new Date(1646745501883 + i * 1000 * 60 * 60 * 10).toString(),
}));

let cartData = [
  { id: "1", amount: 1 },
  { id: "2", amount: 2 },
];

const cartResolver = {
  Query: {
    cart: async (parent, args, context, info) => {
      return cartData;
    },
  },

  Mutation: {
    addCart: async (parent, { productId }) => {
      const newCartData = { ...cartData };
      const targetProduct = mockProducts.find((item) => item.id === productId);

      if (!targetProduct) throw new Error("상품이 없습니다");

      const newItem = {
        ...targetProduct,
        amount: (newCartData[productId]?.amount || 0) + 1,
      };
      newCartData[productId] = newItem;
      cartData = newCartData;

      return newItem;
    },
    updateCart: async (parent, { cartId, amount }) => {
      const newData = { ...cartData };
      if (!newData[cartId]) {
        throw new Error("상품이 존재하지 않습니다.");
      }
      const newItem = {
        ...newData[cartId],
        amount,
      };
      newData[cartId] = newItem;
      cartData = newData;
      return newItem;
    },
    deleteCart: async (parent, { cartId }) => {
      const newData = { ...cartData };
      delete newData[cartId];
      cartData = newData;
      return cartId;
    },
    executePay: (parent, { ids }) => {
      const newCartData = cartData.filter((cartItem) => {
        !ids.includes(cartItem.id);
      });
      cartData = newCartData;
      return ids;
    },
  },
};

export default cartResolver;
👉 Index
// server/src/resolvers/index.ts
import productResolver from "./product";
import cartResolver from "./cart";

export default [productResolver, cartResolver];
✔️ Instance 생성
typeDefs와 resolvers를 ApolloServer 생성자에 넘겨 GraphQL 서버 인스턴스를 생성하고 그 서버를 시작해주는 코드를 작성
// server/src/index.ts
import { ApolloServer } from "apollo-server-express";
import schema from "./schema";
import resolvers from "./resolvers";


const server = new ApolloServer({
  typeDefs: schema,
  resolvers,
});
👍 Server 실행
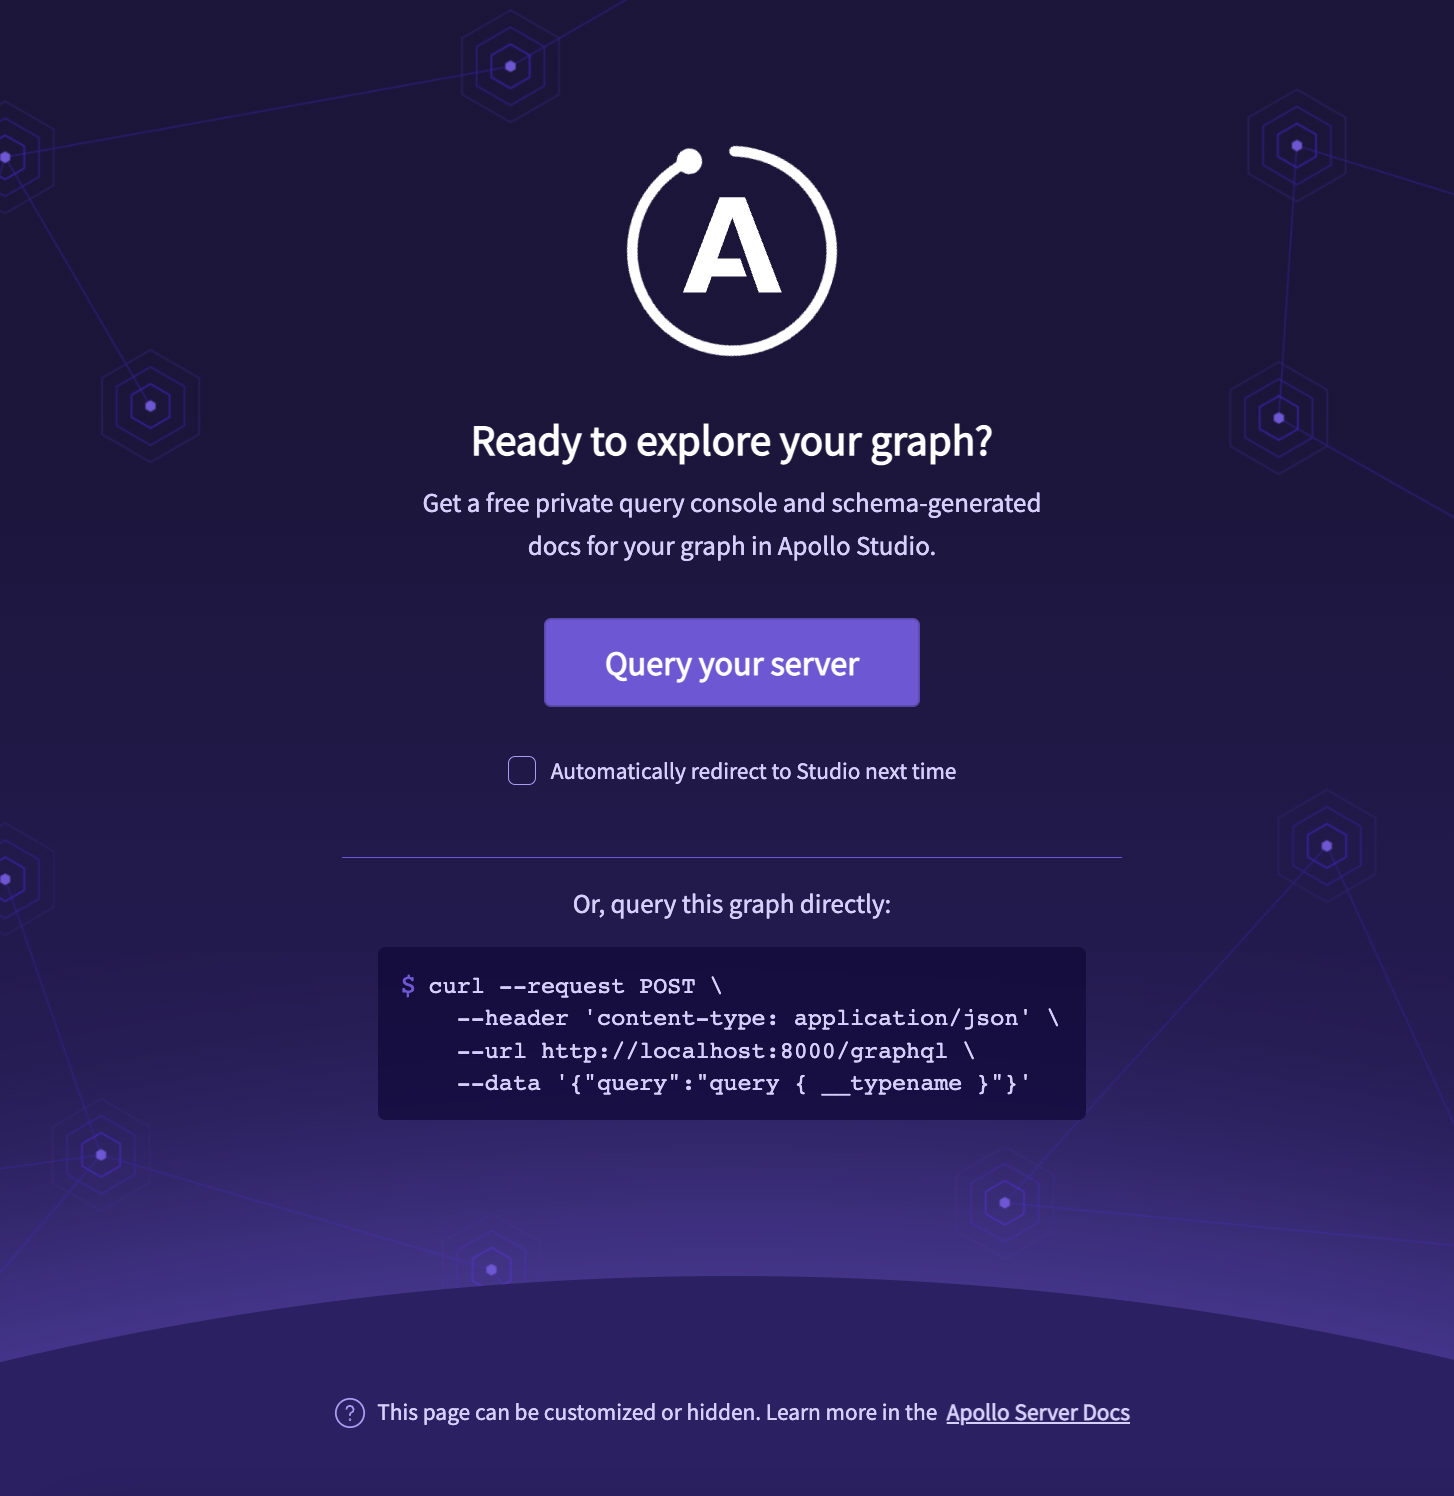
이제 서버를 한번 실행해보자.
✅ 서버 실행하면 다음과 같은 페이지가 보인다.
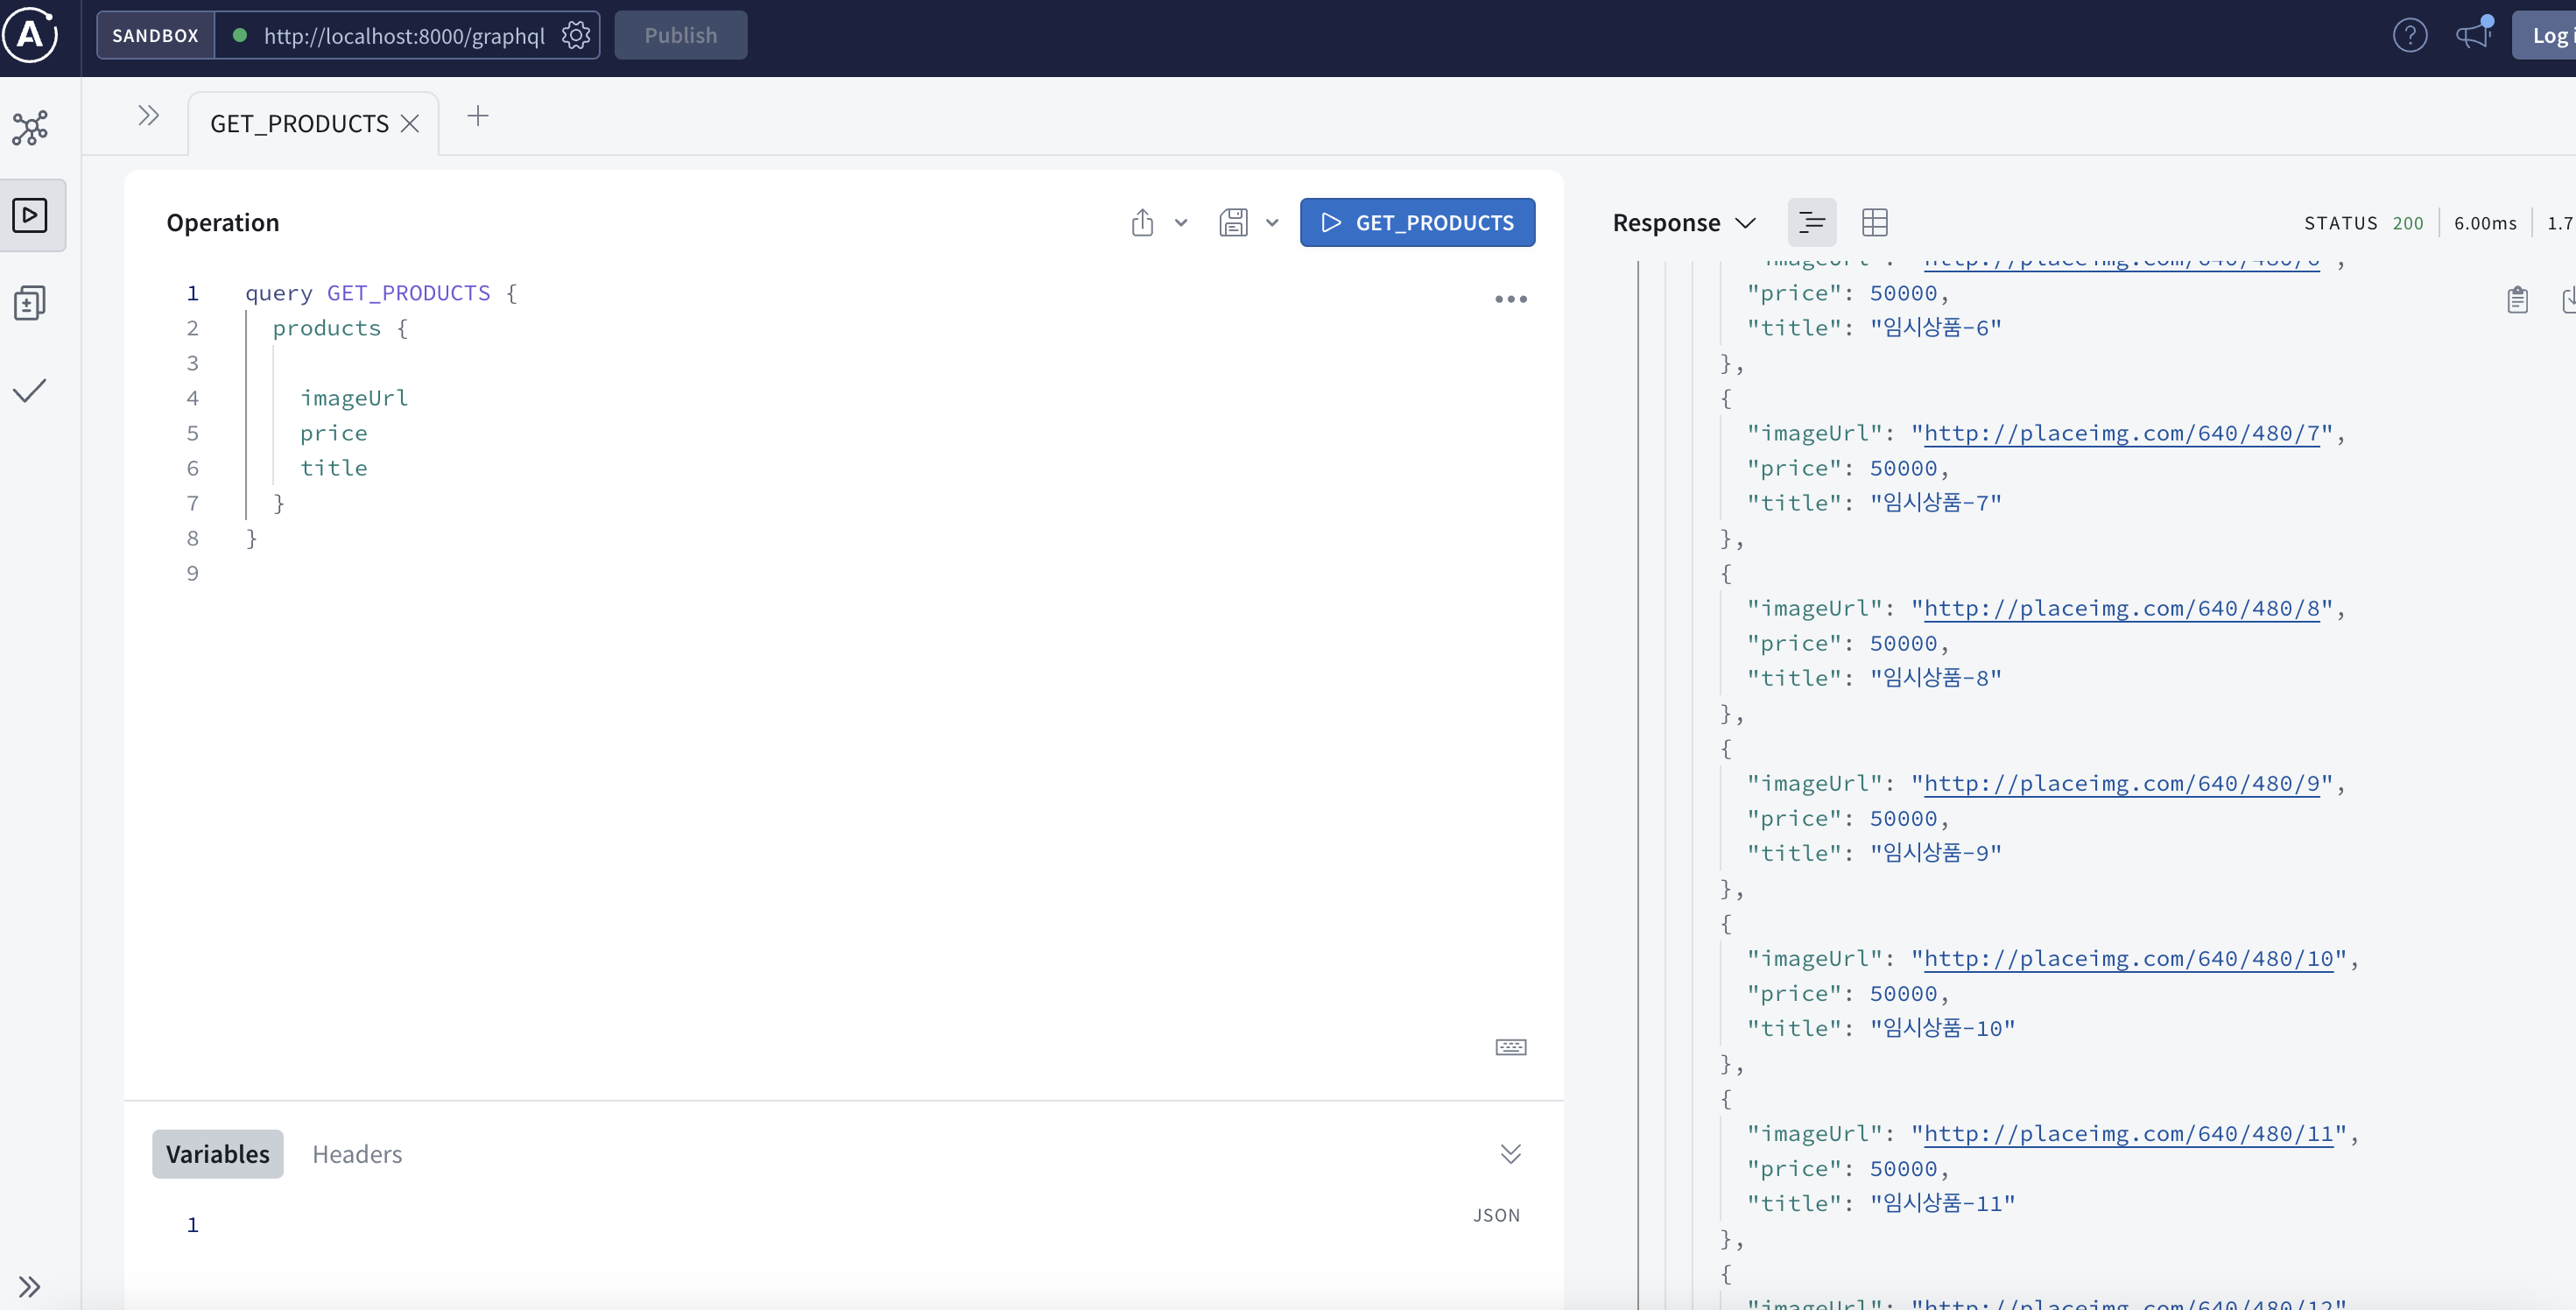
✅ 전체 상품을 불러오는 쿼리를 작성하면 다음과 같이 데이터를 가져오는 것을 확인
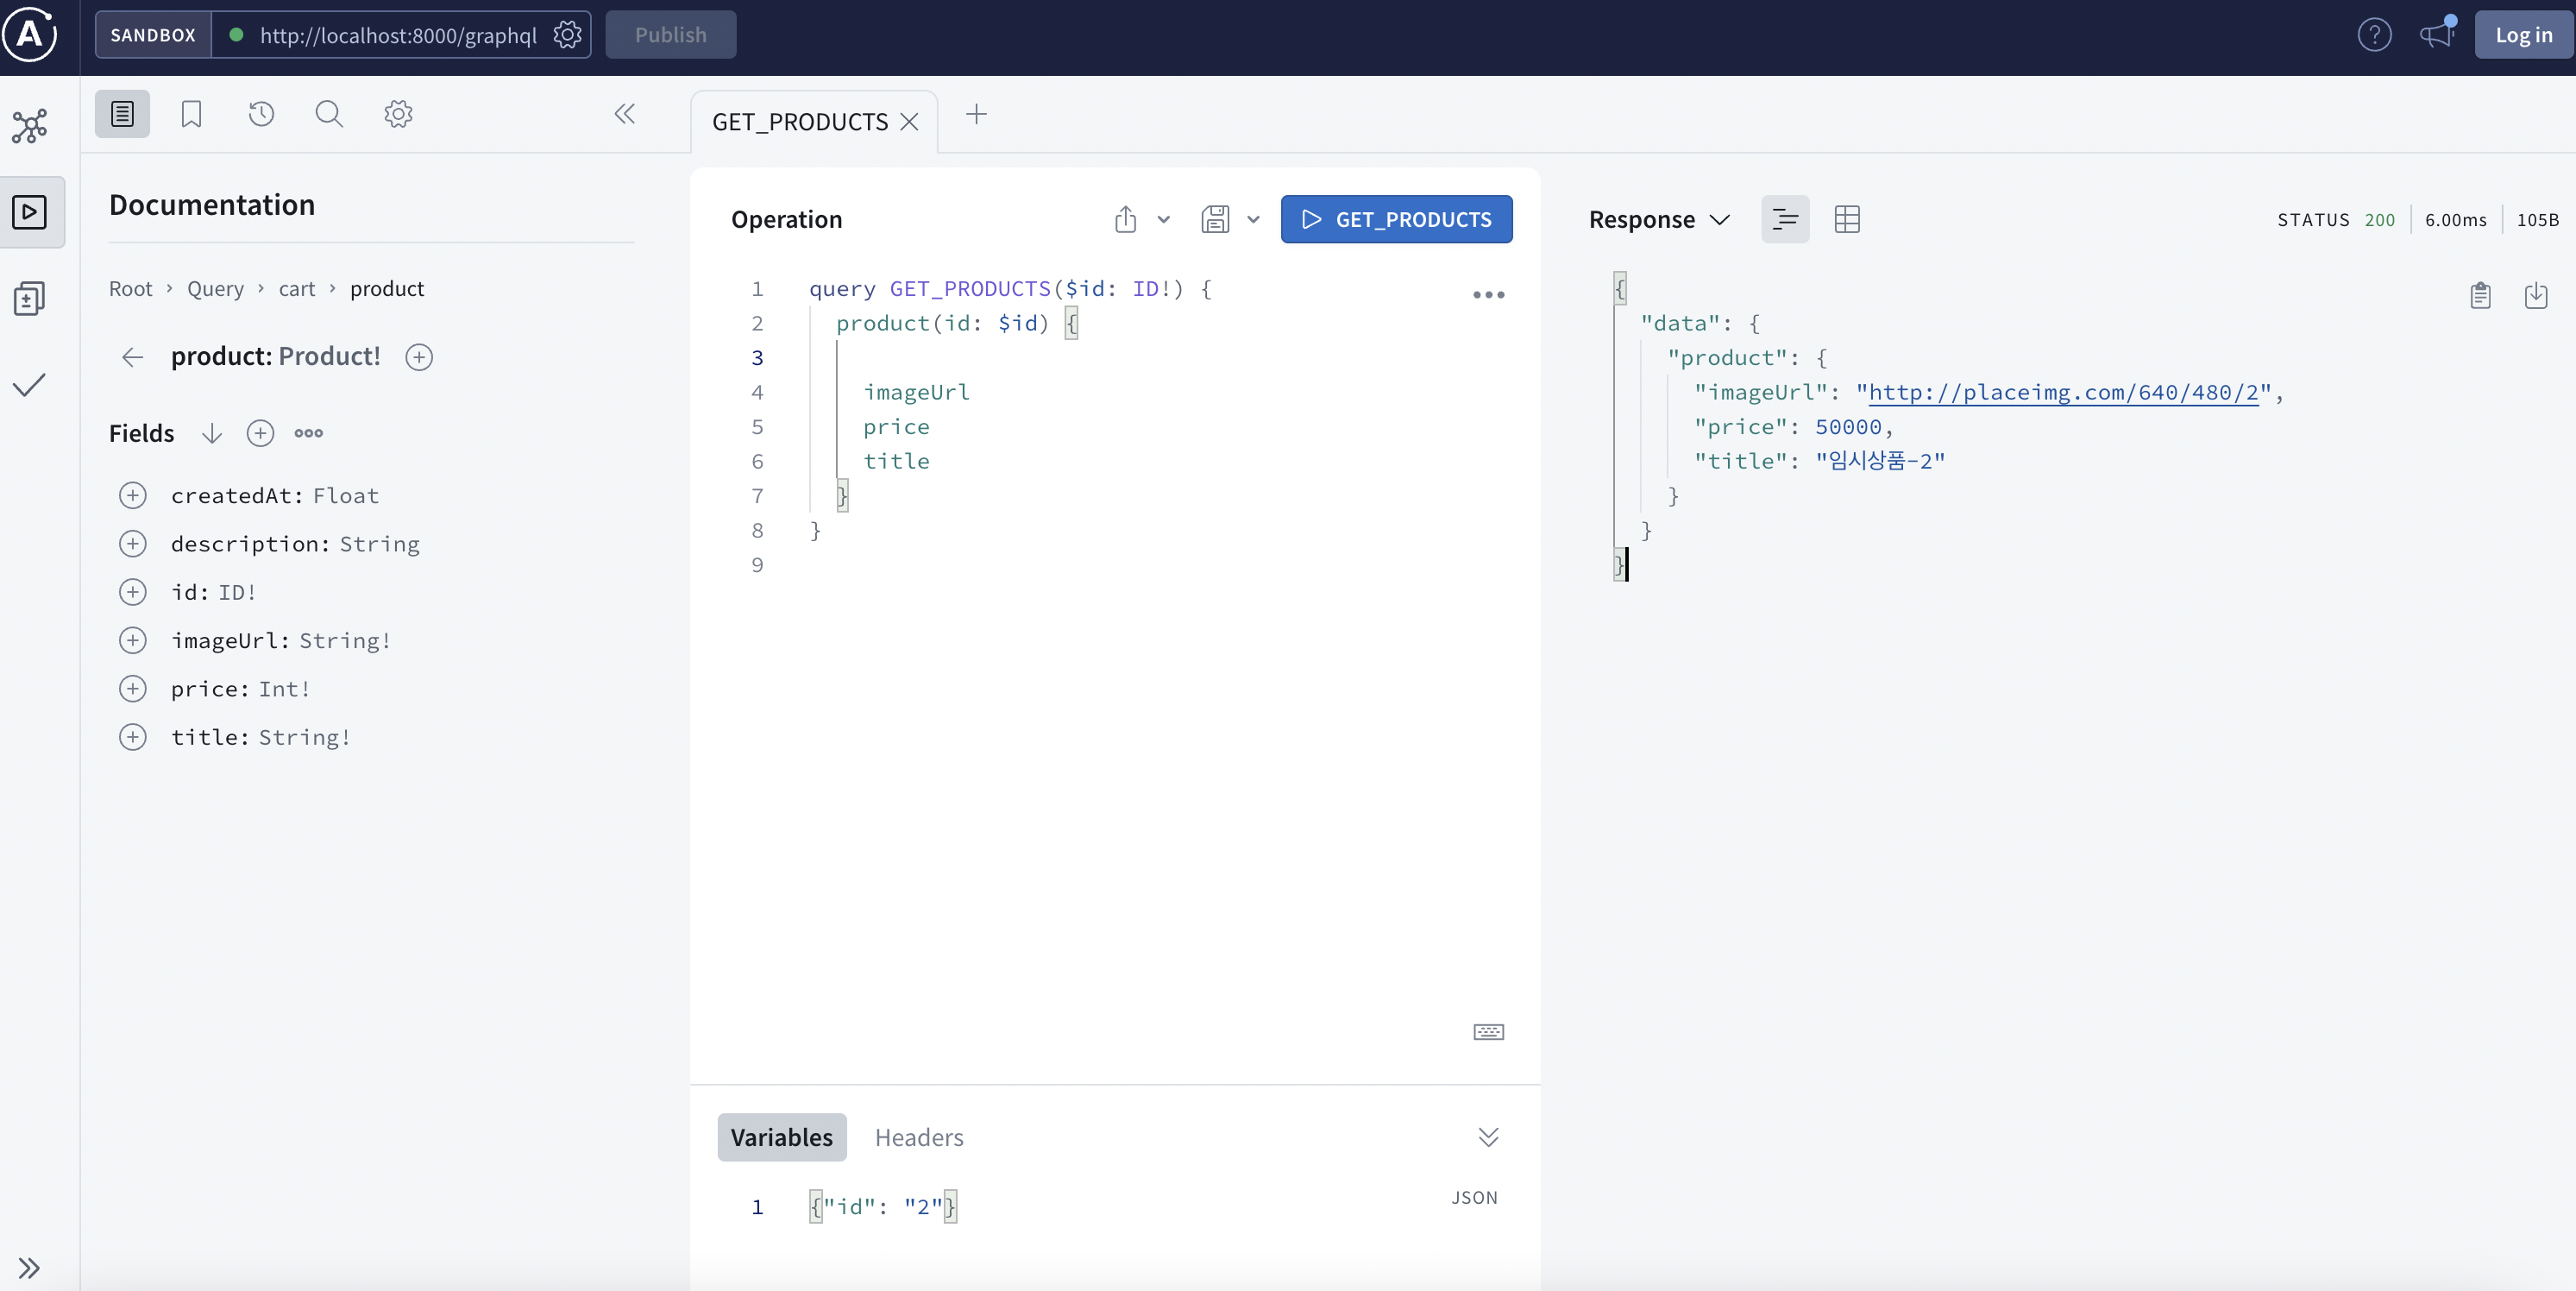
✅ Variables에 id값을 주면 해당 id값의 데이터를가져오는 것을 확인