오늘은 어제에 이어, http에서 요청처리 하는 GET, POST 방식들의 예제들과
데이터베이스의 값을 출력하는 방법에 대해 정리할 예정이다.
✔ @Controller -> HTML 출력
✔ @RestController -> API 서버 생성 의도
HTML Method
GET 방식 - 조회
POST 방식 - 주소와 데이터를 각각 전송
PUT
DELETE
가장 많이 쓰이는 2개
- GET 전송 : ? + 파라미터
- POST 전송 : 1. FormData 2. JsonData
예제1 - 회원가입 정보 전송
GET : 회원가입 창을 보여주는 것
POST : 회원가입의 정보를 전송
GET
 @GetMapping("/register")
  public String showForm() {
    return "register";
  }
-> 단순히 html의 내용을 조회하는 코드.
post
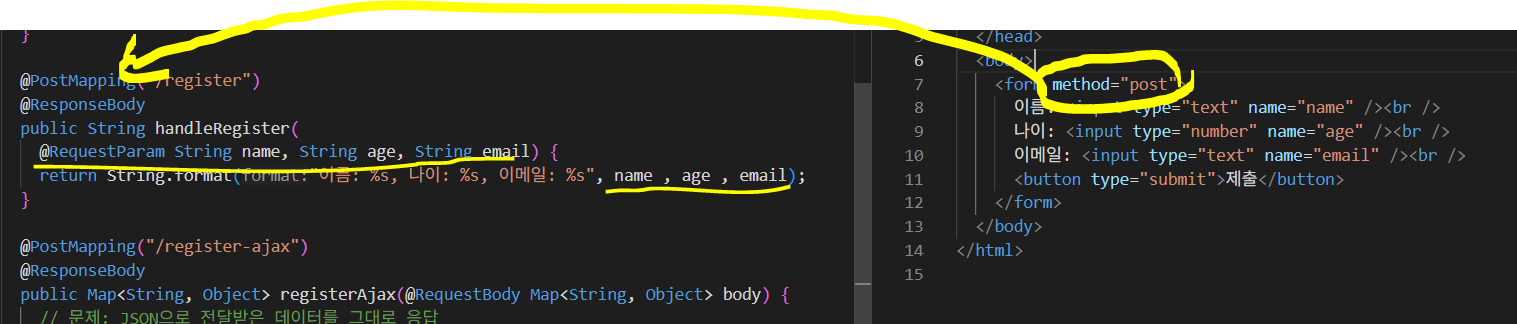
-> method="post"를 지정함으로써 post방식으로 요청을 보낸다 -> @RequestParam 으로 인해, 요청 파라미터를 받고 출력하는 원리!
✅ AJAX로 전송하는 코드
- AJAX로 보낼 때, form 태그를 사용하지 않아도 가능은 하다.
- GET은 ?
- POST는 FormData 또는 JsonData 방법이 있다.
AJAX 코드 기본 형태
 <script>
      async function submitForm() {
        const url = "http://localhost:8080/register-ajax2";
        const res = await fetch(url, "?name=xx&age=oo");
        const data = await res.text();
        console.log(data);
      }
    </script>
get
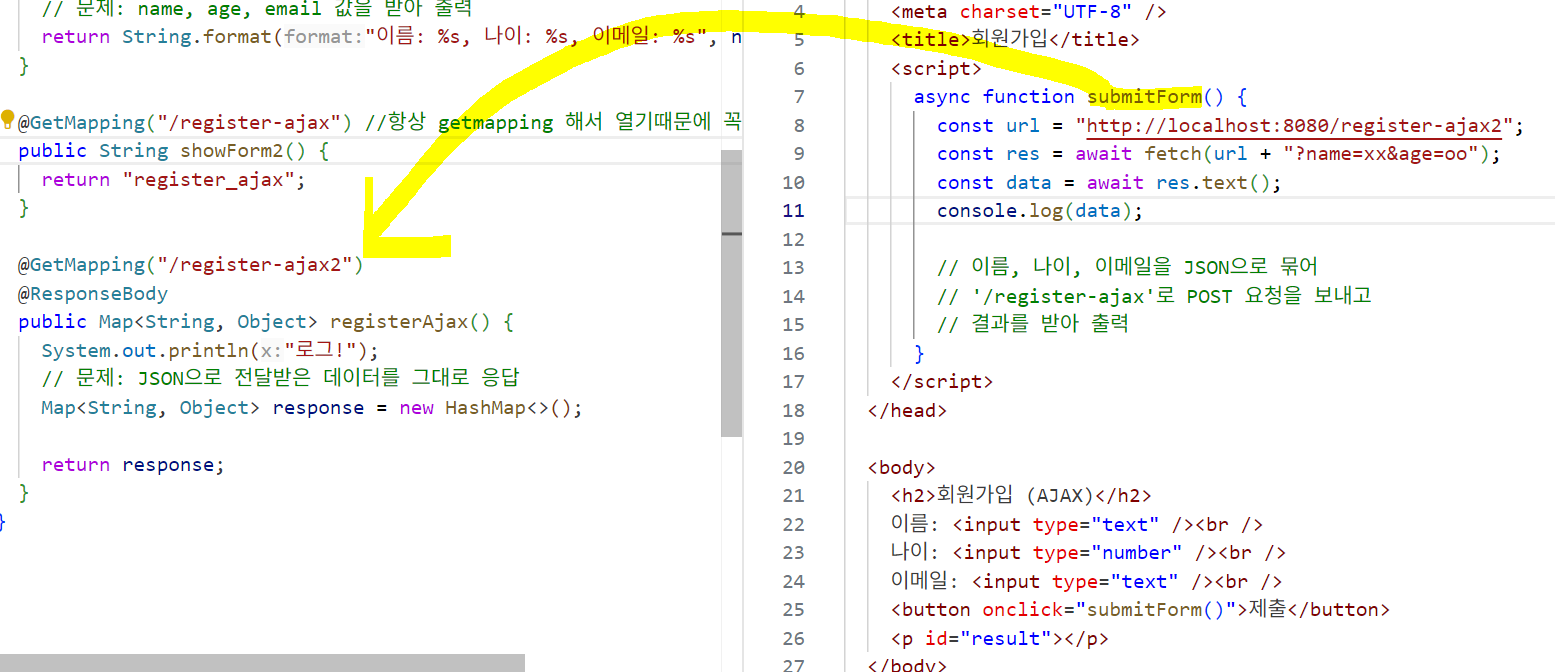
- @ResponseBody를 사용해서 json으로 받은 데이터를 그대로 출력하게 된다.
- 제출 버튼을 누르면 fetch 함수를 통해 get요청을 보내고, 요청을 받은 쪽은 로그가 출력되는 것이다.
post
- formData
front 부분

<script>
      async function submitForm() {

        const url = "http://localhost:8080/register-ajax2";
        const formData = new FormData();

        formData.append("name", xx);
        formData.append("age", 30);
        formData.append("email", tt);

        const res = await fetch(url, {
          method: "post",
          body: formData,
        });
        const data = await res.text();
        console.log(data);
      }
</script>- jsonData
jsonData는@RequestBody가 필수이다!
body에 json 문자열로 통신
contetnType: 'application/json' 추가!
<script>
      async function submitForm() {
        const url = "http://localhost:8080/register-ajax2";

        const obj = {
          name: xx,
          age: 30,
          email: tt,
        };
        const res = await fetch(url, {
          method: "post",
          headers: {
            "content-type": "application/json",
          },
          body: JSON.stringify(obj),
        });
        const data = await res.text();
        console.log(data);
      }
    </script>
---

@PostMapping("/register-ajax2")
  @ResponseBody
  public String registerAjax(
    @RequestBody Map<String, Object> body
  ) {
      return body.toString();
    }
static 폴더
프로젝트 안에서 static 폴더 안에 있는 파일은, 바로 직접 호출 가능하다.
@CrossOrigin
서버를 2개 사용하고 있을때, 원래 쓰던 서버가 아니면 스프링에서는 JS에 의한 요청은 전부 차단한다. 그래서 아무리 요청을 보내도 반응이 없기 때문에 @CrossOrigin 을 사용하면 요청을 허용한다는 의미이다.
따라서 협업할때, 서버를 다르게 쓸 때 꼭 @CrossOrigin을 써줘야 한다.

파랑입니다.