1. DOM
Document Object Model
DOM은 문서의 구조화된 표현(structured representation)을 제공하며 프로그래밍 언어가 DOM 구조에 접근할 수 있는 방법을 제공하여 그들이 문서 구조, 스타일, 내용 등을 변경할 수 있게 돕는다.
DOCS
HTML 문서에 접근하기 위해서는 document 객체가 필요하다.
예전에 정리해 둔 예제
// 해당하는 Id를 가진 요소에 접근하기
document.getElementById()

// 해당하는 모든 요소에 접근하기
document.getElementsByTagName();

// 해당하는 클래스를 가진 모든 요소에 접근하기
document.getElementsByClassName();

// css 선택자로 단일 요소에 접근하기
document.querySelector("selector");

// css 선택자로 여러 요소에 접근하기
document.querySelectorAll("selector");
제어 명령어
1️⃣ 이벤트 삽입하기
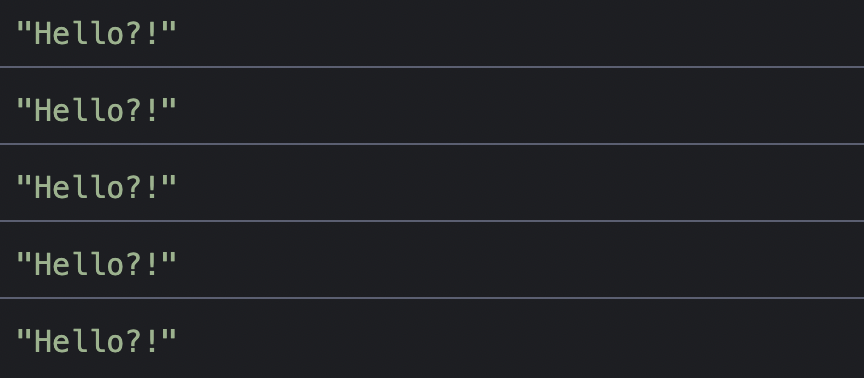
구현할 수 있는 이벤트로는 click, mouseover, mouseout, wheel etc가 있다.
- 아래 코드대로 이벤트를 삽입한 후 버튼을 클릭했을 때 콘솔에 Hello?!라는 문자가 출력되는 걸 확인할 수 있다.
2️⃣ 클래스 제어하기
add : 클래스를 추가
remove : 클래스를 제거
toggle : 클래스가 존재하면 제거, 존재하지 않으면 삽입
contains : 클래스가 존재하는지 확인
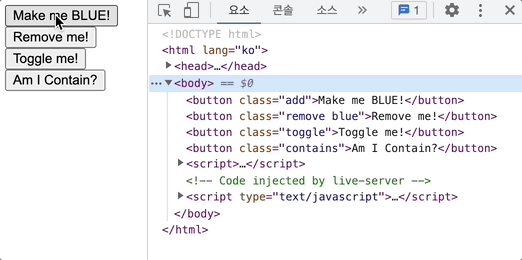
클래스를 제어해 박스의 색이 바뀌도록 해 보자!
3️⃣ 요소 제어하기
document.createElement(): 요소를 생성document.createTextNode(): 텍스트를 생성element.appendChild(): 요소를 element의 자식으로 위치element.removeChild(target): element의 target 자식 요소를 제거
insertBefore(target, location)
: target 요소를 location 위치 앞으로 이동
<div id="parentElement">
  <span id="childElement">Hello World</span>
</div>
var p = document.createElement("p");
var sibling = document.getElementById("childElement");
var parentDiv = document.getElementById("parentElement");
parentDiv.insertBefore(p, sibling);
4️⃣ 노드 생성 / 추가하기
textContent : 노드의 텍스트 콘텐츠를 표현
input 요소에 input 이벤트를 연결할 경우 실시간으로 값이 변경되는 것을 확인 가능
innerHTML : 요소 내에 포함된 HTML 마크업을 불러옴
innerText : 요소의 렌더링된 텍스트 콘텐츠 출력
5️⃣ 인접한 곳으로 정밀하게 배치하기
insertAdjacentHTML : 요소 노드를 지정한 위치에 배치
beforebegin: element 앞에 위치afterbegin: element 안 가장 첫번째 child에 위치beforeend: element 안 가장 마지막 child에 위치afterend: element 뒤에 위치
6️⃣ 노드 탐색하기
<article class="cont">
    <h1>오늘의 기사</h1>
    <p>2022년 05월 12일</p>
    Lorem ipsum dolor sit amet consectetur adipisicing elit. Deserunt incidunt voluptates laudantium fugit, omnis
    dolore itaque esse exercitationem quam culpa praesentium, quisquam repudiandae aut. Molestias qui quas ea iure
    officiis.
    <strong>가나다 기자</strong>
</article>
const cont = document.querySelector(".cont");
// 첫번째 자식 탐색
console.log(cont.firstElementChild);
// 마지막 자식 탐색
console.log(cont.lastElementChild);
// 다음 형제요소를 탐색
console.log(cont.nextElementSibling);
// 이전 형제요소를 탐색
console.log(cont.previousSibling);
// 모든 직계자식을 탐색
console.log(cont.children);
// 부모 요소를 탐색
console.log(cont.parentElement); 
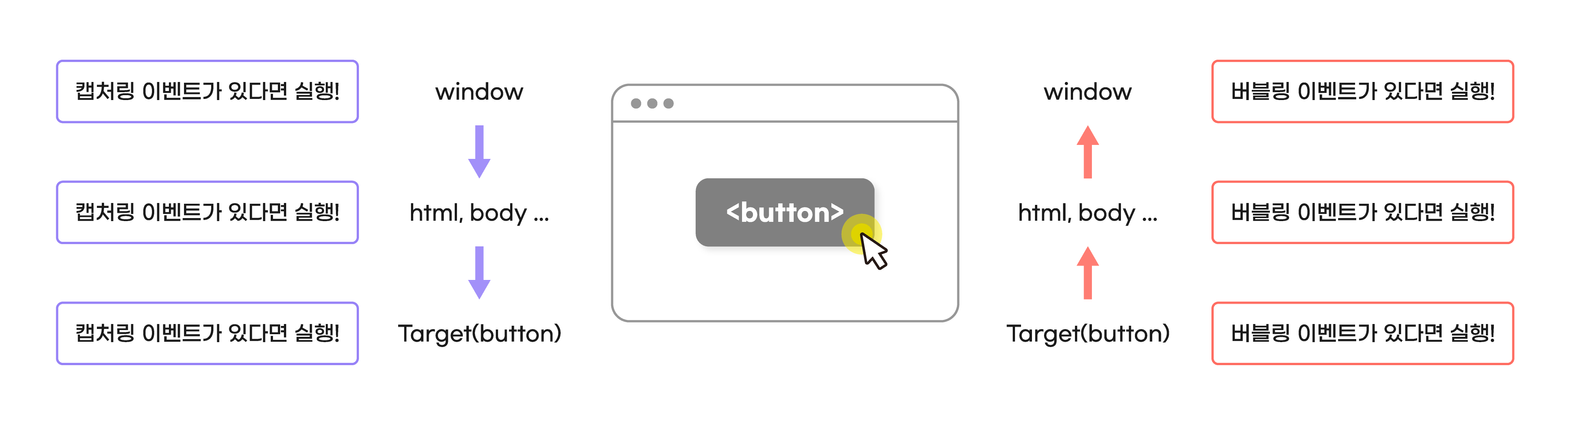
2. 이벤트 흐름
-
캡처링 단계
브라우저가 window 객체부터 html / body, target 순의 정방향으로 이벤트 대상을 찾아가는 것 -
버블링 단계
이벤트 대상을 찾는 도중에 발생하는 캡처링 이벤트 리스너들을 실행시킨 후 역으로 다시 올라가며 버블링 이벤트 리스너를 실행시키는 것
target, currentTarget
위의 캡처링 버블링 단계에서 발생하는 이벤트들의 위치와 정보를 알기 위해 target, currentTarget 속성을 사용한다.
target: 이벤트가 발생한 곳의 정보 포함currentTarget: 이벤트 리스너가 연결된 요소가 참조되어 출력
<article class="parent">
	<ol>
		<li><button class="btn-first" type="button">버튼1</button></li>
		<li><button type="button">버튼2</button></li>
		<li><button type="button">버튼3</button></li>
	</ol>
</article>

<script>
	const parent = document.querySelector('.parent');
	parent.addEventListener('click', 	function (event) {
		console.log(event.target);
		console.log(event.currentTarget);
	})
</script>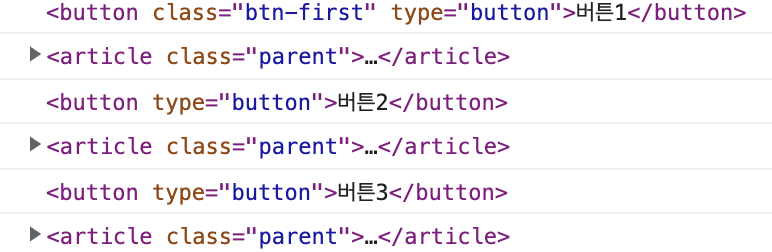
3. 이벤트 위임
이벤트 리스너가 없어도 있는 것처럼 사용할 수 있다.
<article class="parent">
	<ol>
		<li><button class="btn-first" type="button">버튼1</button></li>
		<li><button type="button">버튼2</button></li>
		<li><button type="button">버튼3</button></li>
		</ol>
</article>

<script>
	const parent = document.querySelector('.parent');
    parent.addEventListener('click', function (event) {
	console.log(event.target);
	if (event.target.nodeName === "BUTTON") {
		event.target.innerText = "버튼4";
      }
	})
</script>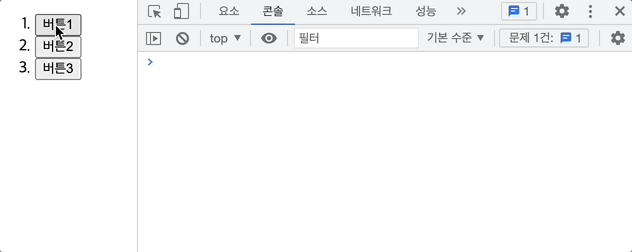
4. this
이벤트 리스너 함수 내부에서의 this는 이벤트가 연결된 노드를 참조한다.
<article class="parent">
    <ol>
        <li><button class="btn-first" type="button">버튼1</button></li>
        <li><button type="button">버튼2</button></li>
        <li><button type="button">버튼3</button></li>
    </ol>
</article>

<script>
    const parent = document.querySelector('.parent');
    parent.addEventListener('click', function (event) {
        console.log(this);
    })
</script>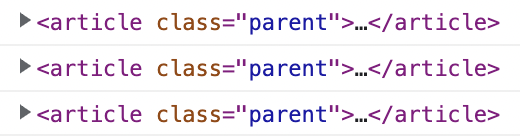
5. preventDefault()
브라우저의 기본 이벤트 동작을 취소시키는 메서드
그러나 이벤트 전파까지는 막지 못한다.
이 메서드를 이용해 우클릭을 했을 때 경고를 띄울 수도 있다.
6. stopPropagation()
이 메서드를 통해 이벤트 전파를 막을 수 있다.
동작
1. p 태그를 클릭하면 p 태그의 컨텐츠를 출력하는 alert 창을 띄움
2. 삭제 버튼을 클릭하면 삭제할 것인지를 물어보는 confirm 창을 띄워 주고, 확인을 누르면 p 태그를 삭제
stopPropagation() 메서드를 사용하지 않고 동작시킬 경우 삭제하시겠습니까? 라는 확인창인 뜬 다음 공백 alert가 뜨는 걸 확인할 수 있다.
뜨는 이유는 무엇일까?
앞에서 이벤트 흐름에 대해 확인한 것처럼 버블링이 발생한 것이다. 안에서부터 다시 올라가기 때문에 바깥의 이벤트가 다시 발생하게 되는 것이다. 이러한 경우를 방지하기 위해서 stopPropagation() 메서드를 사용할 수 있다.
