Reach Rich 프로젝트에선 MSA 환경에서 효율적으로 사용자의 세션을 관리할 수 있도록 Redis를 Session Storage로 이용합니다. (CQRS 패턴을 사용할 것이기 때문에 Cache로 이용할지 여부는 아직 미정...)
따라서 Redis 컨테이너를 실행시켜 Spring Application과 연결시켜봅니다.
Redis 컨테이너 실행
Redis 운용에 있어 redis-cli도 함께 사용할 것이므로 컨테이너간 연결을 위해 network를 생성 후 Redis 컨테이너 실행 시 적용합니다.
MySQL 컨테이너와 마찬가지로 의도치 않은 컨테이너 종료를 대비해 Mount 합니다.
docker run --name reach-rich-redis -p 6379:6379 --network redis-network -v reach-rich-redis-volume:/data -d redis:latest redis-server --appendonly yes

docker run -it --network redis-network --rm redis:latest redis-cli -h reach-rich-redis
redis-cli를 실행하면...

Redis Server에 접속가능한 것을 확인할 수 있습니다.
Redis 컨테이너 연결
이제 Spring Application과 EC2 Linux 서버에 띄운 Redis 컨테이너를 연결합니다.
# application-redis.yml
spring:
  redis:
    host:
    port:
    lettuce:
      pool:
        min-idle: 0
        max-idle: 8
        max-active: 8
@Configuration
public class RedisConfig {
@Value("${spring.redis.host}")
private String host;
@Value("${spring.redis.port}")
private String port;
@Bean
public RedisConnectionFactory redisConnectionFactory() {
RedisStandaloneConfiguration redisStandaloneConfiguration = new RedisStandaloneConfiguration();
redisStandaloneConfiguration.setHostName(host);
redisStandaloneConfiguration.setPort(Integer.parseInt(port));
return new LettuceConnectionFactory(redisStandaloneConfiguration);
}
@Bean
public RedisTemplate<String, Object> redisTemplate() {
RedisTemplate<String, Object> redisTemplate = new RedisTemplate<>();
redisTemplate.setConnectionFactory(redisConnectionFactory());
redisTemplate.setKeySerializer(new StringRedisSerializer());
redisTemplate.setValueSerializer(new StringRedisSerializer());
return redisTemplate;
}
}우선, Redis Config을 작성해줍니다.
Java의 Redis Client에는 크게 Lettuce, Jedis 두가지가 있는데, Lettuce가 Jedis 대비 더 적은 Connection으로 더 높은 TPS를 보여줍니다.
또한 Jedis는 멀티스레드에서 안전하지 않다는 반면 Lettuce는 thread-safe하고, deprecated된 Jedis를 굳이 사용할 이유는 없어보입니다.
따라서 Lettuce를 사용하겠습니다. (Redis Template, Redis Repository 중 어느 것을 사용할지는 미정)
이제 Connection Test를 진행하겠습니다.
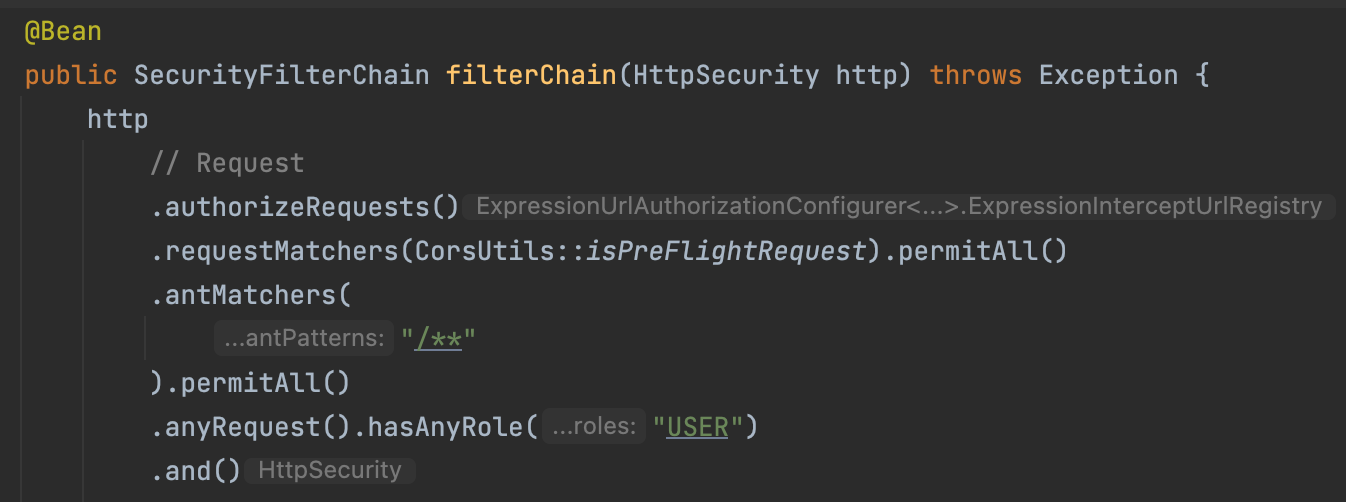
우선 Spring Security를 사용중이기 때문에 임시로 모든 URL에대한 인가를 열어줍니다.
@RestController
@RequiredArgsConstructor
public class RedisController {

    private final RedisTemplate<String, String> redisTemplate;

    @PostMapping("/test")
    public ResponseEntity<Void> setTest() {
        ValueOperations<String, String> vops = redisTemplate.opsForValue();
        vops.set("1", "success");
        return new ResponseEntity<>(HttpStatus.CREATED);
    }

    @GetMapping("/test/{key}")
    public ResponseEntity<String> getRedisKey(@PathVariable String key) {
        ValueOperations<String, String> vops = redisTemplate.opsForValue();
        String value = vops.get(key);
        return new ResponseEntity<>(value, HttpStatus.OK);
    }
}
위와 같이 간단한 Controller를 구현하고 Postman으로 API를 테스트해보면...
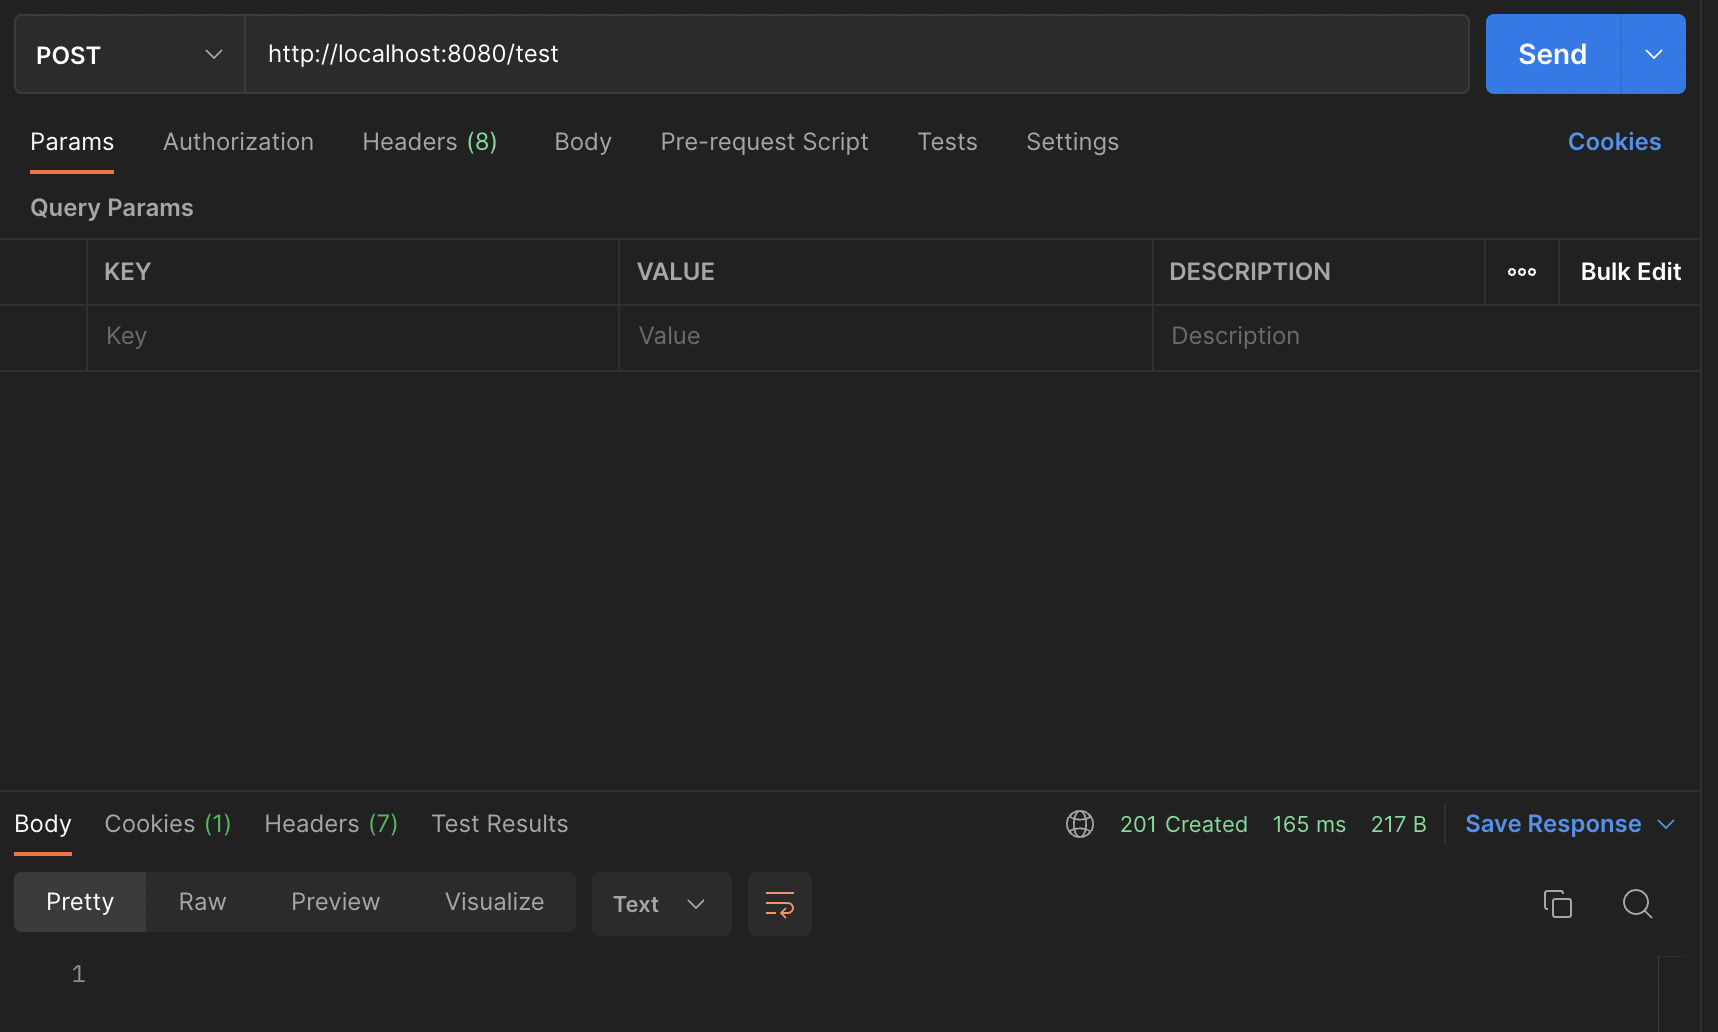
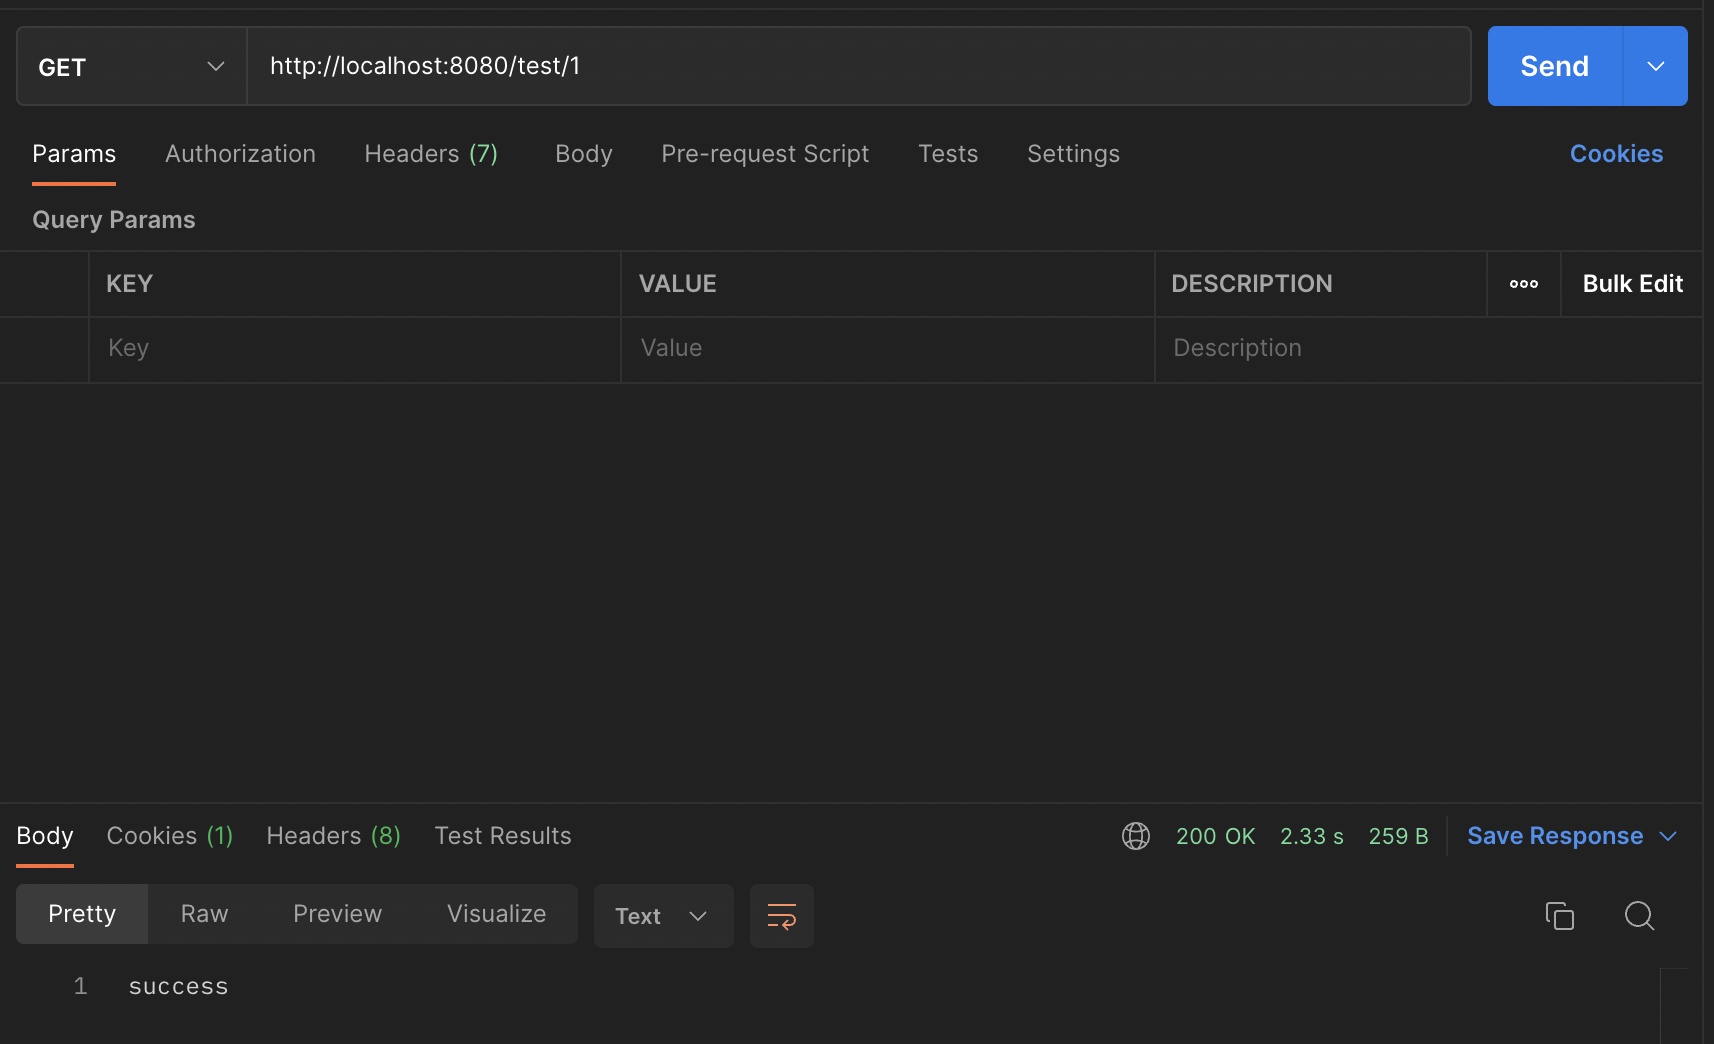
Connection에 성공한 것을 확인할 수 있습니다.
이제 기본적인 프로젝트의 틀이 잡혔으므로, 다음 시간에는 CI/CD를 구축하여 개발 생산성을 높여보겠습니다!