
Ansiblle
구성요소
1. ansible 본체 - ansible 소프트웨어 자체
2. 인벤토리 - 관리 대상을 작성한 리스트, 목록
기본적으로는 /etc/ansible/hosts 를 이용하지만 상세한 관리를 위해서는
별도로 구분하여 파일로 작성한다. 예) seoul.lst, busan.lst, websrv.lst
3. 모듈 - 패키지 설치, 사용자 관리, 파일 및 디렉토리 관리등을 명령어 로 전달하는 것이 아니라
모듈을 통해 관리한다. 예를 들어 yum -y install httpd -> yum 모듈을 불러온다. -m yum
4. 플레이북 - 도커 컨테이너 생성시 docker container run 을 이용하면 불편함이 많아 이를 compose 나 stack 을 이용했던 것처럼 파일 형태로 관리를 위한 내역을 작성하고 이를 실행한다.
결국, ansible 을 이용하여 노드를 관리할 때에는 playbook 을 작성하는 것이 대부분 할일이다!!
Ansible 구성
KVM 설치
- KVM 패키지 설치
[root@localhost ansible]# yum -y install libguestfs-tools libguestfs-xfs- Wok, Kimchi 설치
ansible-server, ansible-node 구성
- Centos7 이미지 다운로드
[root@localhost ansible]# wget https://cloud.centos.org/centos/7/images/CentOS-7-x86_64-GenericCloud-1905.qcow2.xz
--2022-09-20 17:37:45--  https://cloud.centos.org/centos/7/images/CentOS-7-x86_64-GenericCloud-1905.qcow2.xz
Resolving cloud.centos.org (cloud.centos.org)... 3.137.219.52
Connecting to cloud.centos.org (cloud.centos.org)|3.137.219.52|:443... connected.
HTTP request sent, awaiting response... 200 OK
Length: 274411792 (262M) [application/x-xz]
Saving to: ‘CentOS-7-x86_64-GenericCloud-1905.qcow2.xz’

100%[=====================================================================================================================================================================>] 274,411,792  225KB/s   in 34m 39s

2022-09-20 18:12:26 (129 KB/s) - ‘CentOS-7-x86_64-GenericCloud-1905.qcow2.xz’ saved [274411792/274411792]- 이미지 압축 해제
[root@localhost ansible]# xz -d CentOS-7-x86_64-GenericCloud-1905.qcow2.xz ```- 이미지 이름 변경
[root@localhost ansible]# cp CentOS-7-x86_64-GenericCloud-1905.qcow2 centos01.qcow2- 이미지 수정 (password:test123)
[root@localhost ansible]# virt-customize \
> -a centos01.qcow2 \
> --root-password password:test123 \
> --selinux-relabel
[   0.0] Examining the guest ...
[  32.7] Setting a random seed
[  32.7] Setting passwords
[  34.6] SELinux relabelling
[ 44.2] Finishing off- 이미지 복사
[root@localhost ansible]# cp centos01.qcow2 centos02.qcow2
[root@localhost ansible]# cp centos01.qcow2 centos03.qcow2
[root@localhost ansible]# cp centos01.qcow2 centos00.qcow2- ansible-server 인스턴스 생성하기
[root@localhost ansible]# virt-install \
> --name ansible-server \
> --vcpus 1 \
> --ram 1024 \
> --disk /ansible/centos00.qcow2 \
> --import \
> --graphics none \
> --serial pty \
> --console pty &
--import: /ansible/centos00.qcow2를 볼륨으로 사용하여 부팅 디스크로 활용
- node1, 2, 3 인스턴스 생성하기
[root@localhost ansible]# virt-install \
> --name ansible-node1 \
> --vcpus 1 \
> --ram 1024 \
> --disk=/ansible/centos01.qcow2 \
> --import \
> --graphics none \
> --serial pty \
> --console pty &
disk: centos01.qcow2
[root@localhost ansible]# virt-install \
> --name ansible-node2 \
> --vcpus 1 \
> --ram 1024 \
> --disk=/ansible/centos02.qcow2 \
> --import \
> --graphics none \
> --serial pty \
> --console pty &
disk: centos02.qcow2
[root@localhost ansible]# virt-install \
> --name ansible-node3 \
> --vcpus 1 \
> --ram 1024 \
> --disk=/ansible/centos03.qcow2 \
> --import \
> --graphics none \
> --serial pty \
> --console pty &
disk: centos03.qcow2
- 인스턴스 생성 확인
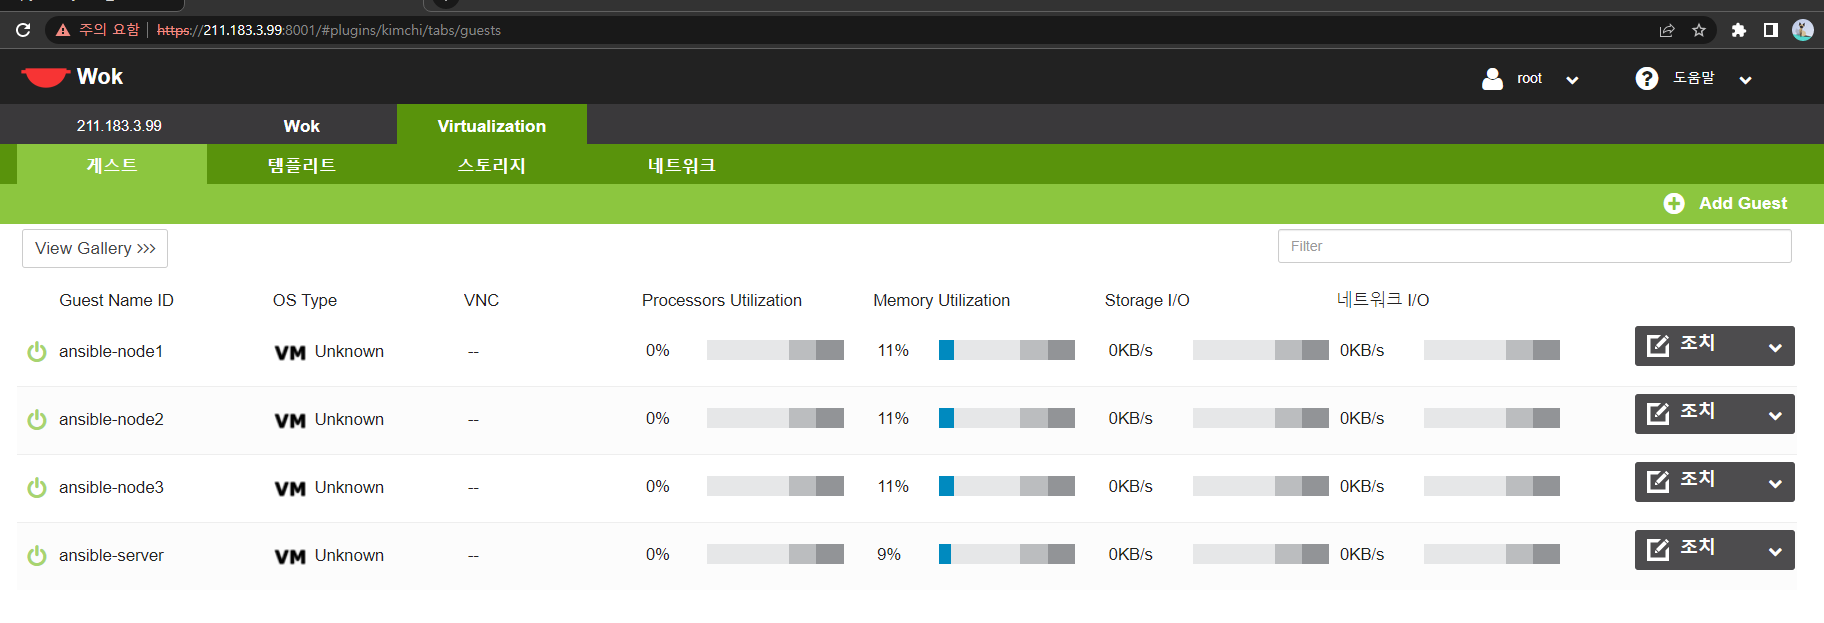
- 각 인스턴스에 접속하여 ip 확인하기
- ansible-server: 211.183.3.142
- ansible-node1: 211.183.3.143
- ansible-node1: 211.183.3.144
- ansible-node1: 211.183.3.145
- 노드 간 통신 확인
[root@localhost ~]# ping 211.183.3.143 -c 3
PING 211.183.3.143 (211.183.3.143) 56(84) bytes of data.
64 bytes from 211.183.3.143: icmp_seq=1 ttl=64 time=2.68 ms
64 bytes from 211.183.3.143: icmp_seq=2 ttl=64 time=2.42 ms
64 bytes from 211.183.3.143: icmp_seq=3 ttl=64 time=3.00 ms

--- 211.183.3.143 ping statistics ---
3 packets transmitted, 3 received, 0% packet loss, time 2004ms
rtt min/avg/max/mdev = 2.423/2.704/3.007/0.246 ms
[root@localhost ~]# ping 211.183.3.144 -c 3
PING 211.183.3.144 (211.183.3.144) 56(84) bytes of data.
64 bytes from 211.183.3.144: icmp_seq=1 ttl=64 time=4.35 ms
64 bytes from 211.183.3.144: icmp_seq=2 ttl=64 time=3.27 ms
64 bytes from 211.183.3.144: icmp_seq=3 ttl=64 time=2.35 ms

--- 211.183.3.144 ping statistics ---
3 packets transmitted, 3 received, 0% packet loss, time 2004ms
rtt min/avg/max/mdev = 2.354/3.326/4.354/0.817 ms
[root@localhost ~]# ping 211.183.3.145 -c 3
PING 211.183.3.145 (211.183.3.145) 56(84) bytes of data.
64 bytes from 211.183.3.145: icmp_seq=1 ttl=64 time=3.73 ms
64 bytes from 211.183.3.145: icmp_seq=2 ttl=64 time=1.22 ms
64 bytes from 211.183.3.145: icmp_seq=3 ttl=64 time=2.63 ms

--- 211.183.3.145 ping statistics ---
3 packets transmitted, 3 received, 0% packet loss, time 2004ms
rtt min/avg/max/mdev = 1.229/2.534/3.736/1.026 ms- ip 주소가 바뀌는 것이 싫다면 DHCP 설정 변경
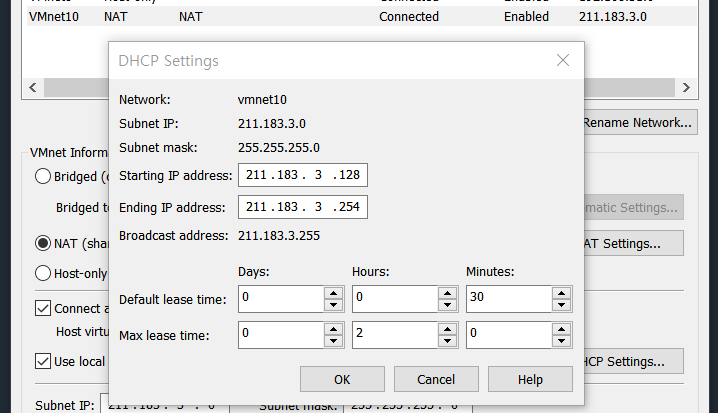
기본 설정: Days 0일
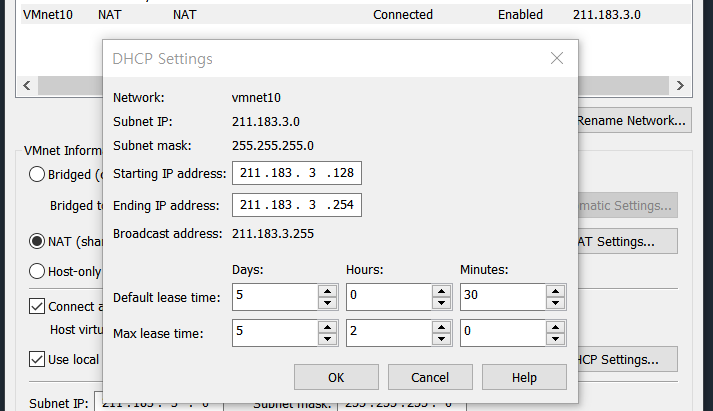
변경 주기를 5일로 연장
- hostname 바꾸기
[root@localhost ~]# hostnamectl set-hostname ansible-server
[root@localhost ~]# su
[root@ansible-server ~]#
Ansible 설치
- 저장소 목록 설치 (ansible-server에서만 작업)
[root@ansible-server ~]# yum -y install epel-release - ansible 설치 (ansible-server에서만 작업)
[root@ansible-server ~]# yum -y install ansible - ansible 설치 확인
[root@ansible-server ~]# ansible --version
ansible 2.9.27
  config file = /etc/ansible/ansible.cfg
  configured module search path = [u'/root/.ansible/plugins/modules', u'/usr/share/ansible/plugins/modules']
  ansible python module location = /usr/lib/python2.7/site-packages/ansible
  executable location = /bin/ansible
  python version = 2.7.5 (default, Apr  9 2019, 14:30:50) [GCC 4.8.5 20150623 (Red Hat 4.8.5-36)]
SSH 구성
- ansible-server의 known_host에 ansible-node1, 2, 3의 key 정보 저장
[root@ansible-server ~]# ssh-keyscan 211.183.3.143 >> ~/.ssh/known_hosts
# 211.183.3.143:22 SSH-2.0-OpenSSH_7.4
# 211.183.3.143:22 SSH-2.0-OpenSSH_7.4
# 211.183.3.143:22 SSH-2.0-OpenSSH_7.4
[root@ansible-server ~]# ssh-keyscan 211.183.3.144 >> ~/.ssh/known_hosts
# 211.183.3.144:22 SSH-2.0-OpenSSH_7.4
# 211.183.3.144:22 SSH-2.0-OpenSSH_7.4
# 211.183.3.144:22 SSH-2.0-OpenSSH_7.4
[root@ansible-server ~]# ssh-keyscan 211.183.3.145 >> ~/.ssh/known_hosts
# 211.183.3.145:22 SSH-2.0-OpenSSH_7.4
# 211.183.3.145:22 SSH-2.0-OpenSSH_7.4
# 211.183.3.145:22 SSH-2.0-OpenSSH_7.4- 키페어 생성
[root@ansible-server ~]# ssh-keygen -q -f ~/.ssh/id_rsa -N ""
[root@ansible-server ~]# ls ~/.ssh
authorized_keys  id_rsa  id_rsa.pub  known_hosts
ssh-keygen -q -f ~/.ssh/id_rsa -N ""
- public key 열어보기
[root@ansible-server ~]# cat ~/.ssh/id_rsa.pub
ssh-rsa AAAAB3NzaC1yc2EAAAADAQABAAABAQC5rwd0FBY37jqsBaN56T0dvG6g0Ruy7eKOPVgCn+DVBEUxY+p/yufxK65HcxTNIX6nYOwc/iII+vkCMCIYVls5iLA2Jy1h1cBenaW76L4/ZK1eBlixBBVZvUoKEefEdSqIXcAtHoDv6JwQavBV6xWyGhYFcso/25x5Q99aMDF2t2sF8s0Y5AJOxK/pU2yFulzpZuj0IITC6cvJj7dDNfnlmHLgim8mmZscF0rcjHRrl+uT4ZNmf5saQnUy38DsgIC3pVHEe+AILX9fiZ4IUgi1xzVEwbQznxpCU87RrxeEDdr7kovipPjs7HlVcUTN6sFiTBTU+/ZJlGE8kvkDJeSZ root@ansible-server- 각 노드에 public key 등록하기
[root@localhost ansible]# virsh console ansible-node1[root@localhost ~]# cd ~/.ssh/
[root@localhost .ssh]# ls
authorized_keys
[root@localhost .ssh]# vi authorized_keys ssh-rsa AAAAB3NzaC1yc2EAAAADAQABAAABAQC5rwd0FBY37jqsBaN56T0dvG6g0Ruy7eKOPVgCn+DVBEUxY+p/yufxK65HcxTNIX6nYOwc/iII+vkCMCIYVls5iLA2Jy1h1cBenaW76L4/ZK1eBlixBBVZvUoKEefEdSqIXcAtHoDv6JwQavBV6xWyGhYFcso/25x5Q99aMDF2t2sF8s0Y5AJOxK/pU2yFulzpZuj0IITC6cvJj7dDNfnlmHLgim8mmZscF0rcjHRrl+uT4ZNmf5saQnUy38DsgIC3pVHEe+AILX9fiZ4IUgi1xzVEwbQznxpCU87RrxeEDdr7kovipPjs7HlVcUTN6sFiTBTU+/ZJlGE8kvkDJeSZ root@ansible-server- ansible-server에서 각 ansible-node에 접속하기
[root@ansible-server .ssh]# ssh -i ~/.ssh/id_rsa -l root 211.183.3.143
Last login: Wed Sep 21 01:06:38 2022
[root@localhost ~]# exit
logout
Connection to 211.183.3.143 closed.
[root@ansible-server .ssh]#

[root@ansible-server .ssh]# ssh -i ~/.ssh/id_rsa -l root 211.183.3.144
Last login: Wed Sep 21 01:07:04 2022
[root@localhost ~]# exit
logout
Connection to 211.183.3.144 closed.
[root@ansible-server .ssh]#

[root@ansible-server .ssh]# ssh -i ~/.ssh/id_rsa -l root 211.183.3.145
Last login: Wed Sep 21 01:07:27 2022
[root@localhost ~]# exit
logout
Connection to 211.183.3.145 closed.
[root@ansible-server .ssh]#
ssh -i ~/.ssh/id_rsa -l root 211.183.3.143
- ansible-server의 ssh_config에 노드의 host 정보 추가
[root@ansible-server ~]# vi /etc/ssh/ssh_configHost 211.183.3.* User root IdentityFile ~/.ssh/id_rsa
- ansible-server에서 각 노드에 접속
[root@ansible-server ~]# ssh 211.183.3.143
Last login: Wed Sep 21 01:55:41 2022 from 211.183.3.142
ssh 211.183.3.143
인벤토리 구성
- ansible hosts에 각 노드의 ip 등록
[root@ansible-server ~]# vi /etc/ansible/hosts # node1
211.183.3.143
# node2
211.183.3.144
# node3
211.183.3.145별도의 인벤토리 파일을 만들어 사용할 수도 있다.
명령 전달
- ping 모듈 전달
[root@ansible-server ~]# ansible all -m ping
211.183.3.145 | SUCCESS => {
    "ansible_facts": {
        "discovered_interpreter_python": "/usr/bin/python"
    },
    "changed": false,
    "ping": "pong"
}
211.183.3.144 | SUCCESS => {
    "ansible_facts": {
        "discovered_interpreter_python": "/usr/bin/python"
    },
    "changed": false,
    "ping": "pong"
}
211.183.3.143 | SUCCESS => {
    "ansible_facts": {
        "discovered_interpreter_python": "/usr/bin/python"
    },
    "changed": false,
    "ping": "pong"
}
ansible all -m ping
- host만 간단하게 보기
[root@ansible-server ~]# ansible all \
> -m ping \
> --list-hosts
  hosts (3):
    211.183.3.143
    211.183.3.144
    211.183.3.145
ping 모듈은 ICMP를 보내는 것이 아니라, 노드가 정상적인 상태인지 확인하는 것.
- shell 모듈 전달
[root@ansible-server ~]# ansible all -m shell -a 'ifconfig ens3'
211.183.3.144 | CHANGED | rc=0 >>
ens3: flags=4163<UP,BROADCAST,RUNNING,MULTICAST>  mtu 1500
        inet 211.183.3.144  netmask 255.255.255.0  broadcast 211.183.3.255
        inet6 fe80::5054:ff:fe9c:2303  prefixlen 64  scopeid 0x20<link>
        ether 52:54:00:9c:23:03  txqueuelen 1000  (Ethernet)
        RX packets 901  bytes 241437 (235.7 KiB)
        RX errors 0  dropped 0  overruns 0  frame 0
        TX packets 663  bytes 66272 (64.7 KiB)
        TX errors 0  dropped 0 overruns 0  carrier 0  collisions 0
211.183.3.143 | CHANGED | rc=0 >>
ens3: flags=4163<UP,BROADCAST,RUNNING,MULTICAST>  mtu 1500
        inet 211.183.3.143  netmask 255.255.255.0  broadcast 211.183.3.255
        inet6 fe80::5054:ff:fee7:fa51  prefixlen 64  scopeid 0x20<link>
        ether 52:54:00:e7:fa:51  txqueuelen 1000  (Ethernet)
        RX packets 961  bytes 246055 (240.2 KiB)
        RX errors 0  dropped 0  overruns 0  frame 0
        TX packets 672  bytes 66585 (65.0 KiB)
        TX errors 0  dropped 0 overruns 0  carrier 0  collisions 0
211.183.3.145 | CHANGED | rc=0 >>
ens3: flags=4163<UP,BROADCAST,RUNNING,MULTICAST>  mtu 1500
        inet 211.183.3.145  netmask 255.255.255.0  broadcast 211.183.3.255
        inet6 fe80::5054:ff:fe91:8243  prefixlen 64  scopeid 0x20<link>
        ether 52:54:00:91:82:43  txqueuelen 1000  (Ethernet)
        RX packets 769  bytes 232022 (226.5 KiB)
        RX errors 0  dropped 0  overruns 0  frame 0
        TX packets 622  bytes 61444 (60.0 KiB)
        TX errors 0  dropped 0 overruns 0  carrier 0  collisions 0
ansible all -m shell -a 'ifconfig ens3'
[root@ansible-server ~]# [root@ansible-server ~]# ansible all -m shell -a 'echo $USER'
211.183.3.145 | CHANGED | rc=0 >>
root
211.183.3.144 | CHANGED | rc=0 >>
root
211.183.3.143 | CHANGED | rc=0 >>
root
211.183.3.145 | CHANGED | rc=0 >>
root
211.183.3.144 | CHANGED | rc=0 >>
root
211.183.3.143 | CHANGED | rc=0 >>
root
ansible all -m shell -a 'echo $USER'
인벤토리 사용
- seoul.lst, busan.lst 생성
[root@ansible-server ~]# touch seoul.lst
[root@ansible-server ~]# touch busan.lst - 인벤토리에 ip 주소 등록
[root@ansible-server ~]# echo "211.183.3.143" >> seoul.lst
[root@ansible-server ~]# echo "211.183.3.144" >> seoul.lst
seoul.lst에 node1, node2 등록
[root@ansible-server ~]# echo "211.183.3.145" >> busan.lstbusan.lst에 node3 등록
- seoul.lst에 속한 노드에게 명령 전달
[root@ansible-server ~]# ansible all -i seoul.lst -m ping
211.183.3.144 | SUCCESS => {
    "ansible_facts": {
        "discovered_interpreter_python": "/usr/bin/python"
    },
    "changed": false,
    "ping": "pong"
}
211.183.3.143 | SUCCESS => {
    "ansible_facts": {
        "discovered_interpreter_python": "/usr/bin/python"
    },
    "changed": false,
    "ping": "pong"
}- busan.lst에 속한 노드에게 명령 전달
[root@ansible-server ~]# ansible all -i busan.lst -m ping
211.183.3.145 | SUCCESS => {
    "ansible_facts": {
        "discovered_interpreter_python": "/usr/bin/python"
    },
    "changed": false,
    "ping": "pong"
}
인벤토리 section 구성
- seoul.lst에 section 설정
[root@ansible-server ~]# vi seoul.lst [web] 211.183.3.143 # node1 [db] 211.183.3.144
- seoul.lst의 web에 속한 노드에게 명령 전달
[root@ansible-server ~]# ansible web -i seoul.lst -m ping
211.183.3.143 | SUCCESS => {
    "ansible_facts": {
        "discovered_interpreter_python": "/usr/bin/python"
    },
    "changed": false,
    "ping": "pong"
}
ansible web \ -i seoul.lst \ -m ping
quiz.
zone에 상관 없이 모든 data center에서 웹서버들로부터만 응답을 받아보세요.
[root@ansible-server ~]# vi busan.lst [web]
211.183.3.145- 명령 전달
[root@ansible-server ~]# ansible web \
> -i seoul.lst \
> -i busan.lst \
> -m ping
211.183.3.143 | SUCCESS => {
    "ansible_facts": {
        "discovered_interpreter_python": "/usr/bin/python"
    },
    "changed": false,
    "ping": "pong"
}
211.183.3.145 | SUCCESS => {
    "ansible_facts": {
        "discovered_interpreter_python": "/usr/bin/python"
    },
    "changed": false,
    "ping": "pong"
}
ansible web \ -i seoul.lst \ -i busan.lst \ -m ping
quiz.
zone에 상관 없이 모든 web 서버들만 업데이트하세요.
[root@ansible-server ~]# ansible web \
> -i seoul.lst \
> -i busan.lst \
> -m shell \
> -a 'yum -y update

[WARNING]: Consider using the yum module rather than running 'yum'.  If you
need to use command because yum is insufficient you can add 'warn: false' to
this command task or set 'command_warnings=False' in ansible.cfg to get rid of
this message.
211.183.3.143 | CHANGED | rc=0 >>
Loaded plugins: fastestmirror
Loading mirror speeds from cached hostfile
 * base: mirror.anigil.com
 * extras: mirror.anigil.com
 * updates: mirror.anigil.com
No packages marked for update
211.183.3.145 | CHANGED | rc=0 >>
Loaded plugins: fastestmirror
Loading mirror speeds from cached hostfile
 * base: mirror.navercorp.com
 * extras: mirror.navercorp.com
 * updates: mirror.navercorp.com
No packages marked for update
shell을 이용하여 특정 패키지를 설치한 후 다시 한 번 동일 명령을 실행하면, 설치를 진행하다가 이미 설치가 되었다고 출력된다.
이런 경우 yum 모듈을 이용하면, 다시 한 번 설치시도를 하지 않는다. shell은 ansible에서 적합한 모듈이 아니다.
모듈 사용하기
user 모듈
- user 모듈
[root@ansible-server ~]# ansible all \
> -m user \
> -a "name=user2"
211.183.3.143 | CHANGED => {
    "ansible_facts": {
        "discovered_interpreter_python": "/usr/bin/python"
    },
    "changed": true,
    "comment": "",
    "create_home": true,
    "group": 1001,
    "home": "/home/user2",
    "name": "user2",
    "shell": "/bin/bash",
    "state": "present",
    "system": false,
    "uid": 1001
}
211.183.3.145 | CHANGED => {
    "ansible_facts": {
        "discovered_interpreter_python": "/usr/bin/python"
    },
    "changed": true,
    "comment": "",
    "create_home": true,
    "group": 1001,
    "home": "/home/user2",
    "name": "user2",
    "shell": "/bin/bash",
    "state": "present",
    "system": false,
    "uid": 1001
}
211.183.3.144 | CHANGED => {
    "ansible_facts": {
        "discovered_interpreter_python": "/usr/bin/python"
    },
    "changed": true,
    "comment": "",
    "create_home": true,
    "group": 1001,
    "home": "/home/user2",
    "name": "user2",
    "shell": "/bin/bash",
    "state": "present",
    "system": false,
    "uid": 1001
}
"state": "present" # 배치하기
"state": "absent" # 제거하기
- user2 생성 확인
[root@ansible-server ~]# ansible all \
> -m shell \
> -a 'cat /etc/passwd | grep user2'
211.183.3.144 | CHANGED | rc=0 >>
user2:x:1001:1001::/home/user2:/bin/bash
211.183.3.145 | CHANGED | rc=0 >>
user2:x:1001:1001::/home/user2:/bin/bash
211.183.3.143 | CHANGED | rc=0 >>
user2:x:1001:1001::/home/user2:/bin/bash- user2 생성 명령 반복
[root@ansible-server ~]# ansible all -m user -a "name=user2"
211.183.3.144 | SUCCESS => {
    "ansible_facts": {
        "discovered_interpreter_python": "/usr/bin/python"
    },
    "append": false,
    "changed": false,
    "comment": "",
    "group": 1001,
    "home": "/home/user2",
    "move_home": false,
    "name": "user2",
    "shell": "/bin/bash",
    "state": "present",
    "uid": 1001
}
211.183.3.145 | SUCCESS => {
    "ansible_facts": {
        "discovered_interpreter_python": "/usr/bin/python"
    },
    "append": false,
    "changed": false,
    "comment": "",
    "group": 1001,
    "home": "/home/user2",
    "move_home": false,
    "name": "user2",
    "shell": "/bin/bash",
    "state": "present",
    "uid": 1001
}
211.183.3.143 | SUCCESS => {
    "ansible_facts": {
        "discovered_interpreter_python": "/usr/bin/python"
    },
    "append": false,
    "changed": false,
    "comment": "",
    "group": 1001,
    "home": "/home/user2",
    "move_home": false,
    "name": "user2",
    "shell": "/bin/bash",
    "state": "present",
    "uid": 1001
}
"changed": false
- user2 삭제하기
[root@ansible-server ~]# ansible all \
> -m user \
> -a "name=user2 state=absent"
211.183.3.144 | CHANGED => {
    "ansible_facts": {
        "discovered_interpreter_python": "/usr/bin/python"
    },
    "changed": true,
    "force": false,
    "name": "user2",
    "remove": false,
    "state": "absent"
}
211.183.3.143 | CHANGED => {
    "ansible_facts": {
        "discovered_interpreter_python": "/usr/bin/python"
    },
    "changed": true,
    "force": false,
    "name": "user2",
    "remove": false,
    "state": "absent"
}
211.183.3.145 | CHANGED => {
    "ansible_facts": {
        "discovered_interpreter_python": "/usr/bin/python"
    },
    "changed": true,
    "force": false,
    "name": "user2",
    "remove": false,
    "state": "absent"
}- 삭제 확인
[root@ansible-server ~]# ansible all \
> -m shell \
> -a "cat /etc/passwd | grep user2"
211.183.3.143 | FAILED | rc=1 >>
non-zero return code
211.183.3.144 | FAILED | rc=1 >>
non-zero return code
211.183.3.145 | FAILED | rc=1 >>
non-zero return code
실습 - 웹서버 실행
- 웹서버 설치
[root@ansible-server ~]# ansible all \
> -m yum \
> -a "name=httpd"- index.html 생성
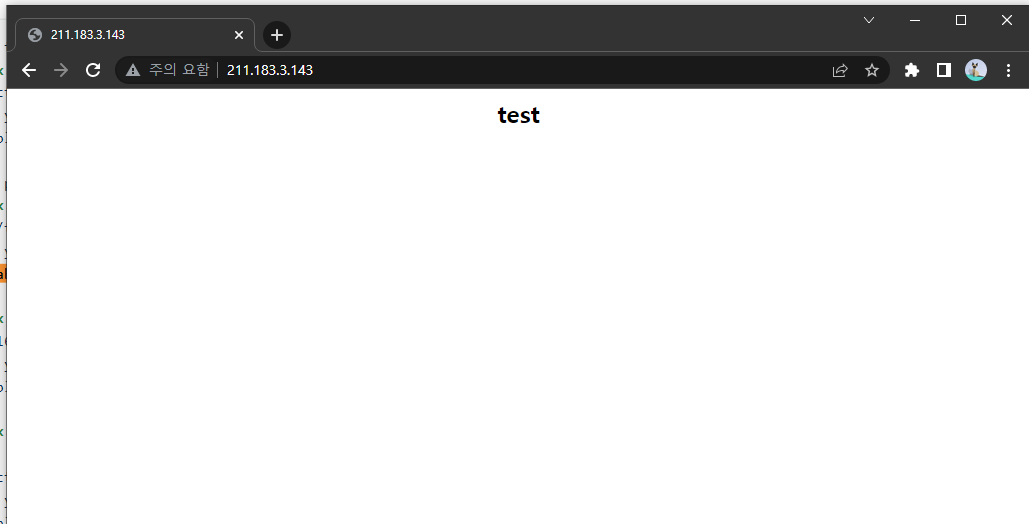
[root@ansible-server ~]# vi index.html <center><h2>test</h2></center>- index.html 넣기
[root@ansible-server ~]# ansible all \
> -m copy \
> -a "src=index.html dest=/var/www/html"
211.183.3.144 | CHANGED => {
    "ansible_facts": {
        "discovered_interpreter_python": "/usr/bin/python"
    },
    "changed": true,
    "checksum": "dccd2aa9eb1ee6dcad077478bef4e73ae02d91bb",
    "dest": "/var/www/html/index.html",
    "gid": 0,
    "group": "root",
    "md5sum": "42e797da45638ed6fbe265672475dcd6",
    "mode": "0644",
    "owner": "root",
    "secontext": "system_u:object_r:httpd_sys_content_t:s0",
    "size": 31,
    "src": "/root/.ansible/tmp/ansible-tmp-1663736978.61-12532-128374392114170/source",
    "state": "file",
    "uid": 0
}
211.183.3.145 | CHANGED => {
    "ansible_facts": {
        "discovered_interpreter_python": "/usr/bin/python"
    },
    "changed": true,
    "checksum": "dccd2aa9eb1ee6dcad077478bef4e73ae02d91bb",
    "dest": "/var/www/html/index.html",
    "gid": 0,
    "group": "root",
    "md5sum": "42e797da45638ed6fbe265672475dcd6",
    "mode": "0644",
    "owner": "root",
    "secontext": "system_u:object_r:httpd_sys_content_t:s0",
    "size": 31,
    "src": "/root/.ansible/tmp/ansible-tmp-1663736978.67-12535-122508875628772/source",
    "state": "file",
    "uid": 0
}
211.183.3.143 | CHANGED => {
    "ansible_facts": {
        "discovered_interpreter_python": "/usr/bin/python"
    },
    "changed": true,
    "checksum": "dccd2aa9eb1ee6dcad077478bef4e73ae02d91bb",
    "dest": "/var/www/html/index.html",
    "gid": 0,
    "group": "root",
    "md5sum": "42e797da45638ed6fbe265672475dcd6",
    "mode": "0644",
    "owner": "root",
    "secontext": "system_u:object_r:httpd_sys_content_t:s0",
    "size": 31,
    "src": "/root/.ansible/tmp/ansible-tmp-1663736978.58-12531-264119893533854/source",
    "state": "file",
    "uid": 0
}
ansible all \ -m copy \ -a "src=index.html dest=/var/www/html"
- httpd 켜기
[root@ansible-server ~]# ansible all \
> -m service \
> -a "name=httpd state=started"
ansible all \ -m service \ -a "name=httpd state=started"
- 노드 접속
git 모듈
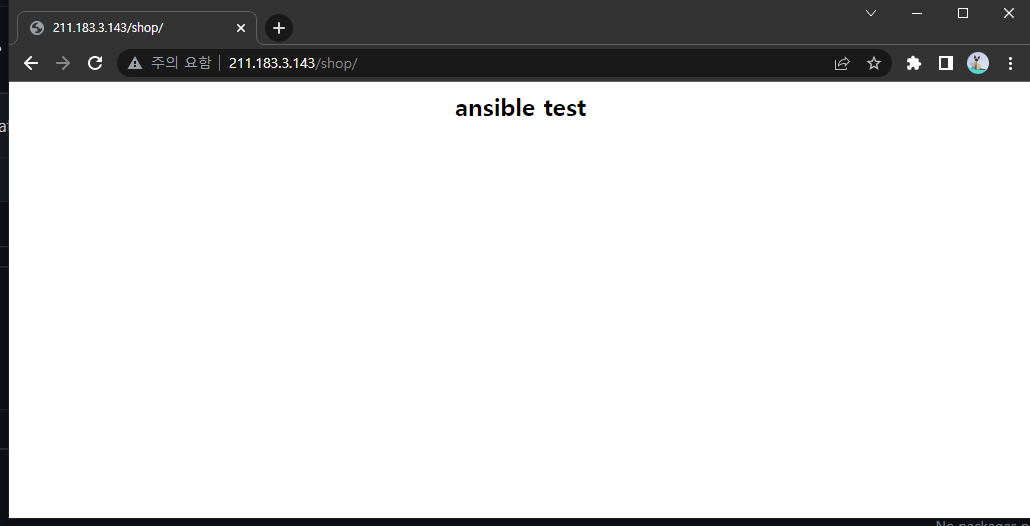
github의 아무 저장소에 간단한 index.html 파일을 올려두세요.
git 모듈을 이용하여 기존 동작 중인 웹서버의 /var/www/html/shop 아래에 github에 있는 index.html 파일을 clone 시키세요.
http://211.183.3.143/shop으로 파일을 확인할 수 있어야 합니다.
- git 설치
[root@ansible-server ~]# ansible all -m yum -a "name=git state=present"
211.183.3.144 | SUCCESS => {
    "ansible_facts": {
        "discovered_interpreter_python": "/usr/bin/python"
    },
    "changed": false,
    "msg": "",
    "rc": 0,
    "results": [
        "git-1.8.3.1-23.el7_8.x86_64 providing git is already installed"
    ]
}
211.183.3.143 | SUCCESS => {
    "ansible_facts": {
        "discovered_interpreter_python": "/usr/bin/python"
    },
    "changed": false,
    "msg": "",
    "rc": 0,
    "results": [
        "git-1.8.3.1-23.el7_8.x86_64 providing git is already installed"
    ]
}
211.183.3.145 | SUCCESS => {
    "ansible_facts": {
        "discovered_interpreter_python": "/usr/bin/python"
    },
    "changed": false,
    "msg": "",
    "rc": 0,
    "results": [
        "git-1.8.3.1-23.el7_8.x86_64 providing git is already installed"
    ]
}[root@ansible-server ~]# ansible all \
> -m git \
> -a "repo=https://github.com/ptah0414/test.git dest=/var/www/html/shop"
211.183.3.143 | CHANGED => {
"after": "0695412292e6a58cdba007605f10e6413500659c",
"ansible_facts": {
"discovered_interpreter_python": "/usr/bin/python"
},
"before": null,
"changed": true
}
211.183.3.144 | CHANGED => {
"after": "0695412292e6a58cdba007605f10e6413500659c",
"ansible_facts": {
"discovered_interpreter_python": "/usr/bin/python"
},
"before": null,
"changed": true
}
211.183.3.145 | CHANGED => {
"after": "0695412292e6a58cdba007605f10e6413500659c",
"ansible_facts": {
"discovered_interpreter_python": "/usr/bin/python"
},
"before": null,
"changed": true
}
uri 모듈
[root@ansible-server ~]# ansible all \
> -m uri \
> -a "url=https://www.instagram.com dest=/var/www/html/index.html"
- httpd 중단하기
[root@ansible-server ~]# ansible all \
> -m service \
> -a "name=httpd state=stopped"- httpd 삭제하기
[root@ansible-server ~]# ansible all \
> -m yum \
> -a "name=httpd state=absent"
Vagrant
- IaC(코드를 이용하여 인프라를 구축하고 사용 가능한 준비 상태를 만들어줄 수 있다. -> 프로비저닝)
- 추가적으로 아주 정밀하지는 않지만 자동화도 지원한다.
- 현재 vagrant와 kvm 간의 연결을 위한 모듈은 결합도가 낮다.
- vagrant + virtualbox는 결합도가 높다.
- 실제 클라우드 환경에 iaC를 적용할 때에는 terraform을 이용하는 것을 추천한다.
- repo 추가
[root@localhost ~]# yum-config-manager --add-repo https://rpm.releases.hashicorp.com/RHEL/hashicorp.repo
BDB2053 Freeing read locks for locker 0x2a: 29588/140048746551424
BDB2053 Freeing read locks for locker 0x2c: 29588/140048746551424
BDB2053 Freeing read locks for locker 0x2d: 29588/140048746551424
BDB2053 Freeing read locks for locker 0x2e: 29588/140048746551424
Loaded plugins: fastestmirror
adding repo from: https://rpm.releases.hashicorp.com/RHEL/hashicorp.repo
grabbing file https://rpm.releases.hashicorp.com/RHEL/hashicorp.repo to /etc/yum.repos.d/hashicorp.repo
repo saved to /etc/yum.repos.d/hashicorp.repo- vagrant 설치
[root@localhost ~]# yum -y install libvirt-daemon-kvm libvirt-client vagrant gcc-c++ make libstdc++-devel libvirt-devel
- libvirtd 재시작
[root@localhost ~]# systemctl restart libvirtd- vagrant-libvirt 플러그인 설치
[root@localhost ~]# vagrant plugin install vagrant-libvirt

Installing the 'vagrant-libvirt' plugin. This can take a few minutes...
Fetching formatador-1.1.0.gem
Fetching fog-core-2.3.0.gem
Fetching fog-json-1.2.0.gem
Fetching nokogiri-1.13.8-x86_64-linux.gem
Fetching fog-xml-0.1.4.gem
Fetching ruby-libvirt-0.8.0.gem
Building native extensions. This could take a while...
Fetching fog-libvirt-0.9.0.gem
Fetching xml-simple-1.1.9.gem
Fetching diffy-3.4.2.gem
Fetching vagrant-libvirt-0.10.7.gem
Installed the plugin 'vagrant-libvirt (0.10.7)'!
vagrant 시작
[root@localhost project1]# vagrant init
A `Vagrantfile` has been placed in this directory. You are now
ready to `vagrant up` your first virtual environment! Please read
the comments in the Vagrantfile as well as documentation on
`vagrantup.com` for more information on using Vagrant.

[root@localhost project1]# ls
Vagrantfile
- Vagrantfile 수정
[root@localhost project1]# vi Vagrantfile Vagrant.configure("2") do |config|
# The most common configuration options are documented and commented below.
# For a complete reference, please see the online documentation at
# https://docs.vagrantup.com.
# Every Vagrant development environment requires a box. You can search for
# boxes at https://vagrantcloud.com/search.
config.vm.box = "centos/7"
config.vm.host_name = "server"
# Disable automatic box update checking. If you disable this, then
# boxes will only be checked for updates when the user runs
# `vagrant box outdated`. This is not recommended.
# config.vm.box_check_update = false
# Create a forwarded port mapping which allows access to a specific port
# within the machine from a port on the host machine. In the example below,
# accessing "localhost:8080" will access port 80 on the guest machine.
# NOTE: This will enable public access to the opened port
config.vm.network "forwarded_port", guest: 22, host: 20021, id: 'ssh'
# Create a forwarded port mapping which allows access to a specific port
# within the machine from a port on the host machine and only allow access
# via 127.0.0.1 to disable public access
# config.vm.network "forwarded_port", guest: 80, host: 8080, host_ip: "127.0.0.1"
# Create a private network, which allows host-only access to the machine
# using a specific IP.
config.vm.network "private_network", ip: "192.168.33.10"- vagrant 시작
[root@localhost project1]# vagrant up - vagrant 시작 확인
[root@localhost project1]# virsh list --all
 Id    Name                           State
----------------------------------------------------
 1     project1_default               running
 -     ansible-node1                  shut off
 -     ansible-node2                  shut off
 -     ansible-node3                  shut off
 -     ansible-server                 shut off
project1_default
[root@localhost project1]# tree -a
.
├── .vagrant
│   ├── bundler
│   │   └── global.sol
│   ├── machines
│   │   └── default
│   │       └── libvirt
│   │           ├── action_provision
│   │           ├── box_meta
│   │           ├── created_networks
│   │           ├── creator_uid
│   │           ├── id
│   │           ├── index_uuid
│   │           ├── private_key
│   │           └── synced_folders
│   └── rgloader
│       └── loader.rb
└── Vagrantfile- ssh로 접속
[root@localhost project1]# vagrant ssh default
[vagrant@server ~]$ - ip 확인
[vagrant@server ~]$ ifconfig eth1
eth1: flags=4163<UP,BROADCAST,RUNNING,MULTICAST>  mtu 1500
        inet 192.168.33.10  netmask 255.255.255.0  broadcast 192.168.33.255
        inet6 fe80::5054:ff:fe55:896f  prefixlen 64  scopeid 0x20<link>
        ether 52:54:00:55:89:6f  txqueuelen 1000  (Ethernet)
        RX packets 200  bytes 11542 (11.2 KiB)
        RX errors 0  dropped 170  overruns 0  frame 0
        TX packets 26  bytes 2796 (2.7 KiB)
        TX errors 0  dropped 0 overruns 0  carrier 0  collisions 0
private network: 192.168.33.X
[vagrant@server ~]$ ifconfig eth0
eth0: flags=4163<UP,BROADCAST,RUNNING,MULTICAST>  mtu 1500
        inet 192.168.121.46  netmask 255.255.255.0  broadcast 192.168.121.255
        inet6 fe80::5054:ff:fea7:abc3  prefixlen 64  scopeid 0x20<link>
        ether 52:54:00:a7:ab:c3  txqueuelen 1000  (Ethernet)
        RX packets 2862  bytes 25404343 (24.2 MiB)
        RX errors 0  dropped 14  overruns 0  frame 0
        TX packets 2392  bytes 263934 (257.7 KiB)
        TX errors 0  dropped 0 overruns 0  carrier 0  collisions 0
192.168.121.46
- eth0은 virbr0에 연결된 것
[root@localhost project1]# ifconfig virbr0
virbr0: flags=4099<UP,BROADCAST,MULTICAST>  mtu 1500
        inet 192.168.122.1  netmask 255.255.255.0  broadcast 192.168.122.255
        ether 52:54:00:97:e3:e5  txqueuelen 1000  (Ethernet)
        RX packets 0  bytes 0 (0.0 B)
        RX errors 0  dropped 0  overruns 0  frame 0
        TX packets 0  bytes 0 (0.0 B)
        TX errors 0  dropped 0 overruns 0  carrier 0  collisions 0
192.168.122.1
- vagrant 통신 확인
[root@localhost project1]# vagrant ssh default
Last login: Wed Sep 21 07:10:44 2022 from 192.168.121.1
[vagrant@server ~]$
[vagrant@server ~]$ ping www.google.com -c 3
PING www.google.com (142.250.199.100) 56(84) bytes of data.
64 bytes from nrt13s52-in-f4.1e100.net (142.250.199.100): icmp_seq=1 ttl=127 time=37.4 ms
64 bytes from nrt13s52-in-f4.1e100.net (142.250.199.100): icmp_seq=2 ttl=127 time=34.9 ms
64 bytes from nrt13s52-in-f4.1e100.net (142.250.199.100): icmp_seq=3 ttl=127 time=34.9 ms

--- www.google.com ping statistics ---
3 packets transmitted, 3 received, 0% packet loss, time 2003ms
rtt min/avg/max/mdev = 34.953/35.792/37.428/1.176 ms
실습
- 기존 vagrant VM destroy
[root@localhost project1]# vagrant destroy
    default: Are you sure you want to destroy the 'default' VM? [y/N] y
==> default: Removing domain...
==> default: Deleting the machine folder- /ansible/project2 생성
- vagrant init
[root@localhost ansible]# mkdir project2
[root@localhost ansible]# cd project2/
[root@localhost project2]# vagrant init
A `Vagrantfile` has been placed in this directory. You are now
ready to `vagrant up` your first virtual environment! Please read
the comments in the Vagrantfile as well as documentation on
`vagrantup.com` for more information on using Vagrant.
[root@localhost project2]# ls
Vagrantfile
[root@localhost project2]# vi Vagrantfile - vi Vagrantfile을 열어서 아래의 내용을 만족하도록 프로비저닝한다.
instance  	box         public network 		private network
server 		centos/7 	None  				10.10.10.10
node1                                       10.10.10.11
node2                                       10.10.10.12
node3                                       10.10.10.13
vi Vagrantfile # vi: set ft=ruby :
Vagrant.configure("2") do |config|
config.vm.define "server" do |cfg0|
cfg0.vm.box = "centos/7"
cfg0.vm.host_name = "server"
cfg0.vm.network "private_network", ip: "10.10.10.10"
cfg0.vm.network "forwarded_port", guest: 22, host: 20010, id: "ssh"
end
config.vm.define "node1" do |cfg1|
cfg1.vm.box = "centos/7"
cfg1.vm.host_name = "node1"
cfg1.vm.network "private_network", ip: "10.10.10.11"
cfg1.vm.network "forwarded_port", guest: 22, host: 20011, id: "ssh"
end
config.vm.define "node2" do |cfg2|
cfg2.vm.box = "centos/7"
cfg2.vm.host_name = "node2"
cfg2.vm.network "private_network", ip: "10.10.10.12"
cfg2.vm.network "forwarded_port", guest: 22, host: 20012, id: "ssh"
end
config.vm.define "node3" do |cfg3|
cfg3.vm.box = "centos/7"
cfg3.vm.host_name = "node3"
cfg3.vm.network "private_network", ip: "10.10.10.13"
cfg3.vm.network "forwarded_port", guest: 22, host: 20013, id: "ssh"
end
end- vagrant up -> 이후 virsh list --all, vagrant ssh server/node 등으로 접속하여 상태 확인
vagrant up [root@localhost project2]# vagrant status
Current machine states:
server running (libvirt)
node1 running (libvirt)
node2 running (libvirt)
node3 running (libvirt)
This environment represents multiple VMs. The VMs are all listed
above with their current state. For more information about a specific
VM, run `vagrant status NAME`.
[root@localhost project2]# virsh list
Id Name State
----------------------------------------------------
13 project2_server running
14 project2_node3 running
15 project2_node2 running
16 project2_node1 running[root@localhost project2]# vagrant ssh server
[vagrant@server ~]$ exit
logout
Connection to 192.168.121.54 closed.
[root@localhost project2]# vagrant ssh node1
[vagrant@node1 ~]$ exit
logout
Connection to 192.168.121.62 closed.
[root@localhost project2]# vagrant ssh node2
[vagrant@node2 ~]$ exit
logout
Connection to 192.168.121.169 closed.
[root@localhost project2]# vagrant ssh node3
[vagrant@node3 ~]$ exit
logout
Connection to 192.168.121.91 closed.- Vagrant 중 server 항목에 ansible 설치를 추가하여 provision 한다.
Vagrant.configure("2") do |config|
  config.vm.define "server" do |cfg0|
    cfg0.vm.box = "centos/7"
    cfg0.vm.host_name = "server"
    cfg0.vm.network "private_network", ip: "10.10.10.10"
    cfg0.vm.network "forwarded_port", guest: 22, host: 20010, id: "ssh"
    cfg0.vm.provision "shell", inline: "yum -y install epel-release && yum -y install ansible"
end[root@localhost project2]# vagrant provision - ansible 설치 확인
[root@localhost project2]# vagrant ssh server
Last login: Thu Sep 22 00:50:20 2022 from 192.168.121.1


[vagrant@server ~]$ ansible --version
ansible 2.9.27
  config file = /etc/ansible/ansible.cfg
  configured module search path = [u'/home/vagrant/.ansible/plugins/modules', u'/usr/share/ansible/plugins/modules']
  ansible python module location = /usr/lib/python2.7/site-packages/ansible
  executable location = /usr/bin/ansible
  python version = 2.7.5 (default, Apr  2 2020, 13:16:51) [GCC 4.8.5 20150623 (Red Hat 4.8.5-39)]
[vagrant@server ~]$ - 로컬(211.183.3.99 호스트)에서 새로운 키페어를 만든다.
private key는 server로 전달
public key는 node들에게 전달
[root@localhost project2]# ssh-keygen -q -f ~/.ssh/project2 -N ""[root@localhost project2]# vi ssh_config_project2 Host 10.10.10.*
User vagrant
IdentityFile /home/vagrant/.ssh/mykey.pem[root@localhost project2]# vi VagrantfileVagrant.configure("2") do |config|
config.vm.define "server" do |cfg0|
cfg0.vm.box = "centos/7"
cfg0.vm.host_name = "server"
cfg0.vm.network "private_network", ip: "10.10.10.10"
cfg0.vm.network "forwarded_port", guest: 22, host: 20010, id: "ssh"
# cfg0.vm.provision "shell", inline: "yum -y install epel-release && yum -y install ansible"
cfg0.vm.provision "file", source: "/root/.ssh/project2", destination: "/home/vagrant/.ssh/mykey.pem"
cfg0.vm.provision "shell", inline: "chmod 600 /home/vagrant/.ssh/mykey.pem"
cfg0.vm.provision "file", source: "ssh_config_project2", destination: "/home/vagrant/ssh_config_mykey"
cfg0.vm.provision "shell", inline: "cat /home/vagrant/ssh_config_mykey >> /etc/ssh/ssh_config"
cfg0.vm.provision "shell", inline: "echo '10.10.10.11' >> /etc/ansible/hosts"
cfg0.vm.provision "shell", inline: "echo '10.10.10.12' >> /etc/ansible/hosts"
cfg0.vm.provision "shell", inline: "echo '10.10.10.13' >> /etc/ansible/hosts"
cfg0.vm.provision "shell", inline: "ssh-keyscan 10.10.10.11 >> /home/vagrant/.ssh/known_hosts"
cfg0.vm.provision "shell", inline: "ssh-keyscan 10.10.10.12 >> /home/vagrant/.ssh/known_hosts"
cfg0.vm.provision "shell", inline: "ssh-keyscan 10.10.10.13 >> /home/vagrant/.ssh/known_hosts"
cfg0.vm.provision "shell", inline: "chown vagrant.vagrant /home/vagrant/.ssh/known_hosts"
end
config.vm.define "node1" do |cfg1|
cfg1.vm.box = "centos/7"
cfg1.vm.host_name = "node1"
cfg1.vm.network "private_network", ip: "10.10.10.11"
cfg1.vm.network "forwarded_port", guest: 22, host: 20011, id: "ssh"
cfg1.vm.provision "file", source: "/root/.ssh/project2.pub", destination: "/home/vagrant/.ssh/mykey.pem.pub"
cfg1.vm.provision "shell", inline: "cat /home/vagrant/.ssh/mykey.pem.pub >> /home/vagrant/.ssh/authorized_keys"
end
config.vm.define "node2" do |cfg2|
cfg2.vm.box = "centos/7"
cfg2.vm.host_name = "node2"
cfg2.vm.network "private_network", ip: "10.10.10.12"
cfg2.vm.network "forwarded_port", guest: 22, host: 20012, id: "ssh"
cfg2.vm.provision "file", source: "/root/.ssh/project2.pub", destination: "/home/vagrant/.ssh/mykey.pem.pub"
cfg2.vm.provision "shell", inline: "cat /home/vagrant/.ssh/mykey.pem.pub >> /home/vagrant/.ssh/authorized_keys"
end
config.vm.define "node3" do |cfg3|
cfg3.vm.box = "centos/7"
cfg3.vm.host_name = "node3"
cfg3.vm.network "private_network", ip: "10.10.10.13"
cfg3.vm.network "forwarded_port", guest: 22, host: 20013, id: "ssh"
cfg3.vm.provision "file", source: "/root/.ssh/project2.pub", destination: "/home/vagrant/.ssh/mykey.pem.pub"
cfg3.vm.provision "shell", inline: "cat /home/vagrant/.ssh/mykey.pem.pub >> /home/vagrant/.ssh/authorized_keys"
end
end[root@localhost project2]# vagrant provision- ssh 확인
[root@localhost project2]# vagrant ssh ansible-server
Last login: Wed Sep 21 08:11:07 2022 from 192.168.121.1
[vagrant@ansible-server ~]$
[vagrant@ansible-server ~]$
[vagrant@ansible-server ~]$ ssh 10.10.10.11
The authenticity of host '10.10.10.11 (10.10.10.11)' can't be established.
ECDSA key fingerprint is SHA256:4ka8Poz8oIay0D6euBwJReph9L7SP3ysFfO1xU9VY9g.
ECDSA key fingerprint is MD5:cd:e9:b6:b3:a2:72:7e:02:e4:ac:c2:c1:b7:7a:17:0a.
Are you sure you want to continue connecting (yes/no)? yes
Warning: Permanently added '10.10.10.11' (ECDSA) to the list of known hosts.
[vagrant@ansible-node01 ~]$ - vagrant ssh 서버로 진입하여 /etc/ansible/hosts 파일에 node들의 ip를 등록하고 ansible all -m ping이 성공해야 한다.
[vagrant@server ~]$ ansible all -m ping
10.10.10.11 | SUCCESS => {
    "ansible_facts": {
        "discovered_interpreter_python": "/usr/bin/python"
    },
    "changed": false,
    "ping": "pong"
}
10.10.10.12 | SUCCESS => {
    "ansible_facts": {
        "discovered_interpreter_python": "/usr/bin/python"
    },
    "changed": false,
    "ping": "pong"
}
10.10.10.13 | SUCCESS => {
    "ansible_facts": {
        "discovered_interpreter_python": "/usr/bin/python"
    },
    "changed": false,
    "ping": "pong"
}