
- terraform에서의 변수 타입
- string
variable "test" {
	type = string
    default = "value1"
} - list
variable "test" {
	type = list(string)
    default = ["value1", "Value2" "value3"]
} - map
default = {
	name = "name1",
    id = "q1w2e3"
}
실습
- flavor 생성
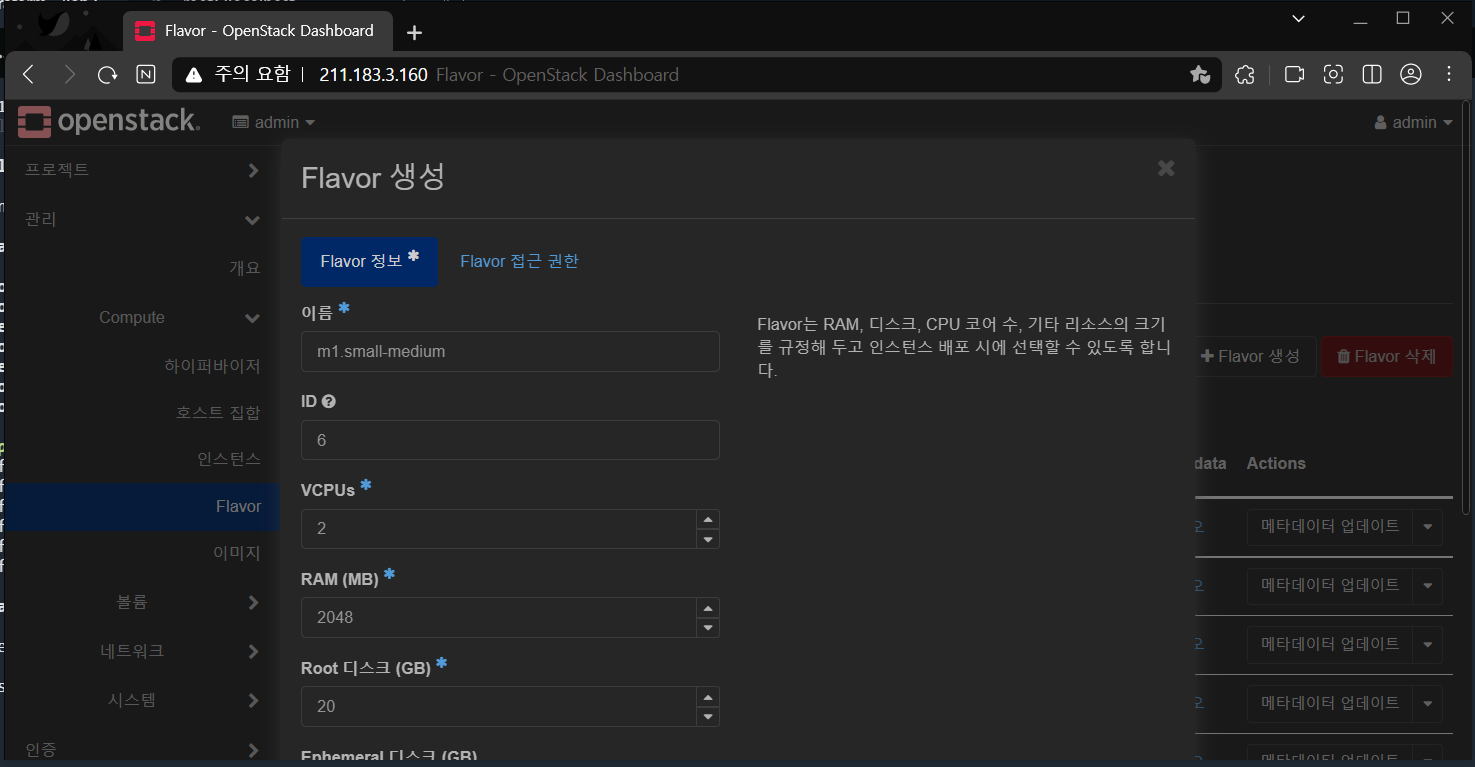
- 변수에 flavor 추가
[root@terraform lab3]# vi vars.tf variable "flavor" {
default = {
id = "6"
name = "m1.small-medium"
}
}- main.tf에서 flavor 변경
[root@terraform lab3]# vi main.tf resource "openstack_compute_instance_v2" "instance" {
name = "instance-${count.index}"
image_name = var.instance["image_name"]
flavor_name = "m1.small-medium"
key_pair = "terraformkey"
security_groups = ["webssh", "icmp"]
count = var.instance["count"]
network {
name = var.inside["name"] # private network
}
}flavor_name = "m1.small-medium"
- 인스턴스 3개 생성
[root@terraform lab3]# vi vars.tf variable "instance" {
default = {
image_name = "CentOS7"
image_id = "5112e14c-3355-459f-8bad-e2881dc838f5"
count = 3
}
}count = 3
- terraform apply
[root@terraform lab3]# terraform apply -auto-approve
Apply complete! Resources: 6 added, 0 changed, 0 destroyed.
Outputs:
private_ip = [
"192.168.101.229",
"192.168.101.208",
"192.168.101.216",
]
public_ip = [
"211.183.3.236",
"211.183.3.219",
"211.183.3.232",
]실습 - Terraform with Ansible
main.tf 파일에 아래의 내용을 만족하는 resource를 작성/프로비전 하세요.
- 편의를 위해 현재 동작 중인 인스턴스는 destroy
- openstack compute 리소스에 구분자로 "control"을 생성한다.
- flavor -> m1.small-medium
- network -> private1
- name -> control
- 파일(terraformkey.pem) 파일을 control의 ~/.ssh/id_rsa로 붙여넣기 하세요
- ansible도 설치하세요.
[root@terraform lab4]# tree
.
├── ansibleinstall.sh
├── floatingip.tf
├── main.tf
├── output.tf
├── provider.tf
├── terraformkey.pem
├── terraform.tfstate
├── terraform.tfstate.backup
└── vars.tf
0 directories, 9 files- ansibleinstall.sh
[root@terraform lab4]# cat ansibleinstall.sh
#!/bin/bash
# install ansible on centos
sudo yum install epel-release -y
sudo yum install ansible -y- floatingip.tf
resource "openstack_networking_floatingip_v2" "fip1" {
pool = var.outside["name"]
count = var.instance["count"]
}
resource "openstack_compute_floatingip_associate_v2" "fip1" {
count = var.instance["count"]
floating_ip = "${openstack_networking_floatingip_v2.fip1[count.index].address}"
instance_id = "${openstack_compute_instance_v2.instance[count.index].id}"
}
resource "openstack_networking_floatingip_v2" "fip2" {
pool = var.outside["name"]
}
resource "openstack_compute_floatingip_associate_v2" "fip2" {
floating_ip = "${openstack_networking_floatingip_v2.fip2.address}"
instance_id = "${openstack_compute_instance_v2.control.id}"
fixed_ip = "${openstack_compute_instance_v2.control.network.0.fixed_ip_v4}"
}- main.tf
resource "openstack_compute_instance_v2" "instance" {
name = "instance-${count.index +1}"
image_name = var.instance["image_name"]
flavor_name = var.flavor["name"]
key_pair = var.keypair["name"]
security_groups = ["webssh", "icmp"]
count = var.instance["count"]
network {
name = var.inside["name"]
}
}
resource "openstack_compute_instance_v2" "control" {
name = "control"
image_name = var.instance["image_name"]
flavor_name = var.flavor["name"]
key_pair = var.keypair["name"]
security_groups = ["webssh", "icmp"]
network {
name = var.inside["name"]
}
user_data = file("ansibleinstall.sh")
provisioner "file" {
source = "terraformkey.pem"
destination = "/home/centos/.ssh/id_rsa"
connection {
type = "ssh"
user = "centos"
private_key = file("/root/lab4/terraformkey.pem")
host = "${openstack_networking_floatingip_v2.fip2.address}"
}
}
}- output.tf
output "private_ip" {
value = openstack_compute_instance_v2.instance.*.network.0.fixed_ip_v4
}
output "public_ip" {
value = openstack_networking_floatingip_v2.fip1.*.address
}- vars.tf
variable "instance" {
default = {
image_name = "CentOS7"
image_id = "5112e14c-3355-459f-8bad-e2881dc838f5"
count = 2
}
}
variable "inside" {
default = {
name = "private1"
id = "24301178-33c1-4c7b-922e-9fd13ea4ec12"
}
}
variable "outside" {
default = {
name = "extnet"
id = "98facebd-53fc-4a1c-80be-013026471da4"
}
}
variable "flavor" {
	default = {
		id = "6"
		name = "m1.small-medium"
	}
}
variable "keypair" {
default = {
name = "terraformkey"
}
}- terraform apply
[root@terraform lab4]# terraform apply -auto-approve

Apply complete! Resources: 9 added, 0 changed, 0 destroyed.

Outputs:

private_ip = [
  "192.168.101.204",
  "192.168.101.213",
]
public_ip = [
  "211.183.3.233",
  "211.183.3.207",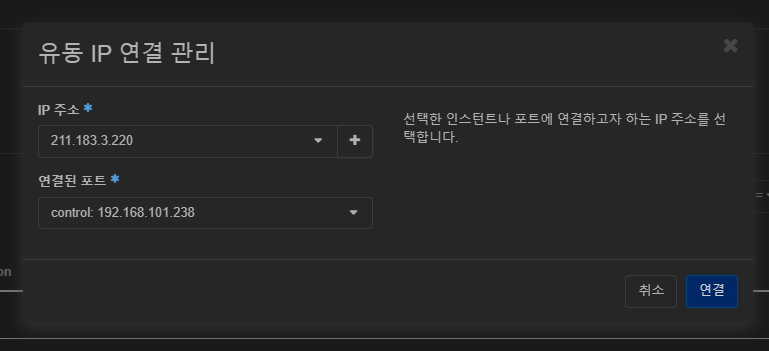
]- control 노드 floating ip 직접 연결
- control 노드 putty 통해 접속
[centos@control ~]$
[centos@control ~]$ cd ~/.ssh/
[centos@control .ssh]$ ll
total 8
-rw-------. 1 centos centos  399 Oct 26 04:39 authorized_keys
-rw-r--r--. 1 centos centos 1679 Oct 26 04:40 id_rsa- 개인키 권한 변경 후 instance 노드로 ssh 접속
[centos@control .ssh]$ chmod 600 id_rsa
[centos@control .ssh]$ ssh -l centos 192.168.101.204
[centos@instance-1 ~]$ - /etc/ansible hosts에 주소 범위 등록
# ndde 1
192.168.101.204

# node 2
192.168.101.213 - ping 모듈 실행
[centos@control ~]$ ansible all -m ping
192.168.101.204 | SUCCESS => {
    "ansible_facts": {
        "discovered_interpreter_python": "/usr/bin/python"
    },
    "changed": false,
    "ping": "pong"
}
192.168.101.213 | SUCCESS => {
    "ansible_facts": {
        "discovered_interpreter_python": "/usr/bin/python"
    },
    "changed": false,
    "ping": "pong"
}
실습 - for문
- web, was, db를 설치하고 프로비전하세요. floating ip 등은 필요 없음
- 기존 main.tf에서 'was'를 지우고 terraform plan을 해보세요.
[root@terraform lab4]# cat provider.tf
terraform {
required_version = ">= 1.0.0"
  required_providers {
    openstack = {
      source = "terraform-provider-openstack/openstack"
      version = "~> 1.42.0"
    }
  }
}

# api login
provider "openstack" {
  user_name     = "admin"
  password      = "test123"
  tenant_name   = "admin"
  auth_url      = "http://211.183.3.160:5000"
  region        = "RegionOne"
}[root@terraform lab4]# cat var.tf
variable "instance_name" {
type = list(string)
default = ["web", "was", "db"]
}[root@terraform lab4]# cat main.tf
resource "openstack_compute_instance_v2" "eachfor_test" {
for_each = toset(var.instance_name)
name = each.value
image_name = "CentOS7"
flavor_name = "m1.sm"
key_pair = "terraformkey"
security_groups = ["webssh", "icmp"]
network {
name = "private1"
}
}
output "server_name" {
value = [ for vm in openstack_compute_instance_v2.eachfor_test : vm.name ]
}- terraform init
[root@terraform lab4]# terraform init

Initializing the backend...

Initializing provider plugins...
- Finding terraform-provider-openstack/openstack versions matching "~> 1.42.0"...
- Installing terraform-provider-openstack/openstack v1.42.0...
- Installed terraform-provider-openstack/openstack v1.42.0 (self-signed, key ID 4F80527A391BEFD2)

Partner and community providers are signed by their developers.
If you'd like to know more about provider signing, you can read about it here:
https://www.terraform.io/docs/cli/plugins/signing.html

Terraform has created a lock file .terraform.lock.hcl to record the provider
selections it made above. Include this file in your version control repository
so that Terraform can guarantee to make the same selections by default when
you run "terraform init" in the future.

Terraform has been successfully initialized!

You may now begin working with Terraform. Try running "terraform plan" to see
any changes that are required for your infrastructure. All Terraform commands
should now work.

If you ever set or change modules or backend configuration for Terraform,
rerun this command to reinitialize your working directory. If you forget, other
commands will detect it and remind you to do so if necessary.- terraform apply
[root@terraform lab4]# terraform apply -auto-approve

Apply complete! Resources: 3 added, 0 changed, 0 destroyed.

Outputs:

server_name = [
  "db",
  "was",
  "web",
]- var.tf에서 인스턴스 하나 제거
[root@terraform lab4]# vi var.tf variable "instance_name" {
type = list(string)
default = ["web", "db"]
}- terraform apply
[root@terraform lab4]# terraform apply -auto-approve

Plan: 0 to add, 0 to change, 1 to destroy.

Changes to Outputs:
  ~ server_name = [
        "db",
      - "was",
        "web",
    ]
openstack_compute_instance_v2.eachfor_test["was"]: Destroying... [id=52e08ec2-cfd2-42f0-9f0b-f732d0d629eb]
openstack_compute_instance_v2.eachfor_test["was"]: Still destroying... [id=52e08ec2-cfd2-42f0-9f0b-f732d0d629eb, 10s elapsed]
openstack_compute_instance_v2.eachfor_test["was"]: Destruction complete after 13s

Apply complete! Resources: 0 added, 0 changed, 1 destroyed.

Outputs:

server_name = [
  "db",
  "web",
] 
take a look