1. 모바텀으로 oracle 유져로 접속해서 12c 설치 압축파일을 올립니다.
2. root에서 oracle 설치를 위한 사전 준비 패키지를 자동으로 설치하는 명령 수행
[oracle@ora19c ~] $ su -

[root@ora19c ~]# yum -y  install oracle-database-preinstall-19c
Loaded plugins: langpacks, ulninfo
Package oracle-database-preinstall-19c-1.0-3.el7.x86_64 already installed and latest version
Nothing to do
만약 지우고 다시 하고 싶다면 다음과 같이 하면 됨

3. 오라클 설치를 위한 필수 그룹들이 제대로 생성되었는지 확인합니다.
아래의 명령어를 실행해서 아래 2개의 그룹이 있는지 확인합니다.
oracle:x:1000:oracle
oinstall:x:54321:
[root@ora19c ~]# cat /etc/group
root:x:0:
bin:x:1:
daemon:x:2:
sys:x:3:
adm:x:4:
tty:x:5:
disk:x:6:
lp:x:7:
mem:x:8:
kmem:x:9:
wheel:x:10:
cdrom:x:11:
mail:x:12:postfix
man:x:15:
dialout:x:18:
floppy:x:19:
games:x:20:
tape:x:33:
video:x:39:
ftp:x:50:
lock:x:54:
audio:x:63:
nobody:x:99:
users:x:100:
utmp:x:22:
utempter:x:35:
input:x:999:
systemd-journal:x:190:
systemd-network:x:192:
dbus:x:81:
polkitd:x:998:
colord:x:997:
printadmin:x:996:
libstoragemgmt:x:995:
rpc:x:32:
saned:x:994:
dip:x:40:
cgred:x:993:
ssh_keys:x:992:
saslauth:x:76:
abrt:x:173:
setroubleshoot:x:991:
rtkit:x:172:
pulse-access:x:990:
pulse-rt:x:989:
pulse:x:171:
radvd:x:75:
unbound:x:988:
kvm:x:36:qemu
qemu:x:107:
gluster:x:987:
chrony:x:986:
tss:x:59:
libvirt:x:985:
usbmuxd:x:113:
geoclue:x:984:
mysql:x:27:
gdm:x:42:
rpcuser:x:29:
nfsnobody:x:65534:
gnome-initial-setup:x:983:
sshd:x:74:
slocate:x:21:
avahi:x:70:
postdrop:x:90:
postfix:x:89:
ntp:x:38:
stapusr:x:156:
stapsys:x:157:
stapdev:x:158:
tcpdump:x:72:
oracle:x:1000:oracle
oinstall:x:54321:
dba:x:54322:oracle
oper:x:54323:oracle
backupdba:x:54324:oracle
dgdba:x:54325:oracle
kmdba:x:54326:oracle
racdba:x:54330:oracle
[root@ora19c ~]#
4. oracle 유져가 오라클을 설치할 수 있는 oinstall 그룹에 속해있는지 확인합니다.
[root@ora19c ~]# id oracle
uid=1000(oracle) gid=54321(oinstall) groups=54321(oinstall),1000(oracle),54322(dba),54323(oper),54324(backupdba),54325(dgdba),54326(kmdba),54330(racdba)
[root@ora19c ~]#
만약 위와 같이 안되어 있다면 oracle 유져를 설치를 위한 그룹에 속하게 해줍니다.
[root@localhost ~]# usermod -g oinstall oracle
[root@localhost ~]#
[root@localhost ~]# id oracle
uid=1000(oracle) gid=54321(oinstall) groups=54321(oinstall),1000(oracle)
[root@localhost ~]#
[root@localhost ~]#
[root@localhost ~]# usermod -a -G dba,oper,backupdba,dgdba,kmdba,racdba oracle
[root@localhost ~]#
[root@localhost ~]# id oracle
uid=1000(oracle) gid=54321(oinstall) groups=54321(oinstall),1000(oracle),54322(dba),54323(oper),54324(backupdba),54325(dgdba),54326(kmdba),54330(racdba)
[root@localhost ~]#
5. 오라클 데이터베이스가 최적으로 동작하기 위한 커널 매개변수들을 활성화
[root@localhost ~]# sysctl -p
fs.file-max = 6815744
kernel.sem = 250 32000 100 128
kernel.shmmni = 4096
kernel.shmall = 1073741824
kernel.shmmax = 4398046511104
kernel.panic_on_oops = 1
net.core.rmem_default = 262144
net.core.rmem_max = 4194304
net.core.wmem_default = 262144
net.core.wmem_max = 1048576
net.ipv4.conf.all.rp_filter = 2
net.ipv4.conf.default.rp_filter = 2
fs.aio-max-nr = 1048576
net.ipv4.ip_local_port_range = 9000 65500
[root@localhost ~]#
6. 오라클 사용자의 시스템 리소스 제한(limits) 설정을 확인하는 명령
[root@localhost ~]#  grep -v ^# /etc/security/limits.d/oracle-database-preinstall-19c.conf

oracle   soft   nofile    1024  # 기본 최대 열린 파일수

oracle   hard   nofile    65536

oracle   soft   nproc    16384  # 기본 최대 프로세서 수

oracle   hard   nproc    16384

oracle   soft   stack    10240

oracle   hard   stack    32768

oracle   hard   memlock    134217728

oracle   soft   memlock    134217728

oracle   soft   data    unlimited

oracle   hard   data    unlimited
[root@localhost ~]#
7. 오라클 데이터 베이스 설치를 위한 표준 디렉토리 구조를 생성하고 권한을 조정
[root@localhost ~]# mkdir -p /u01/app/oracle
[root@localhost ~]# mkdir -p /u01/app/oraInventory
[root@localhost ~]# mkdir -p /u01/app/oracle/product/12.2.0/dbhome_1
[root@localhost ~]# chown -R oracle:oinstall /u01
[root@localhost ~]# chmod -R 775 /u01
[root@localhost ~]#
8. oracle 유져로 접속해서 환경변수 설정 파일을 다음과 같이 생성합니다.
[root@localhost ~]# su - oracle
[oracle@ora19c ~]$ vi .bash_profile
export ORACLE_BASE=/u01/app/oracle
export ORACLE_HOME=/u01/app/oracle/product/12.2.0/dbhome_1
export ORA_INVENTORY=/u01/app/oraInventory
export ORACLE_SID=ORA12 vi .bash_profile
#export TNS_ADMIN=/u01/app/oracle/product/19.2.0/dbhome_1/network/admin
export PATH=$PATH:$HOME/bin:$ORACLE_HOME/bin
export LD_LIBRARY_PATH=$ORACLE_HOME/lib:/lib:/usr/lib
export CLASSPATH=$ORACLE_HOME/JRE:$ORACLE_HOME/jlib:$ORACLE_HOME/rdbms/jlib
[oracle@ora19c ~]$ source .bash_profile
[oracle@ora19c ~]$ env | grep ORA
ORACLE_SID=ORA12
ORACLE_BASE=/u01/app/oracle
ORA_INVENTORY=/u01/app/oraInventory
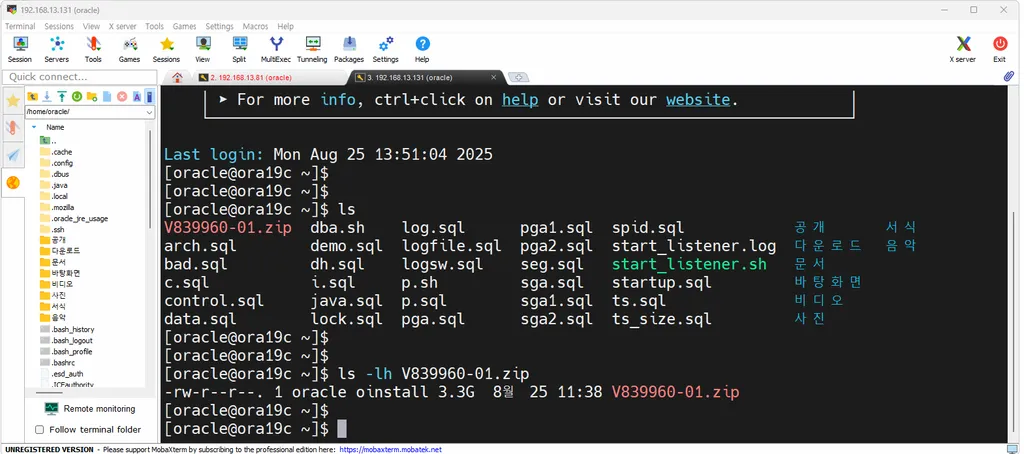
ORACLE_HOME=/u01/app/oracle/product/12.2.0/dbhome_19. 모바텀으로 12c 설치파일을 oracle 유져로 전송하세요
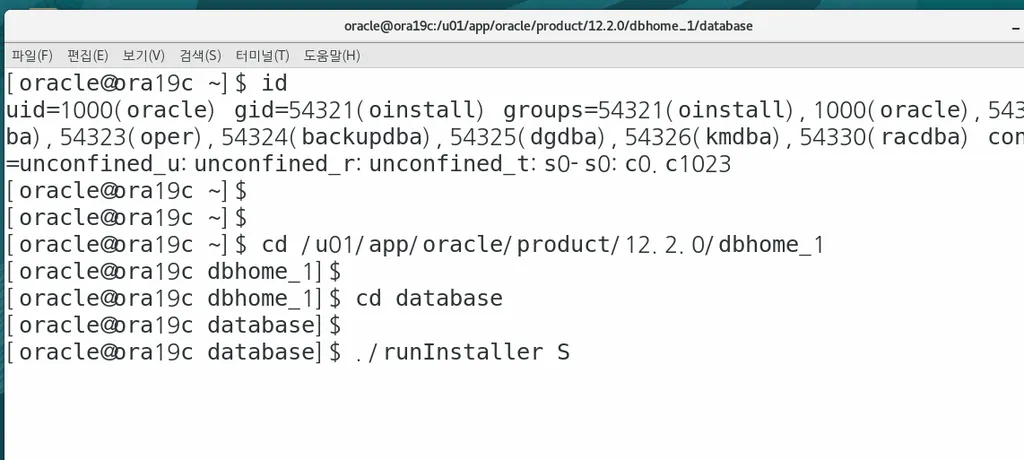
10. 다음과 같이 오라클 홈 디렉토리로 이동해서 /home/oracle 에 있는 오라클 설치 파일의 압축을 풉니다.
[oracle@ora19c ~]$ rm -rf database   -- 혹시 압축 잘못 풀었으면 이거 실행하면 됨

[oracle@ora19c ~]$
[oracle@ora19c ~]$ cd /u01/app/oracle/product/12.2.0/dbhome_1
[oracle@ora19c dbhome_1]$
[oracle@ora19c dbhome_1]$ pwd
/u01/app/oracle/product/12.2.0/dbhome_1
[oracle@ora19c dbhome_1]$
[oracle@ora19c dbhome_1]$ unzip -q /home/oracle/V839960-01.zip
11. 리눅스 서버에서 oracle 소프트웨어를 설치합니다.
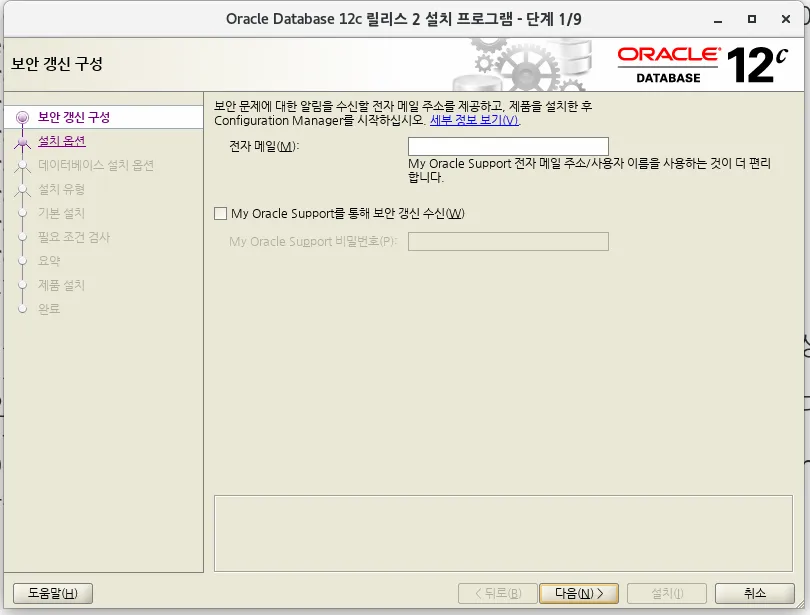
이메일 넣지 않음
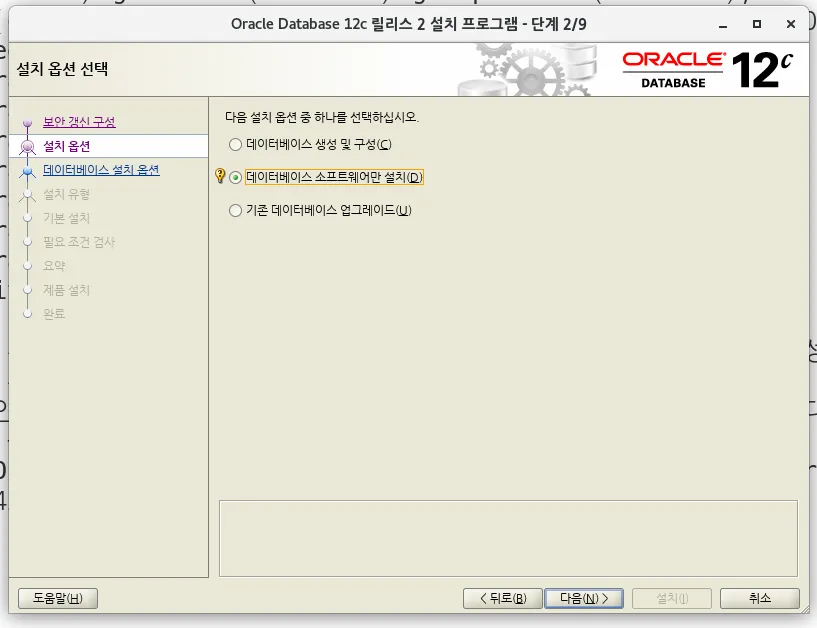
소프트웨어만 설치
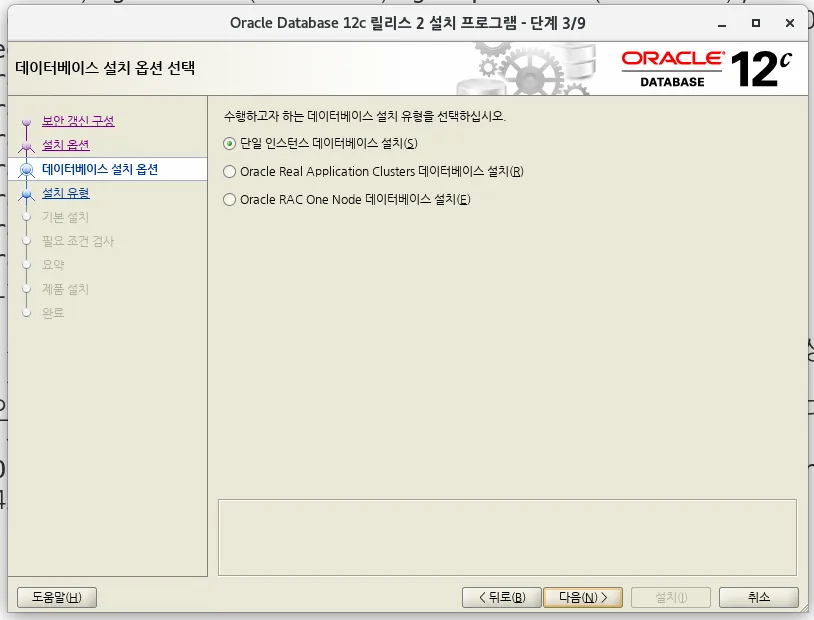
단일 인스턴스로 설치
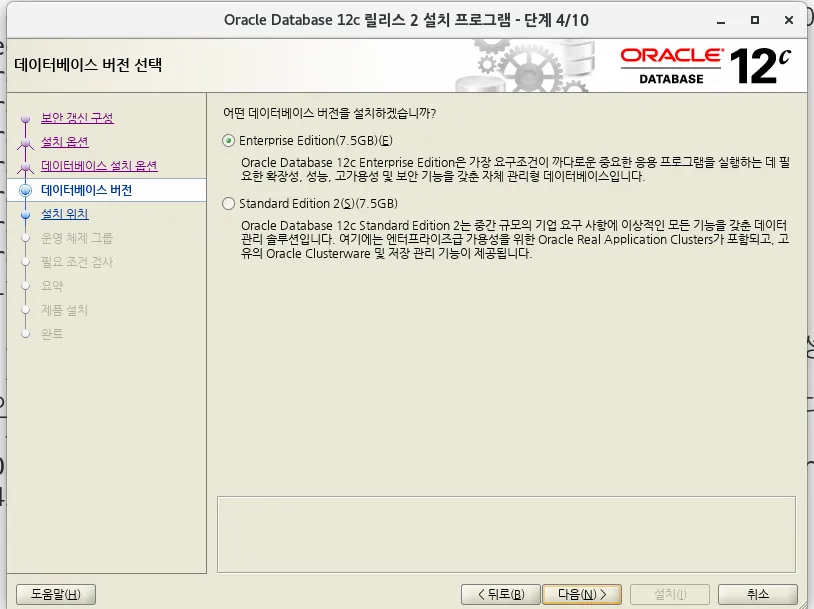
Enterprise Edition으로 설치
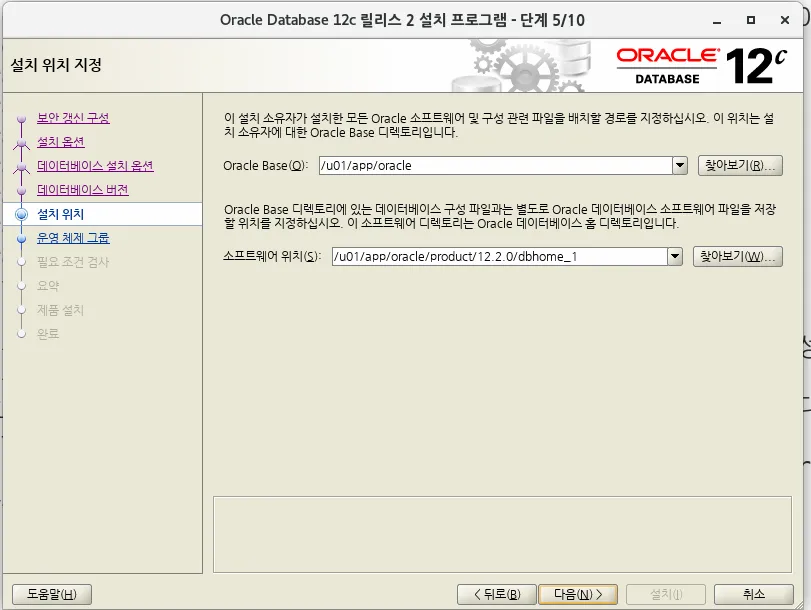
오라클 소프트웨어 설치 디렉토리를 지정
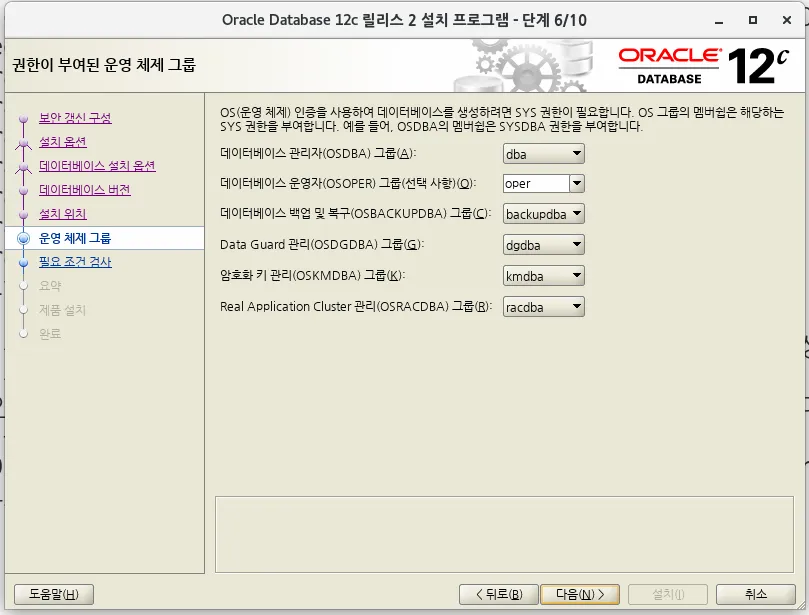
다음과 같이 셋팅되어 있으면 다음버튼 클릭
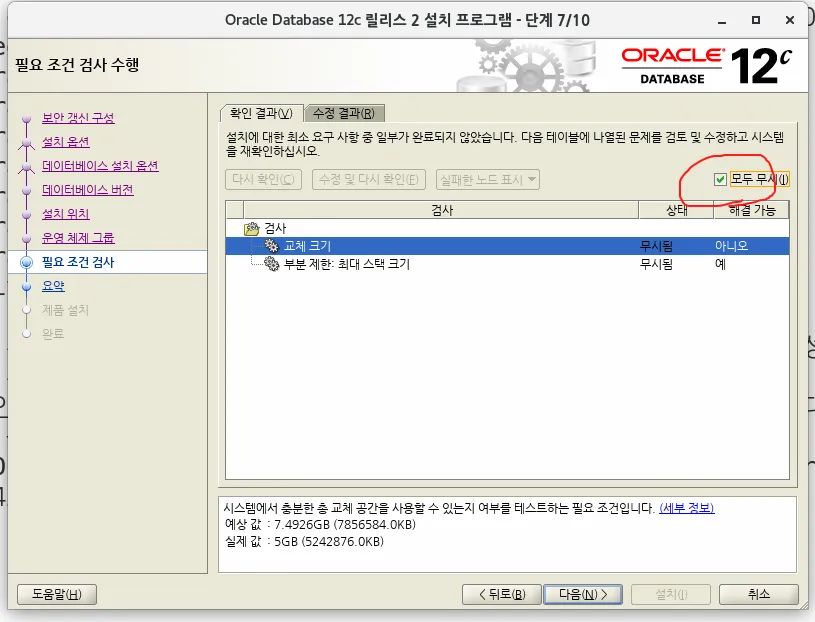
모두 무시 버튼 체크하기
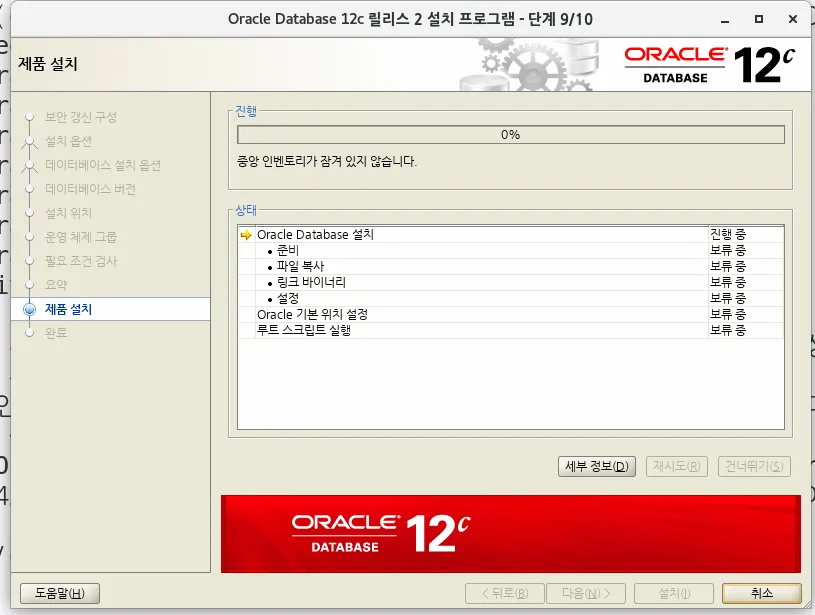
다음은 반드시 root 유져에서 putty 로 작업하고 확인누르세요
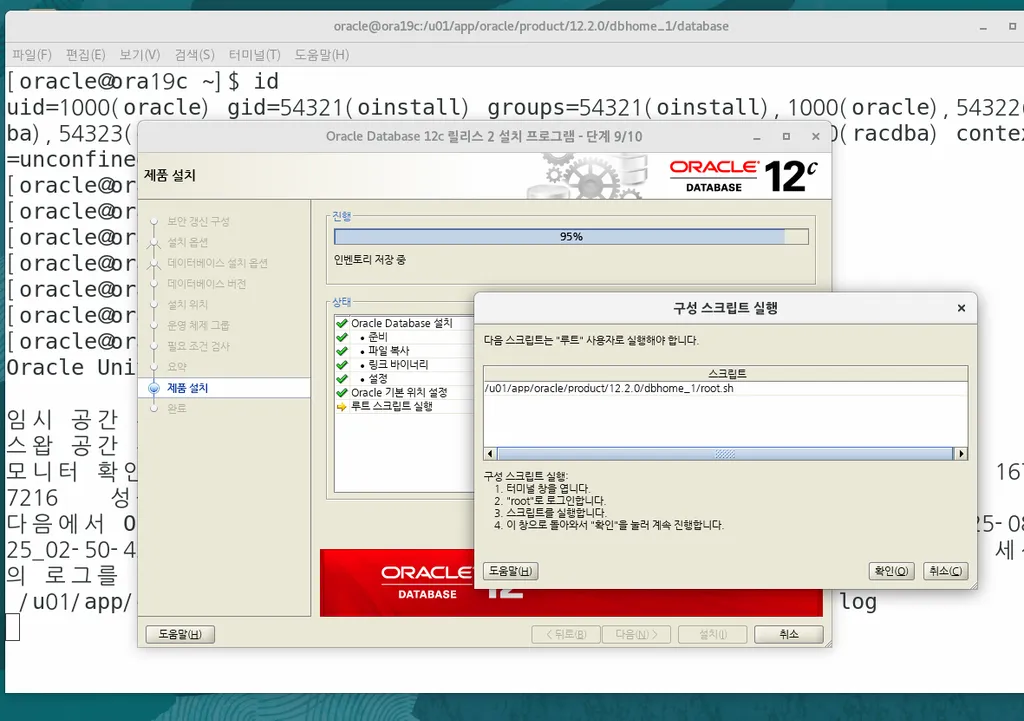
그냥 엔터 엔터를 칩니다.
[root@ora19c ~]# /u01/app/oracle/product/12.2.0/dbhome_1/root.sh
Performing root user operation.

The following environment variables are set as:
    ORACLE_OWNER= oracle
    ORACLE_HOME=  /u01/app/oracle/product/12.2.0/dbhome_1

Enter the full pathname of the local bin directory: [/usr/local/bin]:
The contents of "dbhome" have not changed. No need to overwrite.
The file "oraenv" already exists in /usr/local/bin.  Overwrite it? (y/n)
[n]:
The file "coraenv" already exists in /usr/local/bin.  Overwrite it? (y/n)
[n]:

Entries will be added to the /etc/oratab file as needed by
Database Configuration Assistant when a database is created
Finished running generic part of root script.
Now product-specific root actions will be performed.
Do you want to setup Oracle Trace File Analyzer (TFA) now ? yes|[no] :

Oracle Trace File Analyzer (TFA - User Mode) is available at :
    /u01/app/oracle/product/12.2.0/dbhome_1/suptools/tfa/release/tfa_home/bin/tfactl

OR

Oracle Trace File Analyzer (TFA - Daemon Mode) can be installed by running this script :
    /u01/app/oracle/product/12.2.0/dbhome_1/suptools/tfa/release/tfa_home/install/roottfa.sh

[root@ora19c ~]#
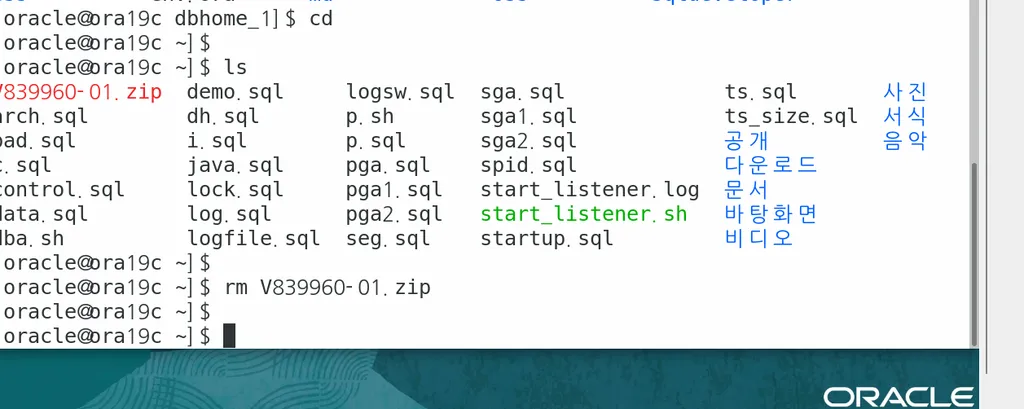
설치파일은 지웁니다.