Stepper Widget 사용하기.
Stepper 위젯은 순차적으로 사용자에게 무언가를 요구하거나 보여줄 때 사용하기 적합한 위젯이다.
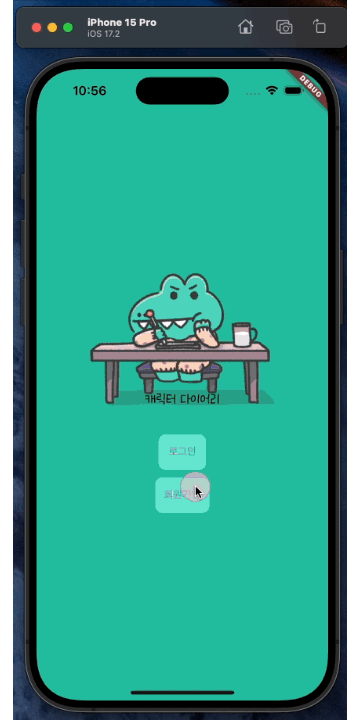
요새 회원가입 페이지의 UI 를 보면,
한 페이지에서 단계별로 사용자의 입력을 요구한 뒤 유효한 값이면 다음 단계로 넘어가는..
이러한 형태의 UI가 많은 것 같아서 Stepper Widget 을 사용하기로 결정했다.
우선 Stepper Widget 의 자세한 properties 는 API 를 참고하길 바라고,
내가 사용한 프로퍼티는
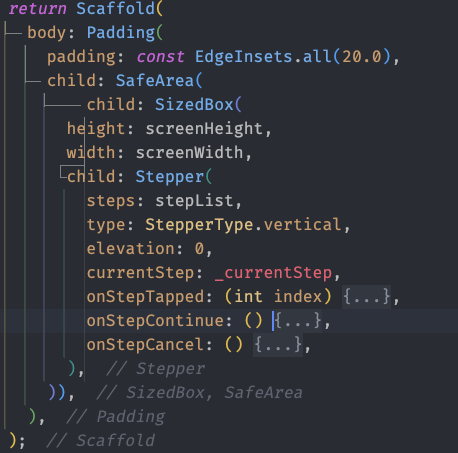
이렇게 총 7가지를 설정해 주었다.
차근차근 하나씩 설명해보자면,
steps
우리가 화면에 보여줄 Step 리스트이다.
"The steps of the stepper whose titles, subtitles, icons always get shown."
type
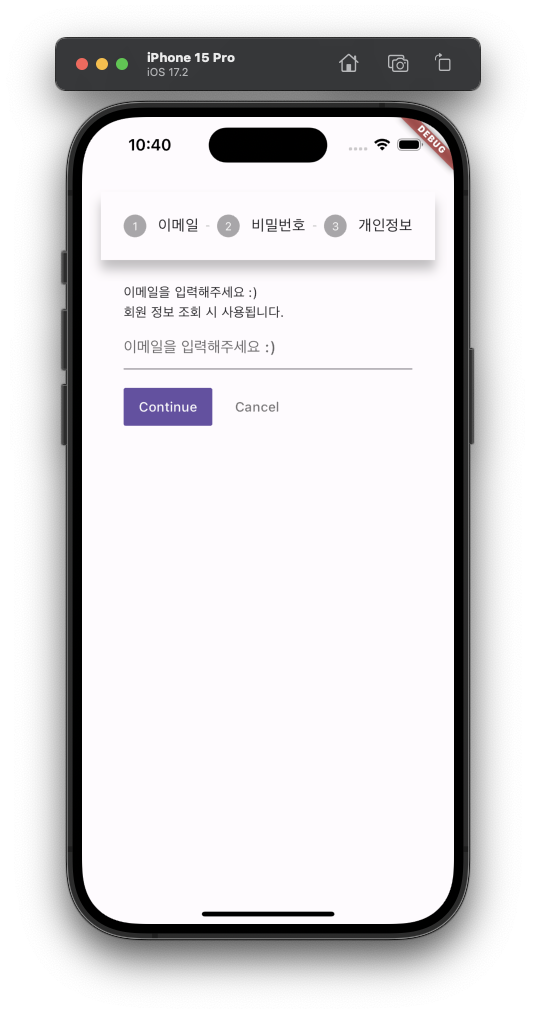
step 을 수직으로 보여줄 것인지, 수평으로 보여줄 것인지 설정한다.
"The type of stepper that determines the layout. In the case of StepperType.horizontal, the content of the current step is displayed underneath as opposed to the StepperType.vertical case where it is displayed in-between."
elevation
type 이 수평으로 설정되었을 때만 적용되며, 상단의 표시되는 스텝들의 높이를 설정한다.
"The elevation of this stepper's Material when type is StepperType.horizontal."
currentStep
현재 표시되는 스텝의 index 값이다.
"The index into steps of the current step whose content is displayed"
onStepTabbed
스텝들을 탭 했을 때, 동작할 로직을 구현한다.
"The callback called when a step is tapped, with its index passed as an argument."
onSteepContinue
다음 버튼을 탭 했을 때, 동작할 로직을 구현한다.
"The callback called when the 'continue' button is tapped."
onStepCancel
취소 버튼을 탭 했을 때, 동작할 로직을 구현한다.
"The callback called when the 'cancel' button is tapped."
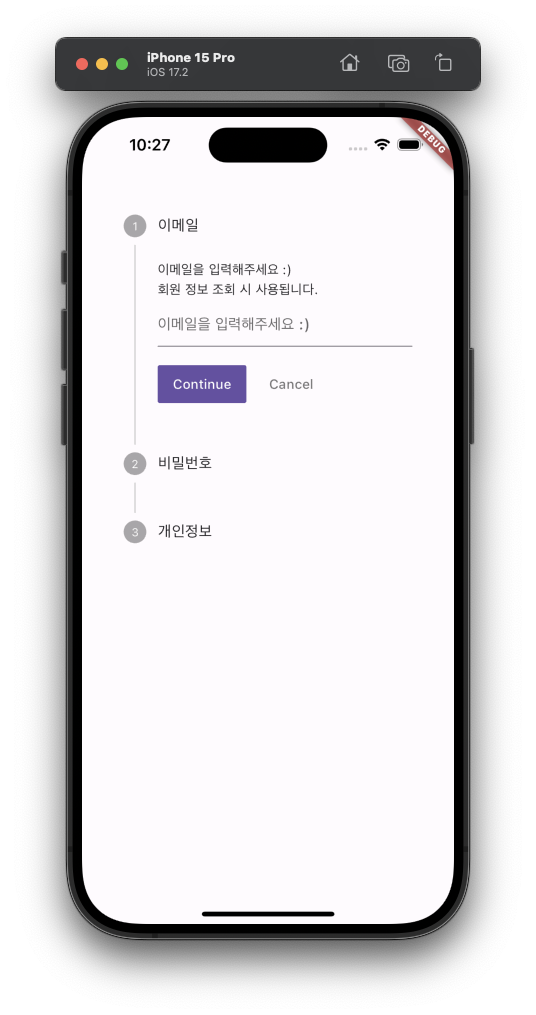
Step List 설정.
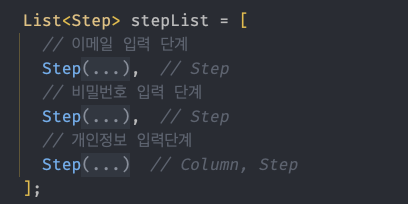
우선 나는 이메일, 비밀번호, 개인정보 입력 단계로 총 3단계로 구성하였다.
TextFormField 를 통해 유효성 검사하기.
사용자의 이메일 혹은 아이디는 중복이 되면 안되기 때문에, 입력 단계에서 유효한 값인지 검증한 뒤 단계를 넘어가야 한다.
그러기 위해서 사용자의 입력을 검증할 때 유용한 TextFormField 를 사용했다.
			Form(
                  key: emailFormKey,
                  child: TextFormField(
                    controller: controllers['email'],
                    decoration: const InputDecoration(
                      hintText: "이메일을 입력해주세요 :)",
                      errorBorder: UnderlineInputBorder(
                        borderSide: BorderSide(color: Colors.red),
                      ),
                      focusedErrorBorder: UnderlineInputBorder(
                        borderSide: BorderSide(color: Colors.red, width: 2.0),
                      ),
                    ),
                    keyboardType: TextInputType.emailAddress,
                    onChanged: (value) => userInputData['email'] = value,
                    validator: (value) {
                      if (value == null || value.isEmpty) {
                        return '이메일은 반드시 입력 해야 합니다!';
                      }
                      if (!EmailValidator.validate(value)) {
                        return '유효한 이메일을 입력해 주세요!';
                      }
                      if (!validation['email']!) {
                        return '이미 등록된 이메일 입니다!';
                      }
                      return null;
                    },
                  ),
                ),
우선 Continue 버튼이 탭 될 때, 유효성 검증을 하기 위해 부모 위젯으로 Form 위젯을 선언해준 뒤 GlobalKey<FormState> form 의 상태를 관리하는 key를 등록해준다.
실제 유효성 검사는 이 emailFormKey 를 통해 동작하게 된다.
TextFormField 내의 validator 를 선언하여, 우리가 원하는 동작 로직을 구현한다.
여기서 return 값은 errorText 로 들어간다.
    Future<bool> emailValidCheck() async {
      await emailDuplicateCheck();
      return emailFormKey.currentState!.validate();
    }
나는 스프링부트와 연동하였기 때문에 Future 값을 넘겨준다.
여기서 이메일이 중복되지 않으면, emailFormKey 의 현재 상태를 검증한 뒤 에러가 없으면 true 를 반환 하는 것이다.
onStepContinue: () {
              switch (_currentStep) {
                case 0:
                  emailValidCheck().then((value) {
                    if (value) {
                      setState(() {
                        log(userInputData.toString());
                        _currentStep += 1;
                      });
                    }
                  });

                  break;
                case 1:
                  if (passwordValidCheck()) {
                    if (passwordValidDoubleCheck()) {
                      userInputData['password'] = controllers['password']!.text;
                      setState(() {
                        _currentStep += 1;
                      });
                    }
                  }
                  break;
                case 2:
                  userIdValidCheck().then((value) {
                    if (value) {
                      userInputData['userId'] = controllers['userId']!.text;
                      if (nameValidCheck() &&
                          birthValidCheck() &&
                          genderValidCheck()) {
                        dbService.registerUser(User(
                            email: userInputData['email'],
                            birth: userInputData['birth'],
                            gender: userInputData['gender'],
                            userId: userInputData['userId'],
                            name: userInputData['name'],
                            password: userInputData['password']));
                        Navigator.pushAndRemoveUntil(
                            context,
                            MaterialPageRoute(
                                builder: (BuildContext context) => InitPage()),
                            (route) => false);
                      } else {}
                    }
                  });
              }
            },
이제 Stepper 위젯의 onStepContinue 를 보면, 현재 스텝 인덱스마다 필요한 검증들을 진행하고 다음 스텝으로 넘어가는 것이다.
이 때, 나는 Futer<bool> 타입을 반환하므로 then 을 통해서 값을 처리한다.
결과.
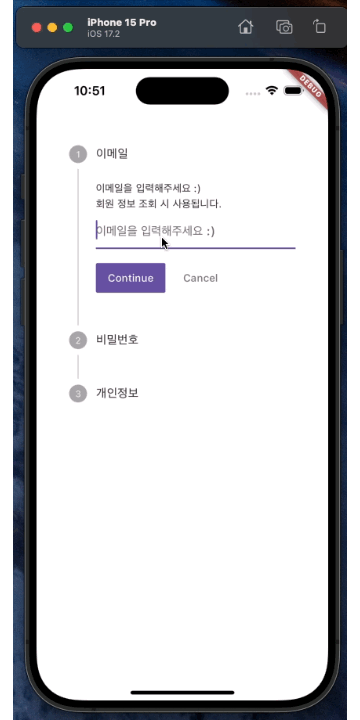
그럼 이렇게 단계별로 회원가입을 구현할 수 있다.
에러메세지.