💡 학습목표
   1. H2 메모리 DB 초기 설정 하기
   2. yml 파일에 설정 하기
   3. H2 실행 및 확인
yml 파일 설정
server:
  port: 80
  servlet:
    encoding:
      charset: utf-8
      force: true

spring:
  mvc:
    view:
      prefix: /WEB-INF/view/
      suffix: .jsp
  datasource:
    url: jdbc:h2:mem:testdb;MODE=MySQL
    driver-class-name: org.h2.Driver
    username: sa
    password:
초기 세팅 추가
server:
port: 80
servlet:
encoding:
charset: utf-8
force: true
spring:
mvc:
view:
prefix: /WEB-INF/view/
suffix: .jsp
datasource:
url: jdbc:h2:mem:testdb;MODE=MySQL
driver-class-name: org.h2.Driver
username: sa
password:
sql:
init:
schema-locations:
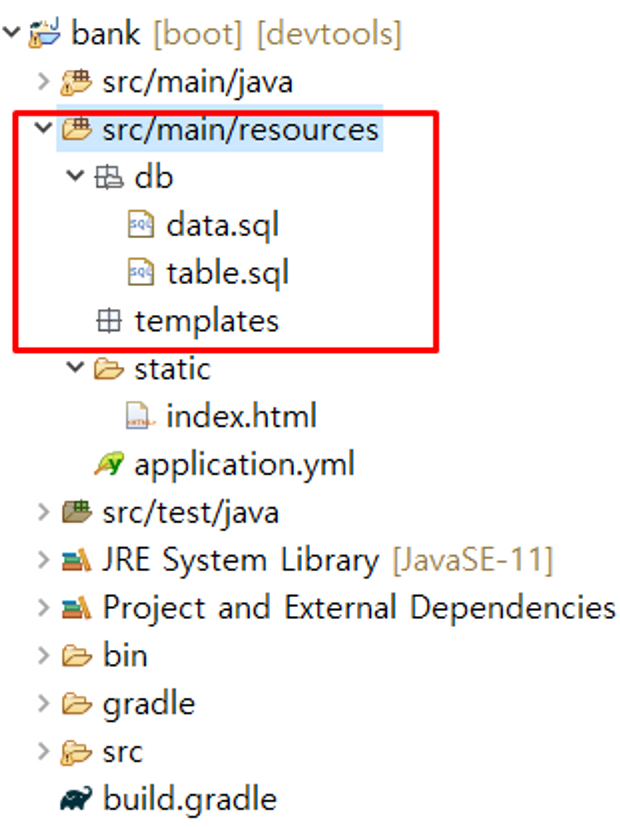
- classpath:db/table.sql
data-locations:
- classpath:db/data.sql테이블 설계하기
table.sql
-- 유저 테이블 설계하기
create table user_tb(
	id int auto_increment primary key,
    username varchar(50) not null unique,
    password varchar(30) not null,
	fullname varchar(50) not null,
    created_at timestamp not null default now()
);

-- 계좌 정보 테이블 설계하기
create table account_tb(
	id int auto_increment primary key,
    number varchar(30) not null unique,
    password varchar(20) not null,
    balance bigint not null comment '계좌잔액',
    user_id int,
    created_at timestamp not null default now()
);


-- 히스토리 정보 테이블
-- 입금 내역
-- 출금 내역
-- 사용자간에 이체 내역 저장
create table history_tb(
	id int auto_increment primary key comment '거래 내역 ID',
    amount bigint not null comment '거래 금액',
    w_account_id int comment '출금 계좌 ID',
    d_account_id int comment '입금 계좌 ID',
    w_balance bigint comment '출금 요청된 계좌의 잔액',
    d_balance bigint comment '입금 요청된 계좌의 잔액',
    created_at timestamp not null default now()
);
data.sql
-- 샘플 데이터 입력 --
-- 유저 데이터 등록
insert into user_tb(username, password, fullname, created_at)
values('길동', '1234', '고', now());
insert into user_tb(username, password, fullname, created_at)
values('둘리', '1234', '아기공룡', now());
insert into user_tb(username, password, fullname, created_at)
values('마이', '1234', '콜', now());
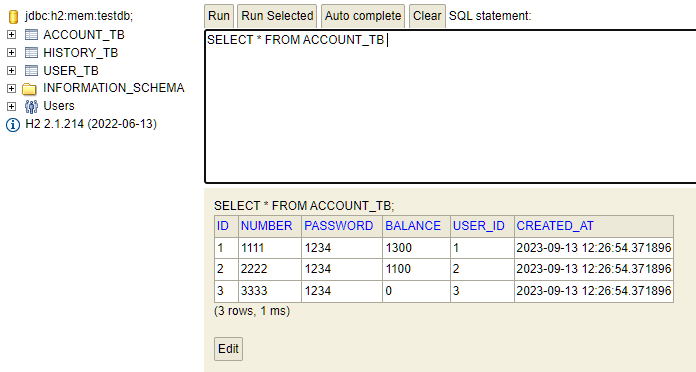
-- 기본 계좌 등록
insert into account_tb(number, password, balance, user_id, created_at)
values('1111', '1234', 1300, 1, now());
insert into account_tb(number, password, balance, user_id, created_at)
values('2222', '1234', 1100, 2, now());
insert into account_tb(number, password, balance, user_id, created_at)
values('3333', '1234', 0, 3, now());
-- 1번 계좌 - 1000원
-- 2번 계좌 - 1000원
-- 이체 내역을 기록(1번 계좌에서 2번계좌로 100원 이체한다)
insert into history_tb(amount, w_balance, d_balance, w_account_id, d_account_id, created_at)
values(100, 900, 1100, 1, 2, now());
-- 출금 내역 (1번 계좌에서 100원을 출금했다)
insert into history_tb(amount, w_balance, d_balance, w_account_id, d_account_id, created_at)
values(100, 800, null, 1, null, now());
-- 입금 내역 (1번 계좌에 500원을 입금했다)
insert into history_tb(amount, w_balance, d_balance, w_account_id, d_account_id, created_at)
values(500, null, 1300, null, 1, now());yml 파일 설정
server:
  port: 80
  servlet:
    encoding:
      charset: utf-8
      force: true

spring:
  mvc:
    view:
      prefix: /WEB-INF/view/
      suffix: .jsp
  datasource:
    url: jdbc:h2:mem:testdb;MODE=MySQL
    driver-class-name: org.h2.Driver
    username: sa
    password:
  sql:
    init:
      schema-locations:
      - classpath:db/table.sql
      data-locations:
      - classpath:db/data.sql

  h2:
    console:
      enabled: true
  output:
    ansi:
enabled: alwaysspring: Spring Boot 애플리케이션 설정을 시작하는 루트 노드입니다.spring.mvc.view.prefix및spring.mvc.view.suffix: Spring MVC 뷰 리졸버(View Resolver) 설정입니다. JSP 뷰 파일의 위치와 확장자를 지정합니다.spring.datasource: 데이터베이스 연결 정보 설정입니다. H2 데이터베이스를 사용하며, URL, 드라이버 클래스, 사용자 이름, 비밀번호 등을 지정합니다.spring.sql.init.schema-locations및spring.sql.init.data-locations: 초기 데이터베이스 스키마 및 데이터를 초기화하기 위한 SQL 스크립트 파일의 위치를 지정합니다. 여기서는 클래스패스(classpath) 상의db/table.sql및db/data.sql파일을 사용합니다.spring.h2.console.enabled: H2 데이터베이스 콘솔을 활성화할지 여부를 설정합니다. 여기서는 활성화되어 있으므로 웹 브라우저에서 H2 콘솔에 액세스할 수 있습니다.spring.output.ansi.enabled: ANSI 색상 코드를 사용하여 로깅 출력을 강조 표시할지 여부를 설정합니다. 여기서는 항상 사용되므로 로그 메시지가 강조 표시됩니다.
mysql 연결 방법
spring:
  datasource:
    driver-class-name: com.mysql.cj.jdbc.Driver
    url: jdbc:mysql://localhost:3306/green_blog?serverTimezone=Asia/seoul
    username: root
    password: asd1234
서버 실행 후
http://localhost/h2-console