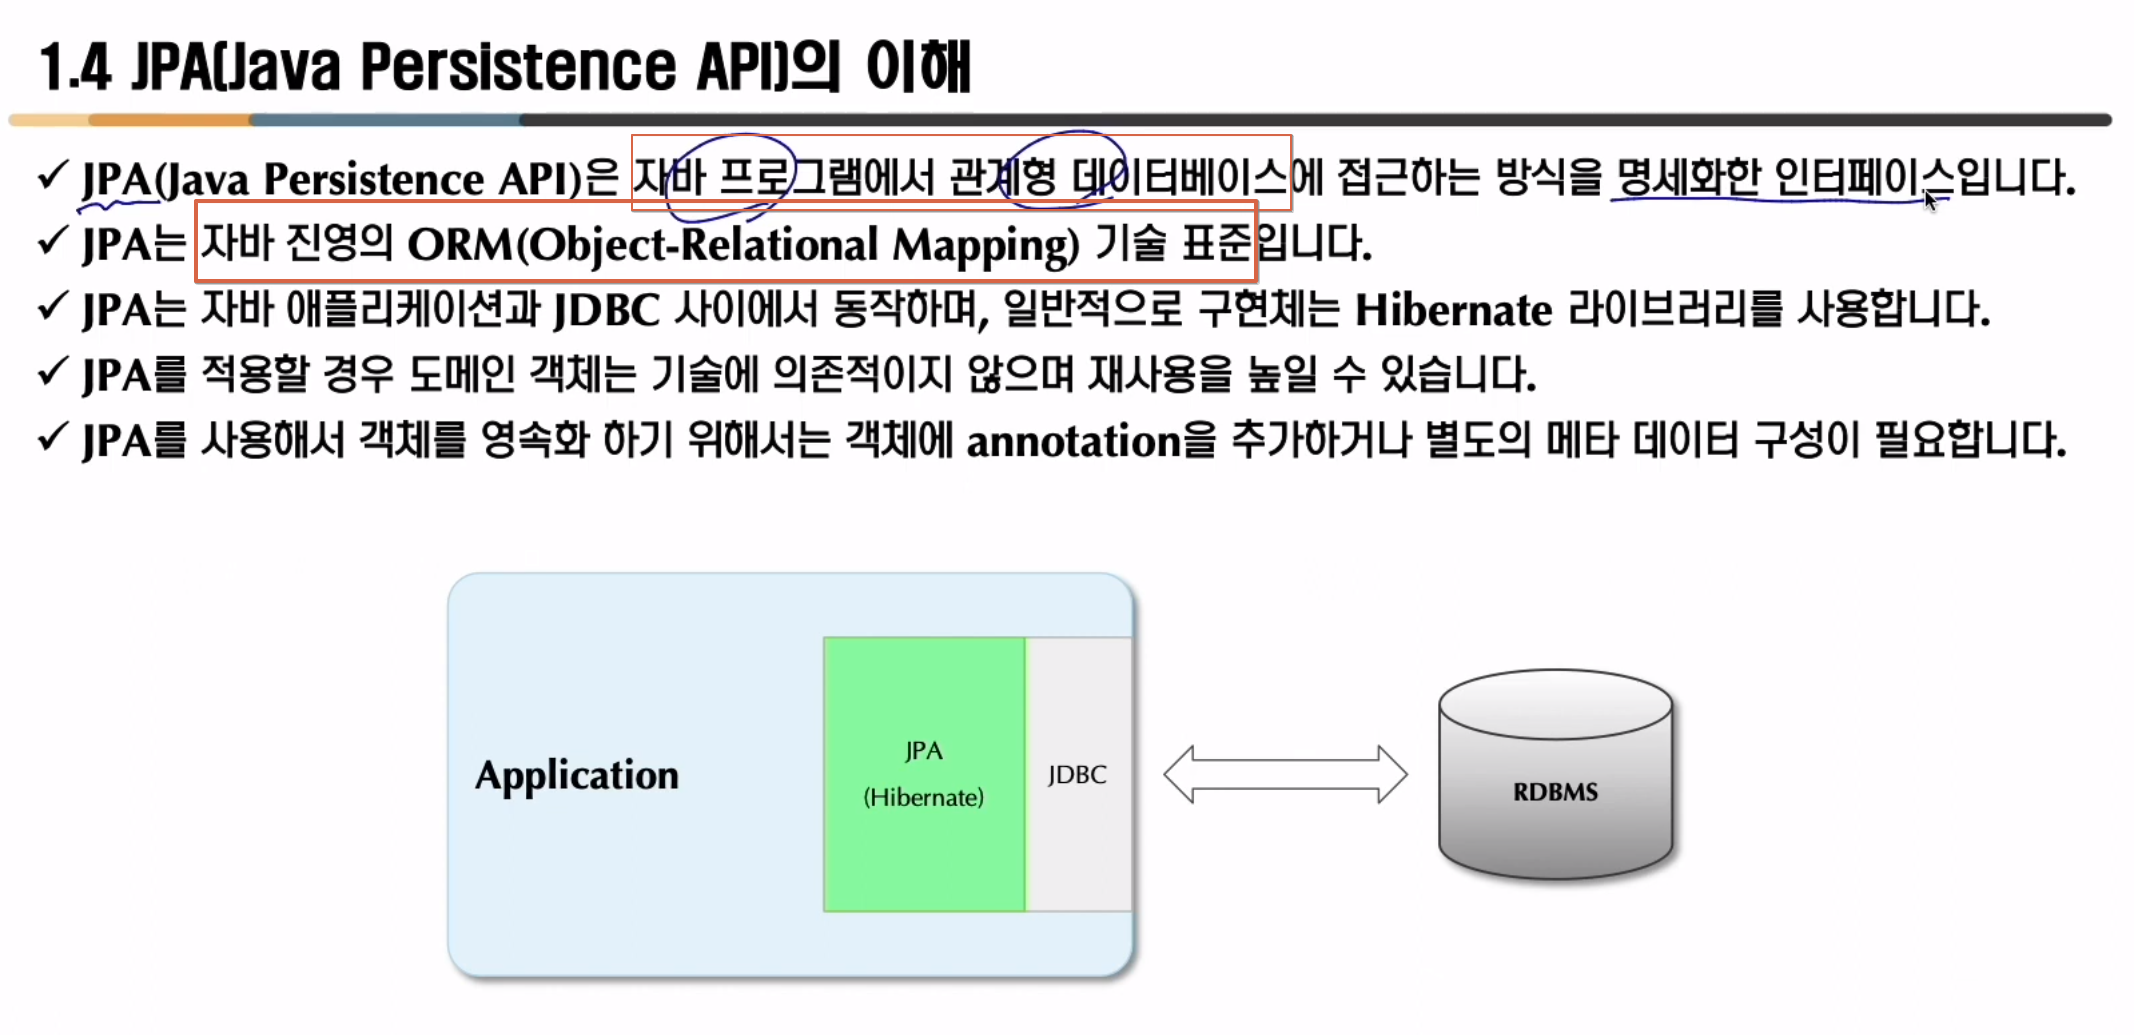
출처 | 나무소리 https://www.youtube.com/watch?v=dxnTN-fKbGA&list=PLOSNUO27qFbvzGd3yWbHISxHctPRKkctO&index=3
CustomerJpaExam
package io.namoosori.jpa;

import jakarta.persistence.EntityManager;
import jakarta.persistence.EntityManagerFactory;
import jakarta.persistence.Persistence;

public class CustomerJpaExam {

    public static void main(String[] args) {
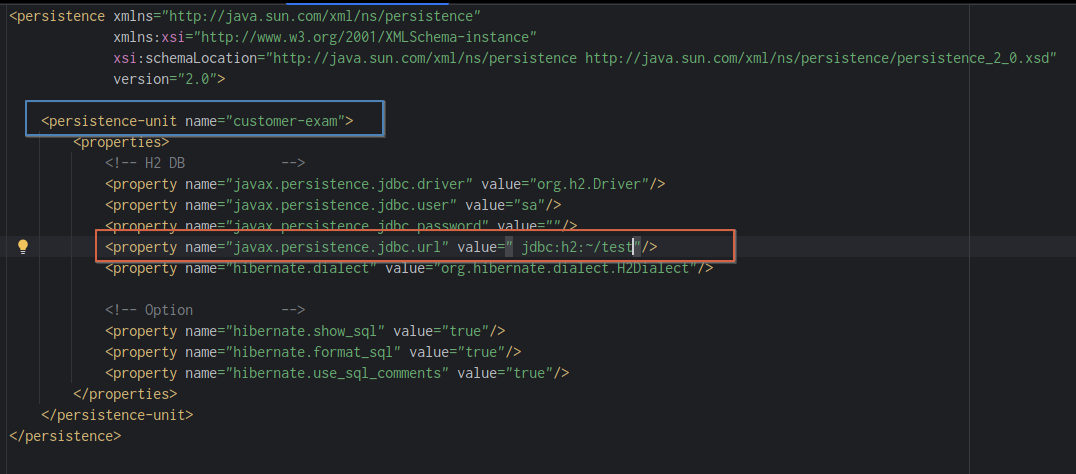
        EntityManagerFactory  emf = Persistence.createEntityManagerFactory("customer-exam");
    }
}
- 여기에 있는 "customer-exam" 부분이
public class CustomerJpaExam {

    public static void main(String[] args) {
        EntityManagerFactory  emf = Persistence.createEntityManagerFactory("customer-exam");
        /*entityManager를 얻어오기 위한 작업*/

        EntityManager em = emf.createEntityManager();
        // 하나의 엔티티 매니저를 갖게 됐음
        // 항상 트랜잭션 단위로 작업된다. (커밋 <-> 롤백) * 단위에 대해서 숙지해야한다. *

        EntityTransaction tx = em.getTransaction();

        tx.begin();
        /*
            em.persist(); 내가 넣을 객체를 persist() 파라미터 안에다 넣으면 된다.
        * */

        em.persist(Customer.sample());


        tx.commit(); // 문제가 있었을 때 tx.rollback(); 작업을 진행하면 된다.

        em.close(); // 작업이 끝났을 때 이 과정을 진행해야함
        emf.close();
    }
}
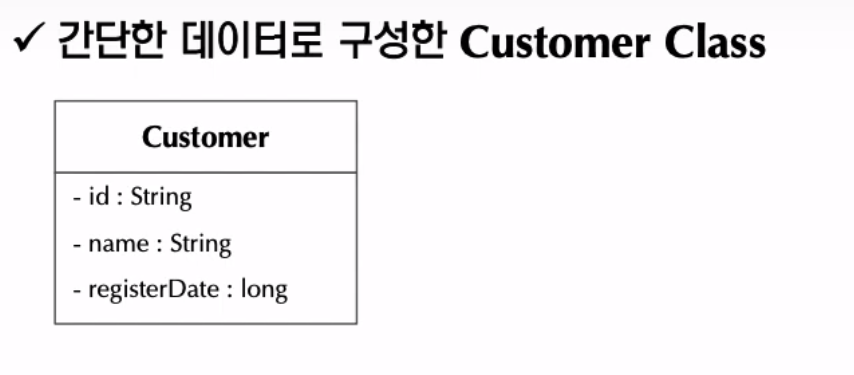
이렇게 진행하면 된다. 하지만 이렇게 진행하면 오류가 발생하기 때문에, 어노테이션을 작성해야한다.
- @Entity
- @Table
- @Id
Customer 엔티티
@Entity
@Table(name="customer_tb") // RDBMS에 해당 테이블에 값을 넣는다는 의미
public class Customer {

    @Id //PK 라는 의미
    private String id;
    private String name;
    private long registerDate;


    public Customer()
    {

    }
    public Customer(String id, String name)
    {
        this.id = id;
        this.name = name;
        this.registerDate = System.currentTimeMillis();
    }

    public static Customer sample()
    {
        return new Customer("ID0001", "kim");
    }

}
이 Customer를 사용하는 부분
CustomerJpaExam
public class CustomerJpaExam {

    public static void main(String[] args) {
        EntityManagerFactory  emf = Persistence.createEntityManagerFactory("customer-exam");
        /*entityManager를 얻어오기 위한 작업*/

        EntityManager em = emf.createEntityManager();
        // 하나의 엔티티 매니저를 갖게 됐음
        // 항상 트랜잭션 단위로 작업된다. (커밋 <-> 롤백) * 단위에 대해서 숙지해야한다. *

        EntityTransaction tx = em.getTransaction();

        tx.begin();
        /*
            em.persist(); 내가 넣을 객체를 persist() 파라미터 안에다 넣으면 된다.
        * */

        em.persist(Customer.sample());


        tx.commit(); // 문제가 있었을 때 tx.rollback(); 작업을 진행하면 된다.

        em.close(); // 작업이 끝났을 때 이 과정을 진행해야함
        emf.close();
    }
}
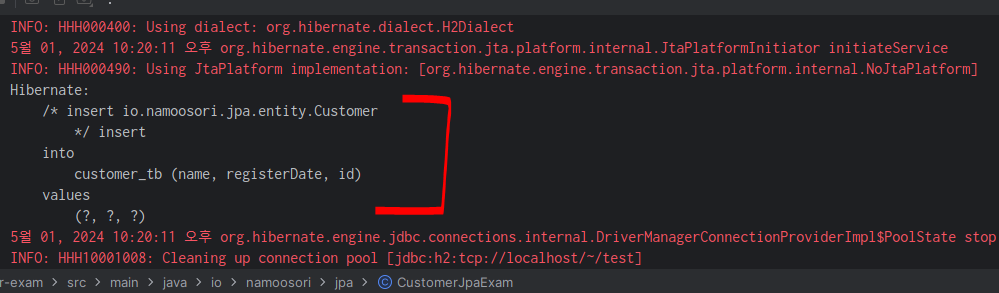
이렇게 저장된다.
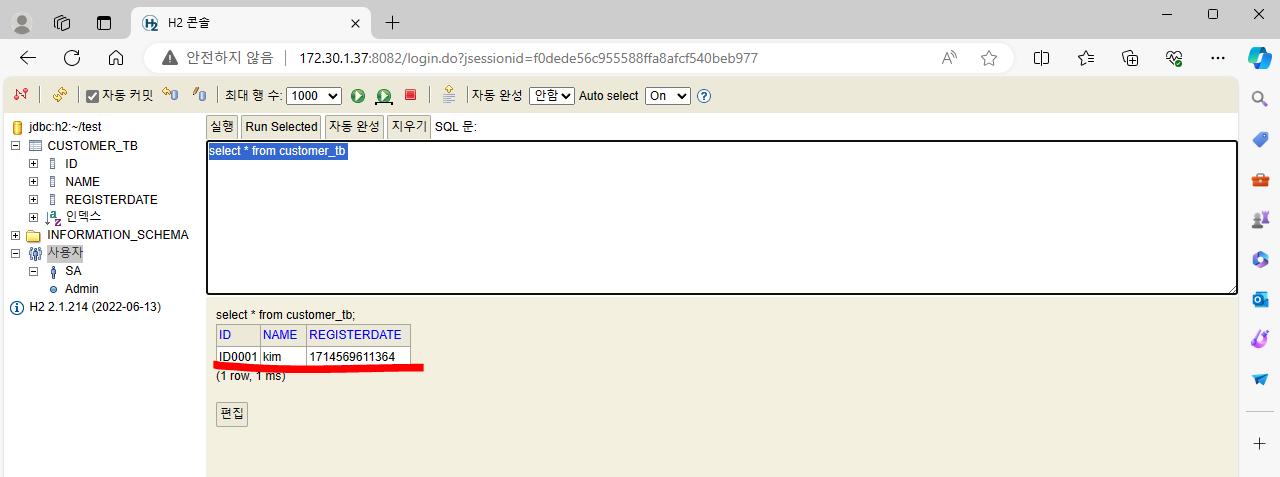
이런식으로 잘 들어감.

아는만큼보인다.