이미 안드로이드 기기로 appium 연결을 완료하였으므로, appium 설치 과정은 생략하겠다.
사전 조건
- xcode 설치
- ios Device <-> mac pc 연결
- Udid 확인 > 터미널 열고 아래 명령어 실행
# xcode 12
instruments -s devices

# xcode 12 이상
xcrun xctrace list devices
세팅 과정
- 개발자 등록 필요
xcode - Preferences - Accounts - [+] - [Apple ID] - [Continue]
- id/pw 입력 후 next
- [Download Menual Profiles] > [Manage Certificates...] > [+] > [Apple Development]
- 인증서 등록 확인
- [Done] 선택
- [Source Control] - [Clone...]
- WebDriverAgent 설치
Enter repository URL > "https://github.com/appium/WebDriverAgent.git" 입력
- master 확인 후 [clone]
- Documents 폴더에 저장
- /Users/jiyoungan/Documents/WebDriverAgent
- 터미널을 열고 위 경로로 이동
cd /Users/jiyoungan/Documents/WebDriverAgent - 위 경로에 부트스트랩 스크립트 만들기
mkdir -p Resources/WebDriverAgent.bundle ./Scripts/bootstrap.sh -d- WebDriverAgent 실행** (위 순서대로 하면 자동으로 열려있지만, 이후에 실행할 땐 아래 프로그램을 그냥 열면 된다.
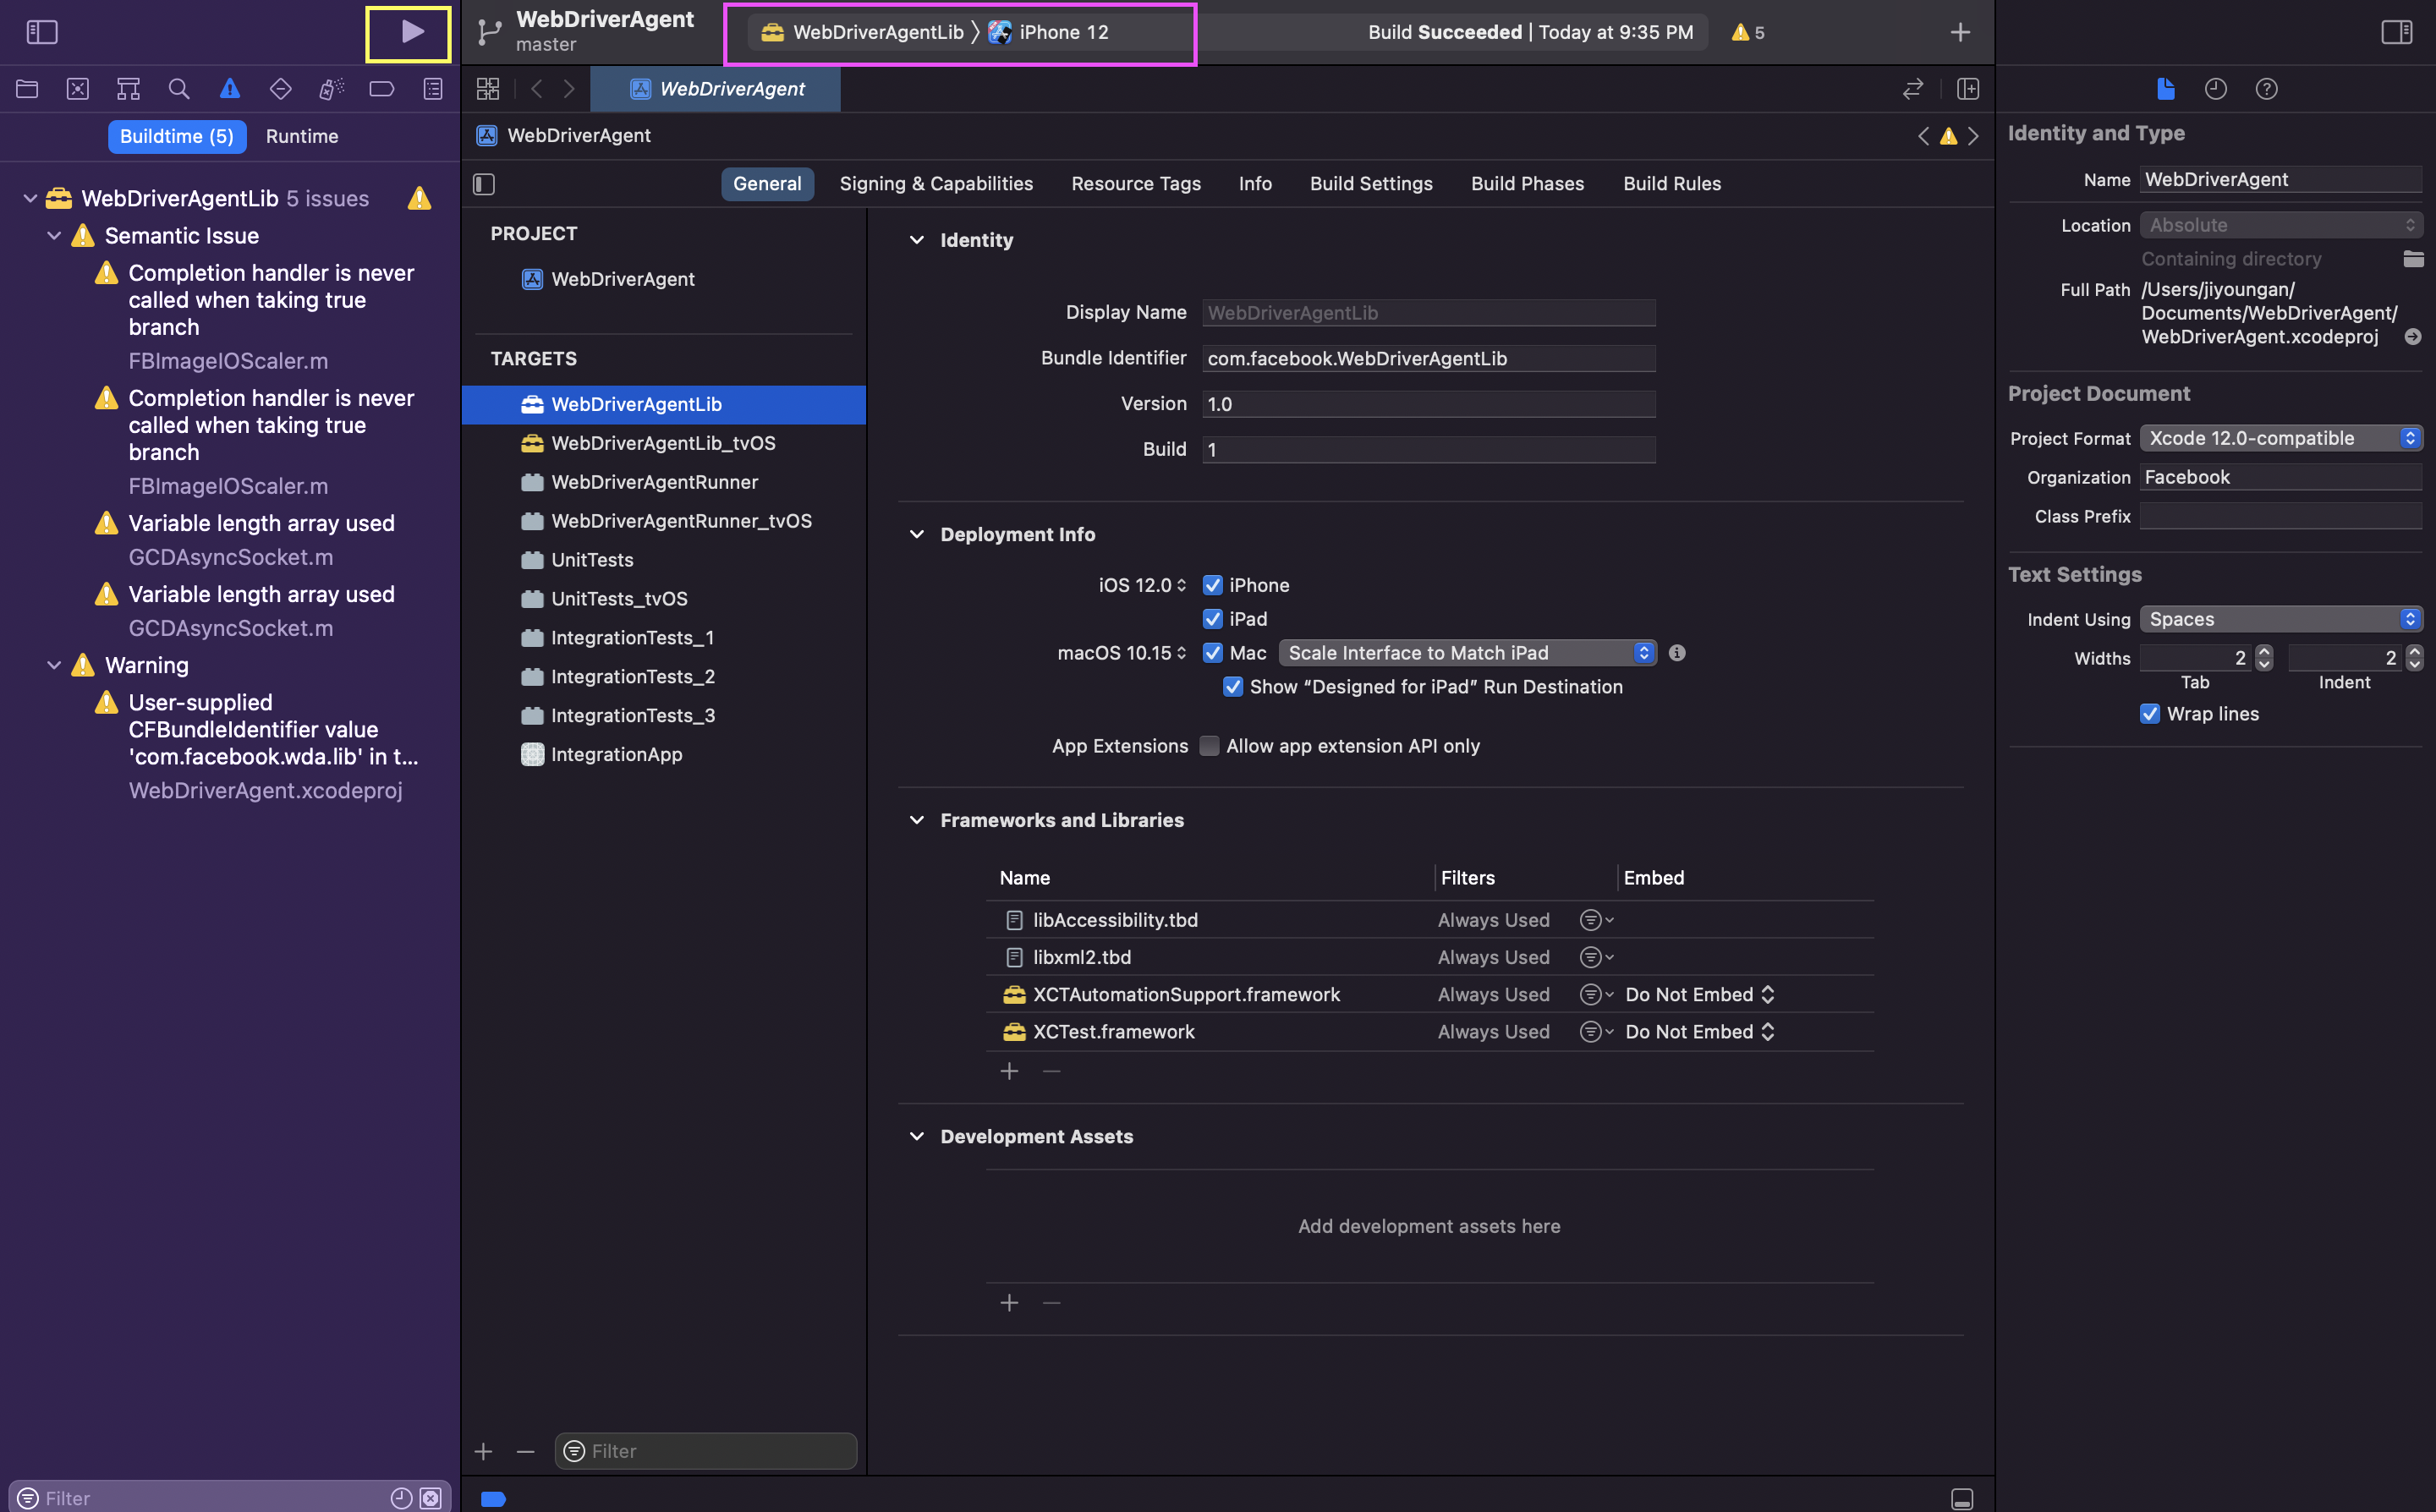
/Users/jiyoungan/Documents/WebDriverAgent/WebDriverAgent.xcodeproj - 번들id 수정(이 과정은 패스해도 될지도?)
기존의 id 는 com.facebook.WebDriverAgentLib 으로 되어 있는데(빨강색 네모칸) 테스트 하려는 번들id가 com.a.b 라면 "com.a.b.WebDriverAgentLib" 으로 수정하면 된다.
TARGETS 을 하나씩 선택하여 모두 같은 번들id 로 수정한다.(초록색 네모칸)

- Lib 실행
WebDriverAgentLib > 내 디바이스 선택 상태(분홍색 네모칸) 에서 실행 버튼 선택 (노랑색 네모칸)
캡처 이미지는 시뮬레이터의 iphone12 가 선택되어 있지만, pc와 연결한 디바이스가 선택되어야 함
- Runner 실행
WebDriverAgentRunner > 디바이스 선택 후 다시 실행 버튼 선택
- 상단 메뉴바 - [Product] - [Test] 선택
-> 이 작업을 해야 Appium 서버에 연결됨(매번 해줘야 하는 동작!)
내가 연결한 디바이스의 udid 를 확인할 수 있다.
- appium 실행
- appium inspector 실행 후 capabilities 입력
'appium:app': app,
'platformName': 'iOS',
'appium:platformVersion': "14.6",
'appium:automationName': 'XCUITest',
'appium:noReset': True,
'appium:udid': '00008030-0008296E3698402E',
'appium:xcodeOrgId': "*******",
'xcodeSigningId': 'iPhone Developer',
'appium:deviceName': 'iPhone (5)',- [Start Session] 선택
스크립트 작성 준비 끝!

QA Engineer