스프링부트 준비
이전에 구현한 CURD API를 리액트와 연동할 예정이다.
이전 게시물에서는 get - /todo 는 사용자 아이디로 조회하는 기능을 수행하였지만 전체 목록을 출력하는 seleteAll()을 get - /todo로 변경하여 진행하였다.
수정된 API
| 기능 | 메소드 | url |
|---|---|---|
| 등록 | post | /todo |
| 전체 조회 | get | /todo |
| 수정 | put | /todo |
| 삭제 | delete | /todo |
리액트
기존 투두리스트 게시물
리액트 프로젝트로는 로컬스토리지를 사용하였던 기존 투두리스트 프로젝트를 사용하였다.
등록, 조회, 수정, 삭제 기능에 집중하기 위해 일단 할 일과 완료된 일을 나누어 출력하였던 부분을 전체 목록으로 출력되도록 수정하였고, cnt 부분은 TODO의 NO로 대체되어 필요없어져 삭제하였다.
fetch
fetch(URL, options)
.then((response) => response.json())
.then((data) => console.log(data));
- 자바스크립트 내장 함수
- HTTP 파이프라인을 구성하는 요청과 응답 등의 요소를 자바스크립트에서 접근/조작할 수 있는 인터페이스 제공
- 네트워크의 리소스를 비동기적으로 가져올 수 있음
// POST 메서드 구현 예제
async function postData(url = '', data = {}) {
  // 옵션 기본 값은 *로 강조
  const response = await fetch(url, {
    method: 'POST', // *GET, POST, PUT, DELETE 등
    mode: 'cors', // no-cors, *cors, same-origin
    cache: 'no-cache', // *default, no-cache, reload, force-cache, only-if-cached
    credentials: 'same-origin', // include, *same-origin, omit
    headers: {
      'Content-Type': 'application/json',
      // 'Content-Type': 'application/x-www-form-urlencoded',
    },
    redirect: 'follow', // manual, *follow, error
    referrerPolicy: 'no-referrer', // no-referrer, *no-referrer-when-downgrade, origin, origin-when-cross-origin, same-origin, strict-origin, strict-origin-when-cross-origin, unsafe-url
    body: JSON.stringify(data), // body의 데이터 유형은 반드시 "Content-Type" 헤더와 일치해야 함
  });
  return response.json(); // JSON 응답을 네이티브 JavaScript 객체로 파싱
}

postData('https://example.com/answer', { answer: 42 }).then((data) => {
  console.log(data); // JSON 데이터가 `data.json()` 호출에 의해 파싱됨
});
전체 조회
localstorage
  useEffect(() => {
    // loaclstorage에 데이터가 있으면 로드한다.
    // 문자열로 저장
    const localStorageData = localStorage.getItem("todoListData");

    if (localStorageData) {
      let objData = JSON.parse(localStorageData);
      setWorks(objData.todoList);
      setCount(objData.count);
    }
  }, []);
기존 로컬스토리지에 todo 목록을 저장한 코드다.
fetch 사용
  useEffect(() => {
    // fetch() 기능 : 자바스크립트에 내장되어있는 Ajax 기능
    const requestOptions = {
      method: 'GET',
      headers: {
        'Content-Type': 'application/json',
      }
    };
    fetch('http://localhost:8080/todo', requestOptions)
      .then((response) => response.json())  // 프라미스
      .then((respObj) => {
        setWorks(respObj.data);
        console.log('성공:', respObj.data);
      })
      .catch((error) => {
        console.error('실패:', error);
      });
  }, []);
http://localhost:8080/todo url로 GET을 요청한다. GET 방식은 요청 전문을 받지 않는다.
.then((response) => response.json()) 응답 객체를 통해 응답 상태
를 알 수 있다.
.then((respObj) => {
        setWorks(respObj.data);
        console.log('성공:', respObj.data);
      })
대부분의 REST API는 JSON 형태로 데이터를 응답해 응답(response) 객체는 json() 메소드를 제공한다. json()을 호출하면 response 객체로부터 JSON 포맷의 응답 전문을 자바스크립트 객체로 변환하여 얻을 수 있다.
public class ResponseDTO<T> {
    private String error;
    private List<T> data;
}
여기선 ResponseDTO의 형태로 데이터가 들어오기 때문에 우리가 필요한 todo 데이터는 private List<T> data;에 있다. 이것은 respObj.data으로 접근이 가능하고, 리액트 내에서 사용될 works로 setWorks(respObj.data); 데이터를 set해준다.
에러 발생 시 .catch((error) => { console.error('실패:', error); }) 코드가 실행된다.
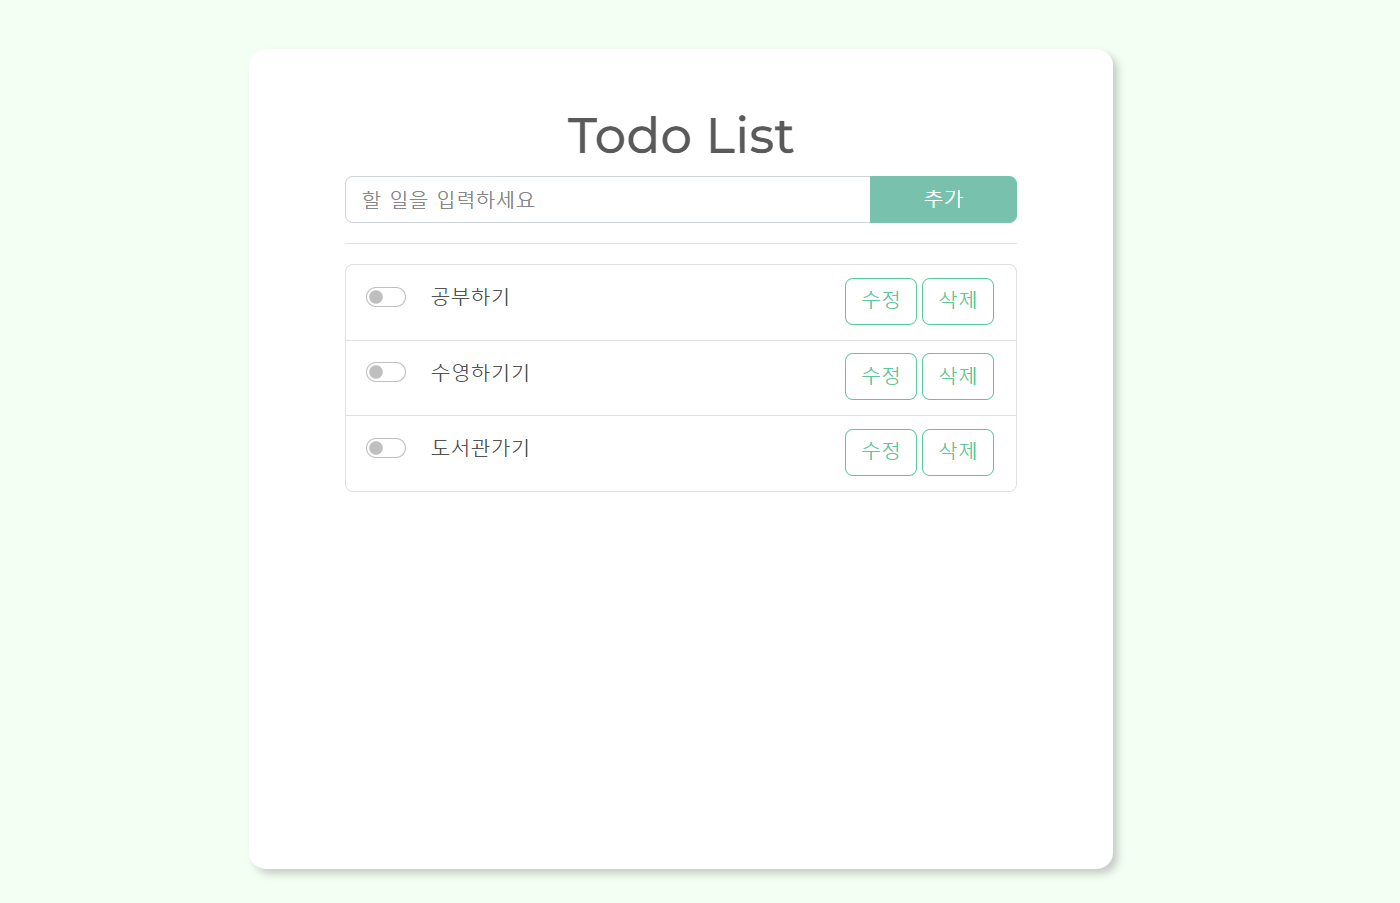
리액트 실행하고 localhost:3000으로 접근하면 DB의 TODO 테이블 데이터가 리액트 화면에서 보인다!
등록/수정/삭제
  function save(method, newItem) {
    const requestOptions = {
      method: method,
      headers: {'Content-Type': 'application/json'},
      body: JSON.stringify(newItem)
    };
    fetch('http://localhost:8080/todo', requestOptions)
      .then((response) => response.json())
      .then((respObj) => {
        setWorks(respObj.data);
      })
      .catch((error) => {
        console.error('실패:', error);
    });
  }

  // 할 일 추가 기능
  function addWork(newWork) {
    save("POST", {userId:"an", title:newWork});
    // 알람창 보이기
    setToastShow(true);
    setToastType("add");
  }

  // 할 일 삭제 기능
  function removeWork(no) {
    save("DELETE", {no:no});
    // 알람창 보이기
    setToastShow(true);
    setToastType("remove");
  }

  // 할 일 목록 업데이트 기능
  function updateItem(item) {;
    save("PUT", item);
  }
등록/수정/삭제 기능은 save() 메소드를 생성하여 기능에 따라 메소드(POST/PUT/DELETE)와 전달 데이터만 다르게 파라미터로 받아 save()를 실행한다.
build
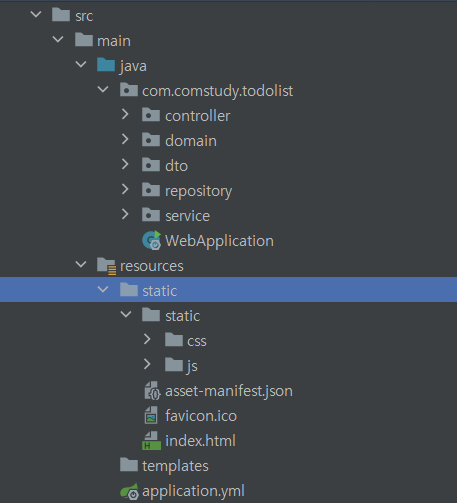
완성된 리액트 프로젝트를 build 하면 build 파일이 생성된다.
생성된 build 파일을 스프링부트 프로젝트의 scr/main/resources/static 디렉토리에 붙여넣는다. 이제 스프링부트 프로젝트를 실행시키면 리액트 화면을 볼 수 있게 된다!
Git
https://github.com/EunbiAn/webkit-backend/tree/master/springboot_TodoList_day31