스프링부트에서 AWS S3에 이미지를 저장하는 연습예제를 만들어 보겠습니다~!
S3 기본 개념
깃헙에 있는 정리본을 참고해주세요!
https://github.com/namusik/TIL-SampleProject/tree/main/AWS/Amazon%20S3
소스코드
https://github.com/namusik/TIL-SampleProject/tree/main/AWS/Amazon%20S3/S3%20%EC%98%88%EC%A0%9C
작업환경
IntelliJ
Spring Boot
java 11
gradle
build.gradle
dependencies {
    implementation 'org.springframework.cloud:spring-cloud-starter-aws:2.2.6.RELEASE'
}
아마존에서 제공하는 라이브러리를 사용하기 위해 의존성을 추가해줍니다.
참고) https://aws.amazon.com/ko/blogs/korea/getting-started-with-spring-boot-on-aws/
application.yml
cloud:
  aws:
    credentials:
      access-key:
      secret-key:
    s3: #버킷이름
      bucket: woosik-bucket
    region: #S3 지역
      static: ap-northeast-2
    stack:
      auto: false
# multipartFile 용량 늘려주는 설정
spring:
  servlet:
    multipart:
      max-file-size: 10MB
      max-request-size: 10MB
#  h2 설정
  h2:
    console:
      enabled: true
  datasource:
    url: jdbc:h2:mem:springminiprojectdb
    username: sa
    password:
AWS 관련 설정값들을 yml에 미리 적어줍니다.
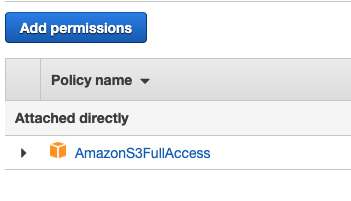
AWS IAM유저를 새롭게 생성하여, S3FullAccess 정책을 부여해준후, 엑세스키를 발급받아 줍니다.
AwsSesConfig
@Configuration
public class S3Config {
    @Value("${cloud.aws.credentials.access-key}")
    private String accessKey;

    @Value("${cloud.aws.credentials.secret-key}")
    private String secretKey;

    @Value("${cloud.aws.region.static}")
    private String region;

    public AmazonS3 amazonS3Client() {
        BasicAWSCredentials awsCredentials = new BasicAWSCredentials(accessKey, secretKey);
        return AmazonS3ClientBuilder.standard()
                .withRegion(region)
                .withCredentials(new AWSStaticCredentialsProvider(awsCredentials))
                .build();
    }
}
보안이 필요한 정보들은 직접 적지않고 application.properties에 적은 후 @Value로 가져옵니다.
(application.properties는 gitignore해주기)
액세스 키를 가지고 Aws에 접근할 수 있는 설정을 해줍니다.
FileDto
@Getter @Setter
public class FileDto {
    private String title;
    private String url;
    private MultipartFile file;
}
업로드된 파일을 객체로 받아주기 위해 Dto를 만들어줍니다.
url 필드는 S3에 업로드 한 후, setter로 넣어줍니다.
FileEntity
@Entity
@Getter
@NoArgsConstructor
public class FileEntity {

    @Id
    @GeneratedValue(strategy = GenerationType.IDENTITY)
    private Long id;

    @Column
    private String title;

    @Column
    private String s3Url;

    public FileEntity(String title, String s3Url) {
        this.title = title;
        this.s3Url = s3Url;
    }

    @Override
    public String toString() {
        return "FileEntity{" +
                "id=" + id +
                ", title='" + title + '\'' +
                ", s3Url='" + s3Url + '\'' +
                '}';
    }
}
DB에 저장을 위한 File 객체입니다.
FileRepository
public interface FileRepository extends JpaRepository<FileEntity, Long> {

}
H2에 저장하기 위한 Repository.
S3Service
@Service
@RequiredArgsConstructor
public class S3Service {
    @Value("${cloud.aws.s3.bucket}")
    private String bucket;
    private final AmazonS3 amazonS3;

    public String uploadFile(MultipartFile multipartFile) throws IOException {
        String fileName = multipartFile.getOriginalFilename();

        //파일 형식 구하기
        String ext = fileName.split("\\.")[1];
        String contentType = "";

        //content type을 지정해서 올려주지 않으면 자동으로 "application/octet-stream"으로 고정이 되서 링크 클릭시 웹에서 열리는게 아니라 자동 다운이 시작됨.
        switch (ext) {
            case "jpeg":
                contentType = "image/jpeg";
                break;
            case "png":
                contentType = "image/png";
                break;
            case "txt":
                contentType = "text/plain";
                break;
            case "csv":
                contentType = "text/csv";
                break;
        }

        try {
            ObjectMetadata metadata = new ObjectMetadata();
            metadata.setContentType(contentType);

            amazonS3.putObject(new PutObjectRequest(bucket, fileName, multipartFile.getInputStream(), metadata)
                    .withCannedAcl(CannedAccessControlList.PublicRead));
        } catch (AmazonServiceException e) {
            e.printStackTrace();
        } catch (SdkClientException e) {
            e.printStackTrace();
        }

        //object 정보 가져오기
        ListObjectsV2Result listObjectsV2Result = amazonS3.listObjectsV2(bucket);
        List<S3ObjectSummary> objectSummaries = listObjectsV2Result.getObjectSummaries();

        for (S3ObjectSummary object: objectSummaries) {
            System.out.println("object = " + object.toString());
        }
        return amazonS3.getUrl(bucket, fileName).toString();
    }
}
S3 버킷에 object를 업로드 하는 Service입니다.
Controller에서 전달받은 MultipartFile을 형식에 맞춰 S3 업로드 해주면 됩니다.
amazonS3.putObject(new PutObjectRequest(bucket, fileName, multipartFile.getInputStream(), metadata)
bucket - 버킷 이름
fileName - 저장할 파일 이름
multipartFile.getInputStream() - multipartFile을 InputStream형태로 변환
meatdata - object 부연설명 메타데이터. 현재는 contentType만 지정해 주었는데, 원하는 데로 태그를 지정할 수 도 있습니다.
.withCannedAcl(CannedAccessControlList.PublicRead));
업로드한 Object를 public에서 접근할 수 있도록 권한 부여.
업로드 과정이 끝난 후, 객체의 URL을 받아와서 return을 해줍니다.
    ListObjectsV2Result listObjectsV2Result = amazonS3.listObjectsV2(bucket);
    List<S3ObjectSummary> objectSummaries = listObjectsV2Result.getObjectSummaries();
현재는 객체의 url만 DB에 저장해주기 때문에 따로 사용은 안했지만,
Object의 관련 정보들을 가져오기 위해서는 위처럼 해주면 됩니다.
S3ObjectSummary객체를 보시면 다양한 getter들이 있습니다.
FileService
@Service
@RequiredArgsConstructor
public class FileService {
    private final FileRepository fileRepository;

    public void save(FileDto fileDto) {
        FileEntity fileEntity = new FileEntity(fileDto.getTitle(), fileDto.getUrl());
        fileRepository.save(fileEntity);
    }

    public List<FileEntity> getFiles() {
        List<FileEntity> all = fileRepository.findAll();
        return all;
    }
}
S3에 Object를 업로드 한 후, FileEntity에 담아서 DB에 저장해주는 과정을 담은 Service 클래스.
S3Controller
@Controller
@RequiredArgsConstructor
public class S3Controller {

    private final S3Service s3Service;
    private final FileService fileService;

    @GetMapping("/api/upload")
    public String goToUpload() {
        return "upload";
    }

    @PostMapping("/api/upload")
    public String uploadFile(FileDto fileDto) throws IOException {
        String url = s3Service.uploadFile(fileDto.getFile());

        fileDto.setUrl(url);
        fileService.save(fileDto);

        return "redirect:/api/list";
    }

    @GetMapping("/api/list")
    public String listPage(Model model) {
        List<FileEntity> fileList =fileService.getFiles();
        model.addAttribute("fileList", fileList);
        return "list";
    }
}
프로젝트 전체 Controller.
실행결과

먼저 업로드 페이지로 이동해서
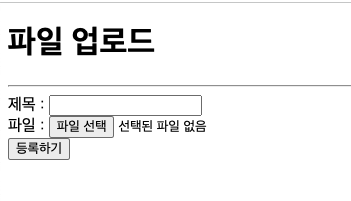
파일을 업로드 해줍니다.
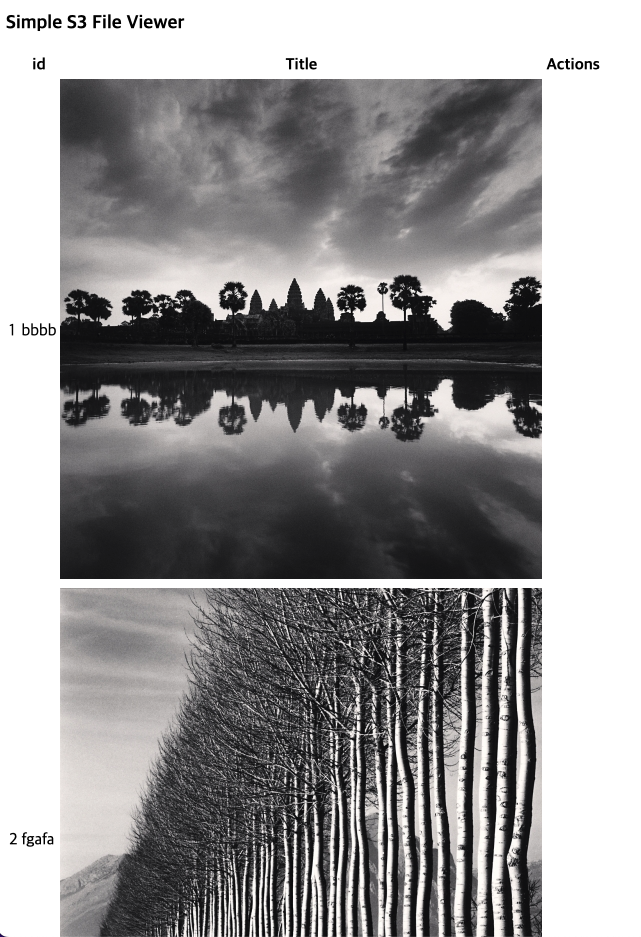
S3에 저장한 이미지들이 보여지는 것을 알 수 있습니다.
AWS 버킷에 저장된 Object url과 DB에 저장된 URL이 동일하면 완료!!
참고
https://aws.amazon.com/ko/blogs/korea/getting-started-with-spring-boot-on-aws/
https://victorydntmd.tistory.com/334?category=764331
https://docs.aws.amazon.com/AmazonS3/latest/userguide/upload-objects.html
