스프링부트에서 Redis를 연동하는 연습용 프로젝트를 만들어 보겠습니다!
Redis 기본 이론
깃헙에 있는 정리본을 참고해주세요!
https://github.com/namusik/TIL-SampleProject/tree/main/Redis
Redis window 설치 및 실행
https://oingdaddy.tistory.com/225
Redis 서버를 킨 상태에서 코드를 작성해봅시다!
소스코드
https://github.com/namusik/TIL-SampleProject/tree/main/Redis/Redis%20get-set%20%EC%98%88%EC%A0%9C
작업환경
IntelliJ
Spring-boot
java 11
gradle
dependency
Lombok
spring web
spring data redis
application.yml
spring:
  redis:
    host: localhost
    port: 6379
autoConfiguration 덕분에 서버주소:포트번호만 적어줘도 StringRedisTemplate과 redisConnectionFactory는 자동 생성된다
ChatMessage Model
@Getter
@NoArgsConstructor
@AllArgsConstructor

public class ChatMessage {
    private String sender;
    private String context;
}
메세지 모델 클래스
보내는사람과 내용을 필드로 가지고 있음.
RedisConfig
@Configuration
public class RedisConfig {

    @Bean
    public RedisConnectionFactory redisConnectionFactory() {
        return new LettuceConnectionFactory();
    }

    @Bean
    public RedisTemplate<String, Object> redisTemplate() {
        RedisTemplate<String, Object> redisTemplate = new RedisTemplate<>();
        redisTemplate.setConnectionFactory(redisConnectionFactory());
        redisTemplate.setKeySerializer(new StringRedisSerializer());
//        redisTemplate.setValueSerializer(new Jackson2JsonRedisSerializer<>(ChatMessage.class));
        redisTemplate.setValueSerializer(new StringRedisSerializer());
        return redisTemplate;
    }
}
Json 형식으로 객체를 Value에 저장시키기 때문에 valueSerializer를 Jackson으로 미리 설정해놓은 RedisTemplate을 만들어 준다.
Config 단계에서 ClassType을 지정해주면 이 template은 오직 ChatMessage에만 쓸 수 있고 다른 객체를 저장하려면 새로운 template을 만들어줘야함.
그래서 범용성을 위해 StringRedisSerializer를 사용하고 직접 변환해주는 것으로 바꿨습니다.
StringRedisTemplate은 따로 Bean으로 안만들어도 쓸 수 있음.
RedisService
@Service
@RequiredArgsConstructor
public class RedisService {

    private final RedisTemplate<String, Object> redisTemplate;
    private final StringRedisTemplate stringRedisTemplate;
    private final ObjectMapper objectMapper;

    public void setRedisStringValue(ChatMessage chatMessage) {
        ValueOperations<String, String> stringValueOperations = stringRedisTemplate.opsForValue();
        stringValueOperations.set("sender", chatMessage.getSender());
        stringValueOperations.set("context", chatMessage.getContext());
    }

    public void getRedisStringValue(String key) {

        ValueOperations<String, String> stringValueOperations = stringRedisTemplate.opsForValue();
        System.out.println(key +" : " + stringValueOperations.get(key));
    }

    //직접 만든 redisTemplate 사용
    public void setRedisValue(ChatMessage chatMessage) throws JsonProcessingException {
        String key = chatMessage.getSender();
        redisTemplate.opsForValue().set(key, objectMapper.writeValueAsString(chatMessage));
    }

    public <T> T  getRedisValue(String key, Class<T> classType) throws JsonProcessingException {
        String redisValue = (String)redisTemplate.opsForValue().get(key);

        return objectMapper.readValue(redisValue, classType);
    }
}
Redis 서비스클래스
RedisTemplate<String, Object>는 get/set을 위한 객체.
template에서 valueOperation객체를 받아 사용함.
스프링부트에서는 아래의 redisTemplate이 자동생성되는데,
@Autowired RedisTemplate redisTemplate;
@Autowired StringRedisTemplate stringRedisTemplate;
@Autowired ReactiveRedisTemplate reactiveRedisTemplate;
@Autowired ReactiveStringRedisTemplate reactiveStringRedisTemplate;
redisTemplate 과 stringRedsiTemplate는 직렬화에 차이가 있음
stringRedisTemplate은 문자열에 특화된 template제공. 대부분 레디스 key-value는 문자열 위주기 때문에.
redisTemplate은 자바 객체를 redis에 저장하려고 할 때 사용하면 됨.
setRedisStringValue(ChatMessage chatMessage)를 통해 전달받은 메시지객체를 각각 redis에 set해줌.
getRedisValue(String key, Class classType)통해 제대로 저장이 되었는지 출력해봄.
Value가 String으로 저장되었기 때문에, 인자로 넘겨준 classType으로 변환시켜주는 작업이 필요하다.
setRedisValue(ChatMessage chatmessage) 는 redisTemplate을 사용해서 value에 자바 객체를 String으로 변환하여 저장
RedisController
@RestController
@RequiredArgsConstructor
public class RedisController {

    private final RedisService redisService;

    @PostMapping("api/redisStringTest")
    public String sendString(@RequestBody ChatMessage chatMessage) {
        redisService.setRedisStringValue(chatMessage);

        redisService.getRedisStringValue("sender");
        redisService.getRedisStringValue("context");

        return "success";
    }

    @PostMapping("api/redisTest")
    public String send(@RequestBody ChatMessage chatMessage) throws JsonProcessingException {
        redisService.setRedisValue(chatMessage);

        String key = chatMessage.getSender();
        ChatMessage chatMessage1 = redisService.getRedisValue(key, ChatMessage.class);

        return chatMessage1.getContext();
    }
}
RedisService를 생성자 의존성주입으로 가져와서 JSON형태로 객체를 전달받으면 set/get을 한번에 실행시켜서 최종적으로 출력시켜보는 Controller.
두 방식 모두 같은 결과로 나옴
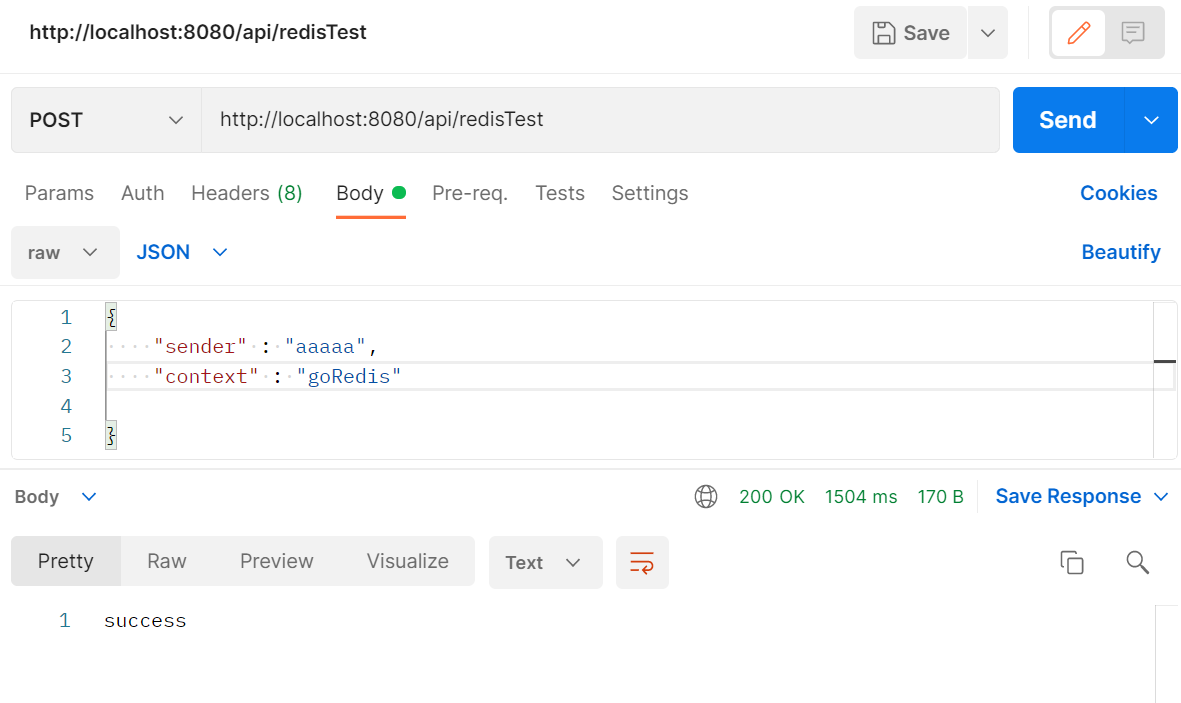
실행결과
Postman을 사용해서 api를 실행시키면
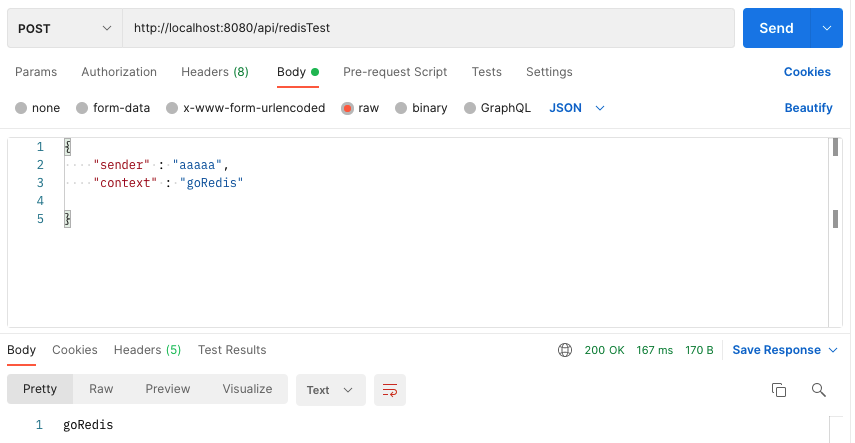
제대로 value값이 반환된다.
참고
https://victorydntmd.tistory.com/348
https://oingdaddy.tistory.com/308
https://jeong-pro.tistory.com/175
https://bcp0109.tistory.com/328
