
실무에서 외부 라이브러리를 도입해야 할 때나 두 로직 사이의 성능 차이를 체크하고 싶을 때가 있다.
내 코드가 얼마나 효율적으로 리소스를 사용하는지 체크하기 위해서는 몇 가지 방법을 사용할 수 있다.
Stopwatch Benchmark
간단하게는 stopwatch benchmark라고 불리는 방법을 사용하여 성능을 체크할 수 있다.
학부 과제를 할 때 자주 등장하는 코드이기도 하다. (특히 멀티코어 프로그래밍 수업에서 자주 사용했던 것이 기억난다)
public class Foo {
   public void bar()
   {
       long startTime = System.currentTimeMillis();
       testMethod();
       long endTime = System.currentTimeMillis();
       System.out.println("총 수행시간: " + (endTime-startTime) + "ms");
   }
}- 즉 실행 시간을 측정하고자 하는 코드의 시작에서 시스템의 현재 시각을 읽고
- 코드가 종료되는 시점에 시스템의 현재 시각을 읽은 후 그 차이를 계산한다.
- 위 코드에서 사용한 것처럼 밀리초 또는 나노초 (
System.nanoTime()) 단위로 계산할 수 있다.- 나노초는 보다 정밀한 결과를 도출할 수 있지만 몇 가지 노운 이슈가 존재한다.
- https://stackoverflow.com/questions/503877/how-can-i-measure-time-with-microsecond-precision-in-java
Stopwatch Benchmark의 한계

근데.. 이 방법이 정확할까?
https://stackoverflow.com/questions/410437/is-stopwatch-benchmarking-acceptable
굉장히 러프하게 성능을 측정하는 방식이기 때문에 한계가 명확할 것이라는 예상과는 다르게, 꽤나 유의미한 결과를 도출하기에 적당한 방식이라는 답변이 존재했다.
다만 더 정확한 결과를 뽑기 위해서는 아래의 전제 조건들이 필요했다.
- 충분한 반복을 더할 것
- 이는 테스트 프로세스에 OS 인터럽션이 걸리거나 스케쥴링에 의해 테스트 결과가 더럽혀지는 것을 막기 위함이다.
- 5초에서 30초 사이의 프로세스 실행에는 스레드 스케쥴링이 큰 영향을 미치지 않는다.
- 테스트 코드를 실행하기 전에 웜업을 돌리는 것이 바람직하다
- 우리는 어디까지나 실제 환경에서 동작했을 때의 결과를 보고 싶은 것
- 때문에 웜업 반복 횟수를 일정량 수행함으로써 JIT 컴파일러의 입장에서 최대한 유사한 환경을 구성할 수 있다.
JMH

https://github.com/openjdk/jmh
오픈소스로 코드가 얼마나 리소스를 사용하는지 체크할 수 있는 JMH (Java Microbenchmark Harness) 라이브러리가 있다.
https://www.oracle.com/technical-resources/articles/java/architect-benchmarking.html
- 벤치마킹은 특정 동작이 실행되는데 얼마나 걸리는지를 측정한다.
- 만약 해당 동작이 너무 빠르다면 반복문을 통해서 반복할 수 있다.
- 이 접근법은 c와 같은 정적 컴파일 언어로 쓰여진 프로그램으로 작성된 프로그램에게 적합해보인다.
- 위 링크에 첨부된 코드의 예시처럼, 가상 머신 위에서 돌아가는 프로그램 내 특정 연산의 성능을 측정한 일은 복잡하다.
- OpenJDK 프로젝트의 일환으로 개발된 JMH는 예상치 못하게 실행되는 가상머신 최적화로 인해 결과가 잘못되지 않는 벤치마크를 실행할 수 있는 기반을 제공한다. (물론 완벽하게 방지하지는 못한다)
- JMH는 마이크로벤치마크, 즉 굉장히 작은 코드의 조각을 벤치마킹한다. 동시성 테스트와 같은 범용적인 벤치마킹에도 능하다.
하지만 JMH 기반은 위 링크들에서 소개되었던 것처럼 maven을 기반으로 동작한다.
maven을 안 쓰게 된 지 몇 년이 지나기도 했고, 실무에서는 gradle을 사용하고 있기에 gradle로 jmh를 사용하려 하자 무수히 많은 에러가 발생했다.
jmh-gradle-plugin
https://github.com/melix/jmh-gradle-plugin
때문에 gradle을 사용하는 프로젝트라면 상기 플러그인을 적극적으로 활용하는 것이 좋겠다.
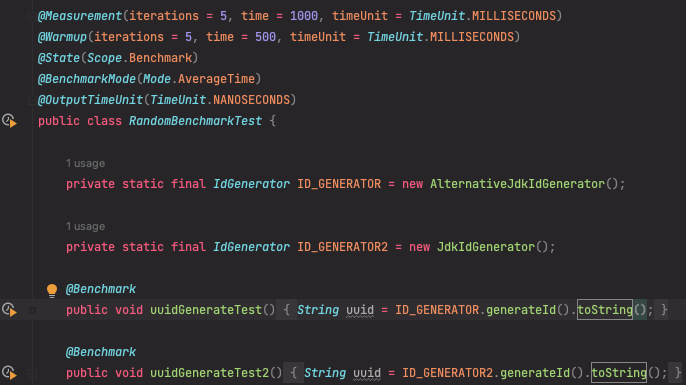
나는 아래와 같이 테스트 코드를 작성하여 보았다. 플러그인 매뉴얼대로 src/jmh/java 디렉토리 하위에 아래와 같이 생성하였다.
import java.util.concurrent.TimeUnit;

import org.openjdk.jmh.annotations.Benchmark;
import org.openjdk.jmh.annotations.BenchmarkMode;
import org.openjdk.jmh.annotations.Measurement;
import org.openjdk.jmh.annotations.Mode;
import org.openjdk.jmh.annotations.OutputTimeUnit;
import org.openjdk.jmh.annotations.Scope;
import org.openjdk.jmh.annotations.State;
import org.openjdk.jmh.annotations.Warmup;
import org.springframework.util.AlternativeJdkIdGenerator;
import org.springframework.util.IdGenerator;
import org.springframework.util.JdkIdGenerator;

@Measurement(iterations = 5, time = 1000, timeUnit = TimeUnit.MILLISECONDS)
@Warmup(iterations = 5, time = 500, timeUnit = TimeUnit.MILLISECONDS)
@State(Scope.Benchmark)
@BenchmarkMode(Mode.AverageTime)
@OutputTimeUnit(TimeUnit.NANOSECONDS)
public class StringBenchmarkTest {

    private static final IdGenerator ID_GENERATOR = new AlternativeJdkIdGenerator();

    private static final IdGenerator ID_GENERATOR2 = new JdkIdGenerator();

    @Benchmark
    public void uuidGenerateTest() {
        String uuid = ID_GENERATOR.generateId().toString();
    }

    @Benchmark
    public void uuidGenerateTest2() {
        String uuid = ID_GENERATOR2.generateId().toString();
    }

    public static void main(String[] args) {

    }

}
plugins {
id 'java'
id "me.champeau.jmh" version "0.7.2"
}
group 'org.example'
version '1.0-SNAPSHOT'
repositories {
mavenCentral()
}
dependencies {
// https://mvnrepository.com/artifact/org.springframework/spring-core
implementation 'org.springframework:spring-core:6.0.21'
testImplementation 'org.junit.jupiter:junit-jupiter-api:5.8.1'
testRuntimeOnly 'org.junit.jupiter:junit-jupiter-engine:5.8.1'
jmh 'org.openjdk.jmh:jmh-core:0.9'
jmh 'org.openjdk.jmh:jmh-generator-annprocess:0.9'
jmh 'org.openjdk.jmh:jmh-generator-bytecode:0.9'
}
jmh {
warmupIterations = 2
iterations = 5
fork = 0
profilers = ["gc"]
}
test {
useJUnitPlatform()
}gradle 세팅을 살펴 보면 jmh phrase에 들어 있는 옵션들이 존재한다. 세부 옵션의 설명과 전체 목록은 이 링크를 참조하면 되겠다.
내가 설정한 옵션으로는
warmupIterations: 웜업 반복 횟수를 설정한다.iterations: 실제 벤치마킹 횟수를 설정한다.fork: 단일 벤치마크를 얼마나 fork 하여 실행할지를 설정한다. 동시에 수행되는 것을 원치 않아 0으로 설정하였다.profilers: 벤치마크 결과를 분석할 프로파일러를 추가하는 옵션이다.gc옵션을 설정하여 메모리 사용량을 측정하고자 하였다.- jmh를 사용한 벤치마크는 cpu 사용량을 정확하게 측정하지는 못한다. 기본적으로 100%의 가용량을 사용하기 떄문이라는 답글을 찾을 수 있었다.
정확히 측정하기 위해서라면 iteration과 warmup 사이즈를 훨씬 더 크게 설정해야 하지만, 단순히 결과만 보기 위해서 최대한 간단하게 설정하였다.
벤치마크 결과
다음과 같이 결과가 build/results/jmh/result.txt로 생성된다.
Benchmark                                                  Mode  Cnt     Score     Error   Units
RandomBenchmarkTest.uuidGenerateTest                       avgt    5    62.475 ±  11.616   ns/op
RandomBenchmarkTest.uuidGenerateTest:·gc.alloc.rate        avgt    5  1345.193 ± 254.135  MB/sec
RandomBenchmarkTest.uuidGenerateTest:·gc.alloc.rate.norm   avgt    5    88.000 ±   0.001    B/op
RandomBenchmarkTest.uuidGenerateTest:·gc.count             avgt    5    23.000            counts
RandomBenchmarkTest.uuidGenerateTest:·gc.time              avgt    5    23.000                ms
RandomBenchmarkTest.uuidGenerateTest2                      avgt    5   378.484 ±   5.174   ns/op
RandomBenchmarkTest.uuidGenerateTest2:·gc.alloc.rate       avgt    5   382.760 ±   5.263  MB/sec
RandomBenchmarkTest.uuidGenerateTest2:·gc.alloc.rate.norm  avgt    5   152.010 ±   0.047    B/op
RandomBenchmarkTest.uuidGenerateTest2:·gc.count            avgt    5     6.000            counts
RandomBenchmarkTest.uuidGenerateTest2:·gc.time             avgt    5    11.000                ms
앞서 말했던 것처럼 정확한 결과는 아니다. 보다 정확한 결과를 얻기 위해서는 훨씬 더 긴 시간 동안 벤치마킹을 수행해야 하지만, 간단하게 성능 지표를 확인할 수 있다는 점에서 마냥 무의미한 수행은 아니었다고 생각한다.
gc 프로파일러 옵션을 제거한 결과는 아래와 같다.
Benchmark                              Mode  Cnt    Score    Error  Units
RandomBenchmarkTest.uuidGenerateTest   avgt    5   67.251 ±  5.564  ns/op
RandomBenchmarkTest.uuidGenerateTest2 avgt 5 375.545 ± 10.141 ns/opAlternativeJdkIdGenerator가 JdkIdGenerator 보다 성능이 대체적으로 좋지 않았다고 판단할 수 있다.
/*
 * Copyright 2002-2015 the original author or authors. * * Licensed under the Apache License, Version 2.0 (the "License"); * you may not use this file except in compliance with the License. * You may obtain a copy of the License at * *      https://www.apache.org/licenses/LICENSE-2.0
 * * Unless required by applicable law or agreed to in writing, software * distributed under the License is distributed on an "AS IS" BASIS, * WITHOUT WARRANTIES OR CONDITIONS OF ANY KIND, either express or implied. * See the License for the specific language governing permissions and * limitations under the License. */
package org.springframework.util;

import java.math.BigInteger;
import java.security.SecureRandom;
import java.util.Random;
import java.util.UUID;

/**
 * An {@link IdGenerator} that uses {@link SecureRandom} for the initial seed and
 * {@link Random} thereafter, instead of calling {@link UUID#randomUUID()} every
 * time as {@link org.springframework.util.JdkIdGenerator JdkIdGenerator} does.
 * This provides a better balance between securely random ids and performance. * * @author Rossen Stoyanchev
 * @author Rob Winch
 * @since 4.0
 */public class AlternativeJdkIdGenerator implements IdGenerator {

   private final Random random;


   public AlternativeJdkIdGenerator() {
      SecureRandom secureRandom = new SecureRandom();
      byte[] seed = new byte[8];
      secureRandom.nextBytes(seed);
      this.random = new Random(new BigInteger(seed).longValue());
   }

   @Override
   public UUID generateId() {
      byte[] randomBytes = new byte[16];
      this.random.nextBytes(randomBytes);

      long mostSigBits = 0;
      for (int i = 0; i < 8; i++) {
         mostSigBits = (mostSigBits << 8) | (randomBytes[i] & 0xff);
      }
      long leastSigBits = 0;
      for (int i = 8; i < 16; i++) {
         leastSigBits = (leastSigBits << 8) | (randomBytes[i] & 0xff);
      }
      return new UUID(mostSigBits, leastSigBits);
   }
}
/*
* Copyright 2002-2015 the original author or authors. * * Licensed under the Apache License, Version 2.0 (the "License"); * you may not use this file except in compliance with the License. * You may obtain a copy of the License at * * https://www.apache.org/licenses/LICENSE-2.0
* * Unless required by applicable law or agreed to in writing, software * distributed under the License is distributed on an "AS IS" BASIS, * WITHOUT WARRANTIES OR CONDITIONS OF ANY KIND, either express or implied. * See the License for the specific language governing permissions and * limitations under the License. */
package org.springframework.util;
import java.util.UUID;
/**
* An {@link IdGenerator} that calls {@link java.util.UUID#randomUUID()}.
* * @author Rossen Stoyanchev
* @since 4.1.5
*/public class JdkIdGenerator implements IdGenerator {
@Override
public UUID generateId() {
return UUID.randomUUID();
}
}- https://stackoverflow.com/questions/39786902/uuid-randomuuid-vs-securerandom
AlternativeJdkIdGenerator는SecureRandom을 사용해 8비트의 시드를 생성한다.JdkIdGenerator또한SecureRandom을 사용하지만, 6비트의 랜덤하지 않은 비트가 존재한다.- 때문에
AlternativeJdkIdGenerator가 조금 더 '랜덤하게 보이는' uuid를 생성하기 위해서 성능을 조금 잡아먹었다고 해석하였다.
trouble shooting cases
Execution failed for task ':jmhRunBytecodeGenerator'.에러를 만났다면 gradle / 자바 버전의 문제다.- 나의 경우 동일한 java 17을 사용하였음에도 불구하고 마이너 버전이 17.0.3 --> 17.0.11 로 업그레이드하니 해결되었었다.
- 테스트 클래스 (
RandomBenchmarkTest)에 붙은 어노테이션을 통한 설정은 항상 gradle의jmhphrase 설정보다 후순위로 적용된다.- 즉
@Warmup(iterations = 2)설정을 해도 gradle의jmh설정에warmupIterations설정이 우선시된다.
- 즉
jmh intellij plugin
intellij를 사용한다면 아래의 플러그인을 사용할 수 있다.
https://plugins.jetbrains.com/plugin/7529-jmh-java-microbenchmark-harness
https://github.com/artyushov/idea-jmh-plugin
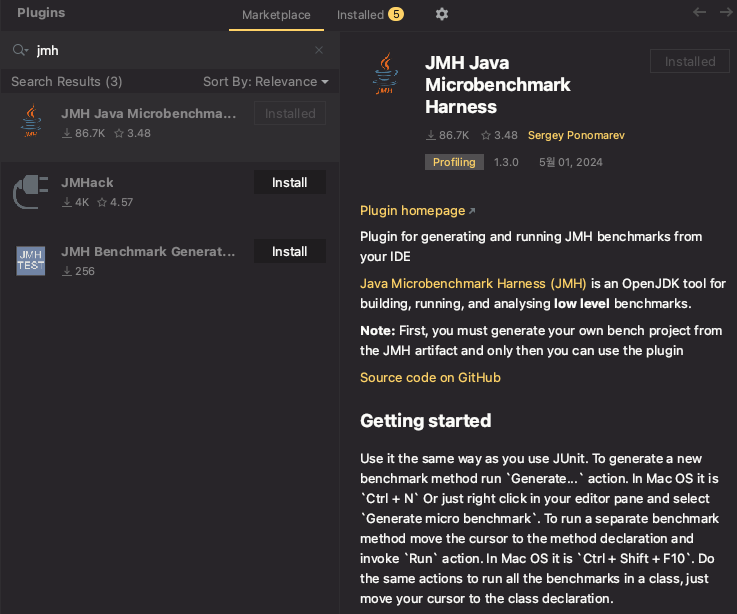
적용하게 되는 경우 아래와 같이 테스트하고자하는 메서드, 클래스 옆에 아이콘이 생성되는 것을 볼 수 있다.
실제 실행하였을 때에는 아래와 같은 에러와 마주치게 되었는데,
Exception in thread "main" java.lang.RuntimeException: ERROR: Unable to find the resource: /META-INF/BenchmarkList
	at org.openjdk.jmh.runner.AbstractResourceReader.getReaders(AbstractResourceReader.java:98)
	at org.openjdk.jmh.runner.BenchmarkList.find(BenchmarkList.java:124)
	at org.openjdk.jmh.runner.Runner.internalRun(Runner.java:253)
	at org.openjdk.jmh.runner.Runner.run(Runner.java:209)
	at org.openjdk.jmh.Main.main(Main.java:71)

Process finished with exit code 1
구글링을 조금 해보니 이미 open 상태의 이슈를 볼 수 있었다.
- intellij를 사용하는 사용자라면 enable annotation processor 옵션을 켜주어야 동작한다고 해서 켜주었지만 동작하지 않았다.
- 의존성 추가의 이야기도 있어서 아래 코드를 추가해보았지만 동작하지 않았다.
testImplementation 'org.openjdk.jmh:jmh-core:1.25'
testAnnotationProcessor 'org.openjdk.jmh:jmh-generator-annprocess:1.25'
해당 플러그인에 아직 문제가 있는 것 같다.. gradle-plugin으로 동작하였으니 언젠가 고쳐지겠지 하고 크게 신경쓰지 않았다.
결론
- stopwatch benchmark를 사용해서도 충분히 의미있는 벤치마킹 결과를 얻을 수 있다.
- 다만 vm 위에서 동작하는 프로그램에 대해서 보다 정확하고 다양한 측면에서 서로 다른 두 코드의 동작을 비교하고 싶을 때에는 jmh의 도움을 빌릴 수 있다.
- gradle을 사용한다면 plugin을 적극적으로 사용하자.