□ 자바스크립트 - 2강 3/3
1. 웹사이트의 주요 기능 만들기
1) 버튼을 클릭했을 때, 배경을 바꾸는 기능 개선하기
- 버튼을 클릭했을 때, 임의의 헥사코드값으로 배경색에 변하면서 화면에 배경색의 헥사코드값이 출력되도록 함
※ HEX Code(헥사코드) - #000fff와 같이 #과 0 ~ 9의 숫자와 a ~ f 사이의 알파벳의 6자리 조합으로 이루어져 있음
코드)
[main.js]

var hex = document.getElementById('hex');
var btn = document.getElementById('btn');


// hex 태그와 btn태그가 정상적으로 따라왔는지 확인하기
// console.log(hex);
// console.log(btn);

btn.addEventListener('click', function() {
    // console.log("클릭");

    var arr = [0, 1, 2, 3, 4, 5, 6, 7, 8, 9, "a", "b", "c", "d", "e", "f"];
    var color = "#";

    for(var i = 0; i < 6; i++) {

        var random = Math.floor(Math.random() * arr.length);
        color += arr[random];

    }

    document.body.style.backgroundColor = color;
    hex.textContent = color;

});
◆ for문 작동 스크린샷
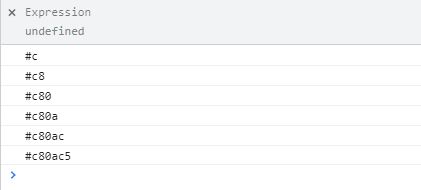
◆ 결과 스크린샷

● addEventListener( , )의 2번째로 인수로 전달한 함수 자체를 변형하기
- 위의 코드에서 2번째 인수로 넣은 함수를 별도의 함수명(
createColor)을 지정하여 전역변수로 만든 후, 2번째 인수로 함수명을 넣어줌(콜백함수)
코드)
btn.addEventListener('click', createColor);

function createColor () {
    // console.log("클릭");

    var arr = [0, 1, 2, 3, 4, 5, 6, 7, 8, 9, "a", "b", "c", "d", "e", "f"];
    var color = "#";

    for(var i = 0; i < 6; i++) {

        var random = Math.floor(Math.random() * arr.length);
        color += arr[random];

    }

    document.body.style.backgroundColor = color;
    hex.textContent = color;
};
★ 작성코드
2. javaScript 활용 실습
1) 배열의 개체 안에 인용문구가 들어가 있고, 이를 랜덤하게 출력하는 기능 구현하기
[html]

<body>

    <button type="button" id="btn">클릭</button>

    <h1 id="quote">인용문구가 들어갈 자리</h1>
    <span id="author">작가가 들어갈 자리</span>


    <script src="js/main.js"></script>

</body>
[main.js]
var arr = [
{
quote: "아이들은 누구나 예술가이다",
author: "피카소"
},
{
quote: "내면의 목소리는 들리지 않게 된다.",
author: "반 고흐"
},
{
quote: "완벽을 두려워하지 말라",
author: "달리"
},
{
quote: "영감이 오는 것을 기다리고 있을 수는 없다.",
author: "런던"
},
{
quote: "의욕만 있으면 이런 노력만으로도 얼마든지 많은 생각을 찾을 수 있다.",
author: "수스"
},
];
// console.log(arr[0].quote);
// console.log(arr[0].author);
var quote = document.getElementById("quote");
var author = document.getElementById("author");
var btn = document.getElementById('btn');
btn.addEventListener('click', function() {
var random = Math.floor(Math.random() * arr.length);
quote.textContent = arr[random].quote;
author.textContent = arr[random].author;
});◆ 결과 스크린샷

◆ 결과 스크린샷 2

★ 작성코드
2) input 태그를 사용하여, 입력한 글자를 화면에 출력하기
- 입력한 글자가 있을 경우 글자를 출력하고, 글자가 없을 경우 ‘input을 입력하라’는 에러문구 출력하기
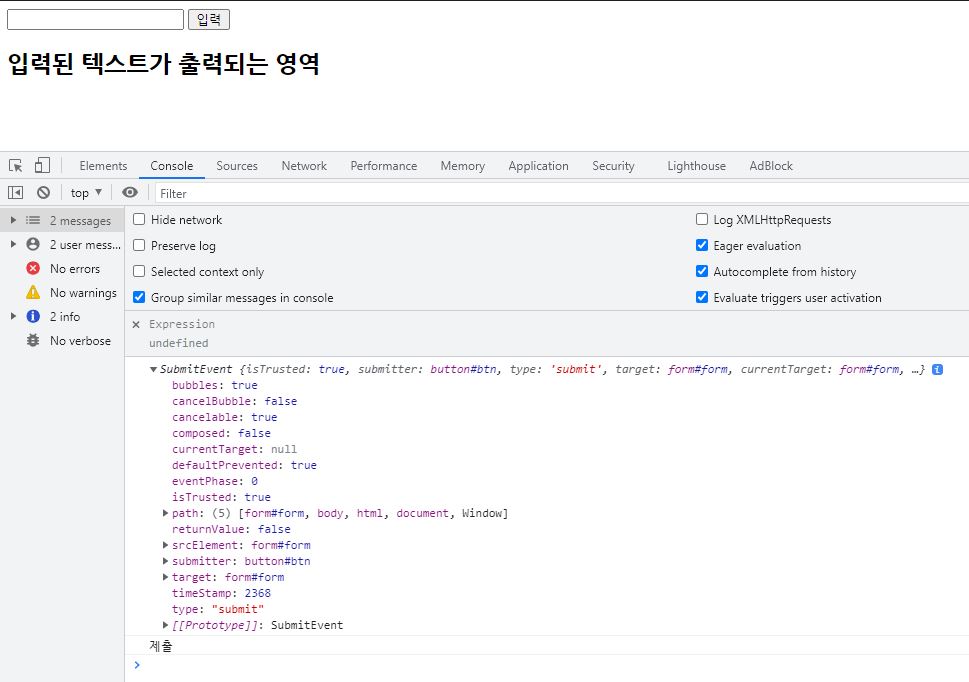
● form 태그에는 버튼을 눌러서 글자를 submit하게 되면, 작업을 수행 후 바로 창을 새로고침하게 됨
→ 새로고침을 막기위해 main.js의 function( )에서 .preventDefault( ); 메서드를 작성함
● preventDefault( );는 태그의 본연의 기능을 정지시킬 수 있음
코드)
[main.js]

form.addEventListener('submit', function(e) {

    e.preventDefault();
    console.log(e);

    console.log("제출");
});
◆ preventDefault( ); 사용 결과 스크린샷
● .reset( ); 메서드 – 내용을 초기화 할 때 사용. 여기서는 input의 입력 내용을 초기화할 때 사용함.
form.reset();● if문에서 else의 경우 새로운 클래스 명을 추가하기
.classList.add( );를 사용하여 적용시킴
else {

        feedback.classList.add('show');

    }
● 일정 시간이 지난 후, show 클래스가 사라지도록 하는 기능 적용
setTimeout( , );메서드를 사용함 → 2가지 인수를 받음, 첫 번째는 콜백함수, 두 번째는 시간을 받음
예시)
[main.js]

setTimeout(function() {
            feedback.classList.remove('show');
}, 2000);
★ 작성코드
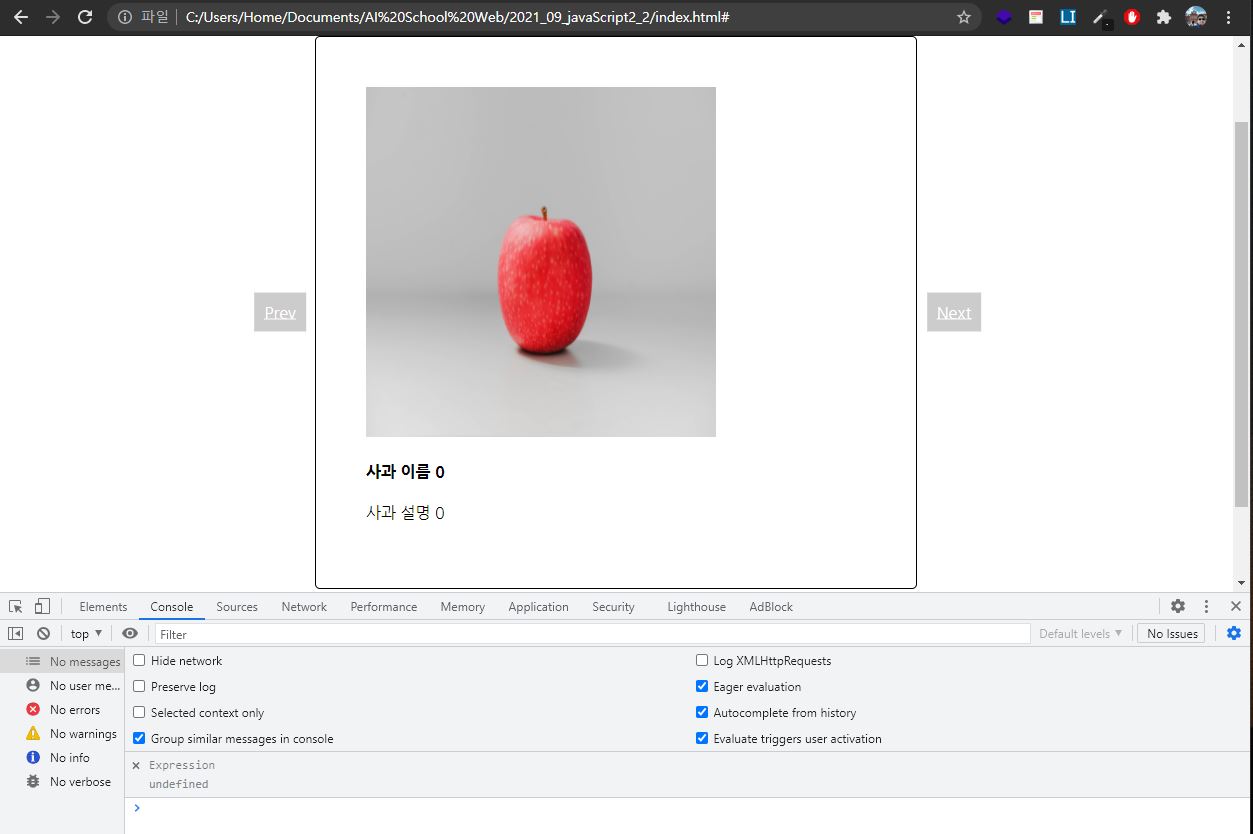
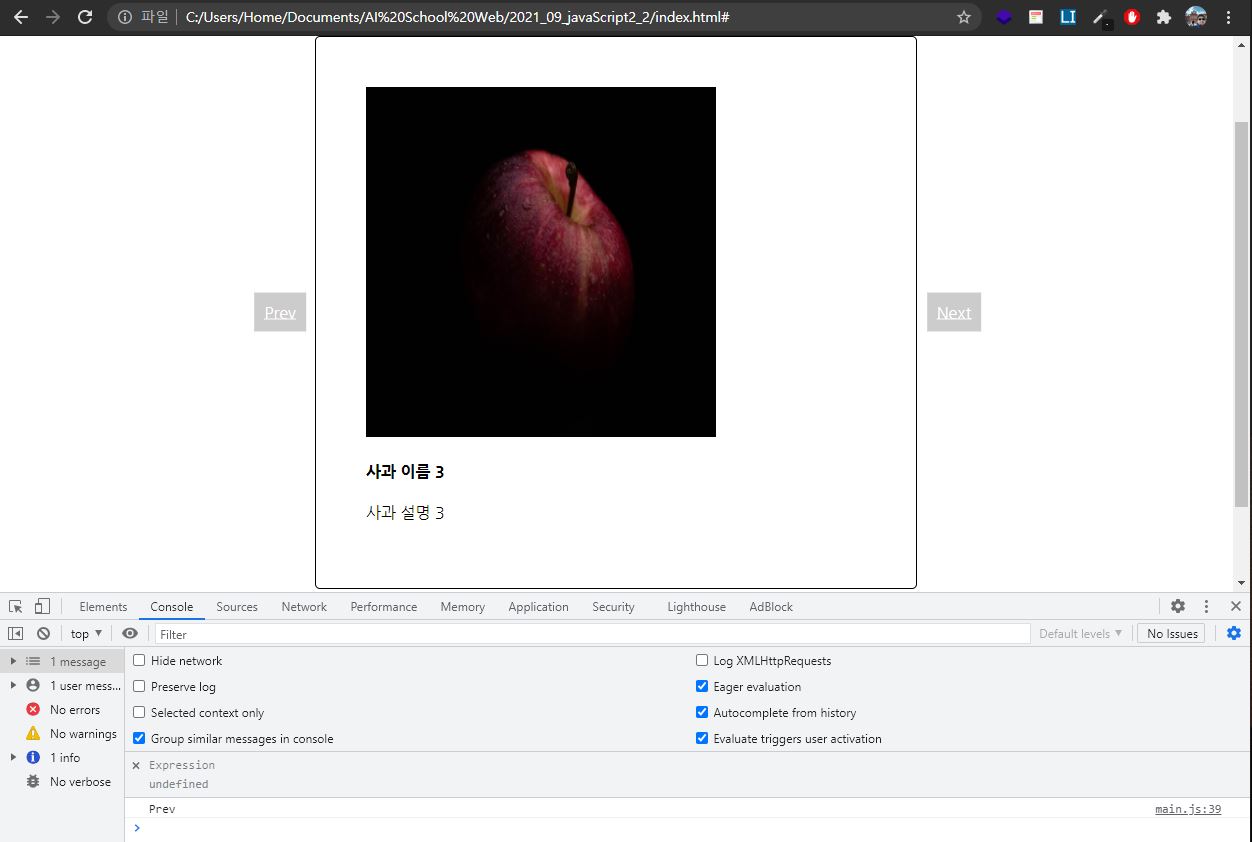
3) 이미지의 좌, 우측을 클릭 시, 다른 이미지로 바뀌도록 하는 기능 만들기
● document.querySelectorAll( );을 사용하여 html 영역 가져오기
- 가져온
html영역은 배열 형태로 저장됨
예시)
document.querySelectorAll('.btn');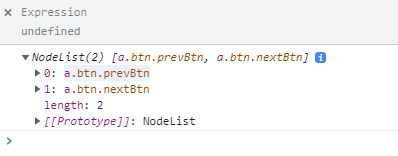
※ ‘.btn’ 클래스 영역을 가져옴
● prev나 next 버튼 클릭 시, 화면 시점이 페이지 상단으로 올라가는 기능 멈추기
html의a태그의 고유 기능으로 이를 멈춰야 함.preventDefault( );를 사용함
예시)
[main.js]

document.querySelectorAll('.btn').forEach(function (element, index) {

    element.addEventListener('click', function(e) {

        e.preventDefault();

    });

});
● 클릭한 버튼이 어떤 버튼인지 확인하는 방법
.target을 사용하여 어떤 버튼을 사용했는지 확인함
예시)
if(e.target.classList.contains('prevBtn')) {
            console.log("Prev");
}

if(e.target.classList.contains('nextBtn')) {
            console.log("Next");
}
◆ 결과 스크린샷
◆ 결과 스크린샷(prev)
◆ 결과 스크린샷(next)

★ 작성코드
※ 조건문과 반복문의 작동 순서를 알고자 할 때, 도움이 되는 사이트 – https://pythontutor.com/

반갑습니다. 잘부탁드립니다.