auth 모듈
사용자 인증을 담당하는 auth 모듈을 추가한다.
nest g module auth
nest g constoller auth --no-spec
nest g service auth --no-spec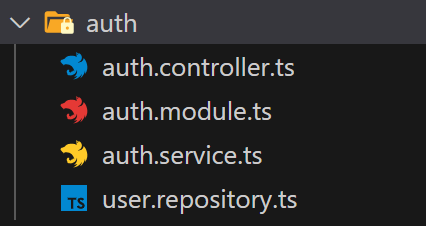
User Entity
사용자 관리를 위해서는 User entity를 사용한다.
@Entity()
export class User extends BaseEntity {
    @PrimaryGeneratedColumn()
    id: number;

    @Column()
    username: string;

    @Column()
    password: string;
}
auth.module, auth.controller, auth.service에도 등록해준다.
user repository도 board와 비슷하게 생성한 후 등록한다.
@Injectable()
export class UserRepository extends Repository<User> {
    constructor(private dataSource : DataSource){
        super(User, dataSource.createEntityManager())
    }

}
Sign up
간단하게 회원가입 로직을 구현해보자. username과 password를 받아 그것을 User 테이블에 저장해주면 된다.
우선 회원가입을 위한 dto를 생성한다.
export class AuthCredentialDto {
    username: string;
    password: string;
}
이 dto를 repository의 createUser 메서드에서 사용한다.
async createUser(authCredentialDto:AuthCredentialDto) : Promise<void> {
const {username, password} = authCredentialDto
const user = this.create({username,password})
await this.save(user);
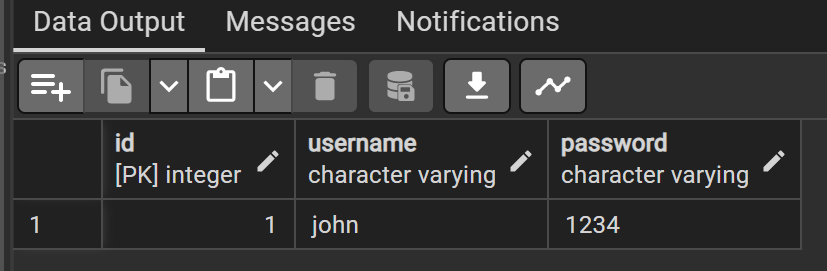
}로직은 일단 createBoard와 비슷하게 한다. 서비스에 createUser를 활용하여 signup 메서드를 추가하고 컨트롤러에도 만들어준다.
postman으로 요청을 넣어주면 DB에 잘 들어온 것을 확인할 수 있다.
Validation
이제 유효성 검사를 위해 dto에 class-validator를 적용한다.
@IsString() @MinLength(6) @MaxLength(20)
username: string;

@IsString() @MinLength(6) @MaxLength(20)
@Matches(/^[a-zA-Z0-9]*$/,{
    message: "Only alpabet and number possible for password"
})
password: string;
@Matches() 데코레이터로 정규식을 사용한 유효성 검사를 적용할 수 있다. 패스워드로 알파벳과 숫자만 가능하게 지정한다.
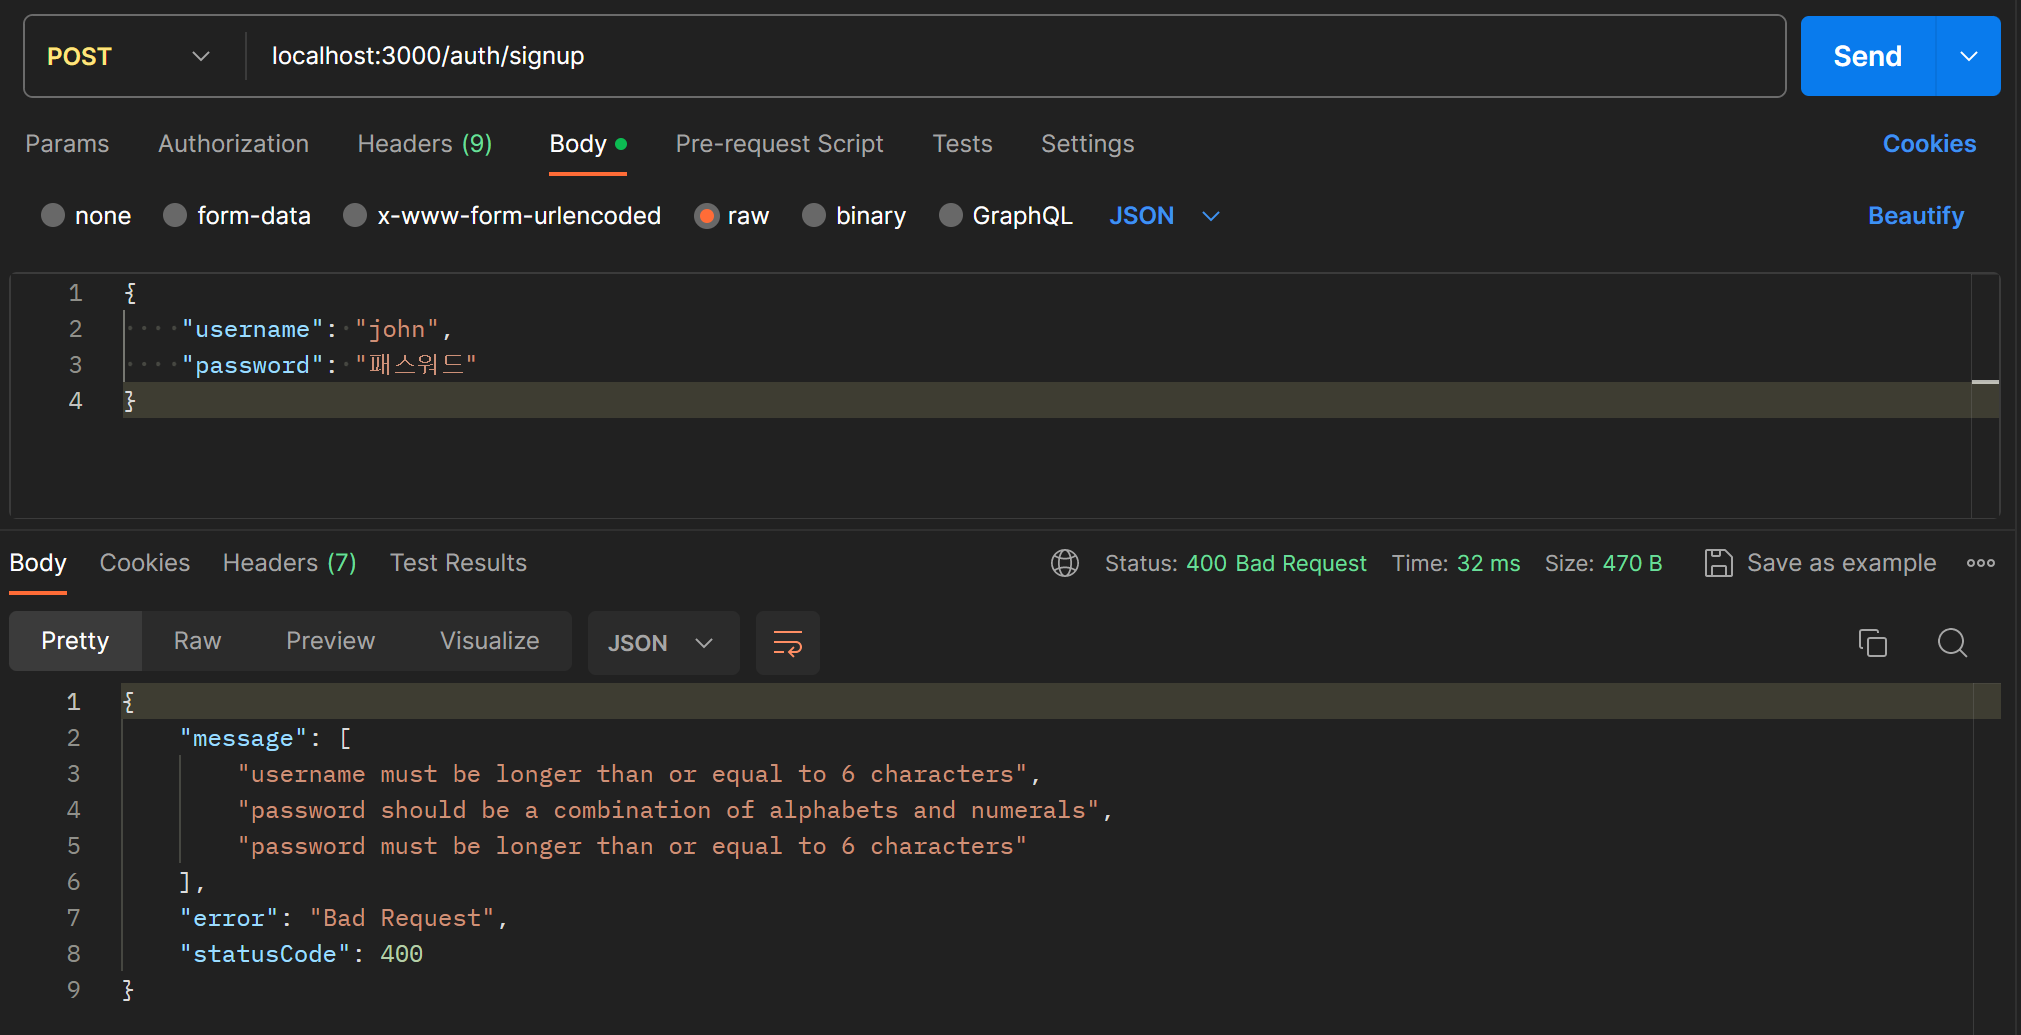
DTO에 정의한 조건을 체크하려면 컨트롤러의 핸들러에 ValidationPipe를 넣어주어야한다.
@Post('/signup')
signUp(@Body(ValidationPipe) authCredentialDto : AuthCredentialDto): Promise<void> {
    return this.authService.signUp(authCredentialDto)
}
postman으로 다시 회원가입 요청을 보내보면 조건에 맞지 않는 입력값일 때 아래와 같이 에러 메시지를 제대로 반환한다.
반대로 조건에 맞으면 아무런 에러 메시지 없이 제대로 회원가입이 된다.

이제 username 중복 체크를 해보자.
entity를 정의할 때 username을 Unique로 지정한다. Unique 데코레이터에 중복을 허용하지 않을 Colomn의 이름을 배열로 넣어주면 된다.
@Entity() @Unique(['username'])
export class User extends BaseEntity {
    @PrimaryGeneratedColumn()
    id: number;

    @Column()
    username: string;

    @Column()
    password: string;
}
그럼 중복된 username을 DB에 생성하려 할 때 오류를 반환한다. 메서드단에서 이 오류를 처리하는 로직을 추가한다.
async createUser(authCredentialDto:AuthCredentialDto) : Promise<void> {
    const {username, password} = authCredentialDto
    const user = this.create({username,password})
    try {
        await this.save(user);
    } catch (error) {
        console.log(error);
    }
}
아직 에러 내용으로 어떤 것이 오는지 모르니 로그를 찍어 확인한다.
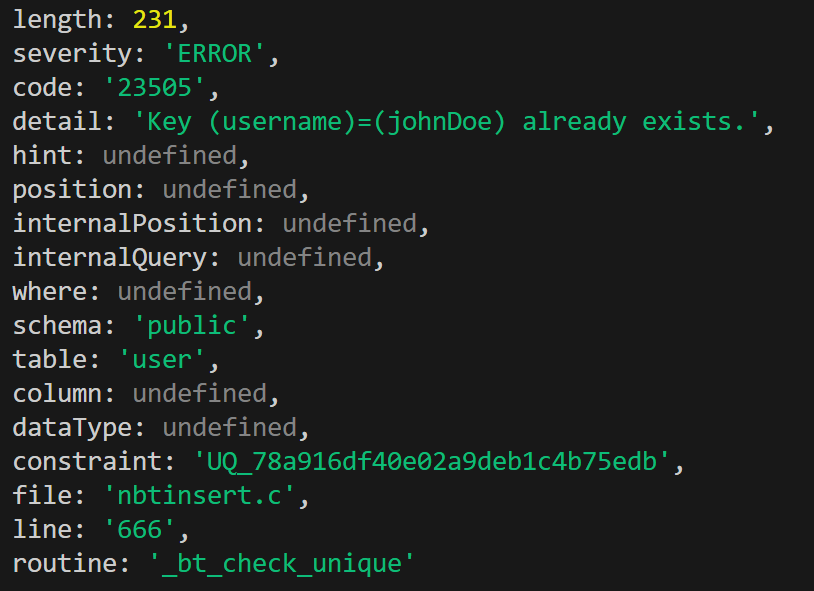
중복 오류는 코드가 23505인 것 같다. 이 코드로 예외처리 로직을 만든다. 나머지 오류 코드에 대해서는 그냥 일반적인 서버 에러로 처리해준다.
async createUser(authCredentialDto:AuthCredentialDto) : Promise<void> {
const {username, password} = authCredentialDto
const user = this.create({username,password})
try {
await this.save(user);
} catch (error) {
if(error.code==='23505'){
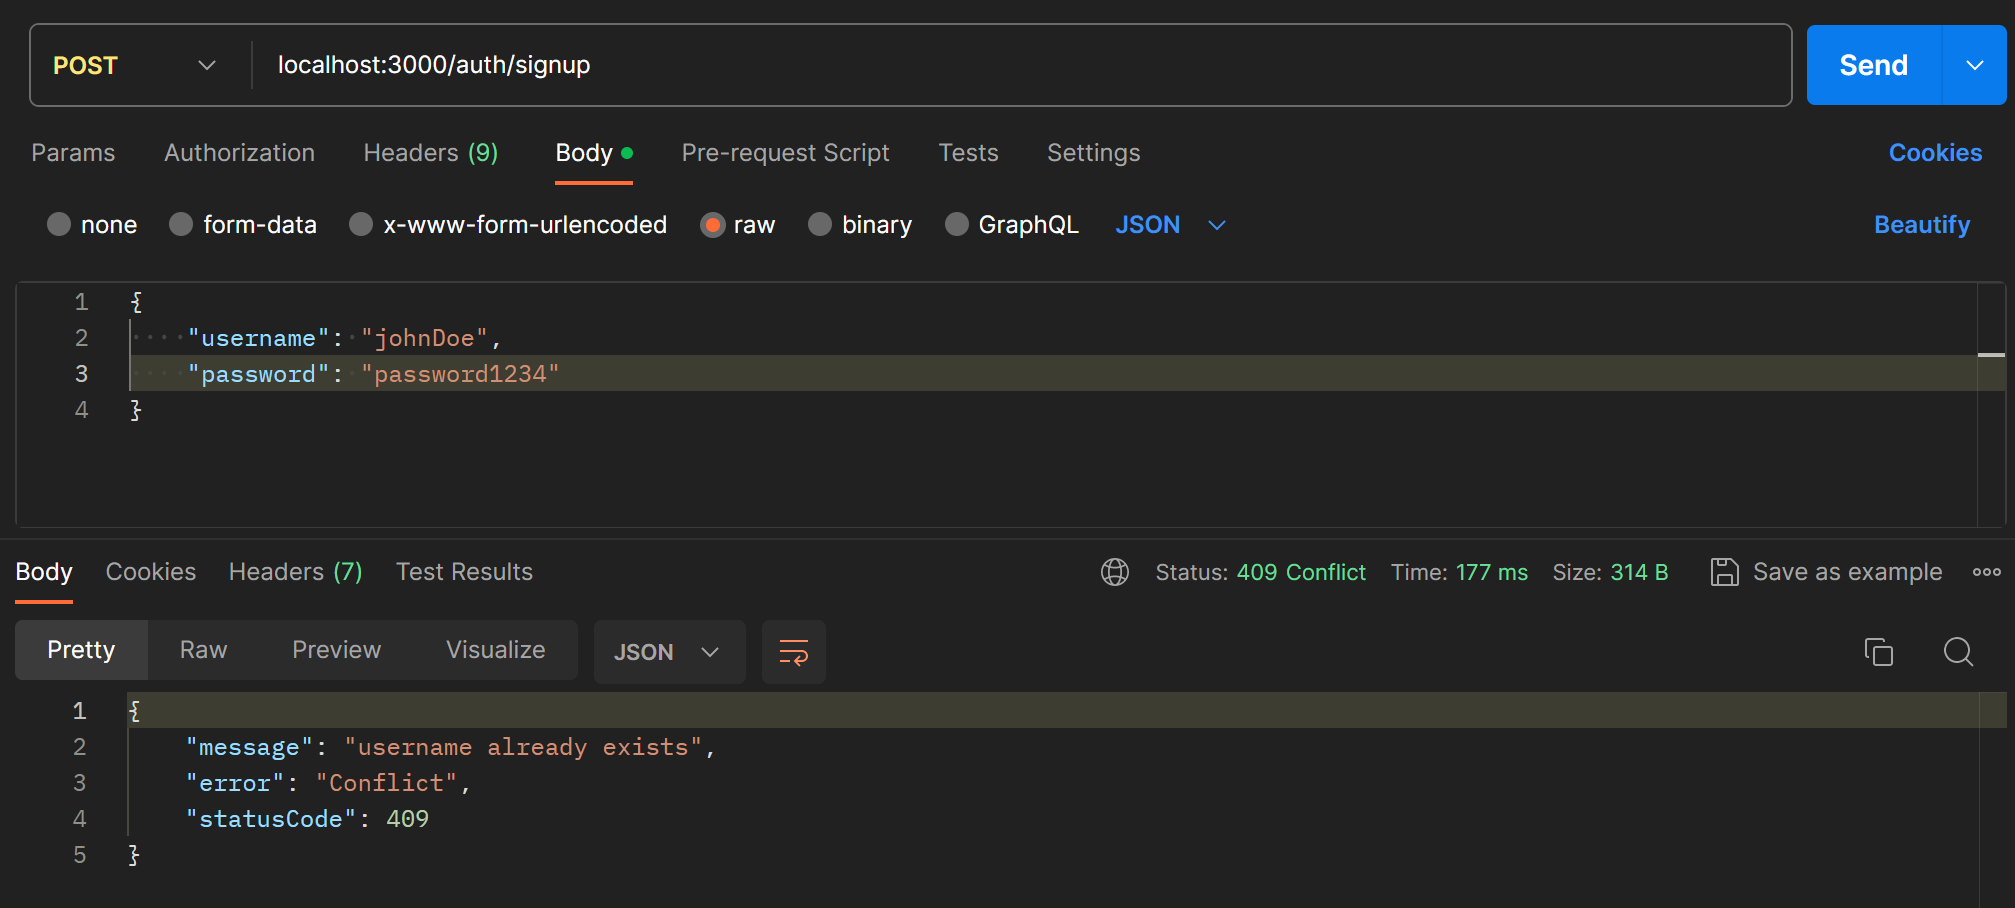
throw new ConflictException('username already exists')
} else {
throw new InternalServerErrorException();
}
}
}아까 보낸 것과 같은 값으로 회원가입 요청을 보내면 이번에는 예외처리한 대로 오류 메시지가 전달된다.
Password Encryption
당연히 패스워드는 암호화하여 저장해야 한다. bcrypt 모듈을 이용하여 암호화한다.
npm i bcrypt --save보통 salted hash 방식을 사용하여 패스워드를 저장한다.
async createUser(authCredentialDto:AuthCredentialDto) : Promise<void> {
    const {username, password} = authCredentialDto
    const salt = await bcrypt.genSalt()
    const hashed = await bcrypt.hash(password,salt)
    const user = this.create({username,password:hashed})
    try {
        await this.save(user);
    } catch (error) {
        if(error.code==='23505'){
            throw new ConflictException('username already exists')
        } else {
            throw new InternalServerErrorException();
        }
    }
}
salt를 생성해준 후, hash 함수로 입력된 패스워드와 함께 해시해준다.
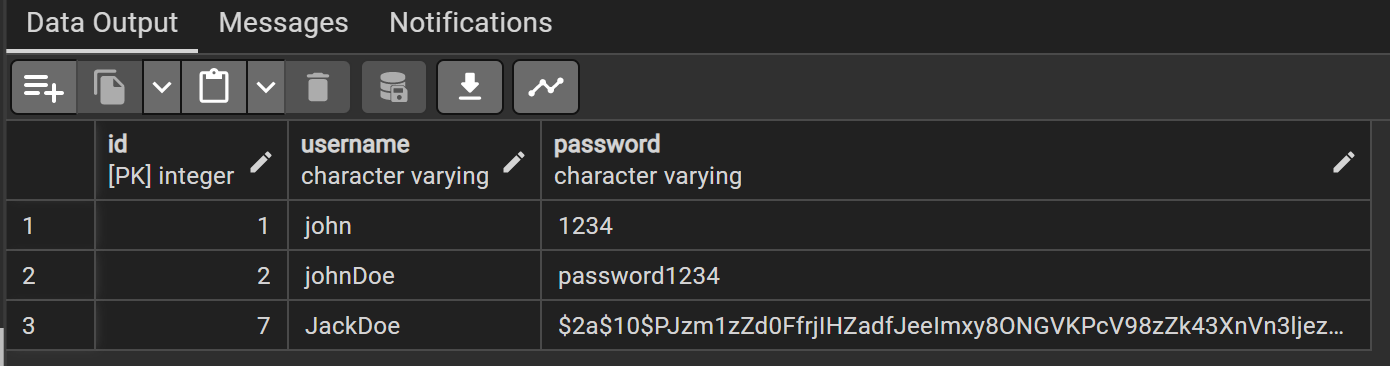
이제부터는 이전의 User와는 다르게 해시를 적용한 후 DB에 저장된다.
Log in
로그인은 username으로 User 테이블에서 사용자 정보를 찾고, 저장된 hashed password와 입력한 패스워드를 비교하는 방식으로 만든다.
async signIn(authCredentialDto: AuthCredentialDto) : Promise<string> {
const {username, password} = authCredentialDto
const user = await this.userRepository.findOneBy({username})
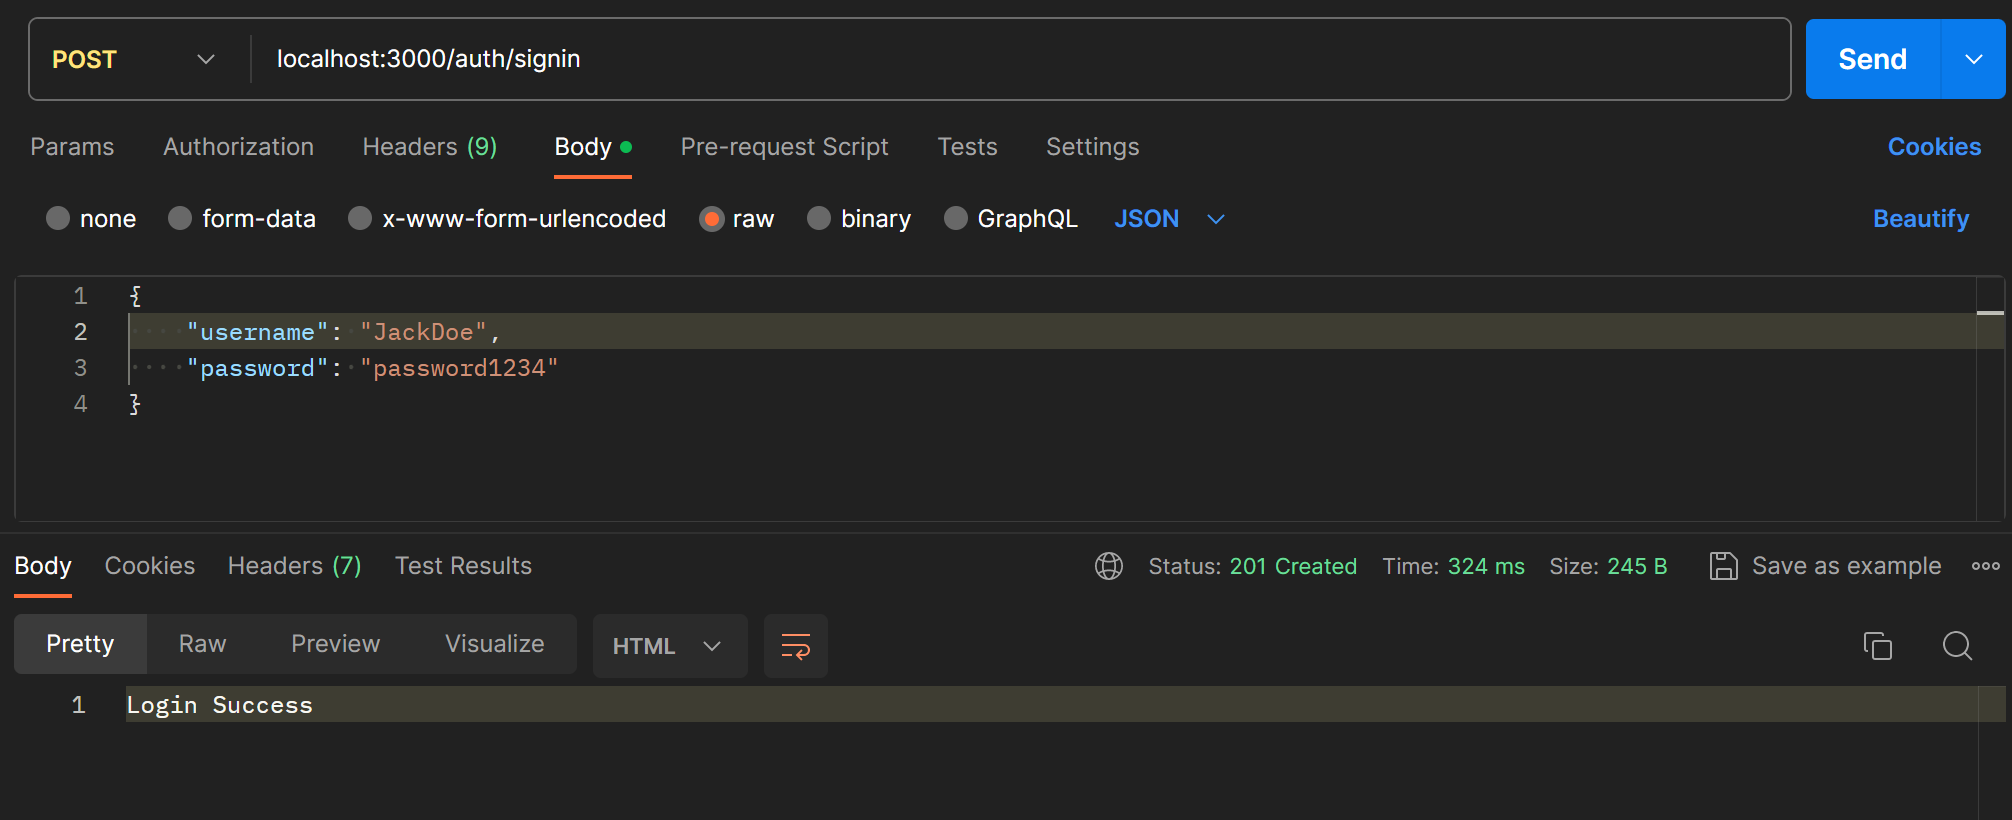
if (user && (await bcrypt.compare(password,user.password))) {
return 'Login Success'
} else {
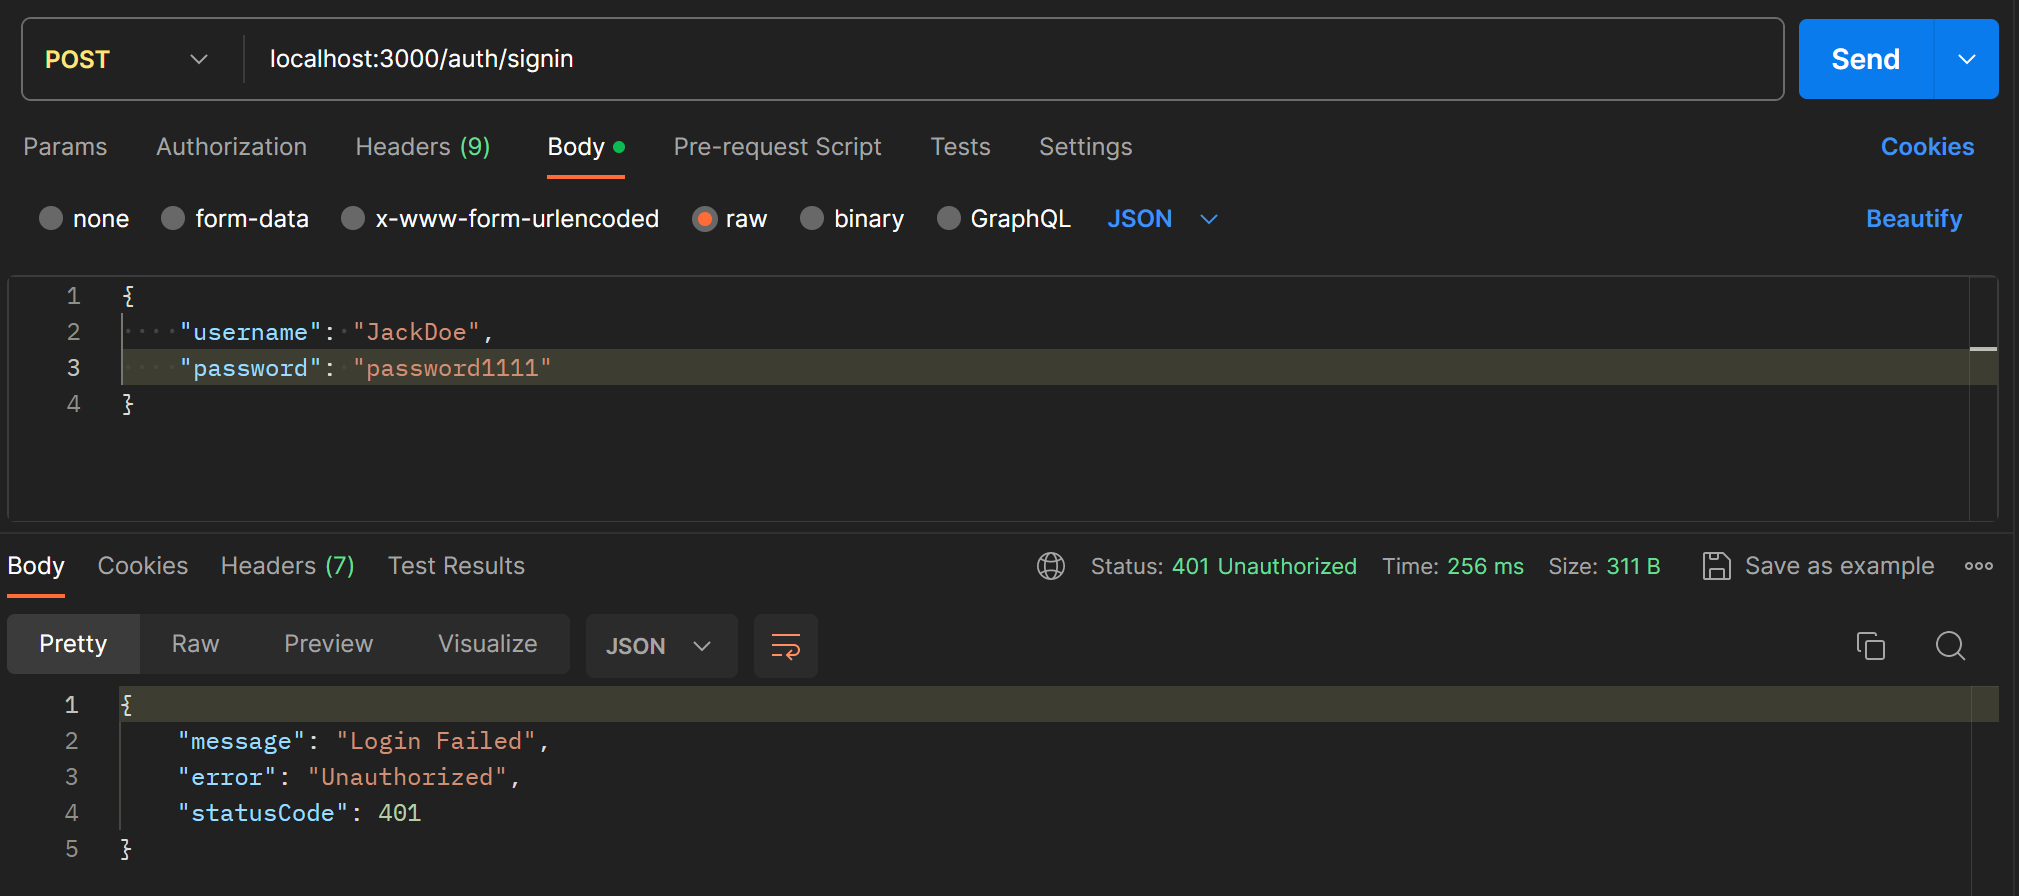
throw new UnauthorizedException("Login Failed")
}
}TypeORM의 findOneBy 메서드로 사용자를 찾고, bcrypt의 compare()로 패스워드를 검사한다.
JWT (Json Web Token)
JWT는 웹에서 정보를 안전하게 전달하기 위해 사용하는 토큰이다. 주로 사용자 인증에 사용된다. 보통 로그인 후 토큰을 발급해준다. 지난 포스트 참고.
jwt와 passport 모듈을 사용한다. secret을 .env에서 가져와서 사용하려면 dotenv 모듈도 함께 설치한다.
npm i @nestjs/jwt @nestjs/passport passport passport-jwt @types/passport-jwt --savejwt 모듈은 auth 모듈에 등록해주어야 한다. JwtModule의 register에 secret을 넣고, 유효기간은 1시간으로 설정한다.
@Module({
  controllers: [AuthController],
  providers: [AuthService,UserRepository],
  imports: [TypeOrmModule.forFeature([User]),
  JwtModule.register({
    secret: process.env.JWT_SECRET,
    signOptions:{
      expiresIn: 60*60
    }
  })
  ]
})
서비스에서도 JWT를 사용하려면 constructor에 주입해주어야한다.
constructor(
    @InjectRepository(UserRepository)
    private userRepository : UserRepository,
    private jwtService : JwtService
){}
이제 로그인 성공시 JWT를 발급하도록 signIn 메서드를 수정한다. jwt의 sign 함수를 이용해서 주어진 payload로 토큰을 발급할 수 있다.
async signIn(authCredentialDto: AuthCredentialDto) : Promise<{accessToken : string}> {
    const {username, password} = authCredentialDto
    const user = await this.userRepository.findOneBy({username})
    if (user && (await bcrypt.compare(password,user.password))) {
        const payload = {username}
        const accessToken = await this.jwtService.sign(payload)
        return {accessToken}
    } else {
        throw new UnauthorizedException("Login Failed")
    }
}
이제 로그인에 성공하면 accessToken이 발급된다.
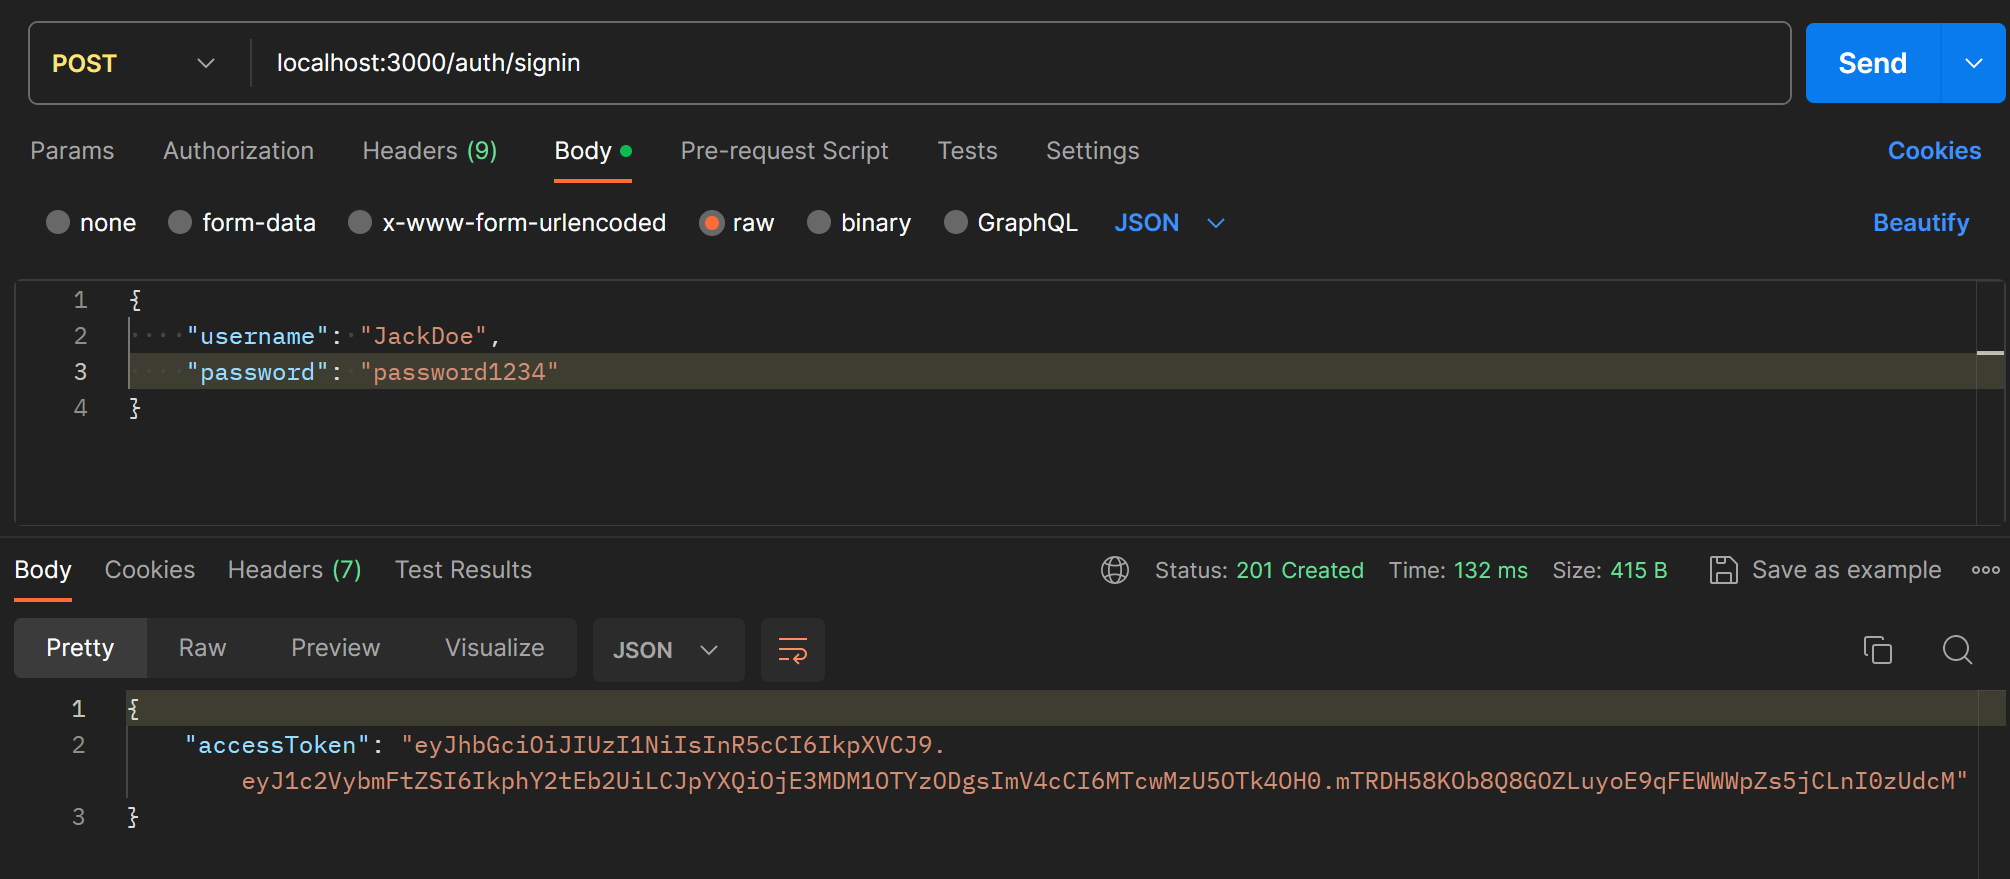
발급한 토큰은 포스트맨의 authorization 탭에 넣어서 요청과 함께 보낼 수 있다.

Passport
이제 발급한 토큰을 검증하는 로직을 구현한다.
auth/jwt.strategy.ts를 생성하여 jwtStrategy를 작성한다.
@Injectable()
export class JwtStrategy extends PassportStrategy(Strategy) {
    constructor(@InjectRepository(UserRepository) private userRepository : UserRepository){
        super({
            secretOrKey: process.env.JWT_SECRET,
            jwtFromRequest: ExtractJwt.fromAuthHeaderAsBearerToken()
        })
    }
}
super에 옵션으로 JWT를 발급할 때 사용한 secret을 넣어주고, JWT를 어디서 extract할지 지정해준다.
JWT를 검증하는데 사용할 validate 함수를 작성한다.
async validate(payload) {
    const {username} = payload
    const user : User = await this.userRepository.findOneBy({username})
    if(!user){
        throw new UnauthorizedException()
    }

    return user;
}
JwtStrategy를 auth.module에 등록하고 다른 모듈에서 사용할 수 있도록 export 해준다.
@Module({
  controllers: [AuthController],
  providers: [AuthService,UserRepository, JwtStrategy],
  imports: [
    TypeOrmModule.forFeature([User]),
    PassportModule.register({defaultStrategy: 'jwt'}),
    JwtModule.register({
      secret: process.env.JWT_SECRET,
      signOptions:{
        expiresIn: 60*60
      }
    })
  ],
  exports: [JwtStrategy, PassportModule]
})
컨트롤러의 핸들러에 useGuards() 데코레이터를 추가하면 요청을 받을 때 유저 정보도 함께 받을 수 있다. passport의 AuthGard() 사용하면 validate한 user의 정보가 포함된다.
test 핸들러를 하나 생성하여 테스트해본다.
@Post('/test')
@UseGuards(AuthGuard())
test(@Req() req){
    console.log(req);
}
토큰과 함께 요청을 보내면 validate에 선언한대로 user 정보가 request에 포함되어 들어온다.
Custom Decorator
접근제어를 위해 특정 사용자만 접근할 수 있도록 하기 위하여 request 속의 user 정보를 파라미터로 가져오는 커스텀 데코레이터를 만들어보자. createParamDecorator를 사용하여 생성할 수 있다.
export const GetUser = createParamDecorator((data,ctx: ExecutionContext): User=>{
    const req = ctx.switchToHttp().getRequest();
    return req.user
})
context를 이용하여 request를 뽑아내고, 그 안의 user만 반환하도록한다.
@Post('/test')
@UseGuards(AuthGuard())
test(@GetUser() user: User){
console.log(user);
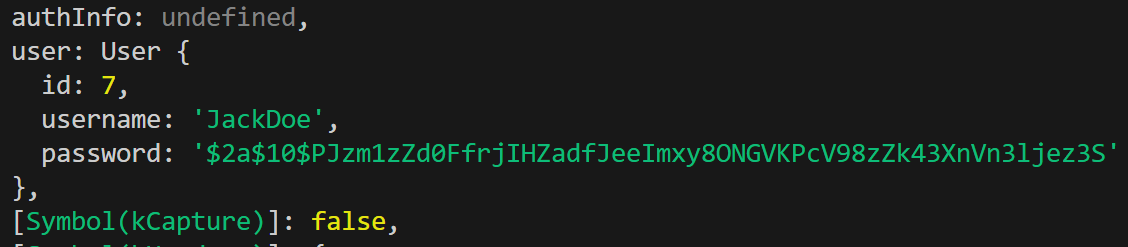
}핸들러에 생성한 GetUser 데코레이터를 적용한 뒤 로그를 찍어보면 아래처럼 user 객체만 가져온 것을 볼 수 있다.

Access Control
이제 토큰에서 user 정보를 뽑아낼 수 있으니 board에 특정 user만 접근할 수 있도록 접근 제어를 해보자.
우선 boards 모듈에서 auth 모듈을 import한다. boards 컨트롤러 전체에 @UseGuards(AuthGuard())를 적용하여 모든 핸들러에 적용되도록한다.

이제 토큰이 없으면 unauthorized가 반환된다.