이미지 전송
안드로이드 개발에서 서버로 이미지를 전송하는 것은 흔한 요구사항이다.
Local에서 이미지를 선택(ex. PhotoPicker)하면 Uri를 반환한다.
그리고 서버로 이미지를 전송할 때는 REST API의 경우 MultipartFile가 필요하고, Firebase의 Storage 역시 File형태로 전송이 가능하다. 그래서 결국 이미지를 전송하기 위해선 Uri를 File로 변환하는 로직이 필요하다.
요즘엔 스마트폰으로 촬영한 이미지도 용량이 엄청 커서 이런 큰 이미지를 그대로 전송한다면 Storage 비용 문제, 전송 시간 지연 문제, OutOfMemory 문제 등이 발생할 수 있다.
그래서 이미지 전송을 위해 Uri를 File로 변환할 때 이미지 크기를 줄이는 과정이 필요하고, Android에선 Bitmap을 통해 이미지를 조작하고 압축할 수 있기 때문에 이 포스팅에선 '어떻게 효율적이고 안전하게 Uri를 Bitmap으로 또 Bitmap을 File로 변환해야할까?'란 고민을 해결한 과정을 공유하려 한다.
코루틴 Dispatchers
Uri, Bitmap, File 관련 로직을 처리할 땐, IO 작업과 많은 연산이 요구된다.
그리고 보통 ViewModel에서 최종적으로 비즈니스 로직을 수행하기 때문에 이미지 압축 과정에서 Main 스레드가 Blocked 되지 않도록 주의해야 한다.
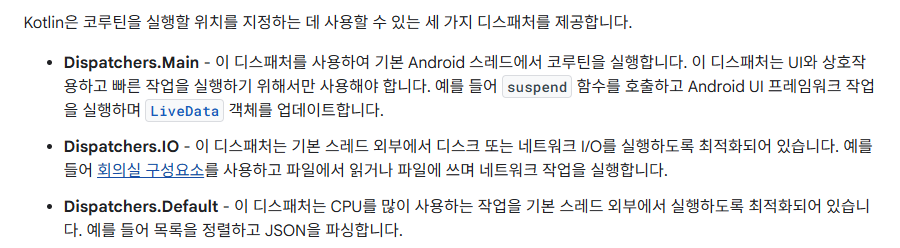
그래서 Dispatcher를 지정해서 가장 적합한 스레드에서 로직이 수행되어야 한다.
따라서 디스크 입출력과 같은 IO 작업은 Dispatchers.IO에서 수행하고,
비트맵 조작과 같은 연산이 많은 작업은 Dispatchers.Default에서 수행할 것이다.
Kotlin Result을 통한 예외 처리
Android Uri to File 관련된 많은 포스팅에선 try-catch문이 많이 활용되고 결과적으로 nullable인 File?을 반환하는 것을 볼 수 있다.
나는 Kotlin의 Result 클래스를 활용해 반환 값 혹은 예외를 안전하게 Wrapping하고, 코드 가독성을 향상시키고자 했다.
Result에 대한 이해를 위해선 [TossTech] 에러 핸들링을 다른 클래스에게 위임하기을 읽어보면 좋을 것 같다.
public inline fun <R> runCatching(block: () -> R): Result<R> {
    return try {
        Result.success(block())
    } catch (e: Throwable) {
        Result.failure(e)
    }
}
Result를 활용한다면 runCatching을 통해 복잡한 try-catch문 없이 결과를 Wrapping 할 수 있다. 개인적으로 긴 try-catch문이 있는 코드는 가독성이 떨어진다고 느껴서 runCatching을 활용하여 가독성 높은 코드를 작성하려 했다.
1. 압축 포맷 정하기
private fun getSuffixAndCompressFormatByVersion(): Pair<String, CompressFormat> {
    return if (Build.VERSION.SDK_INT >= Build.VERSION_CODES.R) {
        ".webp" to CompressFormat.WEBP_LOSSY
    } else {
        ".jpeg" to CompressFormat.JPEG
    }
}
먼저, Android 버전에 따른 suffix와 CompressFormat을 정해주었다.
WEBP 형식의 경우 R 버전(sdk 30)이상부터 사용 가능하다.
그래서 R 버전 이상이면 WEBP, 아니면 JPEG 형식을 사용했다.
2. 임시 파일 만들기
private fun createTempImageFile(suffix: String): File {
    return if (Build.VERSION.SDK_INT >= Build.VERSION_CODES.O) {
        createTempFile(
            directory = context.cacheDir.toPath(),
            prefix = FILE_NAME_PREFIX,
            suffix = suffix
        ).toFile()
    } else {
        File.createTempFile(FILE_NAME_PREFIX, suffix, context.cacheDir)
    }
}
다음으로 전송에 사용할 임시 File을 만들었다. 해당 File에 디코딩된 Bitmap을 압축해 저장할 것이다.
여기서도 버전에 따라 File 생성 방식이 다른데, O 버전(sdk 26) 이상부터는 kotlin.io.path의 createTempFile을 사용하도록 권장된다. 개발 환경의 minSdk가 24이므로 버전별로 File 생성 방식을 구분해주었다.
참고로 context는 Hilt의 @ApplicationContext를 주입하여 사용한 것이다.
3. Bitmap 다운샘플링 및 디코딩
private fun getDownSampledBitmap(uri: Uri, reqWidth: Int, reqHeight: Int): Result<Bitmap> {
    val options = BitmapFactory.Options().apply {
        inJustDecodeBounds = true
        decodeUriToBitmap(uri, this)
        inSampleSize = calcInSampleSize(reqWidth, reqHeight)
        inJustDecodeBounds = false
    }
    return decodeUriToBitmap(uri, options)
}

private fun decodeUriToBitmap(uri: Uri, options: BitmapFactory.Options): Result<Bitmap>
	= runCatching {
        context.contentResolver.openInputStream(uri).use { inputStream ->
            BitmapFactory.decodeStream(inputStream, null, options)
                ?: throw RuntimeException("bitmap decoding failed")
        }
    }

private fun BitmapFactory.Options.calcInSampleSize(reqWidth: Int, reqHeight: Int): Int {
    val (width, height) = outWidth to outHeight
    var inSampleSize = 1
    if (width > reqWidth || height > reqHeight) {
        val halfWidth = width shr 1
        val halfHeight = height shr 1
        while (halfWidth / inSampleSize >= reqWidth && halfHeight / inSampleSize >= reqHeight) {
            inSampleSize = inSampleSize shl 1
        }
    }
    return inSampleSize
}
이제 PhotoPicker 등으로 받은 Uri를 Bitmap으로 디코딩할 것이다.
디코딩에는 BitmapFactory.decodeStream을 이용한다.
여기서 주의할 점은 용량이 큰 이미지가 메모리에 올라간다면 OutOfMemory가 발생할 수 있어서 다운샘플링과정이 필요하다. 그래서 reqWidth와 reqHeight을 기준으로 다운샘플링된 Bitmap을 만들어낸다.
BitmapFactory.Options로 디코딩 옵션을 설정하는데, 처음 생성하는 options를 보면 inJustDecodeBounds = true로 설정하고 decodeUriToBitmap을 수행한다.
inJustDecodeBounds를 true로 설정하면, 해당 이미지를 메모리에 올리지 않고, inSampleSize에 사용할 Bitmap의 width와 height 등의 정보만 얻을 수 있다.
inSampleSize는 2의 거듭제곱 형태의 Int값으로, 설정된 inSampleSize만큼 줄어든 해상도로 디코딩이 가능하다.
자세한 내용은 [Android Developers] 큰 비트맵을 효율적으로 로드에서 확인할 수 있다.
calcInSampleSize에선 reqWidth와 reqHeight를 기준으로 inSampleSize를 계산하는데, inSampleSize가 2의 거듭제곱이기 때문에 약간의 효율성을 위해 비트 연산을 사용했다.
options에 inSampleSize를 설정하고, 다시 inJustBounds를 false로 설정하여 다운샘플링된 Bitmap으로 디코딩할 준비가 끝났고, 마지막으로 decodeUriToBitmap를 반환한다.
public inline fun <T : Closeable?, R> T.use(block: (T) -> R): R {
    contract {
        callsInPlace(block, InvocationKind.EXACTLY_ONCE)
    }
    var exception: Throwable? = null
    try {
        return block(this)
    } catch (e: Throwable) {
        exception = e
        throw e
    } finally {
        when {
            apiVersionIsAtLeast(1, 1, 0) -> this.closeFinally(exception)
            this == null -> {}
            exception == null -> close()
            else ->
                try {
                    close()
                } catch (closeException: Throwable) {
                    // cause.addSuppressed(closeException) // ignored here
                }
        }
    }
}decodeUriToBitmap에선 openInputStream(uri)에 use를 사용했는데, 내부 코드를 보면 try-catch문을 통해 block 내부의 로직을 수행하고, 예외가 발생하면 던지는 것을 확인할 수 있다.
또 마지막에 InputStream에 대한 close()를 수행하기 때문에 메모리 누수를 방지할 수 있다.
해당 디코딩 과정을 runCatching으로 Wrapping하고 있기 때문에 예외가 발생한다면, Result.failure로 안전하게 전달할 수 있다.
4. 회전된 Bitmap 복구하기
private suspend fun rotateBitmapIfRequired(bitmap: Bitmap, uri: Uri): Result<Bitmap> =
    withContext(Dispatchers.Default) {
        runCatching {
            context.contentResolver.openInputStream(uri)?.use { inputStream ->
                val exif = ExifInterface(inputStream)
                val orientation = exif.getAttributeInt(
                    ExifInterface.TAG_ORIENTATION,
                    ExifInterface.ORIENTATION_NORMAL
                )
                val degrees = when (orientation) {
                    ExifInterface.ORIENTATION_ROTATE_90 -> 90f
                    ExifInterface.ORIENTATION_ROTATE_180 -> 180f
                    ExifInterface.ORIENTATION_ROTATE_270 -> 270f
                    else -> 0f
                }
                if (degrees == 0f) {
                    bitmap
                } else {
                    val matrix = Matrix().apply { postRotate(degrees) }
                    Bitmap.createBitmap(bitmap, 0, 0, bitmap.width, bitmap.height, matrix, true)
                }
            } ?: bitmap
        }
    }
Bitmap 디코딩 과정에서 이미지 방향 정보가 무시되어 원치 않게 회전된 이미지를 얻을 수 있다.
그래서 ExifInterface에서 이미지 방향 정보를 얻어 회전된 이미지를 다시 생성할 것이다.
앞서 설명한 것처럼 Bitmap 생성은 많은 연산이 처리되는 과정이기 때문에 withContext를 통해 Dispatcher를 Default로 변경하여 수행할 것이다.
InputStream을 통해 ExifInterface에서 이미지 방향 정보를 얻고, 회전 각도에 createBitmap으로 새로운 Bitmap을 생성한다.
ExifInterface를 통해 이미지 파일에 대한 메타데이터를 읽고 쓸 수 있고, 참고로 androidX에서 지원하므로 android.media.ExifInterface 대신에 androidX ExifInteface를 사용하길 권장된다.
5. Bitmap, File에 압축하기
private fun compressBitmapToFile(
    bitmap: Bitmap,
    file: File,
    compressFormat: CompressFormat,
    quality: Int = 80,
): Result<File> = runCatching {
    FileOutputStream(file).use { outStream ->
        bitmap.compress(compressFormat, quality, outStream)
    }
}
이제 생성한 File에 디코딩된 Bitmap을 압축하여 저장할 것이다.
Bitmap 압축은 Bitmap 클래스의 compress()로 수행할 수 있는데, 매개변수로 quality를 설정할 수 있다. quality는 1~100 사이의 Int값으로 quality가 낮을 수록 용량은 작아지지만 화질은 떨어진다.
compressBitmapToFile도 마찬가지로 use와 runCatching을 사용하여 메모리 누수를 방지하고, 예외를 Wrapping하고 있다.
6. Uri to File
suspend fun compressUriToFile(uri: Uri, reqWidth: Int, reqHeight: Int): Result<File>
    = runCatching {
        val downSampledBitmap = getDownSampledBitmap(uri, reqWidth, reqHeight).getOrThrow()
        val correctedBitmap = rotateBitmapIfRequired(downSampledBitmap, uri)
            .getOrElse { t ->
                downSampledBitmap.recycle()
                throw t
            }
        val (suffix, compressFormat) = getSuffixAndCompressFormatByVersion()
        val tempFile = createTempImageFile(suffix = suffix)
        compressBitmapToFile(correctedBitmap, tempFile, compressFormat)
            .also {
                downSampledBitmap.recycle()
                correctedBitmap.recycle()
            }
            .getOrElse { t ->
                tempFile.delete()
                throw t
            }
        tempFile
    }
마지막으로 구현한 로직을 모두 사용해 Uri를 File로 변환하는 compressUriToFile를 노출할 것이다.
getOrThrow는 반환된 Result가 Success면 Wrapping된 value를 반환하고, Failure이면 예외를 던진다.
모든 과정이 runCatching 블록에서 수행되기 때문에 중간에 예외가 발생하면 이후 과정을 수행하지 않고 Result.Failure(exception)을 반환한다. 따라서 해당 메서드를 호출한 쪽(ViewModel)에서 예외를 처리할 수 있다.
또 tempFile을 반환하기 전에 생성한 Bitmap을 recycle() 한다. 최근 Android Sdk에선 사용하지 않는 Bitmap을 메모리에서 해제시켜주지만, 명시적으로 메모리를 해제하여 로직이 종료되기 전에 메모리를 확보할 수 있다.
활용 사례
fun onPhotoPickerResult(uri: Uri?) {
    if (uri != null) {
        viewModelScope.launch(Dispatchers.IO) {
            val result = imageProcessor.uriToCompressedFile(uri, 420, 560)
            withContext(Dispatchers.Main) {
                result
                    .onSuccess { file ->
                        image = ImageSource.Local(file)
                    }
                    .onFailure {
                        uiModel.showToast("이미지 변환에 실패했어요")
                    }
            }
        }
    }
}onPhotoPickerResult는 PhotoPicker ActivityResult의 onResult 콜백 시에 수행된다.
Dispatchers.IO를 설정하여 파일 변환 로직들이 IO 스레드에서 수행될 수 있게 했고, 결과 처리는 withContext로 Dispatcher를 Main으로 교체하여 메인 스레드에서 Result의 결과에 따라 UI State을 변경하고 있다.
변환 실패 처리로 단지 Toast 메세지를 띄우고 있지만 변환 과정에서 발생하는 모든 예외가 onFailure로 넘어왔기 때문에, 반환된 exception을 통해 다양한 예외처리가 가능하다.
전체 코드
import android.content.Context
import android.graphics.Bitmap
import android.graphics.Bitmap.CompressFormat
import android.graphics.BitmapFactory
import android.graphics.Matrix
import androidx.exifinterface.media.ExifInterface
import android.net.Uri
import android.os.Build
import dagger.hilt.android.qualifiers.ApplicationContext
import kotlinx.coroutines.Dispatchers
import kotlinx.coroutines.withContext
import java.io.File
import java.io.FileOutputStream
import javax.inject.Inject
import javax.inject.Singleton
import kotlin.io.path.createTempFile

@Singleton
class ImageProcessor @Inject constructor(
    @ApplicationContext private val context: Context,
) {
    suspend fun compressUriToFile(uri: Uri, reqWidth: Int, reqHeight: Int): Result<File>
        = runCatching {
            val downSampledBitmap = getDownSampledBitmap(uri, reqWidth, reqHeight).getOrThrow()
            val correctedBitmap = rotateBitmapIfRequired(downSampledBitmap, uri)
                .getOrElse { t ->
                    downSampledBitmap.recycle()
                    throw t
                }
            val (suffix, compressFormat) = getSuffixAndCompressFormatByVersion()
            val tempFile = createTempImageFile(suffix = suffix)
            compressBitmapToFile(correctedBitmap, tempFile, compressFormat)
                .also {
                    downSampledBitmap.recycle()
                    correctedBitmap.recycle()
                }
                .getOrElse { t ->
                    tempFile.delete()
                    throw t
                }
            tempFile
        }

    private fun getSuffixAndCompressFormatByVersion(): Pair<String, CompressFormat> {
        return if (Build.VERSION.SDK_INT >= Build.VERSION_CODES.R) {
            ".webp" to CompressFormat.WEBP_LOSSY
        } else {
            ".jpeg" to CompressFormat.JPEG
        }
    }

    // 1. 임시 파일 만들기 -> 전송 성공 이후 삭제할 것임.
    private fun createTempImageFile(suffix: String): File {
        return if (Build.VERSION.SDK_INT >= Build.VERSION_CODES.O) {
            createTempFile(
                directory = context.cacheDir.toPath(),
                prefix = FILE_NAME_PREFIX,
                suffix = suffix
            ).toFile()
        } else {
            File.createTempFile(FILE_NAME_PREFIX, suffix, context.cacheDir)
        }
    }

    // 2. bitmap 다운샘플링 옵션 설정 후 uri -> bitmap 디코딩
    private fun getDownSampledBitmap(uri: Uri, reqWidth: Int, reqHeight: Int): Result<Bitmap> {
        val options = BitmapFactory.Options().apply {
            inJustDecodeBounds = true
            decodeUriToBitmap(uri, this)
            inSampleSize = calcInSampleSize(reqWidth, reqHeight)
            inJustDecodeBounds = false
        }
        return decodeUriToBitmap(uri, options)
    }

    // 2-1) uri -> bitmap 으로 디코딩
    private fun decodeUriToBitmap(uri: Uri, options: BitmapFactory.Options): Result<Bitmap> = runCatching {
            context.contentResolver.openInputStream(uri).use { inputStream ->
                BitmapFactory.decodeStream(inputStream, null, options)
                    ?: throw RuntimeException("bitmap decoding failed")
            }
        }


    // 2-2) reqWidth, reqHeight 으로 inSampleSize 구하기
    private fun BitmapFactory.Options.calcInSampleSize(reqWidth: Int, reqHeight: Int): Int {
        val (width, height) = outWidth to outHeight
        var inSampleSize = 1
        if (width > reqWidth || height > reqHeight) {
            val halfWidth = width shr 1
            val halfHeight = height shr 1
            while (halfWidth / inSampleSize >= reqWidth && halfHeight / inSampleSize >= reqHeight) {
                inSampleSize = inSampleSize shl 1
            }
        }
        return inSampleSize
    }

    // 3. 디코딩 중 exif 회전 정보가 무시될 수 있음 -> 다시 원상 복구
    private suspend fun rotateBitmapIfRequired(bitmap: Bitmap, uri: Uri): Result<Bitmap> =
        withContext(Dispatchers.Default) {
            runCatching {
                context.contentResolver.openInputStream(uri)?.use { inputStream ->
                    val exif = ExifInterface(inputStream)
                    val orientation = exif.getAttributeInt(
                        ExifInterface.TAG_ORIENTATION,
                        ExifInterface.ORIENTATION_NORMAL
                    )
                    val degrees = when (orientation) {
                        ExifInterface.ORIENTATION_ROTATE_90 -> 90f
                        ExifInterface.ORIENTATION_ROTATE_180 -> 180f
                        ExifInterface.ORIENTATION_ROTATE_270 -> 270f
                        else -> 0f
                    }
                    if (degrees == 0f) {
                        bitmap
                    } else {
                        val matrix = Matrix().apply { postRotate(degrees) }
                        Bitmap.createBitmap(bitmap, 0, 0, bitmap.width, bitmap.height, matrix, true)
                    }
                } ?: bitmap
            }
        }


    // 4. webp or jpeg 형식 파일 압축
    private fun compressBitmapToFile(
        bitmap: Bitmap,
        file: File,
        compressFormat: CompressFormat,
        quality: Int = 80,
    ) = runCatching {
        FileOutputStream(file).use { outStream ->
            bitmap.compress(compressFormat, quality, outStream)
        }
    }

    companion object {
        private const val FILE_NAME_PREFIX = "dot_upload_"
        private const val TAG = "이미지 프로세서"
    }
}
마치며
이전 포스팅에서도 이미지 처리에 대한 내용을 다뤘었지만 변환 과정에서 어떤 문제가 발생할 수 있는지, 로직에 대한 이해가 부족한 상태로 구현하여 아쉬움이 있었다.
최근에 기업 과제나 면접을 통해 이미지 처리에 대한 공부를 하고 배경 지식을 얻었고, 현재 진행하는 프로젝트에 공부한 내용을 접목하여 적용할 수 있었다.
새로운 기능을 구현할 때는 관련된 배경 지식과 발생할 수 있는 문제 상황을 파악해야 여러 예외상황에 대비하고, 효율적인 코드를 작성할 수 있음을 깨달았다.
한 번 구현한 로직을 내 방식대로 개선한 점이 뿌듯하고, 이미지 처리를 조금이나마 이해하는데까지 오랜 시간이 걸렸기 때문에 이 포스팅을 통해 이해에 도움이 되었으면 좋겠다!