JWT OAuth2 연동
Main-Project가 종료 후 추가 보수 작업을 진행하냐고 이제야 블로깅을 다시하게 되었다.
이전 Project에서 못했던 OAuth2 연동을 도전하였고 다행이 성공할 수 있었다.
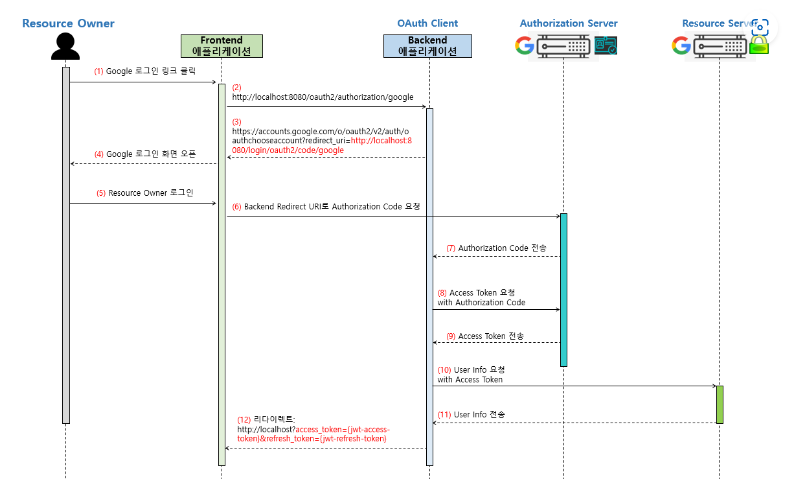
먼저 OAuth2의 동작 원리다. 구현 방식은 아래의 사진과 같이 진행하였다.

Google과 카카오 로그인을 구현했으며 각 사이트에서 필요한 작업을 진행하자.
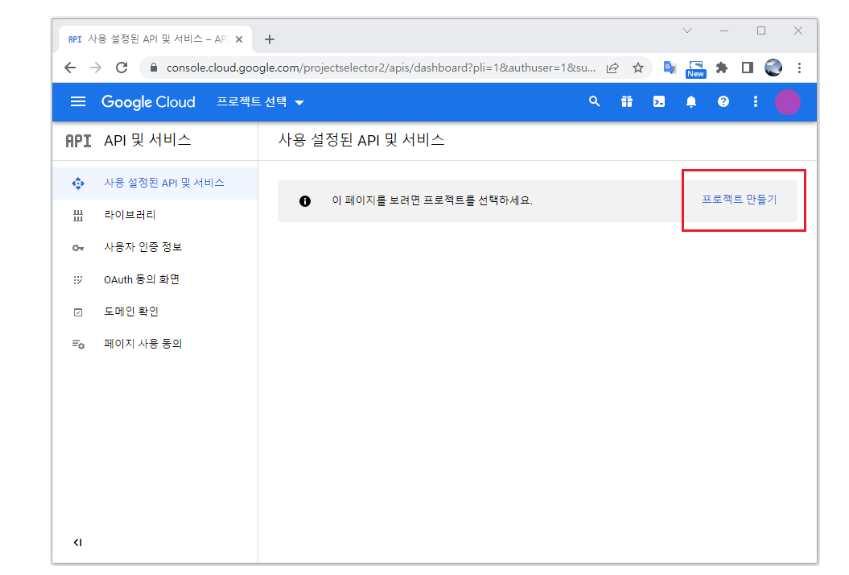
Google은 https://console.cloud.google.com/apis 이 링크를 통해 로그인하여야한다.
1) 프로젝트 생성
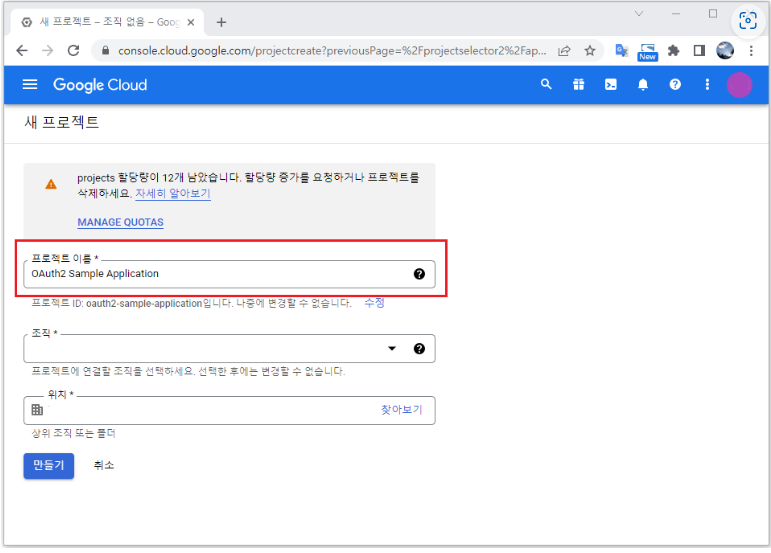
2) 프로젝트 명
3) 동의 화면 설정
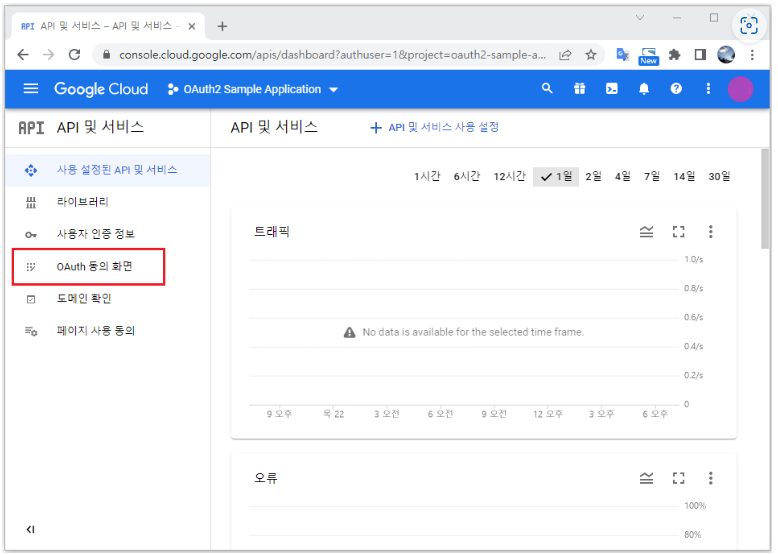
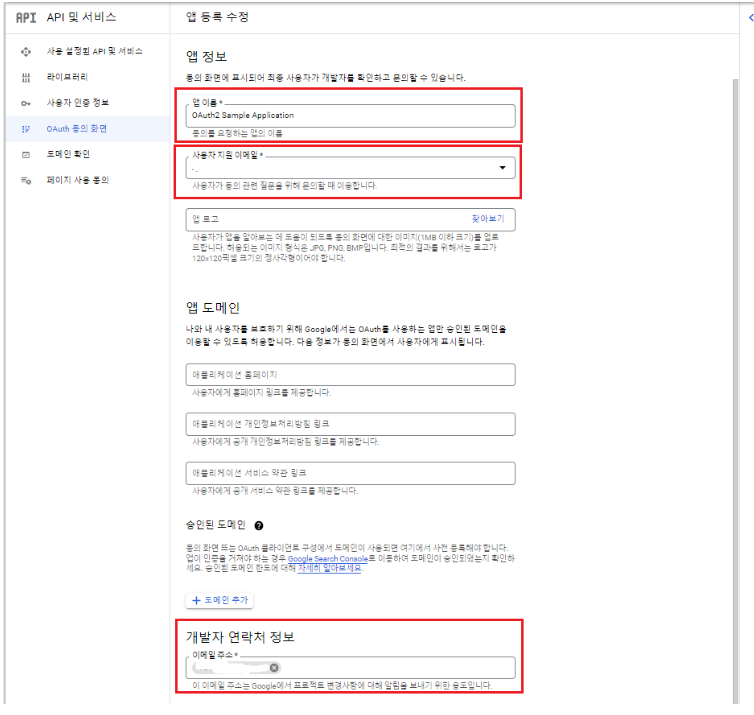
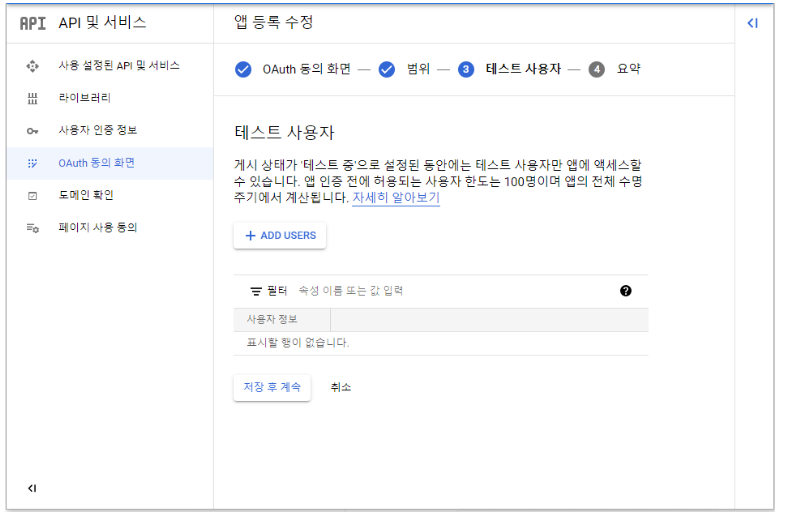
저장 후 계속 클릭
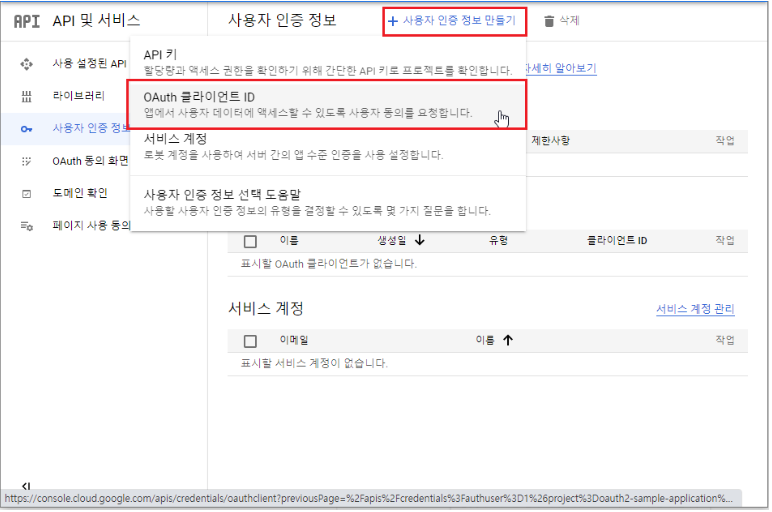
4) 사용자 인증 정보 만들기
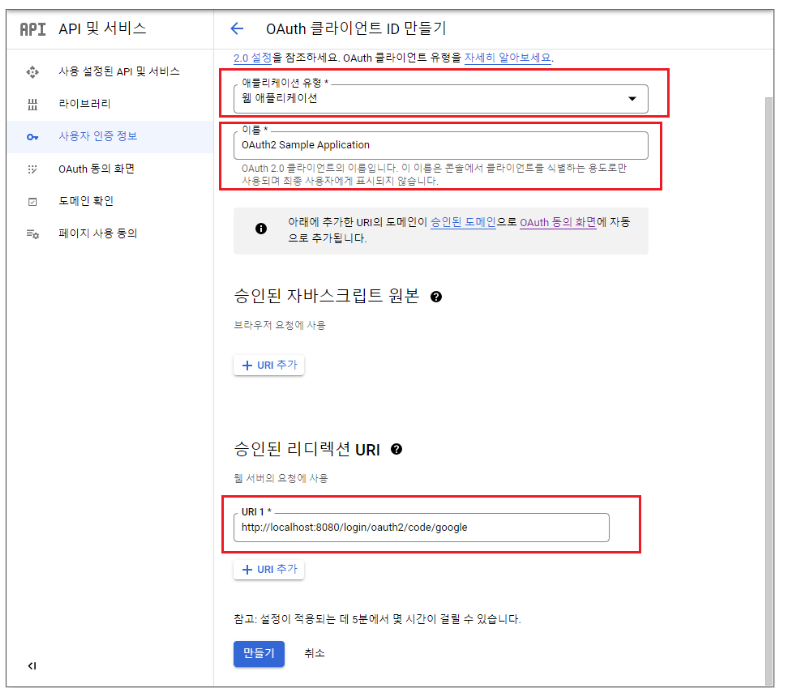
여기서 주의 해야할 것은 승인된 리디렉션 URI는 고정 값이라고 생각하면된다.
다만 프론트와 연동을 하기 위해서는 아래와 같이 승인된 자바스크립트 원본 URI를 추가해줘야한다.
로컬 환경에서는 문제가 없다.

승인된 리디렉션 URI는 로컬환경이기에
http://localhost:8080/login/oauth2/code/google으로 설정했지만 프론트 서버와 연동 시
http://{프론트서버 주소}/login/oauth2/code/google처럼 추가해줘야 한다.
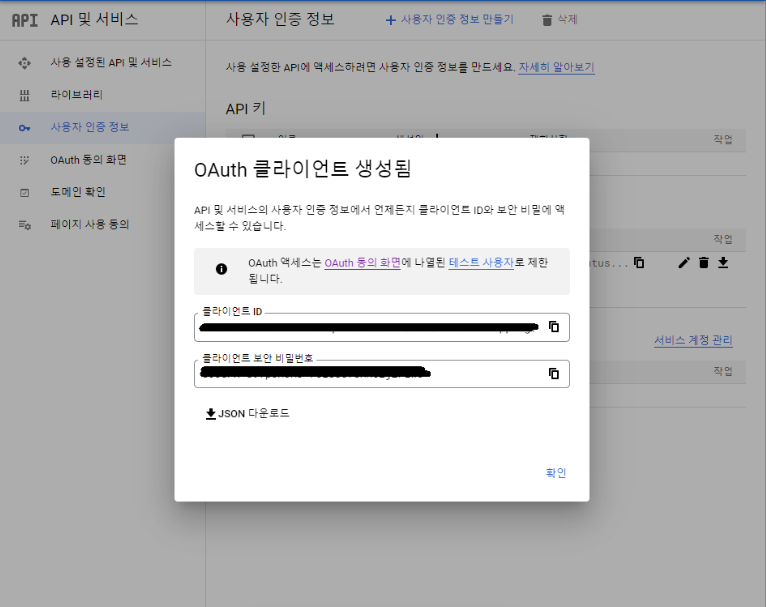
만들기가 완성되면 보안 비밀번호가 나오는데 사용자 인증 정보에서 다시 확인될 수 있고 노출되어서는 안된다.
이제 구글 설정이 끝났으니 카카오톡을 설정해보자
https://developers.kakao.com/console/app 에 접속하여 프로젝트를 생성해야한다.
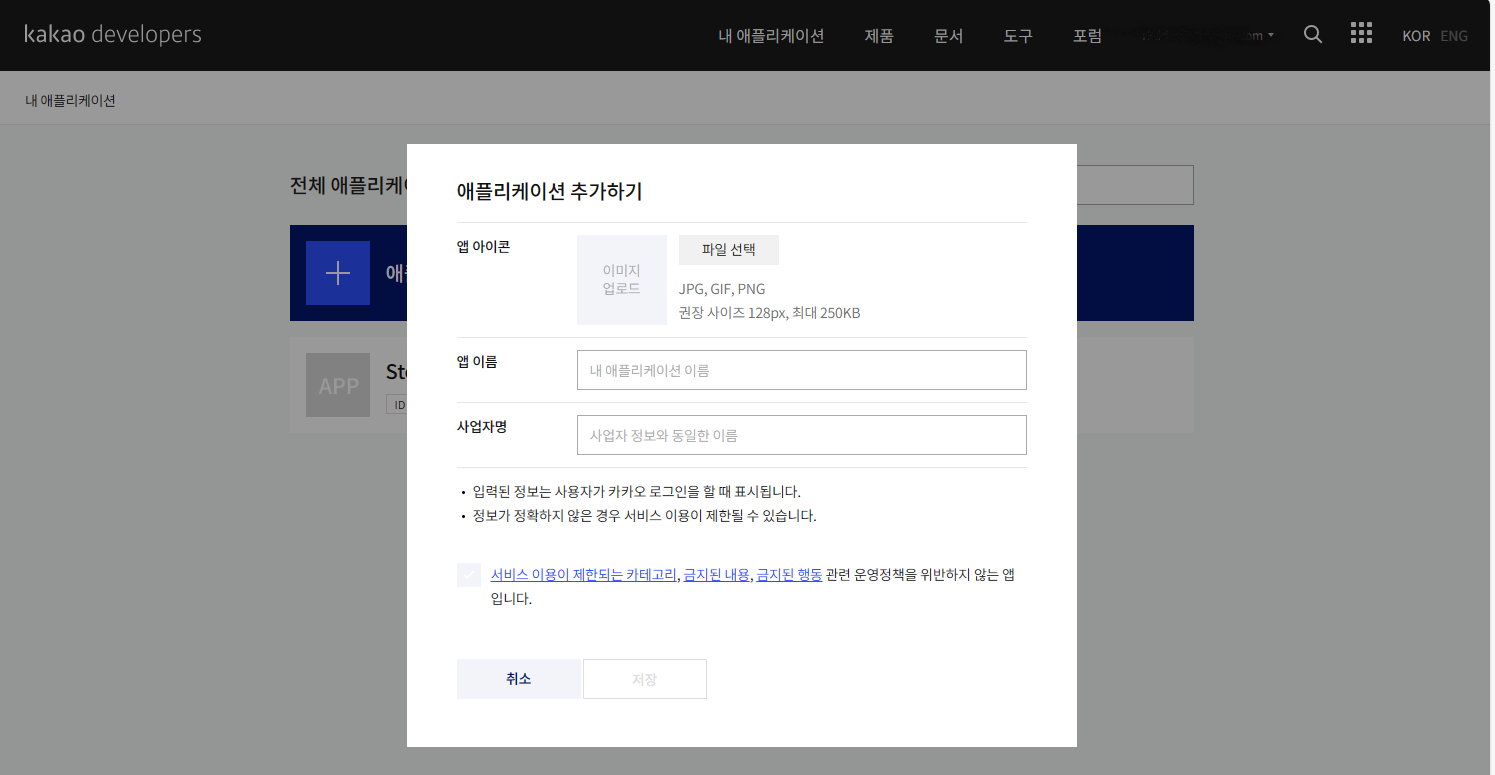
1)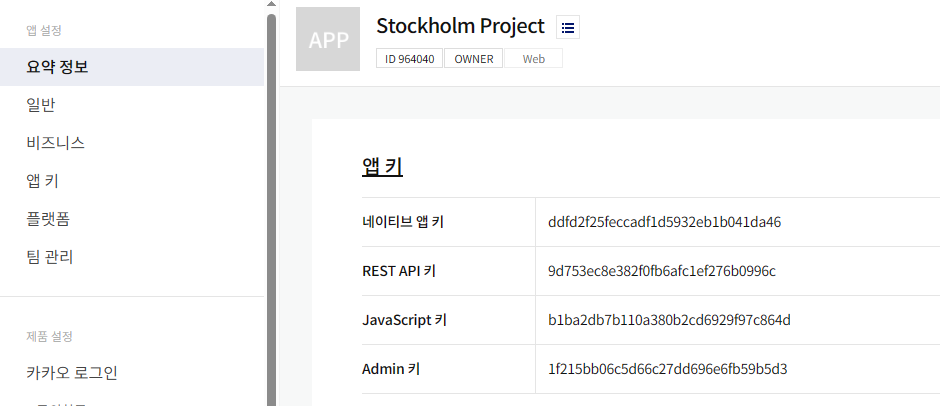
REST API 키 위치를 기억해두자
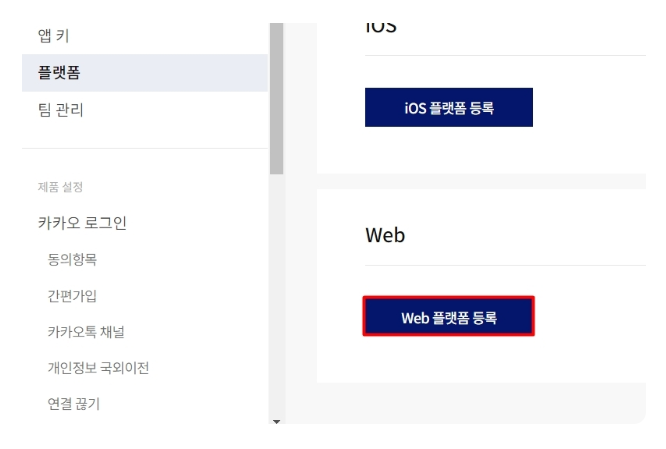
2) 플랫폼 등록
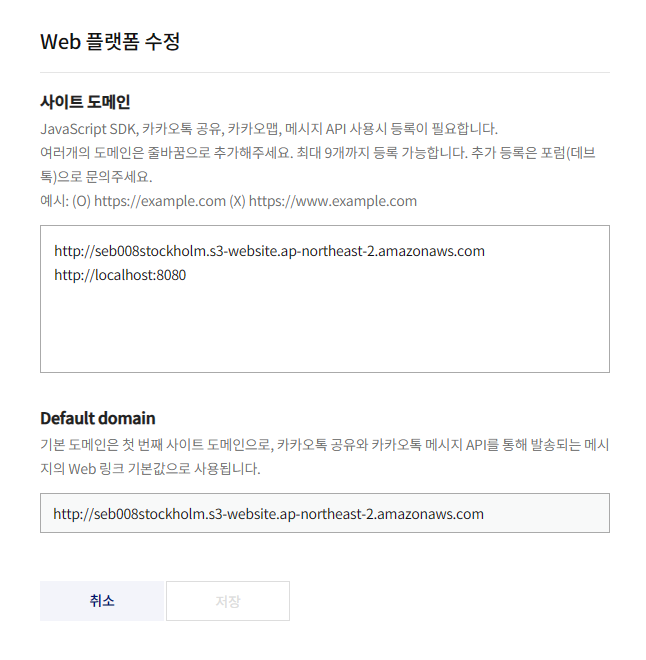
등록을 진행하면 아래와 같이 사이트 설정이 나오는데 사용할 사이트를 입력해주면 된다. 로컬 환경 위에 있는 건 프로젝트에서 진행한 프론트 서버 주소다.
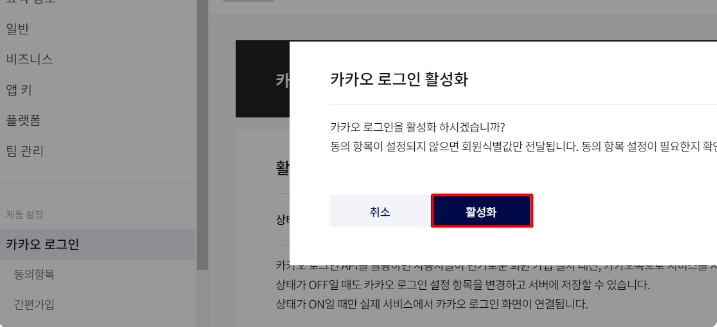
3) 로그인 환경 설정
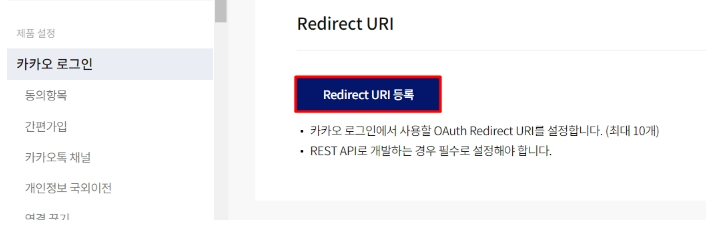
구글과 동일하게 Redirect URI를 설정해야한다.

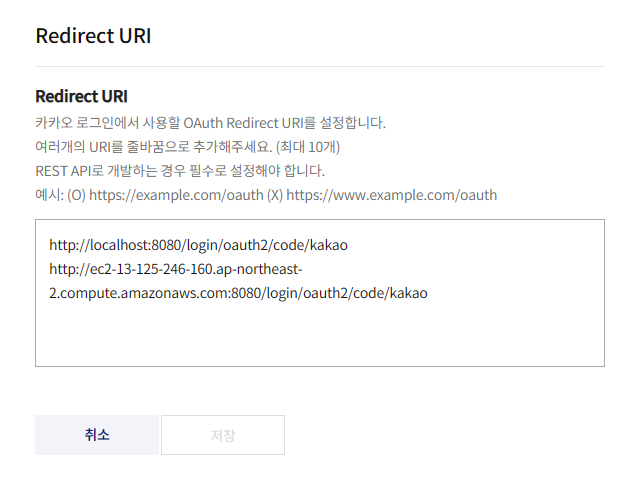
Test단계에서는 http://localhost:8080/login/oauth2/code/kakao만 추가해주면 된다.
http://ec2-13-125-246-160.ap-northeast-2.compute.amazonaws.com:8080는 프로젝트에서 사용된 백엔드 서버 주소다
4) 동의 항목
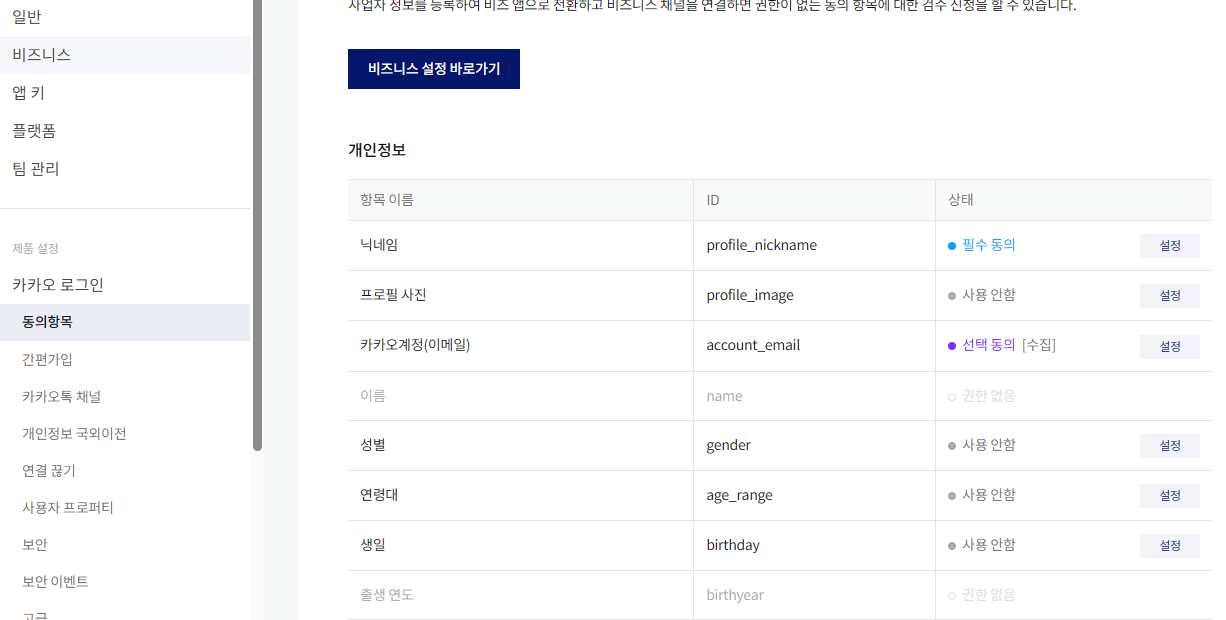
내가 필요한 정보를 여기서 설정한다.
4) 보안 키
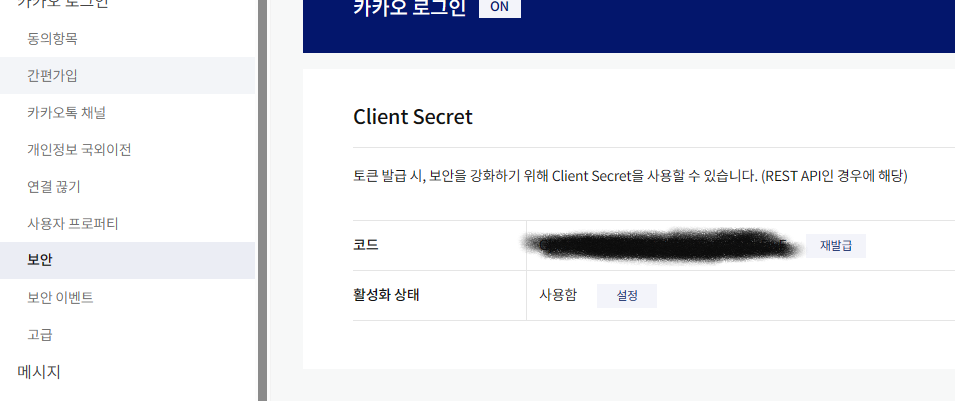
여기서 보안키 설정을 할 수 있는데 노출되어서는 안된다.
이제 사이트에서 준비는 끝났으니 .yml파일 설정을 해야한다.
spring:
  security:
    oauth2:
      client:
        registration:
          google:
            clientId: [Google API 키]
            clientSecret: [Google 보안 키]
            scope:
              - email
              - profile
          kakao:
            client-id: [Kakao API 키]
            client-secret: [Kakao 보안 키]
            client-name: Kakao
            client-authentication-method: POST
            redirect-uri: "http://ec2-13-125-246-160.ap-northeast-2.compute.amazonaws.com:8080/login/oauth2/code/kakao"
#            redirect-uri: "http://localhost:8080/login/oauth2/code/kakao"
            authorization-grant-type: authorization_code
            scope:
              - profile_nickname
              - account_email
        provider:
          kakao:
            authorizationUri: https://kauth.kakao.com/oauth/authorize
            tokenUri: https://kauth.kakao.com/oauth/token
            userInfoUri: https://kapi.kakao.com/v2/user/me
userNameAttribute: id[]안에 위에서 봤던 키 종류를 입력해주어야하고 scope에서 내가 어떤 데이터를 불러오는지를 지정해야한다. Google은 카카오보다 심플한데 카카오나 네이버 같은 경우 provider를 위와 같이 설정해줘야한다.
redirect-uri: "http://ec2-13-125-246-160.ap-northeast-2.compute.amazonaws.com:8080/login/oauth2/code/kakao"
#            redirect-uri: "http://localhost:8080/login/oauth2/code/kakao"
redirect-uri: "http://localhost:8080/login/oauth2/code/kakao" 지금은 주석 처리가 되어있지만 실제 로컬 테스트 단계에서는 얘만 살려두면된다.
이제 클래스들을 구현해야한다.
SecurityConfiguration 먼저 설명하면 OAuth2MemberService 구현 후 DI해주었다. OAuth2MemberService는 아래에서 추가 설명 예정이다.
@Configuration
@EnableWebSecurity
public class SecurityConfiguration {
    private final JwtTokenizer jwtTokenizer;
    private final CustomAuthorityUtils authorityUtils;

    public final OAuth2MemberService oAuth2MemberService;

    private final MemberService memberService;

    public SecurityConfiguration(JwtTokenizer jwtTokenizer, CustomAuthorityUtils authorityUtils, OAuth2MemberService oAuth2MemberService,//추가 @Lazy MemberService memberService) {
        this.jwtTokenizer = jwtTokenizer;
        this.authorityUtils = authorityUtils;
        this.oAuth2MemberService = oAuth2MemberService;
        this.memberService = memberService;
    }
    @Bean
    public SecurityFilterChain securityFilterChain(HttpSecurity httpSecurity) throws Exception {
        httpSecurity
                .headers().frameOptions().sameOrigin() //H2 웹 콘솔에 정상적으로 접근 가능하도록 설정
                .and()
                .cors().configurationSource(corsConfigurationSource())// CORS 설정을 추가
                .and()
                .csrf().disable() //CSRF 공격에 대한 설정
                .sessionManagement().sessionCreationPolicy(SessionCreationPolicy.STATELESS)//.sessionManagement().sessionCreationPolicy(SessionCreationPolicy.STATELESS)를 통해서 세션을 생성하지 않도록 설정
                .and()
                .formLogin().disable() // JSON 포맷 전달 방식 사용을 위해 비활성화
                .httpBasic().disable() // request 전송마다 로그인 정보를 받지 않을 것임으로 비활성화
                .apply(new CustomFilterConfigurer())
                .and()
                .authorizeHttpRequests(authorize -> authorize
                        .antMatchers("members/login").permitAll()
                        .antMatchers(HttpMethod.POST, "/cash").hasRole("USER")
                        .antMatchers(HttpMethod.PATCH, "/cash/{cashId}").hasRole("USER")
                        .antMatchers(HttpMethod.GET, "/cash").hasRole("USER")
                        .antMatchers(HttpMethod.POST, "/stockorders").hasRole("USER")
                        .antMatchers(HttpMethod.POST, "/api/boards").hasRole("USER")
                        .antMatchers(HttpMethod.PATCH, "/api/boards/{boardId}").hasRole("USER")
                        .antMatchers(HttpMethod.DELETE, "/api/boards/{boardId}").hasRole("USER")
                        .antMatchers(HttpMethod.GET, "api/boards").permitAll()
                        .antMatchers(HttpMethod.GET, "api/boards/{boardId}").permitAll() //질문을 선택해 조회하는 기능은 인증된 사용자에게만 혀용
                        .antMatchers(HttpMethod.POST, "/api/boards/{boardId}/comment").hasRole("USER")
                        .antMatchers(HttpMethod.PATCH, "/api/boards/{boardId}/comment/{commentId}").hasRole("USER")
                        .antMatchers(HttpMethod.DELETE, "/api/boards/{boardId}/comment/{commentId}").hasRole("USER")
                        .anyRequest().permitAll()
                )
                .oauth2Login(oauth2 -> oauth2
                        .userInfoEndpoint()
                        .userService(oAuth2MemberService)
                        .and()
                        .successHandler(new OAuth2AuthenticationSuccessHandler(jwtTokenizer, authorityUtils, memberService))
                );

        return httpSecurity.build();
    }

    @Bean
    public PasswordEncoder passwordEncoder() {
        return PasswordEncoderFactories.createDelegatingPasswordEncoder();
    }
    @Bean
    CorsConfigurationSource corsConfigurationSource() {
        CorsConfiguration configuration = new CorsConfiguration();

        configuration.setAllowCredentials(true);
        configuration.setAllowedOrigins(List.of(
                "http://seb008stockholm.s3-website.ap-northeast-2.amazonaws.com/",
                "http://localhost:5173", "http://localhost:3000"
        ));
        configuration.setAllowedMethods(List.of("GET","POST", "PATCH", "DELETE"));
        configuration.setAllowedHeaders(List.of("*"));
        configuration.setExposedHeaders(List.of("*"));

        UrlBasedCorsConfigurationSource source = new UrlBasedCorsConfigurationSource();
        source.registerCorsConfiguration("/**", configuration);
        return source;
    }
    public class CustomFilterConfigurer extends AbstractHttpConfigurer<CustomFilterConfigurer, HttpSecurity> {
        @Override
        public void configure(HttpSecurity builder) throws Exception {
            AuthenticationManager authenticationManager = builder.getSharedObject(AuthenticationManager.class);

            JwtAuthenticationFilter jwtAuthenticationFilter = new JwtAuthenticationFilter(authenticationManager, jwtTokenizer);
            jwtAuthenticationFilter.setFilterProcessesUrl("/members/login");
            jwtAuthenticationFilter.setAuthenticationSuccessHandler(new MemberAuthenticationSuccessHandler());
            jwtAuthenticationFilter.setAuthenticationFailureHandler(new MemberAuthenticationFailureHandler());
            builder.addFilter(jwtAuthenticationFilter);

            JwtVerificationFilter jwtVerificationFilter = new JwtVerificationFilter(jwtTokenizer, authorityUtils, memberService);

            builder
                    .addFilter(jwtAuthenticationFilter)
                    .addFilterAfter(jwtVerificationFilter, JwtAuthenticationFilter.class);
        }
    }
}
전 글에서 포스팅한것과 매우 비슷하지만 다른게 몇가지 있다
@Lazy MemberService memberService @Lazy를 추가한것은 순환참조 오류가 발생되기에 추가해주었다
public SecurityConfiguration(JwtTokenizer jwtTokenizer, CustomAuthorityUtils authorityUtils, OAuth2MemberService oAuth2MemberService,//추가 @Lazy MemberService memberService) {
        this.jwtTokenizer = jwtTokenizer;
        this.authorityUtils = authorityUtils;
        this.oAuth2MemberService = oAuth2MemberService;
        this.memberService = memberService;
    }
또 다른 것은 OAuth2AuthenticationSuccessHandler가 동작할 수 있게
SecurityFilterChain에 추가해주었다.
 .oauth2Login(oauth2 -> oauth2
                        .userInfoEndpoint()
                        .userService(oAuth2MemberService)
                        .and()
                        .successHandler(new OAuth2AuthenticationSuccessHandler(jwtTokenizer, authorityUtils, memberService))
OAuth2AuthenticationSuccessHandler를 구현해보자
JwtTokenizer은 이전에 포스팅한 클래스와 동일한 클래스를 사용했다.
@Component
public class OAuth2AuthenticationSuccessHandler extends SimpleUrlAuthenticationSuccessHandler {

    private final JwtTokenizer jwtTokenizer;

    private final CustomAuthorityUtils authorityUtils;
    private final MemberService memberService;

    @Autowired
    public OAuth2AuthenticationSuccessHandler(JwtTokenizer jwtTokenizer, CustomAuthorityUtils authorityUtils, MemberService memberService) {

        this.jwtTokenizer = jwtTokenizer;
        this.authorityUtils = authorityUtils;
        this.memberService = memberService;
    }

    @Override
    public void onAuthenticationSuccess(HttpServletRequest request, HttpServletResponse response, Authentication authentication) throws IOException, ServletException {
        var oAuth2User = (OAuth2User)authentication.getPrincipal();

        String email = String.valueOf(oAuth2User.getAttributes().get("email"));

        List<String> authorities = authorityUtils.createRoles(email);

        // 액세스 토큰 및 리프레시 토큰 생성
        String accessToken = delegateAccessToken(email, authorities);
        String refreshToken = delegateRefreshToken(email, authorities);

        // 헤더에 토큰 추가
        response.addHeader("Authorization", "Bearer " + accessToken);
        response.addHeader("Refresh-Token", refreshToken);


        redirect(request, response, email, authorities);
    }

    private void redirect(HttpServletRequest request, HttpServletResponse response, String username, List<String> authorities) throws IOException {
        String accessToken = delegateAccessToken(username, authorities);
        String refreshToken = delegateRefreshToken(username, authorities);

        String uri = createURI(accessToken, refreshToken).toString();
        getRedirectStrategy().sendRedirect(request, response, uri);
    }

    private String delegateAccessToken(String username, List<String> authorities) {
        // 사용자의 이메일로 Member ID를 가져옴
        int memberId = memberService.findMemberIdByEmail(username);

        Map<String, Object> claims = new HashMap<>();
        claims.put("email", username);
        claims.put("roles", authorities);
        claims.put("memberId", memberId); // Member ID를 클레임에 추가

        String subject = username;
        Date expiration = jwtTokenizer.getTokenExpiration(jwtTokenizer.getAccessTokenExpirationMinutes());

        String base64EncodedSecretKey = jwtTokenizer.encodeBase64SecretKey(jwtTokenizer.getSecretKey());

        String accessToken = jwtTokenizer.generateAccessToken(claims, subject, expiration, base64EncodedSecretKey);

        return accessToken;
    }

    private String delegateRefreshToken(String username, List<String> authorities) {
        int memberId = memberService.findMemberIdByEmail(username);

        Map<String, Object> claims = new HashMap<>();
        claims.put("email", username);
        claims.put("roles", authorities);
        claims.put("memberId", memberId);

        String subject = username;
        Date expiration = jwtTokenizer.getTokenExpiration(jwtTokenizer.getRefreshTokenExpirationMinutes());
        String base64EncodedSecretKey = jwtTokenizer.encodeBase64SecretKey(jwtTokenizer.getSecretKey());

        String refreshToken = jwtTokenizer.generateRefreshToken(claims, subject, expiration, base64EncodedSecretKey);

        return refreshToken;
    }

    private URI createURI(String accessToken, String refreshToken) {

        MultiValueMap<String, String> queryParams = new LinkedMultiValueMap<>();
        queryParams.add("access_token", accessToken);
        queryParams.add("refresh_token", refreshToken);

        return UriComponentsBuilder
                .newInstance()
                .scheme("http")
                .host("localhost")
                .port(8080)
                .queryParams(queryParams)
                .path("/receive-token.html")
                .build()
                .toUri();
    }
}
onAuthenticationSuccess에 헤더를 추가한 것은 FB에서 어떤 방식을 사용하여 토큰을 불러올지 몰라 토큰이 헤더에 노출되도록 진행했고
delegateAccessToken에서 int memberId = memberService.findMemberIdByEmail(username); 멤버 Id를 찾아 토큰에 추가한 것은 다른 Controller에서 게시글 등에서 실제 작성자만 접근하여 처리할 수 있도록하기 위해 추가 했다
이렇게 추가해주면 JwtVerificationFilter 토큰 검증을 진행될 때 Security Context holder에 ID 값이 올라가게 된다
private void setAuthenticationToContext(Map<String, Object> claims) {
        int memberId = (int)claims.get("memberId");
        Member member = memberService.findMember(memberId);
        log.info(String.valueOf(member));
        List<GrantedAuthority> authorities = authorityUtils.createAuthorities((List)claims.get("roles"));
        Authentication authentication = new UsernamePasswordAuthenticationToken(member, null, authorities);
        SecurityContextHolder.getContext().setAuthentication(authentication);
    }
그러면 Controller에서 @AuthenticationPrincipal 어노테이션만으로 지금 토큰을 요청한 유저가 누군지 식별이 가능하다.
 @GetMapping
    private ResponseEntity getMember(@Parameter(hidden = true) @AuthenticationPrincipal Member member){
        Member response = memberService.findMember(member.getMemberId());

        return new ResponseEntity<>(mapper.memberToMemberResponseDto(response), HttpStatus.OK);
    }
createURI 메서드에서 URI 토큰을 주는 이유는 아래와 같은 방식으로 구현 했기에 추가하였다.
미리 만들어둔 receive-token.html 페이지로 로그인이 성공시 보내면서 URI에 토큰이 포함되어 클라이언트에 보내진다
FB에서 어떤 방식으로 토큰을 추출하여 사용할지는 상의 후 진행하면된다.
동작을 보여주면 아래와 같이 html를 생성해준다.
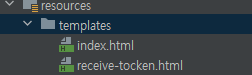
index.html
<!DOCTYPE html>
<html>
<head>
  <meta charset="UTF-8">
  <title>OAuth2 + JWT Frontend</title>
</head>
<body>
<h2>Welcome to OAuth 2.0 + JWT Spring Security</h2>
<a href="/oauth2/authorization/google" class="btn btn-success active" role="button">Google Login</a>
<a href="/oauth2/authorization/kakao" class="btn btn-secondary active" role="button">Kakao Login</a>
</body>
</html>
receice-tocken.html
<!DOCTYPE html>
<html>
<head>
  <meta charset="UTF-8">
  <title>OAuth2 + JWT My page</title>
</head>
<body>
<script type="text/javascript">
        <h2>Welcome to OAuth 2.0 + JWT Spring Security</h2>
</script>
</body>
</html>
위와 같이 설정 후 localhost:8080에 접근하면

아래와 같이 로그인 페이지가 나온다
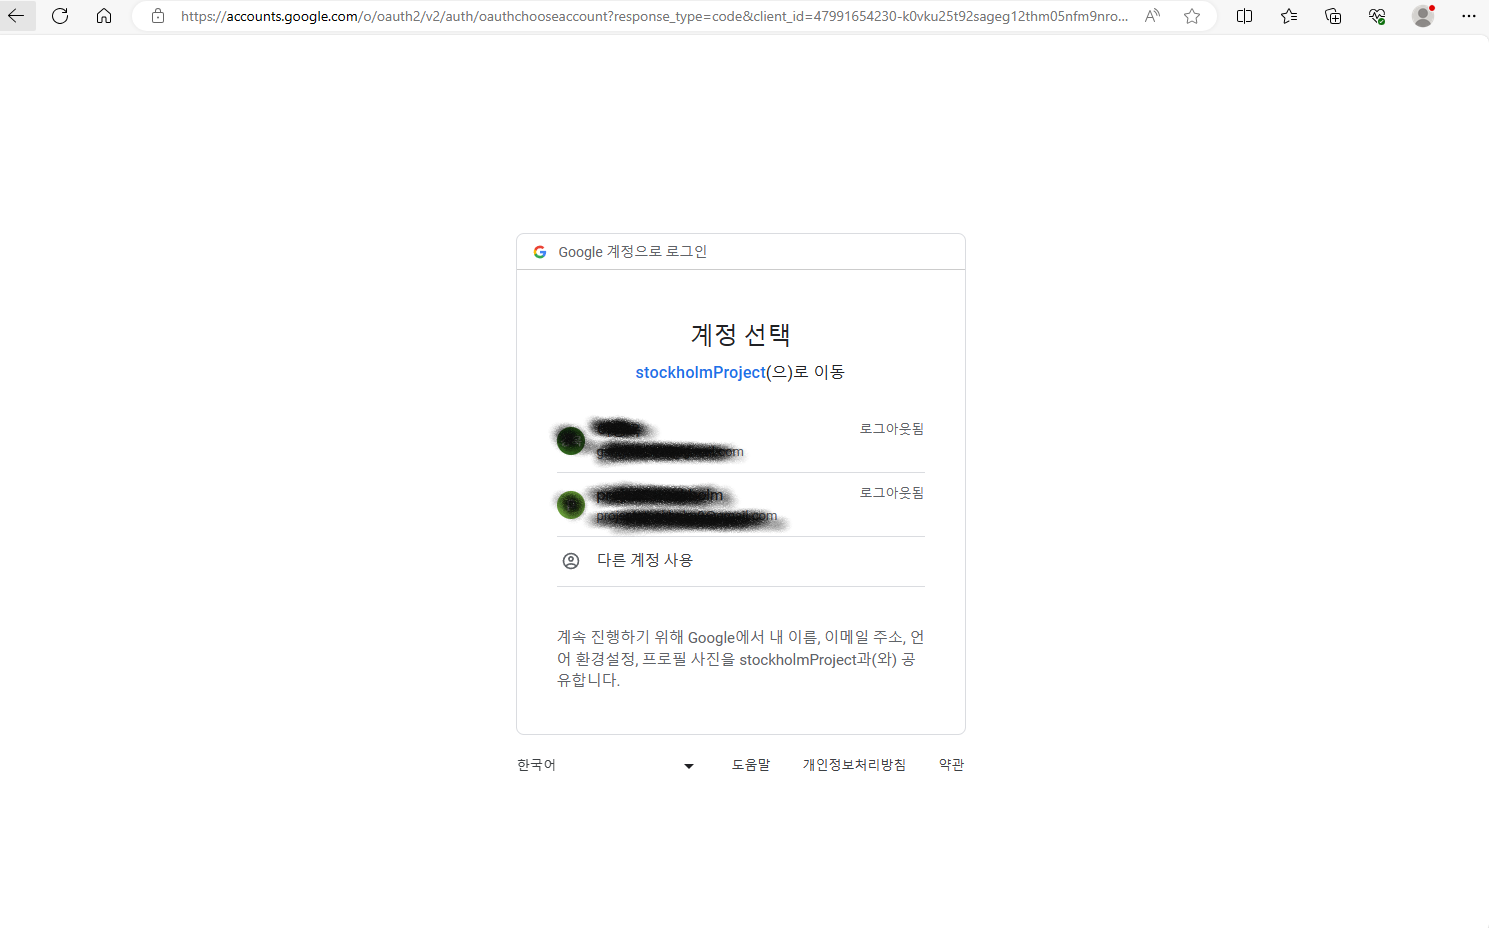
익숙한 화면이 나오고 로그인이 완료 되면

위와 같이 createURI 설정한데로 URI로 토큰을 주고 있다.
http://localhost:8080/receive-token.html?access_token=eyJhbGciOiJIUzI1NiJ9.eyJyb2xlcyI6WyJVU0VSIl0sImVtYWlsIjoiZ2FuZ3dvb2swNUBnbWFpbC5jb20iLCJtZW1iZXJJZCI6MTMsInN1YiI6Imdhbmd3b29rMDVAZ21haWwuY29tIiwiaWF0IjoxNjk3MTgxNjg1LCJleHAiOjE2OTcxODQwODV9.R8mhwkl0turg8xVdxg3nldNphue8lqFeVhq4TPPZMas&refresh_token=eyJhbGciOiJIUzI1NiJ9.eyJyb2xlcyI6WyJVU0VSIl0sImVtYWlsIjoiZ2FuZ3dvb2swNUBnbWFpbC5jb20iLCJtZW1iZXJJZCI6MTMsInN1YiI6Imdhbmd3b29rMDVAZ21haWwuY29tIiwiaWF0IjoxNjk3MTgxNjg1LCJleHAiOjE2OTcyMDY4ODV9.ipL2NXN17xQPBhdgCsGV6McZG75HbNVugXtlnilRRdoaccess_token=
refresh_token=
이런식으로 각 토큰들을 구분할 수 있다.
위의 동작은 모든 클래스가 구현되었을 때의 성공 장면이기에 나머지 클래스도 구현해야한다.
@Service
public class OAuth2MemberService extends DefaultOAuth2UserService {

    private final MemberRepository memberRepository;

    private final HttpSession httpSession;
    @Autowired
    public OAuth2MemberService(MemberRepository memberRepository, HttpSession httpSession) {
        this.memberRepository = memberRepository;
        this.httpSession = httpSession;
    }

    @Override
    public OAuth2User loadUser(OAuth2UserRequest memberRequest) throws OAuth2AuthenticationException {
        OAuth2UserService<OAuth2UserRequest,OAuth2User> delegate = new DefaultOAuth2UserService();
        OAuth2User oauthMember = delegate.loadUser(memberRequest);

        String registrationId = memberRequest.getClientRegistration().getRegistrationId();
        String userNameAttributeName = memberRequest.getClientRegistration().getProviderDetails().getUserInfoEndpoint().getUserNameAttributeName();

        OAuthAttributes attributes = OAuthAttributes.of(registrationId, userNameAttributeName, oauthMember.getAttributes());

        Member member = saveOAuth(attributes);

        return new DefaultOAuth2User(
                Collections.singleton(new SimpleGrantedAuthority("USER")),
                attributes.getAttributes(),
                "email"
        );

    }

    private Member saveOAuth(OAuthAttributes attributes) {
        Member member = memberRepository.findByEmail(attributes.getEmail())
                .orElse(attributes.toEntity());

        return memberRepository.save(member);
    }
}
계정이 생성되기 위한 OAuth2MemberService한 클래스다
OAuth 2.0 사용자 정보를 가져와 DB에 기존에 있는 사용자있지 확인하고 없으면 생성을 도와준다.
그럼 어떤 정보를 불러올지 선택을 해야하는데 이는 OAuthAttributes에서 도와주도록 구현했다.
@Getter
@Builder
public class OAuthAttributes {
    private Map<String, Object> attributes;
    private String nameAttributeKey;
    private String name;
    private String email;
    public static OAuthAttributes of(String registrationId, String userNameAttributeName, Map<String, Object> attributes) {

        if ("kakao".equals(registrationId)) {
            return ofKakao("id", attributes);}

            return ofGoogle(userNameAttributeName, attributes);
    }


    private static OAuthAttributes ofKakao(String userNameAttributeName, Map<String, Object> attributes) {
        Map<String, Object> response = (Map<String, Object>) attributes.get("kakao_account");
        Map<String, Object> account = (Map<String, Object>) response.get("profile");


        return OAuthAttributes.builder()
                .name((String) account.get("nickname"))
                .email((String) response.get("email"))
                .attributes(response)
                .nameAttributeKey(userNameAttributeName)
                .build();
    }

    private static OAuthAttributes ofGoogle(String userNameAttributeName, Map<String, Object> attributes) {
        return OAuthAttributes.builder()
                .name((String) attributes.get("name"))
                .email((String) attributes.get("email"))
                .attributes(attributes)
                .nameAttributeKey(userNameAttributeName)
                .build();
    }

    public Member toEntity() {
        return Member.builder()
                .name(name)
                .email(email)
                .roles(Arrays.asList("USER"))
                .build();
    }
}
카카오와 구글만 사용했기에 OAuthAttributes에서 google인지 카카오인지 식별해줬고 더 많은 로그인 옵션을 사용하려면 추가해주면된다.
ofKakao에서는 .name((String) account.get("nickname")) nickname이고
ofGoogle에서는 .name((String) attributes.get("name"))
name인 이유는 각 사이트에서 로그인 성공시 보내주는 값이 달라 각 사이트에 맞게 표기해줘야한다.
카카오의 유저 정보 Response JSON 예시
{
    "id":123456789,
    "connected_at": "2022-04-11T01:45:28Z",
    "kakao_account": {
        // 프로필 또는 닉네임 동의 항목 필요
        "profile_nickname_needs_agreement": false,
        // 프로필 또는 프로필 사진 동의 항목 필요
        "profile_image_needs_agreement	": false,
        "profile": {
            // 프로필 또는 닉네임 동의 항목 필요
            "nickname": "홍길동",
            // 프로필 또는 프로필 사진 동의 항목 필요
            "thumbnail_image_url": "http://yyy.kakao.com/.../img_110x110.jpg",
            "profile_image_url": "http://yyy.kakao.com/dn/.../img_640x640.jpg",
            "is_default_image":false
        },
        // 이름 동의 항목 필요
        "name_needs_agreement":false,
        "name":"홍길동",
        // 카카오계정(이메일) 동의 항목 필요
        "email_needs_agreement":false,
        "is_email_valid": true,
        "is_email_verified": true,
        "email": "sample@sample.com",
        // 연령대 동의 항목 필요
        "age_range_needs_agreement":false,
        "age_range":"20~29",
        // 출생 연도 동의 항목 필요
        "birthyear_needs_agreement": false,
        "birthyear": "2002",
        // 생일 동의 항목 필요
        "birthday_needs_agreement":false,
        "birthday":"1130",
        "birthday_type":"SOLAR",
        // 성별 동의 항목 필요
        "gender_needs_agreement":false,
        "gender":"female",
        // 카카오계정(전화번호) 동의 항목 필요
        "phone_number_needs_agreement": false,
        "phone_number": "+82 010-1234-5678",
        // CI(연계정보) 동의 항목 필요
        "ci_needs_agreement": false,
        "ci": "${CI}",
        "ci_authenticated_at": "2019-03-11T11:25:22Z",
    },
    "properties":{
        "${CUSTOM_PROPERTY_KEY}": "${CUSTOM_PROPERTY_VALUE}",
        ...
    }
}
구글의 유저 정보 Response JSON 예시
{
   "sub": "식별값",
   "name": "name",
   "given_name": "given_name",
   "picture": "https//lh3.googleusercontent.com/~~",
   "email": "email",
   "email_verified": true,
   "locale": "ko"
}
내가 어떤 정보를 가져와 정의할지 선택해야하고 그 객체에 맞게 building해 줘야한다.
위의 내용은 언제든지 변경될 수 있는 내용이기에 잘 확인하며 진행해야한다.
다음 포스팅에서는 리프레쉬 토큰으로 엑세스 토큰을 재발급하는걸 포스팅하려한다.
전체 코드는 https://github.com/rkddnr05/seb45_main_008/tree/dev-Member/Security 에서 확인이 가능하다.