본격적으로 컨트롤러와 뷰 템플릿을 개발해보자
BasicItemController
package hello.itemservice.web.basic;

import hello.itemservice.domain.item.Item;
import hello.itemservice.domain.item.ItemRepository;
import lombok.RequiredArgsConstructor;
import org.springframework.beans.factory.annotation.Autowired;
import org.springframework.stereotype.Controller;
import org.springframework.ui.Model;
import org.springframework.web.bind.annotation.GetMapping;
import org.springframework.web.bind.annotation.RequestMapping;

import javax.annotation.PostConstruct;
import java.util.List;

@Controller
@RequestMapping("/basic/items")
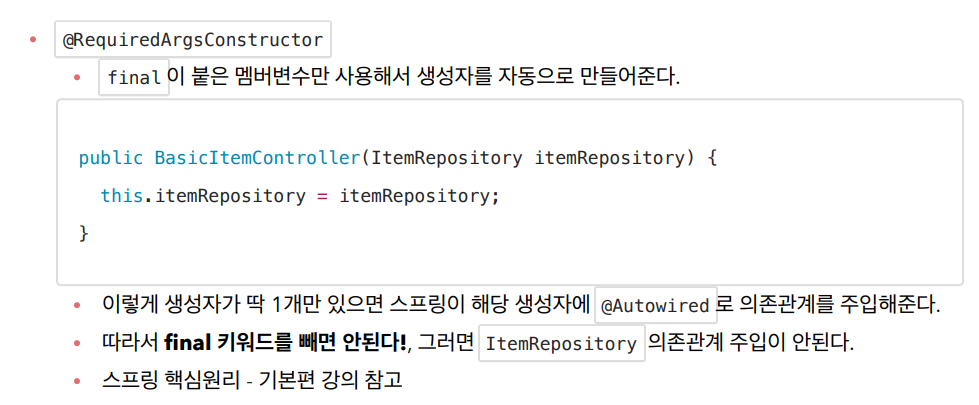
@RequiredArgsConstructor
public class BasicItemController {

    private final ItemRepository itemRepository;

    @GetMapping
    public String items(Model model) {
        List<Item> items = itemRepository.findAll();
        model.addAttribute("items", items);
        return "basic/items";
    }

    /**
     * 테스트용 데이터 추가
     */
    @PostConstruct
    public void init() {
        itemRepository.save(new Item("itemA", 10000, 10));
        itemRepository.save(new Item("itemB", 20000, 20));
    }
}
컨트롤러 로직은 itemRepository에서 모든 상품을 조회한 다음에 모델에 담는다. 그리고 뷰 템플릿을 호출한다.
테스트용 데이터 추가
- 테스트용 데이터가 없으면 회원 목록 기능이 정상 동작하는지 확인하기 어렵다.
- @PostConstruct : 해당 빈의 의존관계가 모두 주입되고 나면 초기화 용도로 호출된다.
- 여기서는 간단히 테스트용 테이터를 넣기 위해서 사용했다.
items.html 정적 HTML을 뷰 템플릿(templates) 영역으로 복사하고 다음과 같이 수정하자.
/resources/templates/basic/items.html
<!DOCTYPE HTML>
<html xmlns:th="http://www.thymeleaf.org">
<head>
    <meta charset="utf-8">
    <link th:href="@{/css/bootstrap.min.css}"
            href="../css/bootstrap.min.css" rel="stylesheet">
</head>
<body>
<div class="container" style="max-width: 600px">
    <div class="py-5 text-center">
        <h2>상품 목록</h2>
    </div>
    <div class="row">
        <div class="col">
            <button class="btn btn-primary float-end"
                    onclick="location.href='addForm.html'"
                    th:onclick="|location.href='@{/basic/items/add}'|"
                    type="button">상품
                등록</button>
        </div>
    </div>
    <hr class="my-4">
    <div>
        <table class="table">
            <thead>
            <tr>
                <th>ID</th>
                <th>상품명</th>
                <th>가격</th>
                <th>수량</th>
            </tr>
            </thead>
            <tbody>
            <tr th:each="item : ${items}">
                <td><a href="item.html" th:href="@{/basic/items/{itemId}(itemId=${item.id})}" th:text="${item.id}">회원id</a></td>
                <td><a href="item.html" th:href="@{/basic/items/{itemId}(itemId=${item.id})}" th:text="${item.itemName}">상품명</a></td>
                <td th:text="${item.price}">10000</td>
                <td th:text="${item.quantity}">10</td>
            </tr>
            </tbody>
        </table>
    </div>
</div> <!-- /container -->
</body>
</html>
타임리프 간단히 알아보기
타임리프 사용 선언
<html xmlns:th="http://www.thymeleaf.org">
속성 변경 - th:href
th:href="@{/css/bootstrap.min.css}"
- href="value1" 을 th:href="value2" 의 값으로 변경한다.
- 타임리프 뷰 템플릿을 거치게 되면 원래 값을 th:xxx 값으로 변경한다. 만약 값이 없다면 새로 생성한다.
- HTML을 그대로 볼 때는 href 속성이 사용되고, 뷰 템플릿을 거치면 th:href 의 값이 href 로 대체되면서 동적으로 변경할 수 있다.
- 대부분의 HTML 속성을 th:xxx 로 변경할 수 있다.
타임리프 핵심
- 핵심은 th:xxx 가 붙은 부분은 서버사이드에서 렌더링 되고, 기존 것을 대체한다. th:xxx 이 없으면 기존 html의 xxx 속성이 그대로 사용된다.
- HTML을 파일로 직접 열었을 때, th:xxx 가 있어도 웹 브라우저는 th: 속성을 알지 못하므로 무시한다.
- 따라서 HTML을 파일 보기를 유지하면서 템플릿 기능도 할 수 있다.
URL 링크 표현식 - @{...}
th:href="@{/css/bootstrap.min.css}"
- @{...} : 타임리프는 URL 링크를 사용하는 경우 @{...} 를 사용한다. 이것을 URL 링크 표현식이라 한다.
- URL 링크 표현식을 사용하면 서블릿 컨텍스트를 자동으로 포함한다.
상품 등록 폼으로 이동
속성 변경 - th:onclick
- onclick="location.href='addForm.html'"
- th:onclick="|location.href='@{/basic/items/add}'|"
여기에는 다음에 설명하는 리터럴 대체 문법이 사용되었다. 자세히 알아보자.
리터럴 대체 - |...|
|...| :이렇게 사용한다.
- 타임리프에서 문자와 표현식 등은 분리되어 있기 때문에 더해서 사용해야 한다.
<span th:text="'Welcome to our application, ' + ${user.name} + '!'">
- 다음과 같이 리터럴 대체 문법을 사용하면, 더하기 없이 편리하게 사용할 수 있다.
<span th:text="|Welcome to our application, ${user.name}!|">
- 결과를 다음과 같이 만들어야 하는데
location.href='/basic/items/add'
- 그냥 사용하면 문자와 표현식을 각각 따로 더해서 사용해야 하므로 다음과 같이 복잡해진다.
th:onclick="'location.href=' + '\'' + @{/basic/items/add} + '\''"
- 리터럴 대체 문법을 사용하면 다음과 같이 편리하게 사용할 수 있다.
th:onclick="|location.href='@{/basic/items/add}'|"
반복 출력 - th:each
<tr th:each="item : ${items}">- 반복은 th:each 를 사용한다. 이렇게 하면 모델에 포함된 items 컬렉션 데이터가 item 변수에 하나씩 포함되고, 반복문 안에서 item 변수를 사용할 수 있다.
- 컬렉션의 수 만큼
<tr>..</tr>이 하위 테그를 포함해서 생성된다.
변수 표현식 - ${...}
<td th:text="${item.price}">10000</td>- 모델에 포함된 값이나, 타임리프 변수로 선언한 값을 조회할 수 있다.
- 프로퍼티 접근법을 사용한다. ( item.getPrice() )
내용 변경 - th:text
<td th:text="${item.price}">10000</td>- 내용의 값을 th:text 의 값으로 변경한다.
- 여기서는 10000을 ${item.price} 의 값으로 변경한다.
URL 링크 표현식2 - @{...},
th:href="@{/basic/items/{itemId}(itemId=${item.id})}"- 상품 ID를 선택하는 링크를 확인해보자.
- URL 링크 표현식을 사용하면 경로를 템플릿처럼 편리하게 사용할 수 있다.
- 경로 변수( {itemId} ) 뿐만 아니라 쿼리 파라미터도 생성한다.
- 예)
th:href="@{/basic/items/{itemId}(itemId=${item.id}, query='test')}"- 생성 링크:
http://localhost:8080/basic/items/1?query=test
- 생성 링크:
URL 링크 간단히
th:href="@{|/basic/items/${item.id}|}"- 상품 이름을 선택하는 링크를 확인해보자.
- 리터럴 대체 문법을 활용해서 간단히 사용할 수도 있다.
참고
타임리프는 순수 HTML 파일을 웹 브라우저에서 열어도 내용을 확인할 수 있고, 서버를 통해 뷰 템플릿을 거치면 동적으로 변경된 결과를 확인할 수 있다. JSP를 생각해보면, JSP 파일은 웹 브라우저에서 그냥 열면
JSP 소스코드와 HTML이 뒤죽박죽 되어서 정상적인 확인이 불가능하다. 오직 서버를 통해서 JSP를 열어야 한다.
이렇게 순수 HTML을 그대로 유지하면서 뷰 템플릿도 사용할 수 있는 타임리프의 특징을 네츄럴 템플릿 (natural templates)이라 한다.
