처음 보시는 분들은 React 첫 번째 설정 글을 보고 오세요~
[Babel7 설치]
React의 컴포넌트들은 ES6 문법에 따라 작성이 되는데, 이를 지원하지 않는 브라우저에서 기존 자바스크립트로 변환을 해주기 위해 사용합니다.
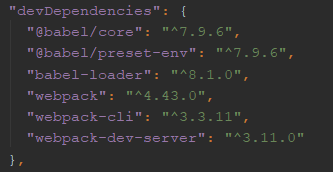
아래의 명령어를 루트 폴더에서 cmd창을 통해 실행합니다.npm install --save-dev @babel/core babel-loader @babel/preset-envpackage.json 파일에 아래와 같이 버전이 업데이트 됩니다.
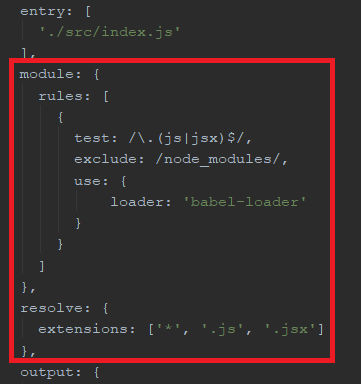
webpack.config.js 파일에 다음을 추가해줍니다. (추후에 react를 연동할 것이기 때문에 react 컴포넌트인 jsx 확장자도 추가해줍니다.)module: { rules: [ { test: /\.(js|jsx)$/, exclude: /node_modules/, use: { loader: 'babel-loader' } } ] }, resolve: { extensions: ['*', '.js', '.jsx'] },
그리고 루트폴더에서 .babelrc 파일을 생성하고 아래 내용을 추가해줍니다.{ "presets": [ "@babel/preset-env ] }React를 설치하기 전까지의 폴더 구조 및 생성한 파일들은 다음과 같습니다.
index.js 파일에 아래 ES6 코드를 입력하고 npm run-script build를 실행하면, 자동으로 babel을 통해 변환된 결과를 dist/bundle.js 파일에서 확인할 수 있습니다.
const arr = [1, 2, 3];
const iAmJavascriptES6 = () => console.log(...arr);
window.iAmJavascriptES6 = iAmJavascriptES6;

[React 설치]
루트 폴더 내에서 아래 npm 명령어를 입력하여 react와 react-dom 그리고 프리셋을 설치해줍니다.
npm install --save-dev react react-dom @babel/preset-react.babelrc 파일에 react 프리셋을 추가해줍니다.
{
  "presets": [
    "@babel/preset-env",
    "@babel/preset-react"
  ]
}
설치 및 설정이 완료된 후, app.js 파일과 app.js를 import 할 index.js 파일을 만들어줍니다.
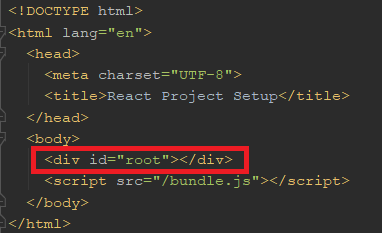
// app.js

import React from 'react';
import ReactDOM from 'react-dom';

const App = () => {
  return (
    <div>
      <p>Working well React+Babel+Webpack!<p>
    </div>
  )
};

export default App;

ReactDOM.render(<App />, document.getElementById('root'));
// index.js import App from “./App”;App.js 파일의 App React 엘리먼트를 root DOM노드에 렌더링 하는 것입니다. index.html 파일의 구조에서 아래 root 부분에 렌더링되는 것입니다.
서버를 실행한 후, localhost:8080으로 접속하여 확인할 수 있는데,
Error: Cannot find module '@babel/core' 이라는 에러가 발생하면, babel-core의 버전이 낮아서 발생할 수 있습니다. Babel7을 설치해주시면됩니다.
[HTML, CSS 설치]
아래 명령어를 통해 html 플러그인을 설치해줍니다.
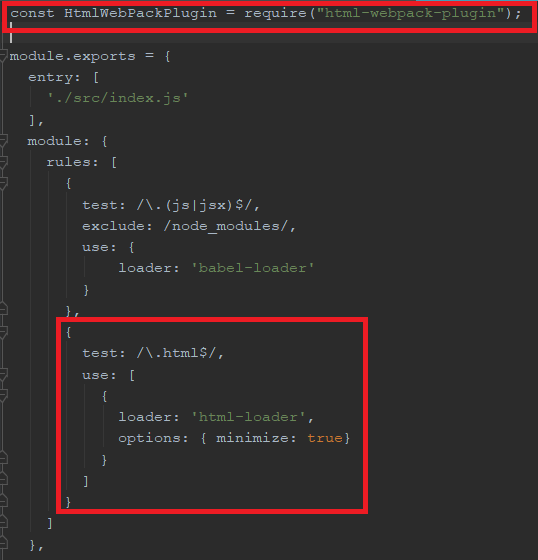
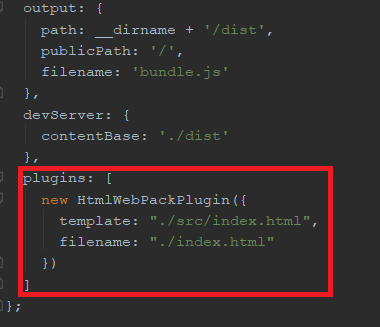
npm install --save-dev html-webpack-plugin html-loader설치 후, webpack.config.js 파일에 아래 내용을 추가해줍니다.
const HtmlWebPackPlugin = require("html-webpack-plugin");

module.exports = {
  module: {
    rules: [
      {
        test: /\.html$/,
        use: [
          {
            loader: 'html-loader',
            options: { minimize: true}
          }
        ]
      }
    ]
  },
  plugins: [
    new HtmlWebPackPlugin({
      template: "./src/index.html",
      filename: "./index.html"
    })
  ]
};
webpack 동작 확인 과정에서 작성했던, dist/index.html을 지우고 src/index.html 파일을 만든 후 아래와 같은 내용을 추가합니다.<!DOCTYPE html> <html lang="en"> <head> <meta charset="UTF-8"> <title>React Project Setup</title> </head> <body> <div id="root"></div> <script src="/bundle.js"></script> </body> </html>그 후 npm run-script build를 통해 스크립트를 실행하면, dist에 index.html이 생성된 것을 확인할 수 있습니다.
HTML 플러그인 동작이 확인되었다면, 아래 명령어를 통해 CSS를 설치해줍니다.
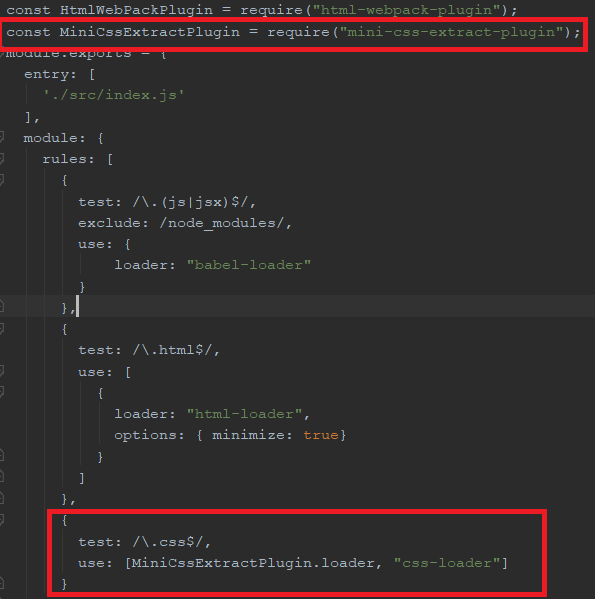
npm install --save-dev mini-css-extract-plugin css-loader그리고 src/main.css 파일을 생성 후 아래 내용을 추가해줍니다.
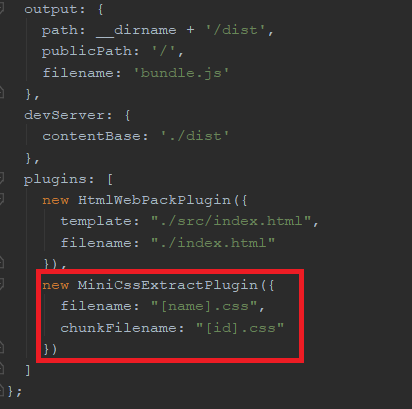
body {
  line-height: 2;
}
webpack.config.js 파일도 아래와 같은 내용을 추가해줍니다.
const MiniCssExtractPlugin = require("mini-css-extract-plugin");

  module: {
    rules: [
      {
        test: /\.css$/,
        use: [MiniCssExtractPlugin.loader, "css-loader"]
      }
    ]
  }

  plugins: [
    new MiniCssExtractPlugin({
      filename: "[name].css",
      chunkFilename: "[id].css"
    })
  ]
[React 동작 확인]
앞선 과정으로 생성된 dist/index.html과 css 파일을 통해 React 동작을 확인할 수 있습니다.
아래 명령어를 입력하여 서버를 실행합니다.
npm run-script start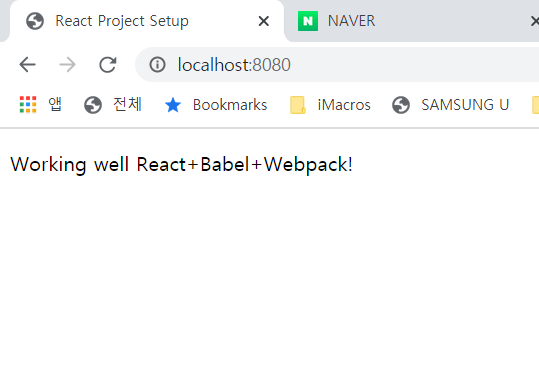
정상적으로 동작이 확인됨을 알 수 있습니다..
[Hot module replacement]
webpack-dev-server는 수정된 사항이 있으면 웹페이지를 새로고침하여 보여줍니다. Hot module replacement를 설치하면, 새로고침 없이 수정된 부분만 렌더링하여 보여줍니다.
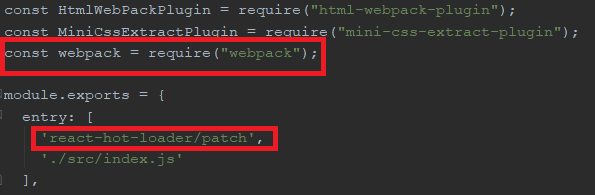
npm install --save-dev react-hot-loader위 명령어를 실행하여 설치해준 뒤, webpack.config.js 파일에 아래 내용을 추가해줍니다.
const webpack = require("webpack");
>
module.exports = {
entry: [
'react-hot-loader/patch',
],
>
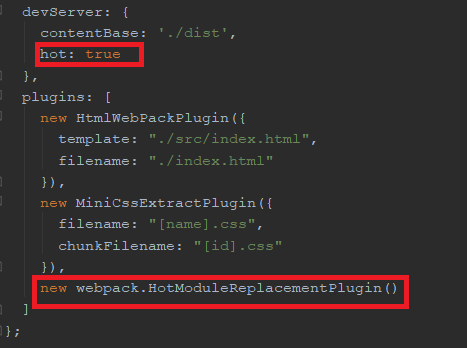
devServer: {
hot: true
},
>
plugins: [
new webpack.HotModuleReplacementPlugin()
]
그리고 서버를 실행한 후, 파일을 수정하게 되면 새로고침 없이 수정된 페이지가 보여지게 됩니다.