[TIL] Day 36 AnimatedPositioned & AnimatedPadding & IndexedStack & 마켓 앱 만들기 (MyTab & HomeTab 데이터 구현) & flutter 숙련 과제 트러블 슈팅 💥
[TIL] Flutter 9기

📍 튜터님과 Widget 공부
✏️ AnimatedPositioned
AnimatedPositioned란?
Positioned 위젯의 애니메이션 버전
top / left / right / bottom / width / height 값이 변경되면
Flutter가 자동으로 부드러운 위치 이동 애니메이션을 만들어 줌
사용 조건
반드시 Stack 안에서만 사용 가능
Stack(
  children: [
    AnimatedPositioned(...)
  ],
)
Positioned 계열 위젯은 Stack의 좌표 시스템을 기준으로 동작함
Column, Row, ListView 안에서는 사용 불가
기본 구조
AnimatedPositioned(
  duration: Duration(milliseconds: 300),
  curve: Curves.easeInOut,
  top: 0,
  left: 0,
  child: Widget,
)
필수요소
| 속성 | 설명 |
|---|---|
duration | 애니메이션 지속 시간 |
child | 이동시킬 위젯 |
예제
class AnimatedPositionedExample extends StatefulWidget {
const AnimatedPositionedExample({super.key});
State<AnimatedPositionedExample> createState() =>
_AnimatedPositionedExampleState();
}
class _AnimatedPositionedExampleState extends State<AnimatedPositionedExample> {
bool _isMoved = false;
Widget build(BuildContext context) {
return Scaffold(
body: Stack(
children: [
AnimatedPositioned(
duration: Duration(milliseconds: 500),
curve: Curves.easeInOut,
top: _isMoved ? 400 : 100,
left: _isMoved ? 200 : 50,
child: Container(
width: 100,
height: 100,
color: Colors.blue,
),
),
],
),
floatingActionButton: FloatingActionButton(
onPressed: () {
setState(() {
_isMoved = !_isMoved;
});
},
child: Icon(Icons.play_arrow),
),
);
}
}✏️ AnimatedPadding
AnimatedPadding이란?
AnimatedPadding은 padding 값이 변경될 때 자동으로 애니메이션을 적용해주는 위젯
setState()로 padding 값만 바꿔도 부드럽게 여백이 늘어나거나 줄어드는 애니메이션이 실행됨
기본 구조
AnimatedPadding(
  padding: EdgeInsets.all(16),
  duration: Duration(milliseconds: 300),
  curve: Curves.easeInOut,
  child: Widget,
)
필수요소
| 속성 | 설명 |
|---|---|
padding | 애니메이션 대상이 되는 padding 값 |
duration | 애니메이션 지속 시간 |
child | padding이 적용될 위젯 |
✏️ IndexedStack
IndexedStack이란?
여러 위젯을 겹쳐(Stack) 두고 지정한 index의 위젯 하나만 화면에 보여주는 위젯
Stack 기반 모든 child 위젯은 항상 트리에 존재
화면에는 index에 해당하는 child만 보임
IndexedStack(
  index: 0,
  children: [
    WidgetA(),
    WidgetB(),
    WidgetC(),
  ],
)
특징
상태(State) 유지
다른 페이지로 이동해도
텍스트, 스크롤, 애니메이션 상태 그대로 유지
화면에는 안 보여도 build는 됨
모든 children은 한 번 build
index만 바꿔서 보여줄 뿐
무거운 페이지 많으면 성능 주의
기본 사용법
BottomNavigationBar랑 함께 사용
Scaffold(
  body: IndexedStack(
    index: _currentIndex,
    children: const [
      HomePage(),
      SearchPage(),
      MyPage(),
    ],
  ),
  bottomNavigationBar: BottomNavigationBar(
    currentIndex: _currentIndex,
    onTap: (index) {
      setState(() {
        _currentIndex = index;
      });
    },
    items: const [
      BottomNavigationBarItem(
        icon: Icon(Icons.home),
        label: '홈',
      ),
      BottomNavigationBarItem(
        icon: Icon(Icons.search),
        label: '검색',
      ),
      BottomNavigationBarItem(
        icon: Icon(Icons.person),
        label: '마이',
      ),
    ],
  ),
);
주의사항
모든 페이지가 메모리에 있음
- API 호출
- 무거운 애니메이션
- 지도, 비디오
📝 마켓 앱 만들기
✏️ MyTab 데이터 구현
왜 Global ViewModel이 필요한가?
회원 정보는 여러 화면(MyTab, HomeTab, 글 작성 등)에서 반복 사용
특정 페이지 생명주기에 종속되면 안 됨
⇒ 앱 전체에서 살아있는 전역 상태 필요
GlobalViewModel 구현
📁 lib/ui/user_global_view_model.dart
class GlobalViewModel extends Notifier<User?> {
User? build() {
fetchUserInfo();
return null;
}
final userRepository = UserRepository();
Future<void> fetchUserInfo() async {
final user = await userRepository.myInfo();
state = user;
}
}
final userGlobalViewModel =
NotifierProvider<GlobalViewModel, User?>(() => GlobalViewModel());AutoDispose ❌ → 앱 종료 전까지 유지
최초 build() 시 내 정보 요청
로그인 후 어디서든 userGlobalViewModel로 접근 가능
MyTab 바인딩
📁 lib/ui/pages/home/_tab/my_tab/widgets/my_profile_box.dart
final user = ref.watch(userGlobalViewModel);
처리 흐름
user == null → 아직 로딩 중
데이터 존재 → 프로필 이미지 + 닉네임 표시
if (user == null) {
  return SizedBox();
}
UI 구성
프로필 이미지
닉네임
프로필수정 버튼
Consumer 사용 이유 - 전역 상태 변경 시 자동 UI 갱신
✏️ HomeTab 구현
Address 모델 & Repository
Address 모델
📁 lib/data/model/address.dart
class Address {
  final int id;
  final String fullName;
  final String displayName;
  final bool? defaultYn;

  Address({
    required this.id,
    required this.fullName,
    required this.displayName,
    required this.defaultYn,
  });

  Address.fromJson(Map<String, dynamic> json)
      : this(
          id: json["id"],
          fullName: json["fullName"],
          displayName: json["displayName"],
          defaultYn: json["defaultYn"],
        );

  Map<String, dynamic> toJson() => {
        "id": id,
        "fullName": fullName,
        "displayName": displayName,
        "defaultYn": defaultYn,
      };
}
defaultYn → 기본 동네 여부
AddressRepository
📁 lib/data/repository/address_repository.dart
import 'package:flutter_market_app/data/repository/address_repository.dart';
import 'package:flutter_market_app/data/repository/user_repository.dart';
import 'package:flutter_test/flutter_test.dart';

void main() {
  final userRepository = UserRepository();
  final addressRepository = AddressRepository();
  test(
    'AddressRepository : getMyAddress test',
    () async {
      // 로그인 안할 시 403에러!
      final resultWithNoAuth = await addressRepository.getMyAddresseList();
      expect(resultWithNoAuth == null, true);

      // 로그인 성공 시 Header에 Auth Token 담아주기때문에 진행
      await userRepository.login(username: 'tester', password: '1111');
      final result = await addressRepository.getMyAddresseList();
      expect(result == null, false);
      expect(result!.length, 1);
      expect(result.first.defaultYn, true);
      expect(result.first.displayName, '온천동');
    },
  );
}
실패 시 null 반환
테스트 코드
📁 test/address_repository_test.dart
import 'package:flutter_market_app/data/repository/address_repository.dart';
import 'package:flutter_market_app/data/repository/user_repository.dart';
import 'package:flutter_test/flutter_test.dart';

void main() {
  final userRepository = UserRepository();
  final addressRepository = AddressRepository();
  test('AddressRepository : getMyAddress test', () async {
    // 로그인 안할 시 403에러!
    final resultWithNoAuth = await addressRepository.getMyAddresseList();
    expect(resultWithNoAuth == null, true);

    // 로그인 성공 시 Header에 Auth Token 담아주기때문에 진행
    await userRepository.login(username: 'tester', password: '1111');
    final result = await addressRepository.getMyAddresseList();
    expect(result == null, false);
    expect(result!.length, 1);
    expect(result.first.defaultYn, true);
    expect(result.first.displayName, '온천동');
  });
}
로그인 안 한 경우 → 403 → null
로그인 성공 → 주소 리스트 정상 반환
기본 동네 여부, 이름 검증
ProductSummary 모델
📁 lib/data/model/product_summary.dart
리스트 조회 vs 상세 조회 데이터 구조 다름
리스트는 가벼운 데이터만
import 'package:flutter_market_app/data/model/address.dart';
import 'package:flutter_market_app/data/model/file_model.dart';

class ProductSummary {
  final int id;
  final String title;
  final FileModel thumbnail;
  final Address address;
  final int price;
  final int likeCnt;
  final DateTime updatedAt;
  final DateTime createdAt;

  ProductSummary({
    required this.id,
    required this.title,
    required this.thumbnail,
    required this.address,
    required this.price,
    required this.likeCnt,
    required this.updatedAt,
    required this.createdAt,
  });

  ProductSummary.fromJson(Map<String, dynamic> json)
      : this(
          id: json["id"],
          title: json["title"],
          thumbnail: FileModel.fromJson(json["thumbnail"]),
          address: Address.fromJson(json["address"]),
          price: json["price"],
          likeCnt: json["likeCnt"],
          updatedAt: DateTime.parse(json["updatedAt"]),
          createdAt: DateTime.parse(json["createdAt"]),
        );

  Map<String, dynamic> toJson() => {
        "id": id,
        "title": title,
        "thumbnail": thumbnail.toJson(),
        "address": address.toJson(),
        "price": price,
        "likeCnt": likeCnt,
        "updatedAt": updatedAt.toIso8601String(),
        "createdAt": createdAt.toIso8601String(),
      };
}
ProductRepository
📁 lib/data/repository/product_repository.dart
import 'package:flutter_market_app/data/model/product_summary.dart';
import 'package:flutter_market_app/data/repository/base_remote_repository.dart';

class ProductRepository extends BaseRemoteRepository {
  Future<List<ProductSummary>?> getProductSummaryList(int addressId) async {
    final response = await client.get(
      "/api/product",
      queryParameters: {'addressId': addressId, 'size': 100},
    );

    if (response.statusCode == 200) {
      // 내 상품 조회의 결과에는 페이징 정보가 포함
      // 무한스크롤 기능 구현시 필요하지만 현재 구현안할거니 List<ProductSummary> 타입으로 돌려준다
      return List.of(
        response.data['content']['content'],
      ).map((e) => ProductSummary.fromJson(e)).toList();
    }
    return null;
  }
}
페이징 구조지만 현재는 무시하고 리스트만 사용
테스트 코드
📁 test/product_repository_test.dart
import 'package:flutter_market_app/data/repository/address_repository.dart';
import 'package:flutter_market_app/data/repository/product_repository.dart';
import 'package:flutter_market_app/data/repository/user_repository.dart';
import 'package:flutter_test/flutter_test.dart';

void main() {
  final userRepository = UserRepository();
  final addressRepository = AddressRepository();
  final productRepository = ProductRepository();
  test(
    'ProductRepository : getProductSummaryList test',
    () async {
      await userRepository.login(username: 'tester', password: '1111');
      // 상품을 조회하기 위해서 자신의 동네 ID를 알아야함
      final addresses = await addressRepository.getMyAddresseList();
      final products =
          await productRepository.getProductSummaryList(addresses!.first.id);

      expect(products == null, false);
      for (var product in products!) {
        print(product.toJson());
      }
    },
  );
}
HomeTabViewModel 구현
📁 lib/ui/pages/home/_tab/home_tab/home_tab_view_model.dart
상태 클래스
class HomeTabState {
  final List<Address> addresses;
  final List<ProductSummary> products;

  const HomeTabState({
    required this.addresses,
    required this.products,
  });

  HomeTabState copyWith({
    List<Address>? addresses,
    List<ProductSummary>? products,
  }) {
    return HomeTabState(
      addresses: addresses ?? this.addresses,
      products: products ?? this.products,
    );
  }
}
ViewModel 로직
class HomeTabViewModel extends Notifier<HomeTabState> {
HomeTabState build() {
fetchAddress().then(
(value) {
fetchProducts();
},
);
return const HomeTabState(
addresses: [],
products: [],
);
}
final addressRepository = AddressRepository();
final productRepository = ProductRepository();
Future<void> fetchAddress() async {
final addresses = await addressRepository.getMyAddresseList();
state = state.copyWith(
addresses: addresses,
);
}
Future<void> fetchProducts() async {
if (state.addresses.isEmpty) {
print("defaultAddress 없음");
return;
}
final defaultAddress = state.addresses.where((e) => e.defaultYn ?? false);
final products =
await productRepository.getProductSummaryList(defaultAddress.first.id);
state = state.copyWith(
products: products,
);
}
}뷰모델 관리자
final homeTabViewModel =
    NotifierProvider.autoDispose<HomeTabViewModel, HomeTabState>(
        () => HomeTabViewModel());
데이터 흐름
- 주소 목록 조회
- 기본 동네 선택
- 해당 동네 상품 조회
주소 없으면 상품 조회 안 함
AppBar 주소 표시
   return AppBar(
      title: Consumer(
        builder: (context, ref, child) {
          final homeTabState = ref.watch(homeTabViewModel);
          final target = homeTabState.addresses
              .where((e) => e.defaultYn ?? false)
              .toList();
          final addr = target.isEmpty ? '' : target.first.displayName;
          return Text(addr);
        },
      ),
기본 동네 이름을 AppBar title로 표시
ProductListItem UI
썸네일 이미지
제목 / 가격 / 좋아요 수 표시
상세 페이지 이동
Navigator.push(
  context,
  MaterialPageRoute(builder: (_) => ProductDetailPage()),
);
intl 패키지 활용
flutter pub add intl국제화뿐 아니라 숫자 / 날짜 포맷팅에 사용
가격 포맷팅
// 숫자 서식 문자열
// 000 => 001
// ### => 1
// ###,###

Text(
  NumberFormat('###,###원').format(product.price),
 style: TextStyle(fontSize: 16, fontWeight: FontWeight.bold),
),
10000 → 10,000원
날짜 포맷팅
DateTimeUtils 구현
📁 lib/core/date_time_utils.dart
날짜를 1분전, 1시간전 형태로 바꿈
공통적으로 많이 쓰이니 유틸클래스 만들어서 구현
import 'package:intl/intl.dart';

class DateTimeUtils {
  static String formatString(DateTime datetime) {
    final now = DateTime.now();
    final diff = now.difference(datetime);

    if (diff.inMinutes < 60) {
      // 1시간 이내
      return '${diff.inMinutes} 분 전';
    } else if (diff.inHours < 24) {
      // 24시간보다 작을 때
      return '${diff.inHours} 시간 전';
    } else {
      // 하루 초과
      return DateFormat('M월 d일').format(datetime);
    }
  }
}
✏️ Product 상세 페이지
모델 설계
ProductCategory
📁 lib/data/model/product_category.dart
class ProductCategory {
  final int id;
  final String category;

  ProductCategory({
    required this.id,
    required this.category,
  });

  ProductCategory.fromJson(Map<String, dynamic> json)
      : this(
          id: json["id"],
          category: json["category"],
        );

  Map<String, dynamic> toJson() => {
        "id": id,
        "category": category,
      };
}
Product (상세 전용 모델)
📁 lib/data/model/product.dart
import 'package:flutter_market_app/data/model/address.dart';
import 'package:flutter_market_app/data/model/file_model.dart';
import 'package:flutter_market_app/data/model/product_category.dart';
import 'package:flutter_market_app/data/model/user.dart';

class Product {
  final int id;
  final String title;
  final String content;
  final List<FileModel> imageFiles;
  final User user;
  final Address address;
  final ProductCategory category;
  final int price;
  final int likeCnt;
  final bool myLike;
  final DateTime updatedAt;
  final DateTime createdAt;

  Product({
    required this.id,
    required this.title,
    required this.content,
    required this.imageFiles,
    required this.user,
    required this.address,
    required this.category,
    required this.price,
    required this.likeCnt,
    required this.myLike,
    required this.updatedAt,
    required this.createdAt,
  });

  Product.fromJson(Map<String, dynamic> json)
    : this(
        id: json["id"],
        title: json["title"],
        content: json["content"],
        imageFiles: List<FileModel>.from(
          json["imageFiles"].map((e) => FileModel.fromJson(e)),
        ),
        user: User.fromJson(json["user"]),
        address: Address.fromJson(json["address"]),
        category: ProductCategory.fromJson(json["category"]),
        price: json["price"],
        likeCnt: json["likeCnt"],
        myLike: json["myLike"],
        updatedAt: DateTime.parse(json["updatedAt"]),
        createdAt: DateTime.parse(json["createdAt"]),
      );

  Map<String, dynamic> toJson() => {
    "id": id,
    "title": title,
    "content": content,
    "imageFiles": List<dynamic>.from(imageFiles.map((e) => e.toJson())),
    "user": user.toJson(),
    "address": address.toJson(),
    "category": category.toJson(),
    "price": price,
    "likeCnt": likeCnt,
    "myLike": myLike,
    "updatedAt": updatedAt.toIso8601String(),
    "createdAt": createdAt.toIso8601String(),
  };
}
설계 포인트
ProductSummary와 완전히 분리
상세 페이지에서 필요한 정보만 포함
이미지 여러 장, 작성자, 좋아요 여부 포함
ProductRepository
📁 lib/data/repository/product_repository.dart
import 'package:flutter_market_app/data/model/product.dart';
import 'package:flutter_market_app/data/model/product_summary.dart';
import 'package:flutter_market_app/data/repository/base_remote_repository.dart';

class ProductRepository extends BaseRemoteRepository {
  Future<List<ProductSummary>?> getProductSummaryList(int addressId) async {
    final response = await client.get(
      "/api/product",
      queryParameters: {'addressId': addressId, 'size': 100},
    );

    if (response.statusCode == 200) {
      // 내 상품 조회의 결과에는 페이징 정보가 포함
      // 무한스크롤 기능 구현시 필요하지만 현재 구현안할거니 List<ProductSummary> 타입으로 돌려준다
      return List.of(
        response.data['content']['content'],
      ).map((e) => ProductSummary.fromJson(e)).toList();
    }
    return null;
  }

  Future<Product?> fetchDetail(int productId) async {
    final response = await client.get("/api/product/$productId");

    if (response.statusCode == 200) {
      return Product.fromJson(response.data['content']);
    }
    return null;
  }

  Future<bool?> like(int productId) async {
    final response = await client.post("/api/product/like/$productId");

    if (response.statusCode == 200) {
      return response.data['content'];
    }
    return null;
  }

  Future<bool> delete(int productId) async {
    final response = await client.delete("/api/product/$productId");

    return response.statusCode == 200;
  }
}
주요 API 메서드
📌 상품 리스트 (홈탭)
Future<List<ProductSummary>?> getProductSummaryList(int addressId)페이징 구조지만 현재는 List로 변환
홈탭 전용
📌 상품 상세 조회
Future<Product?> fetchDetail(int productId)
/api/product/{id}
Product 모델 반환
❤️ 좋아요
Future<bool?> like(int productId)서버에서 좋아요 토글
결과(bool)만 반환
🗑 삭제
Future<bool> delete(int productId)성공 여부만 반환
상세 페이지에서 홈탭 갱신 필요
테스트 코드
📁 test/product_repository_test.dart
  test('ProductRepository : fetchDetail test', () async {
    await userRepository.login(username: 'tester', password: '1111');
    // productId 1 더미데이터 들어가있기 때문에 productId 1로 테스트
    final product = await productRepository.fetchDetail(1);

    expect(product == null, false);
    print(product!.toJson());
  });
}
로그인 - 주소 조회 - 주소 ID로 상품 리스트 조회 -특정 productId로 상세 조회
API + 인증 + 모델 파싱까지 한 번에 검증
UI 없이 데이터 계층 안정성 확인
flutter 숙련 과제 트러블 슈팅💥
Flutter 심화 과제를 진행하면서 여러 UI/상태 관리 이슈를 겪었다.
겉으로 보기에는 사소한 문제들이었지만 원인을 파고들다 보니 Flutter의 위젯 라이프사이클, 상태 변화 타이밍, 그리고 기본 위젯의 내부 동작 방식까지 다시 생각해보는 계기가 되었다.
이번 글에서는 과제 진행 중 마주쳤던 대표적인 트러블 슈팅 4가지를 정리해본다.
1️⃣ 삭제 후 Detail Page 빌드 에러
🔍 상황 인지
할 일 상세 보기 페이지(TodoDetailPage)에서 삭제 버튼을 눌렀을 때 화면이 닫히기 직전 아주 짧은 순간 동안 빨간색 에러 화면이 노출되는 현상을 발견했다. 처음에는 삭제 로직 수행 후 pop을 호출하는 순서의 문제라고 판단하여 Navigator.pop을 먼저 호출하도록 수정했으나 여전히 에러가 간헐적으로 발생했다.
🤔 고민
왜 화면이 완전히 닫히기 전에 에러가 발생하는지 분석했다. 원인은 Flutter의 화면 전환 애니메이션이 진행되는 동안에도 위젯의 build 메서드가 다시 호출된다는 점에 있었다. HomeViewModel의 상태가 변경(삭제)됨에 따라 상세 페이지는 다시 빌드를 시도하지만 이미 데이터가 리스트에서 사라진 상태였기에 firstWhere 함수가 해당 ID를 찾지 못해 에러를 던진 것이었다.
- 삭제 버튼 클릭
- HomeViewModel 상태 변경 (리스트에서 해당 todo 제거)
- 상세 페이지가 닫히는 애니메이션 진행
- 이 과정에서 TodoDetailPage의 build 재호출
- 이미 삭제된 데이터를 firstWhere로 조회 → 예외 발생
UI는 아직 존재하지만 데이터는 이미 사라진 상태에서 빌드가 다시 일어나고 있던 것
🛠️ 적용
조회 방식 변경: firstWhere 대신 firstOrNull을 사용하여 데이터가 없을 때 에러를 던지는 대신 null을 반환하게 했다.
조건부 렌더링: todo 데이터가 존재하는지 확인한 뒤, 데이터가 있을 때만 정상 페이지를 보여주고 없을 때는 로딩 상태(CircularProgressIndicator)를 보여주도록 처리했다.
Widget build(BuildContext context) {
final todos = ref.watch(homeViewModel);
// firstOrNull로 데이터 유무를 확인
final todo = todos.where((todo) => todo.id == widget.todoId).firstOrNull;
// 삼항 연산자를 통해 데이터 삭제 시 에러 대신 로딩 화면을 보여주며 닫히게 구현
return todo != null
? Scaffold( ... )
: Scaffold(body: Center(child: CircularProgressIndicator()));
}🎉 결과
삭제 시 화면 전환이 훨씬 자연스러워졌고 에러 화면이 노출되는 문제도 해결되었다.
이 경험을 통해 상태 기반 UI에서는 “이 시점에 데이터가 반드시 존재한다”는 가정을 해서는 안 된다는 점을 다시 한 번 깨달았다.
특히 화면 전환 애니메이션과 상태 변경이 겹치는 구간에서는 방어적인 UI 처리가 필수적이다.
2️⃣ 액션 버튼이 있는 SnackBar가 자동으로 사라지지 않는 문제
🔍 상황 인지
삭제 취소 기능을 위해 SnackBarAction을 추가한 커스텀 스낵바를 구현했다. 그런데 액션 버튼이 포함되자 설정한 duration이 지나도 스낵바가 자동으로 사라지지 않고 화면에 계속 남아 있는 현상을 확인했다.
🤔 고민
튜터님과 함께 스낵바의 동작 원리를 분석했다. 분석 결과, SnackBar에 action 메서드가 추가될 경우 사용자의 상호작용을 보장하기 위해 내부적으로 persist 값이 true로 설정된다는 사실을 알게 되었다. 이로 인해 지정된 시간이 지나도 스낵바가 닫히지 않았던 것이다.
🛠️ 적용
스낵바 구성 시 persist 속성을 명시적으로 false로 설정하여 해결했다.
final snackBar = SnackBar(
  content: Text(text),
  duration: Duration(seconds: 5),
  // 액션이 있어도 자동으로 닫히도록 false
  persist: false,
  behavior: SnackBarBehavior.floating,
  action: SnackBarAction(label: actionLabel, onPressed: onAction),
);
🎉 결과
스낵바가 의도한 시간 후 정상적으로 사라지며 UX가 개선되었다.
기본 위젯의 숨겨진 기본 동작이 사용자 경험에 큰 영향을 줄 수 있다는 점, 그리고 옵션을 명시하지 않으면 기본값을 정확히 이해해야 한다는 교훈을 얻었다.
3️⃣ Firestore 데이터 내 중복 ID 필드 저장 문제
🔍 상황 인지
Freezed 모델을 사용하여 데이터를 저장할 때, ToDoEntity의 id 필드가 Firestore 문서의 고유 ID뿐만 아니라 문서 내부 필드(data)에도 그대로 중복 저장되는 현상을 인지했다.
🤔 고민
앱 로직상 id는 필수적이었으나 DB 내부 필드에 중복 저장되는 것은 불필요한 리소스 낭비였다. 모델 구조를 바꾸지 않으면서 저장 시점에만 필드를 제외할 방법이 필요했다.
- 앱 로직상 id 필드는 필요함
- 하지만 Firestore 문서 내부에 중복 저장되는 것은 불필요
- 모델 구조 자체는 변경하고 싶지 않음
🛠️ 적용
Extension을 활용하여 Firestore 전용 데이터 가공 로직을 분리했다.
// Firestore 저장 전용
extension ToDoEntityFirestore on ToDoEntity {
  Map<String, dynamic> toFirestore() {
    final json = toJson();
    json.remove('id'); // 저장 직전에 id 필드만 제거하여 중복 방지
    return json;
  }
}
🎉 결과
Firestore 데이터 구조가 깔끔해졌고 기존 모델의 불변성을 해치지 않으면서도 요구사항을 충족할 수 있었다.
이 경험을 통해 도메인 모델과 저장소 레이어의 책임을 분리하는 설계의 중요성을 느꼈다.
4️⃣ 새로고침 UI/UX 개선
🔍 상황 인지
날씨 정보를 갱신하기 위해 하단 바에 별도의 새로고침 버튼을 두었으나 디자인적으로 별로였고 메인 기능인 투두 리스트보다 눈에 띈다는 문제점이 있었다.
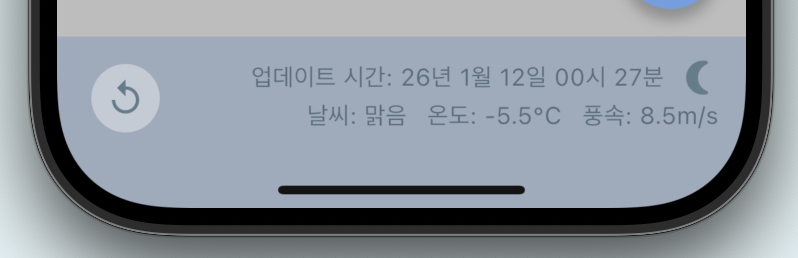
🤔 고민
어떻게 하면 시각적 부담을 줄이면서도 사용자가 필요할 때 정보를 갱신하게 할 수 있을지 고민했다. 모바일 앱에서 가장 대중적인 'Pull to Refresh' 패턴이 정답이라고 판단했다.
🛠️ 적용
아이콘 버튼을 제거하고, 리스트 전체를 RefreshIndicator 위젯으로 감쌌다.
return RefreshIndicator(
  onRefresh: () async {
    // 사용자가 화면을 당기면 날씨 정보와 할 일 목록을 한꺼번에 갱신
    await ref.read(weatherInfoViewModel.notifier).refreshWeather();
    await ref.read(homeViewModel.notifier).fetch();
  },
  child: ListView.builder(...),
);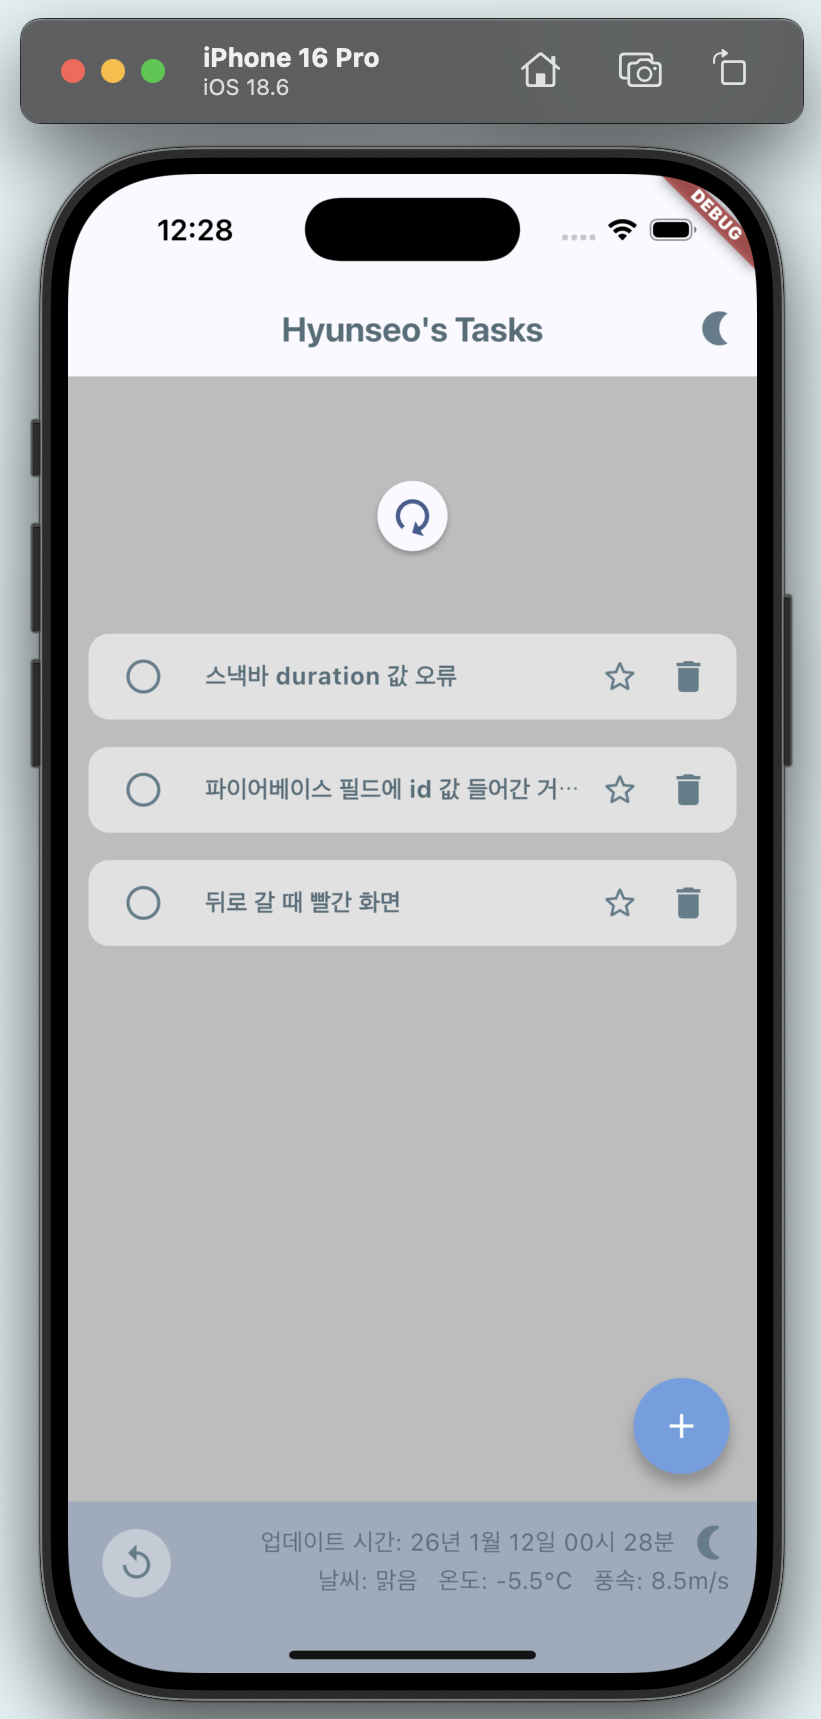
ㄴ 바텀바에 새로 고침 버튼은 나중에 삭제함🎉 결과
UI가 훨씬 간결해졌고 사용자는 자연스러운 제스처 하나로 모든 정보를 갱신할 수 있게 되었다.
기능 구현뿐만 아니라 어떤 기능이 사용자에게 가장 중요하게 보여야 하는지를 고민하는 것이 UI 설계에서 매우 중요하다는 점을 느꼈다.