포켓몬 Detail
포켓몬의 디테일한 설명을 알고 싶었다.
포켓몬을 좋아하는 친구가 "얘는 특성이 XX 인데 효과가 이러쿵저러쿵 해서 엄청 좋아" 라고 말을 해줘도 사실 잘 알아듣지 못하는 경우가 많았기 때문에, 도감을 컨셉트로 잡았으니 필요한 정보를 보여줄 수 있었으면 했다.
내가 포켓몬 Detail 창에서 보여주기를 원한 것은
- 포켓몬 이름
- 포켓몬 분류
- 포켓몬 타입
- 포켓몬 특성
- 공식 삽화(Official Artwork) & 색이 다른(이로치) 포켓몬
이었다.
사용할 수 있는 기술 , 타입에 따른 기술 데미지 비율 등등 표시 할 수 있는것은 엄청 많았지만, Modal 창이 너무 길게 나오는 것을 원하지 않았다.
다른 것들은 포켓몬의 이름을 받아오듯, 동일한 과정으로 진행 되었는데 몇가지 예외가 있는데 바로
- 포켓몬 타입
- 포켓몬 특성
- 이로치 토글링
이 세가지 였다.
포켓몬 타입
포켓몬 게임을 해보신 분들은 아시겠지만, 포켓몬의 타입이 그냥 글씨로만 띡 나와있지는 않다. 타입에 따른 색 분류 , 타입 이모티콘등이 있는데, 이것을 포켓몬 Detail 창에 표시하고 싶었다.
구글에 pokemon type image icon 을 검색 한 후, 구경하다 보니 타입 이미지 아이콘을 정리해놓은 깃허브를 발견 할 수 있었다.
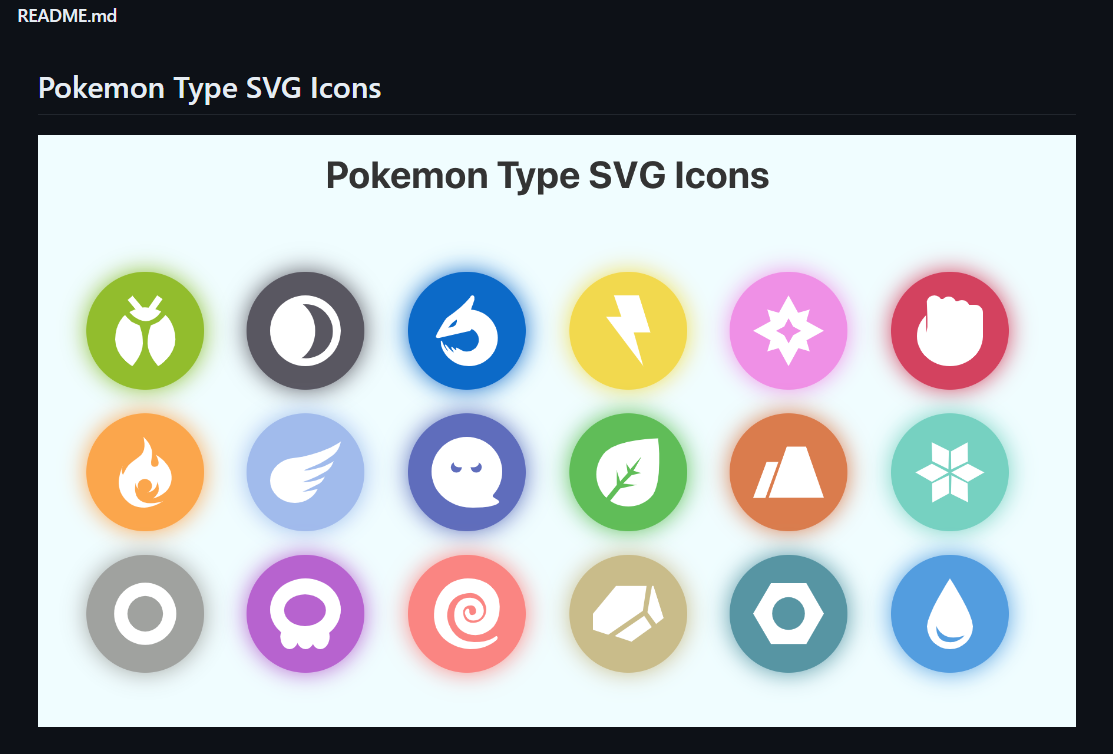
.svg 파일을 icons 라는 폴더를 만들어 그 안에 넣어 준 후, 다음과 같이 사용해주었다.
const typeIcons = {
  bug:require("./icons/bug.svg").default,
  dark:require("./icons/dark.svg").default,
  dragon:require("./icons/dragon.svg").default,
  .
  .
  .
  }

const colors = {
  normal: "#A0A29F",
  fighting: "#D3425F",
  flying: "#A1BBEC",
  .
  .
  .
  };
색상 값 또한 정리해두셨기에 따로 신경쓰지 않고 간편하게 사용할 수 있었다.
function getTypeColor(type) {
    return colors[type] || "#FFFFFF"; // 타입 정보가 없으면 기본 색상 사용
}

<div>
 { pokemonType && pokemonType.length > 0
 	? pokemonType.map((type,index) => (
    	<div
         key = {index}
         style={{ backgroundColor: getTypeColor(type) }}
        >
         <img src={typeIcons[type]} alt={type} />
         <span>{pokemonType[index]}</span>
        </div>
     )) : null
 }
</div>
typeIcons 와 Color 를 import 한 뒤 포켓몬 Card , Detail 컴포넌트에서 사용 하였다. 위와 같이 작성 하여 타입에 맞는 Color 와 svg 아이콘을 삽입 할 수 있었다.
포켓몬 특성
금방 만들 수 있을 줄 알았는데 생각 보다 어려웠다. API 구조를 살펴보면 알 수 있는데, 이상해씨 정보 를 보면
data.abilities 배열을 확인 할 수 있다.
abilities: [
  {
    ability: {
    name: "overgrow",
    url: "https://pokeapi.co/api/v2/ability/65/"
    },
    is_hidden: false,
    slot: 1
  },
  {
    ability: {
    name: "chlorophyll",
    url: "https://pokeapi.co/api/v2/ability/34/"
    },
    is_hidden: true,
    slot: 3
  }
], //요런 JSON 형태를 갖추고 있음.
음 이상해씨의 특성은 "overgrow" , "chlorophyll" 이구나... 근데 이거 한국어로 뭐지?
ability.url로 이동...
쭉 내리다 보면 names 배열에 여러가지 객체가 있는 것을 확인 할 수 있다,
{
  language: {
  name: "ko",
  url: "https://pokeapi.co/api/v2/language/3/"
  },
  name: "심록"
},
오 "overgrow" 는 한국어로 "심록" 이구나... 심록의 한국어 설명도 찾아보자...
flavor-text_entries 라는 매우 긴 배열이 있는데 여기서 한국어 설명을 찾을 수 있다.
포켓몬 특성에 대해서 하나 새로운 사실을 알았는데 , 포켓몬 세대가 바뀔 때 마다 특성도 달라진다는 것이었다. 생각보다 디테일하게 설정을 해주는듯 하다.
예를 들어 보면
{
  flavor_text: "위급할 때 풀타입의
  위력이 올라간다.",
    language: {
    name: "ko",
    url: "https://pokeapi.co/api/v2/language/3/"
    },
    version_group: {
    name: "x-y",
    url: "https://pokeapi.co/api/v2/version-group/15/"
    }
},

{
  flavor_text: "HP가 줄었을 때
    풀타입 기술의
    위력이 올라간다.",
    language: {
    name: "ko",
    url: "https://pokeapi.co/api/v2/language/3/"
    },
    version_group: {
    name: "sun-moon",
    url: "https://pokeapi.co/api/v2/version-group/17/"
    }
},
꽤나 많은 정보를 담고 있는 "x-y" 버전 (gif 등 유용한게 많음) 에서와 꽤나 최근 버전인 "sun-moon" 버전에서의 "심록" 특성에 대한 설명은 다르다. 그냥 돌려막기 하면서 쓸 줄 알았는데 생각 보다 디테일에 집착하는 것을 알 수 있었다..
(위급할 때 => HP가 줄었을 때)
아무튼 내가 가지고 오고 싶은 정보들이 여러 군데 흩어져 있고 정보들이 없는 특정 포켓몬 들도 있었기 때문에 포켓몬 특성에 대한 설명을 가져오는데에 꽤 시간이 걸렸던 것 같다. (한국어 번역이 없는 포켓몬 들이 뒤로 갈수록 많아짐)
특성 이름은 하나로 통일 되어 있지만, 특성 설명은 버전 마다 다르게 여러개가 있었기 때문에, find() 메서드를 사용하여 특성 배열의 language = 'ko' 중 첫 번째 한국어 설명을 반환 하였다.
export async function getKoreanPokemonAbilities(pokemonName) {
  try {
    // 1. axios를 사용하여 API에서 포켓몬 정보를 가져옵니다.
    const response = await axios.get(`${baseURL}/pokemon/${pokemonName}`);
    const data = response.data;

    // 2. 데이터가 없거나 능력 정보가 없는 경우 기본값 또는 에러 처리를 수행할 수 있습니다.
    if (!data || !data.abilities || data.abilities.length === 0) {
      return [{ name: "Unknown Ability", description: "No description available" }];
    }

    // 3. 능력 정보 배열에서 각 능력의 이름과 설명을 가져와 객체로 반환합니다.
    const koreanAbilities = data.abilities.map(async (abilityInfo) => {
      const abilityName = abilityInfo.ability.name;

      // 4. 능력 정보의 URL로 이동하여 더 자세한 정보를 가져옵니다.
      try {
        const abilityResponse = await axios.get(abilityInfo.ability.url);
        const namesEntries = abilityResponse.data.names;
        const koreanAbilitiesNameInfo = namesEntries.find((entry) => entry.language.name === 'ko');
        const koreanAbilitiesNames = koreanAbilitiesNameInfo ? koreanAbilitiesNameInfo.name : '번역 없음';

        // 5. 원하는 언어("ko"로 설정)에 해당하는 설명을 찾습니다.
        const flavorTextEntries = abilityResponse.data.flavor_text_entries;
        const koreanDescriptionInfo = flavorTextEntries.find((entry) => entry.language.name === 'ko');
        const koreanDescription = koreanDescriptionInfo ? koreanDescriptionInfo.flavor_text : '번역 없음';

        // 6. 이름과 설명을 가진 객체를 반환합니다.
        return { name: koreanAbilitiesNames, description: koreanDescription };
      } catch (error) {
        // 7. 에러가 발생한 경우, 에러 메시지를 출력하고 기본값을 반환합니다.
        console.error(`Error fetching description for ability "${abilityName}":`, error);
        return { name: abilityName, description: '번역 없음' };
      }
    });

    // 8. 모든 능력에 대한 비동기 작업을 병렬로 실행하고 결과를 반환합니다.
    return Promise.all(koreanAbilities);
  } catch (error) {
    // 9. 모든 에러를 캐치하고 에러 메시지를 출력한 후 에러를 다시 던집니다.
    console.error('Error fetching data:', error);
    throw error;
  }
}- 결과물
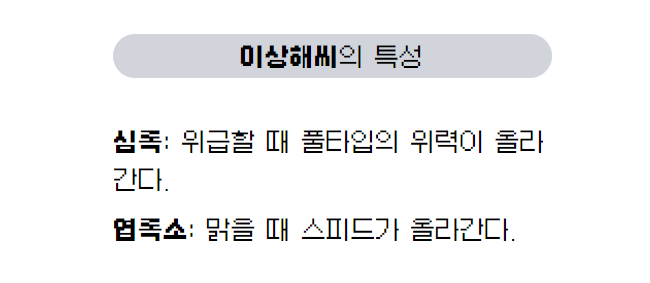
위와 같은 과정을 거친 뒤, 이런 식으로 특성에 대한 정보를 한국어로 출력하는 것이 가능하다!
이로치 토글링
도감에서의 볼거리 중 하나가 바로 포켓몬 그림이라고 생각한다. pokeAPI 에서 official-artwork 라는 객체를 얻어올 수 있는데 아마 공식 삽화 인듯 하였다. official-artwork 객체는 front_default , front_shiny 값을 얻어올 수 있는데, 이게 바로 색이 다른 포켓몬 (이로치) 였다.
포덕 들이 참 좋아하는 이로치도 넣어보는것도 괜찮을 것 같다고 생각하였고, 사진의 이미지를 크게 보여주는 것이 보는 맛이 있을 것 같다고 생각하였기에, 두 장을 사진을 같이 보여주는 것 보다 토글링을 통해 원하는 사진을 번갈아 가면서 볼 수 있도록 해보았다!
export async function getOfficialArtwork(pokemonName){
  try{
    const response = await axios.get(`${baseURL}/pokemon/${pokemonName}`);
    const data=response.data;

    const officialArtwork=data.sprites.other["official-artwork"].front_default;

    return officialArtwork;
  }catch (error){
    console.error('Error fetching data:', error);
    throw error;
  }
}
// 동일한 방식으로 front_shiny 를 받아 옵니다.
우선 이로치 공식 삽화를 변경 해주기 위한 Toggle 컴포넌트를 만듭니다.
import React from "react";

function Toggle({className,onClick }){
  return (
    <div className={`${className}`}>
      <label className="relative inline-flex items-center cursor-pointer">
        <input type="checkbox" value="" className="sr-only peer"onClick={onClick} />
        <div className="w-11 h-6 bg-gray-200 peer-focus:outline-none  peer-focus:ring-blue-300 dark:peer-focus:ring-blue-800 rounded-full peer dark:bg-gray-700 peer-checked:after:translate-x-full peer-checked:after:border-white after:content-[''] after:absolute after:top-[2px] after:left-[2px] after:bg-white after:border-gray-300 after:border after:rounded-full after:h-5 after:w-5 after:transition-all dark:border-gray-200 peer-checked:bg-blue-300"></div>
        <span className="ml-3 text-xs font-bold text-black dark:text-gray-300">이로치</span>
      </label>
    </div>
  );
}

export default Toggle;
funtion Detail({officialArtwork,shinyArtwork}){
const [isShiny, setIsShiny] = useState(false);
const handleToggleClick = () => {
// 현재 상태의 반대로 Toggle 상태 변경
setIsShiny(!isShiny);
};
const currentArtwork = isShiny ? shinyArtwork : officialArtwork;
return(
<Toggle className="px-4 flex justify-end items-end md:px-24 lg:px-36 mt-8" onClick={handleToggleClick} />
<LazyLoad className="flex justify-center items-center">
{currentArtwork ? (
<img src={currentArtwork} alt="pokemonName" className="w-[50%] sm:w-1/2 md:w-55 lg:w-3/4"/>
) : (
<Loader />
)}
</LazyLoad>
);
}- 결과물
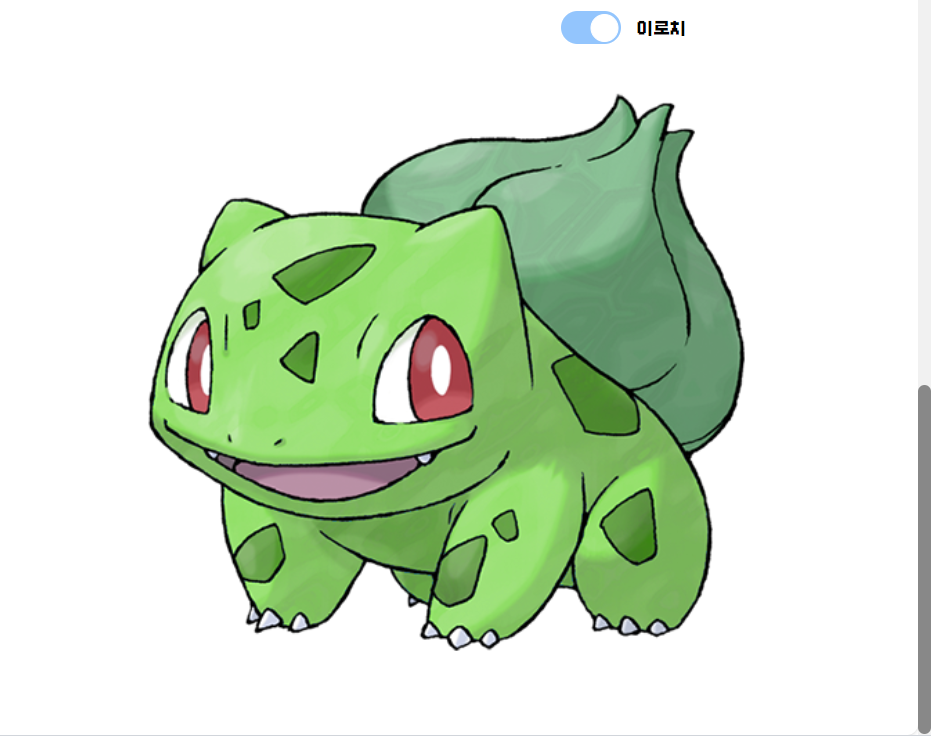
이로치에 대한 공식 삽화를 Toggle 버튼을 통해 받아올 수 있게 되었습니다. 색이 좀더 진해진(?) 이상해씨를 볼 수 있습니다 ㅎㅎ..