🎭 제네릭 도입
함수형 인터페이스에도 제네릭을 사용할 수 있다. 그 전에 함수형 인터페이스에 제네릭이 필요한 경우가 있는지 알아보자.
package lambda.lambda3;

public class GenericMain1 {
    public static void main(String[] args) {

        StringFunction upperCase = s -> s.toUpperCase();
        String result1 = upperCase.apply("hello");
        System.out.println("result1 = " + result1);

        NumberFunction square = n -> n * n;
        Integer result2 = square.apply(3);
        System.out.println("result2 = " + result2);
    }

    @FunctionalInterface
    interface StringFunction {
        String apply(String s);
    }

    @FunctionalInterface
    interface NumberFunction {
        Integer apply(Integer n);
    }
}

/*
result1 = HELLO
result2 = 9
*/
위의 코드를 보면, 매개 변수의 타입과 반환 타입은 다르지만 모양이 완전 똑같은 2개의 인터페이스가 있다. 중복의 느낌이 강하게 온다. 다형적 참조를 활용하기 위해 Object 클래스로 모든 타입을 담을 수 있게 리팩토링 한다면 문제가 없어 보인다.
package lambda.lambda3;

public class GenericMain2 {
    public static void main(String[] args) {

        ObjectFunction upperCase = s -> ((String) s).toUpperCase();
        String result1 = (String) upperCase.apply("hello");
        System.out.println("result1 = " + result1);

        ObjectFunction square = n -> (Integer) n * (Integer) n;
        Integer result2 = (Integer) square.apply(3);
        System.out.println("result2 = " + result2);
    }

    @FunctionalInterface
    interface ObjectFunction {
        Object apply(Object obj);
    }

}

/*
result1 = HELLO
result2 = 9
*/
하지만, 짜치는 부분이 있다. 바로 알맞은 타입으로 캐스팅을 별도로 해줘야 한다는 것이다. 분명히 복잡하고 안전하지 않은 방법이다. 코드의 재사용과 타입 안전성을 동시에 잡기 위한 방법이 뭐였지? 그렇다. 바로 제네릭을 이용하면 된다. 코드를 보기 쉽게 제네릭을 활용한 익명 클래스로 변경하도록 하자.
package lambda.lambda3;

public class GenericMain4 {
    public static void main(String[] args) {

		// String 타입을 입력 받아서 String 타입을 반환
        GenericFunction<String, String> upperCase = new GenericFunction<>() {
            @Override
            public String apply(String s) {
                return s.toUpperCase();
            }
        };

        String result1 = upperCase.apply("hello");
        System.out.println("result1 = " + result1);

		// Integer 타입을 입력 받아서 Integer 타입을 반환
        GenericFunction<Integer, Integer> square = new GenericFunction<>() {
            @Override
            public Integer apply(Integer n) {
                return n * n;
            }
        };

        Integer result2 = square.apply(3);
        System.out.println("result2 = " + result2);
    }

    @FunctionalInterface
    interface GenericFunction<T, R> {
        R apply(T t);
    }

}

/*
result1 = HELLO
result2 = 9
*/
GenericFunction 함수형 인터페이스를 살펴보면, T 타입을 넣으면 R 타입으로 반환되도록 처리됐다. 덕분에 메서드 apply()의 매개 변수와 반환 타입을 상황에 맞게 유연하게 변경할 수 있게 됐다. 이제 람다를 활용하여 코드를 더 간결하게 리팩토링 해보자.
package lambda.lambda3;

public class GenericMain5 {
    public static void main(String[] args) {

        GenericFunction<String, String> upperCase = s -> s.toUpperCase();
        String result1 = upperCase.apply("hello");
        System.out.println("result1 = " + result1);

        GenericFunction<Integer, Integer> square = n -> n * n;
        Integer result2 = square.apply(3);
        System.out.println("result2 = " + result2);
    }

    @FunctionalInterface
    interface GenericFunction<T, R> {
        R apply(T t);
    }

}

/*
result1 = HELLO
result2 = 9
*/
이제 GenericFunction 함수형 인터페이스만 있다면, 매개 변수가 1개이고, 반환값이 있는 모든 람다에서 사용할 수 있는 것이다. 이처럼 함수형 인터페이스에 제네릭을 도입하면 아래 예시 코드처럼 재사용성이 매우 높아진다.
package lambda.lambda3;

public class GenericMain6 {
    public static void main(String[] args) {

        GenericFunction<String, String> upperCase = str -> str.toUpperCase();
        GenericFunction<String, Integer> stringLength = str -> str.length();
        GenericFunction<Integer, Integer> square = x -> x * x;
        GenericFunction<Integer, Boolean> isEven = num -> num % 2 == 0;

        System.out.println(upperCase.apply("hello"));
        System.out.println(stringLength.apply("hello"));
        System.out.println(square.apply(5));
        System.out.println(isEven.apply(5));
    }

    @FunctionalInterface
    interface GenericFunction<T, R> {
        R apply(T t);
    }

}

/*
HELLO
5
25
false
*/
지금까지의 내용을 정리하자면… 제네릭을 사용하면 동일한 구조의 함수형 인터페이스를 다양한 타입에 재사용할 수 있고, 컴파일 시점에 타입 체크가 이루어지기 때문에 런타임 에러를 방지할 수 있다. 그리고 무엇보다 제네릭을 사용하지 않았다면 각각의 경우에 대해 별도의 함수형 인터페이스를 만드느라 정신이 없었을 것이다.
💥 제네릭 도입의 문제점
그럼 전부 제네릭을 도입해서 사용하면 되겠네? 그러기엔 몇 가지 문제가 남아 있다.
지금 위의 예제에서만 보더라도 람다를 사용하기 위해 매개 변수가 1개가 있고, 반환값이 있는 함수형 인터페이스를 만들었다면, “이 메커니즘의 인터페이스를 세상 모든 개발자들이 각각 개발해야 한다는 것” 이다. 표준화가 되어 있지 않아 기능은 똑같은데 이름만 다른 함수형 인터페이스를 사용하는데 있어서 소통에 문제가 생긴다는 것이다.
그리고 그에 따라 함수형 인터페이스가 서로 호환되지 않는 문제가 발생한다. 뭐가 호환이 안 된다는거지? 제네릭 쓴 함수형 인터페이스는 어디든 적용 가능하다고 하지 않았나? 무슨 말인지 아래 코드로 이해해보자.
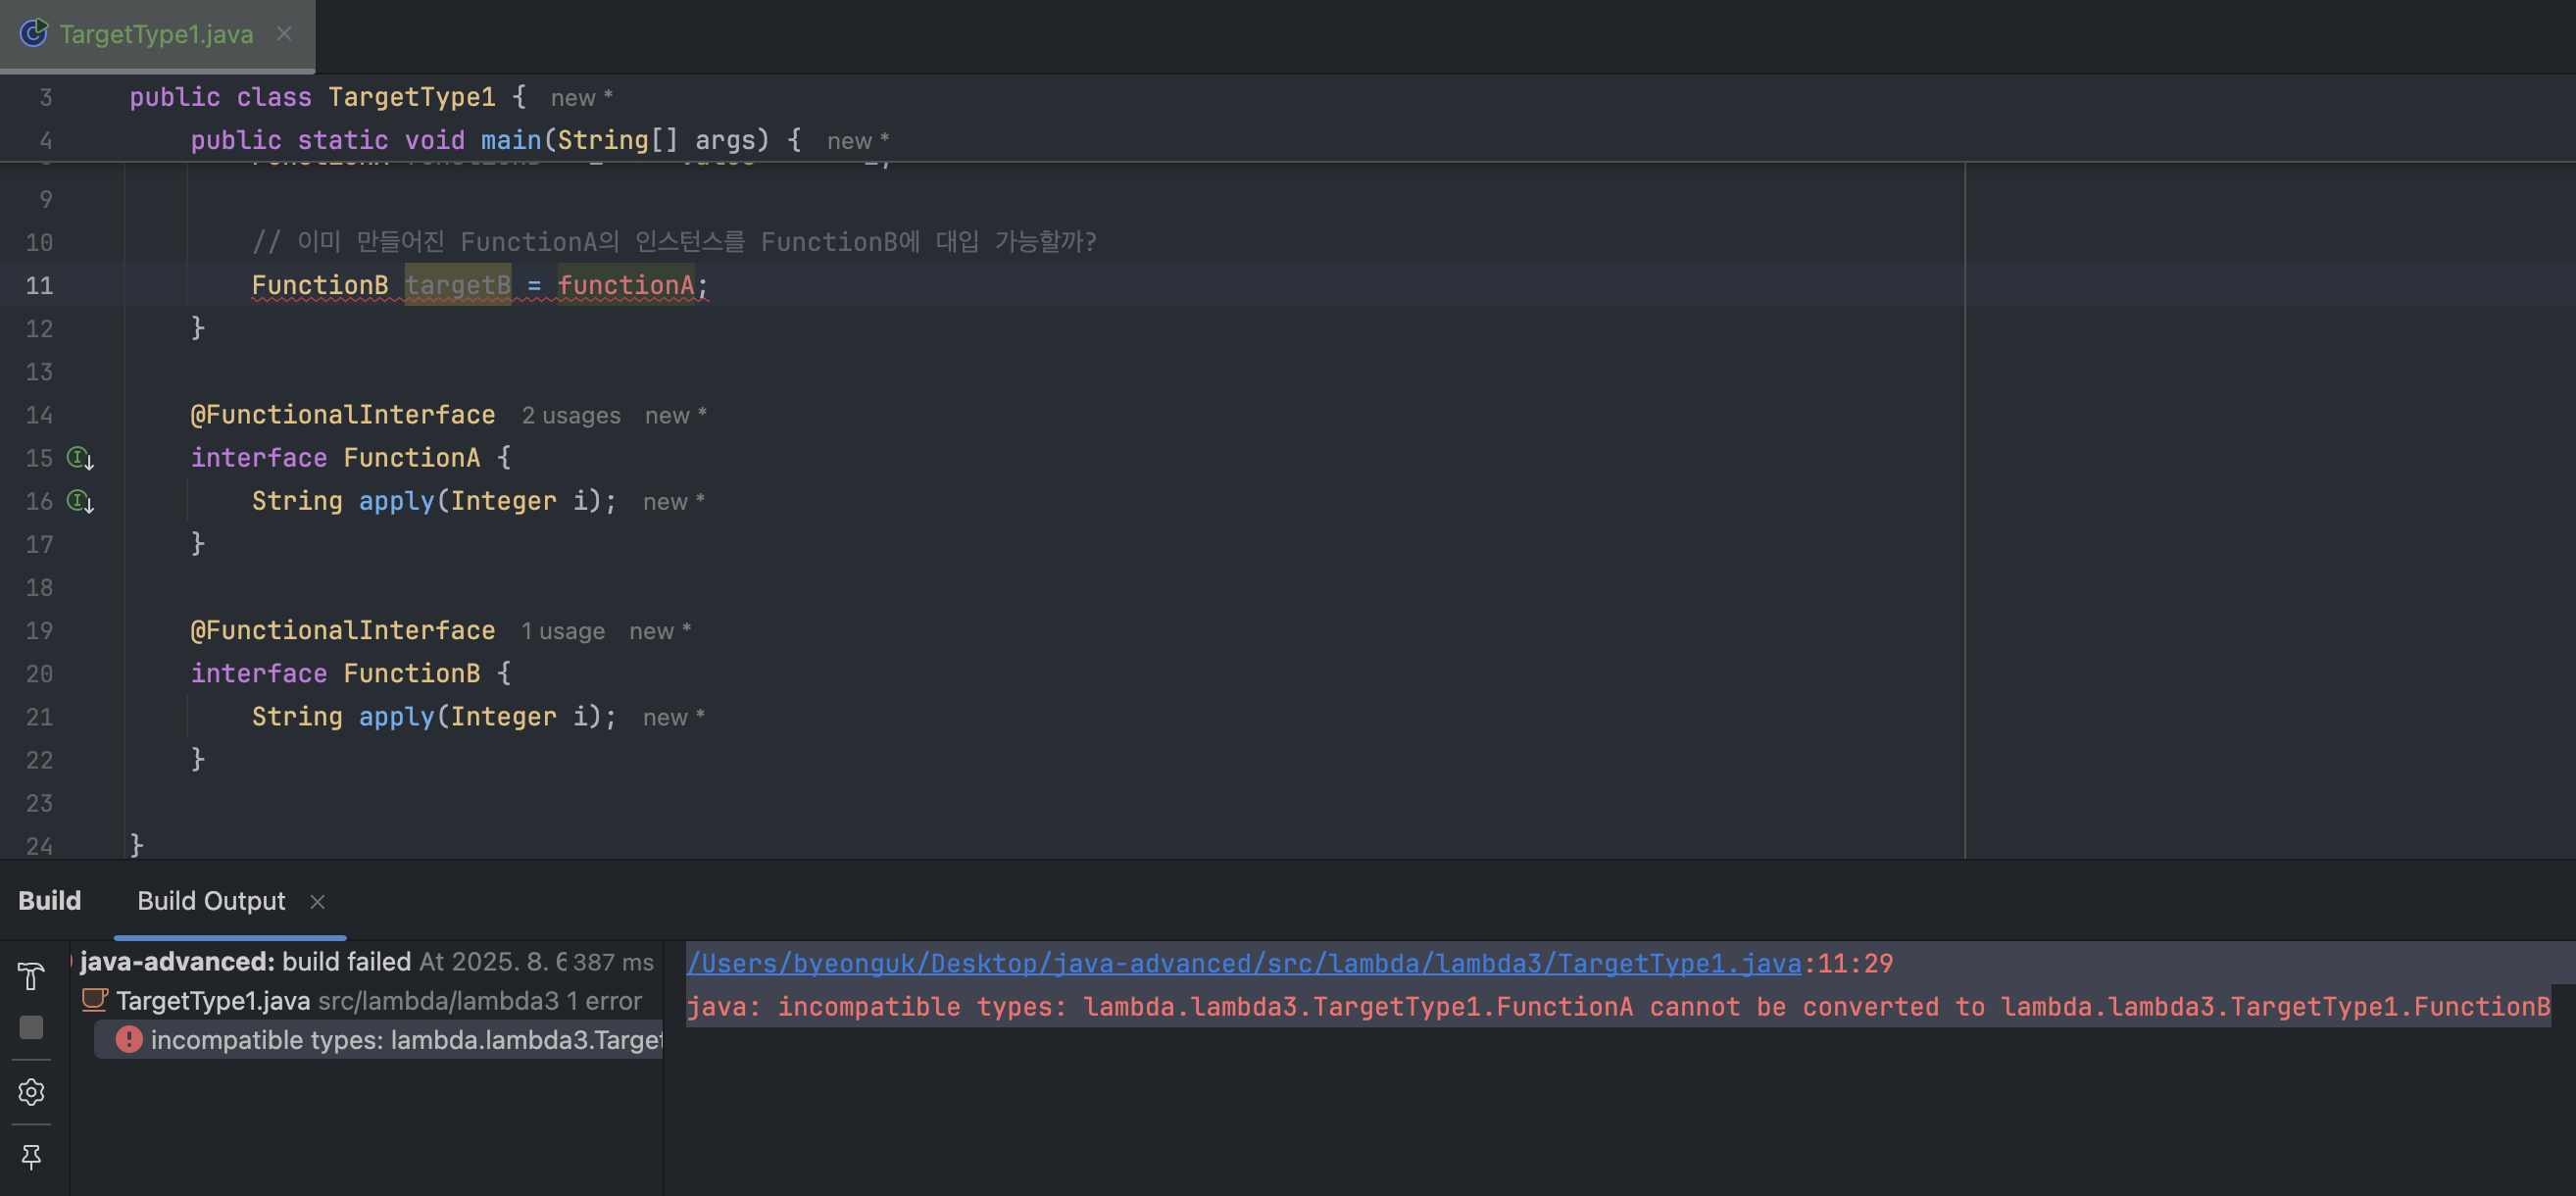
package lambda.lambda3;

public class TargetType1 {
    public static void main(String[] args) {

        // 람다 직접 대입: 문제 없음
        FunctionA functionA = i -> "value = " + i;
        FunctionB functionB = i -> "value = " + i;

        // 이미 만들어진 FunctionA의 인스턴스를 FunctionB에 대입 가능할까?
//        FunctionB targetB = functionA; 컴파일 오류
    }

    @FunctionalInterface
    interface FunctionA {
        String apply(Integer i);
    }

    @FunctionalInterface
    interface FunctionB {
        String apply(Integer i);
    }

}
람다는 그냥 시그니처만 맞으면 문제없이 잘 대입된다. 하지만, FunctionB targetB = functionA 부분은 컴파일 오류가 터진다. 자바에서는 알다시피 다른 타입에 대한 대입은 불가능하다. 지금 String 타입에 Integer 타입을 대입하는 것과 똑같은 상황인 것이다.
🎯 람다와 타겟 타입
람다는 그 자체만으로는 구체적인 타입이 정해져 있지 않고, 사실 타겟 타입(Target Type)이라고 불리는 맥락에 의해 타입이 결정된다. 아래 예시를 보자.
FunctionA functionA = i -> "value = " + i;
위 코드에서 i -> "value = " + i라는 람다식은 functionA 변수에 대입되는 “순간”, FunctionA라는 타겟 타입을 만나서 비로소 FunctionA 타입으로 결정되는 것이다. 이렇게 타입이 결정되고 나면 이후에 다른 타입에 대입하는 것이 불가능하다. functionA는 이제 명시적인 인터페이스 타입을 가진 객체가 되었기 때문에 메서드의 시그니처가 같다고 해도 자바 컴파일러가 FunctionA와 FunctionB가 서로 다른 타입임을 명확히 인식하기 때문에 대입이 불가능하다는 말이다.
// functionA는 FunctionA 타입으로 결정되었기 때문에 컴파일 오류 발생
FunctionB targetB = functionA;
그래서 개발자A는 FunctionA, 개발자B는 FunctionB 인터페이스를 만들어도 서로 호환되지 않는 문제가 발생할 수 있는 것이다. 그래서 자바는 이런 문제들을 해결하기 위해 기본적으로 함수형 인터페이스를 제공하고 있다.
🧬 기본 함수형 인터페이스
함수형 인터페이스들은 대부분 제네릭을 활용하기 때문에 종류가 많을 필요가 없다. 함수형 인터페이스는 Runnable을 제외한 대부분 java.util.function 패키지에 위치한다. 하나씩 살펴보자.
<Function 함수형 인터페이스>
package java.util.function;

import java.util.Objects;

@FunctionalInterface
public interface Function<T, R> {

    R apply(T t);

    default <V> Function<V, R> compose(Function<? super V, ? extends T> before) {
        Objects.requireNonNull(before);
        return (V v) -> apply(before.apply(v));
    }

    default <V> Function<T, V> andThen(Function<? super R, ? extends V> after) {
        Objects.requireNonNull(after);
        return (T t) -> after.apply(apply(t));
    }

    static <T> Function<T, T> identity() {
        return t -> t;
    }

}
Function 인터페이스는 하나의 매개 변수를 받고, 결과를 반환하는 함수형 인터페이스다. 입력값을 받아서 다른 타입의 출력값을 반환해야 하는 상황에서 사용하면 편리하다.
package lambda.lambda3;

import java.util.function.Function;

public class TargetType2 {
    public static void main(String[] args) {

        Function<String, String> upperCase = s -> s.toUpperCase();
        String result1 = upperCase.apply("hello");
        System.out.println("result1 = " + result1);

        Function<Integer, Integer> square = x -> x * x;
        Integer result2 = square.apply(5);
        System.out.println("result2 = " + result2);
    }
}

/*
result1 = HELLO
result2 = 25
*/
package lambda.lambda3;
import java.util.function.Function;
public class TargetType3 {
public static void main(String[] args) {
Function<Integer, String> functionA = i -> "value = " + i;
System.out.println(functionA.apply(10));
Function<Integer, String> functionB = functionA; // 대입해도 문제 없음
System.out.println(functionB.apply(50));
}
}
/*
value = 10
value = 50
*/같은 Function 타입이기 때문에 대입해도 전혀 문제가 없다.
<Consumer 함수형 인터페이스>
package java.util.function;

import java.util.Objects;

@FunctionalInterface
public interface Consumer<T> {

    void accept(T t);

    default Consumer<T> andThen(Consumer<? super T> after) {
        Objects.requireNonNull(after);
        return (T t) -> { accept(t); after.accept(t); };
    }

}
보다시피 입력 값만 받고, 결과를 반환하지 않는 연산을 수행하는 함수형 인터페이스다. 컬렉션에 값을 추가한다든지, DB에 저장하는 작업이라든지, 입력 받은 데이터를 기반으로 내부적으로 처리만 하는 경우에 유용하게 사용할 수 있다. “입력을 받아서(accept) 소비(consume)해 버린다고 생각하면 편하다.”
package lambda.lambda4;

import java.util.function.Consumer;

public class ConsumerMain {
    public static void main(String[] args) {

        Consumer<String> consumer1 = new Consumer<>() {
            @Override
            public void accept(String s) {
                System.out.println(s);
            }
        };

        consumer1.accept("hello");

        Consumer<String> consumer2 = s -> System.out.println(s);
        consumer2.accept("hello, consumer~");
    }
}

/*
hello
hello, consumer~
*/
<Supplier 함수형 인터페이스>
package java.util.function;

@FunctionalInterface
public interface Supplier<T> {

    T get();
}
입력을 받지 않고 어떤 데이터를 공급해주는 함수형 인터페이스를 말한다. 객체나 값 생성, 지연 초기화 등에 주로 사용된다. 아래 예시 코드를 보고 넘어가자.
package lambda.lambda4;

import java.util.Random;
import java.util.function.Supplier;

public class SupplierMain {
    public static void main(String[] args) {

        Supplier<Integer> supplier1 = new Supplier<>() {
            @Override
            public Integer get() {
                return new Random().nextInt(10);
            }
        };

        System.out.println("supplier1.get() = " + supplier1.get());

        Supplier<Integer> supplier2 = () -> new Random().nextInt(10);
        System.out.println("supplier2.get() = " + supplier2.get());
    }
}

/*
supplier1.get() = 7
supplier2.get() = 5
*/
<Runnable 함수형 인터페이스>
package java.lang;

@FunctionalInterface
public interface Runnable {

    void run();
}
“스레드 실행을 위해 Runnable 인터페이스를 구현해야 한다.” 에서 그 Runnable 인터페이스… 그거 맞다. 이는 입력값도, 반환값도 없는 함수형 인터페이스다. 원래는 스레드 실행을 위한 인터페이스로 쓰였지만, 자바 8 이후에는 람다식으로도 많이 표현된다.
package lambda.lambda4;

public class RunnableMain {
    public static void main(String[] args) {

        Runnable runnable1 = new Runnable() {
            @Override
            public void run() {
                System.out.println("Hello, Runnable!");
            }
        };

        runnable1.run();

        Runnable runnable2 = () -> System.out.println("Hello, Runnable!");
        runnable2.run();
    }
}

/*
Hello, Runnable!
Hello, Runnable!
*/
🏹 특화 함수형 인터페이스
특화됐다는 말의 의미는, 함수형 인터페이스의 “의도를 명확하게 만들었다” 는 말이다. 크게 2가지가 있는데 차례대로 살펴보자.
<Predicate 함수형 인터페이스>
package java.util.function;

import java.util.Objects;

@FunctionalInterface
public interface Predicate<T> {

    boolean test(T t);

    default Predicate<T> and(Predicate<? super T> other) {
        Objects.requireNonNull(other);
        return (t) -> test(t) && other.test(t);
    }

    default Predicate<T> negate() {
        return (t) -> !test(t);
    }

    default Predicate<T> or(Predicate<? super T> other) {
        Objects.requireNonNull(other);
        return (t) -> test(t) || other.test(t);
    }

    static <T> Predicate<T> isEqual(Object targetRef) {
        return (null == targetRef)
                ? Objects::isNull
                : object -> targetRef.equals(object);
    }

    @SuppressWarnings("unchecked")
    static <T> Predicate<T> not(Predicate<? super T> target) {
        Objects.requireNonNull(target);
        return (Predicate<T>)target.negate();
    }

}
보다시피, 입력 값을 받아서 참/거짓을 판단하는 함수형 인터페이스다. 쉽게 말해서, “이거 조건이 맞는거야? True나 False로 알려줘!” 라고 하는 것이다. 그래서 보통 조건 검사나, 필터링 같은 기능에서 많이 사용된다. 아래 예시 코드를 보자.
package lambda.lambda4;

import java.util.function.Predicate;

public class PredicateMain {
    public static void main(String[] args) {

        Predicate<Integer> predicate1 = new Predicate<>() {
            @Override
            public boolean test(Integer n) {
                return n % 2 == 0;  // 짝수인지 판별
            }
        };

        System.out.println("predicate1.test(10) = " + predicate1.test(10));

        Predicate<Integer> predicate2 = n -> n % 2 == 0;
        System.out.println("predicate2.test(10) = " + predicate2.test(9));
    }
}

/*
predicate1.test(10) = true
predicate2.test(10) = false
*/
🤔 근데 Predicate 인터페이스가 꼭 필요할까?
근데 꼴랑 참/거짓을 판단하는데 꼭 Predicate 인터페이스를 사용해야 하나? 그냥 Function 인터페이스에 입력 타입으로 원하는 타입 쓰고, 반환 타입으로 Boolean을 주면 되는거 아닌가? 사용해야 하는 이유는 간단하다. 의도를 명시적으로 드러내기 위함이다. 물론 Function 인터페이스로도 충분히 구현 가능하지만, 의도를 한눈에 파악하기 어려울 수 있다. 여러 사람이 협업하는 상황에서 Predicate<T>를 사용함으로써 “이거 참/거짓 판별하는 기능인가보다” 라고 한 번에 이해할 수 있다. 이처럼 이름도 명시적이고, 제네릭에 Boolean을 적지 않아도 돼서 코드 가독성과 유지보수성이 향상된다.
이처럼 “의도” 가 핵심인 것이다. 자바가 제공하는 다양한 함수형 인터페이스들을 선택할 때는 단순히 입력값, 반환값만 보고 선택하는게 아니라 해당 함수형 인터페이스가 제공하는 의도를 중요하게 생각해야 한다. 예를 들어서 조건 검사, 필터링 등을 사용한다면 Function이 아니라 Predicate를 선택하는 것이 더 나은 선택이다. 그래야 다른 개발자가 "아~ 이 코드는 조건 검사 등에 사용할 의도가 있구나" 하고 코드를 더욱 쉽게 이해할 수 있다.
<Operator 함수형 인터페이스>
// 단항 연산
package java.util.function;

@FunctionalInterface
public interface UnaryOperator<T> extends Function<T, T> {

    static <T> UnaryOperator<T> identity() {
        return t -> t;
    }

}
// 이항 연산
package java.util.function;
import java.util.Objects;
import java.util.Comparator;
@FunctionalInterface
public interface BinaryOperator<T> extends BiFunction<T,T,T> {
public static <T> BinaryOperator<T> minBy(Comparator<? super T> comparator) {
Objects.requireNonNull(comparator);
return (a, b) -> comparator.compare(a, b) <= 0 ? a : b;
}
public static <T> BinaryOperator<T> maxBy(Comparator<? super T> comparator) {
Objects.requireNonNull(comparator);
return (a, b) -> comparator.compare(a, b) >= 0 ? a : b;
}
}보다시피 Operator 인터페이스에는 UnaryOperator와 BinaryOperator가 제공된다. 큰 틀에서 보면, Operator는 같은 타입의 값들을 받아서 동일한 타입의 결과를 반환한다. 근데 UnaryOperator는 하나의 피연산자에 대해 연산을 수행하고, BinaryOperator는 2개의 피연산자에 대해 연산을 수행한다. 예시 코드를 가볍게 보고 넘어가도록 하자.
package lambda.lambda4;

import java.util.function.BiFunction;
import java.util.function.BinaryOperator;
import java.util.function.Function;
import java.util.function.UnaryOperator;

public class OperatorMain {
    public static void main(String[] args) {

        // UnaryOperator
        Function<Integer, Integer> square1 = x -> x * x;
        UnaryOperator<Integer> square2 = x -> x * x;
        System.out.println("square1.apply(3) = " + square1.apply(3));
        System.out.println("square2.apply(3) = " + square2.apply(3));

        // BinaryOperator
        BiFunction<Integer, Integer, Integer> add1 = (a, b) -> a + b;
        BinaryOperator<Integer> add2 = (a, b) -> a + b;

        System.out.println("add1.apply(3, 4) = " + add1.apply(3, 4));
        System.out.println("add2.apply(3, 4) = " + add2.apply(3, 4));
    }
}

/*
square1.apply(3) = 9
square2.apply(3) = 9
add1.apply(3, 4) = 7
add2.apply(3, 4) = 7
*/
참고) BiFunction은 입력 매개 변수가 2개인 Function이다.
Operator 인터페이스도 Predicate와 마찬가지로 의도를 염두에 두고 사용된다. 그냥 BiFunction으로 처리하면, 타입이 같은 연산임을 어필하기에 약간 부족하다. 그리고 보다시피 제네릭을 적는 양도 하나로 줄일 수 있어서 코드 가독성이 훨씬 좋아진다. 정리하자면, 단항 연산이고 타입이 동일하면 UnaryOperator<T>를 사용하고, 이항 연산에 타입이 동일하다면 BinaryOperator<T>를 사용하는 것이 개발자의 의도와 로직을 더 명확하게 표현하고, 가독성을 높일 수 있다.
🏷 기타 함수형 인터페이스
나머지는 간단하다. 입력 값이 2개인 경우에는 BiXxx 형태의 함수형 인터페이스를 사용하면 되고, 3개를 사용하고 싶다면 본인이 그에 맞게 설계해서 사용하면 된다. 예시 코드를 간단히 보고 넘어가자.
package lambda.lambda4;

import java.util.function.BiConsumer;
import java.util.function.BiFunction;
import java.util.function.BiPredicate;

// 입력값이 2개인 경우
public class BiMain {
    public static void main(String[] args) {

        BiFunction<Integer, Integer, Integer> add = (a, b) -> a + b;  // 입력값 2개
        System.out.println("add.apply(1, 2) = " + add.apply(1, 2));

        BiConsumer<String, Integer> repeat = (c, n) -> {  // 입력값 2개
            for (int i = 0; i < n; i++) {
                System.out.print(c);
            }

            System.out.println();
        };

        repeat.accept("*", 10);

        BiPredicate<Integer, Integer> isGreater = (a, b) -> a > b;  // 입력값 2개
        System.out.println("isGreater.test(3, 9) = " + isGreater.test(3, 9));
    }
}

/*
add.apply(1, 2) = 3
**********
isGreater.test(3, 9) = false
*/
package lambda.lambda4;
// 입력값이 3개인 경우
public class TriMain {
public static void main(String[] args) {
TriFunction<Integer, Integer, Integer, Integer> triFunction = (a, b, c) -> a + b + c;
System.out.println("triFunction.apply(3, 4, 5) = " + triFunction.apply(3, 4, 5));
}
// 입맛에 맞게 설계
@FunctionalInterface
interface TriFunction<A, B, C, D> {
D apply(A a, B b, C c);
}
}
// triFunction.apply(3, 4, 5) = 12🎠 기본형 지원 함수형 인터페이스
아래와 같이 기본형을 지원하는 함수형 인터페이스도 존재한다.
package java.util.function;

@FunctionalInterface
public interface IntFunction<R> {

    R apply(int value);
}
많이 사용할 일은 없지만, 고민해볼 필요는 있을 것 같다. 제네릭으로 다 처리될 것 같지만, 아닌 경우도 있다.
일단 생각해보면, 자바 제네릭은 기본형을 다룰 수 없다. 아래와 같은 코드를 본 적이 없다.
interface MyFunction<int, long> ... // 생각해보니 이런거 본 적이 없다.
그리고 래퍼 타입의 경우, 오토 박싱과 언박싱으로 인한 성능 비용이 발생하는데, 이를 줄이기 위해 기본형을 지원하는 인터페이스가 필요하다.
package lambda.lambda4;

import java.util.function.IntFunction;
import java.util.function.IntToLongFunction;
import java.util.function.IntUnaryOperator;
import java.util.function.ToIntFunction;

public class PrimitiveFunction {
    public static void main(String[] args) {

        // 기본형 매개 변수
        IntFunction<String> function = x -> "숫자: " + x;
        System.out.println("function.apply(100) = " + function.apply(100));

        // 기본형 반환
        ToIntFunction<String> toIntFunction = s -> s.length();
        System.out.println("toIntFunction.applyAsInt(\"hello\") = " + toIntFunction.applyAsInt("hello"));

        // 기본형 매개 변수, 기본형 반환
        IntToLongFunction intToLongFunction = x -> x * 100L;
        System.out.println("intToLongFunction.applyAsLong(100) = " + intToLongFunction.applyAsLong(100));

        // IntUnaryOperator: int -> int
        IntUnaryOperator intUnaryOperator = x -> x * 100;
        System.out.println("intUnaryOperator.applyAsInt(100) = " + intUnaryOperator.applyAsInt(100));
    }
}

/*
function.apply(100) = 숫자: 100
toIntFunction.applyAsInt("hello") = 5
intToLongFunction.applyAsLong(100) = 10000
intUnaryOperator.applyAsInt(100) = 10000
*/
지금까지 함수형 인터페이스를 살펴봤다. 가장 중요한 점을 꼽자면 람다를 사용할 때는 항상 의도에 맞게, 항상 자바가 기본으로 제공하는 함수형 인터페이스를 사용하는 것을 매우 매우 권장한다는 것이다. 적극적으로 활용하도록 하자.