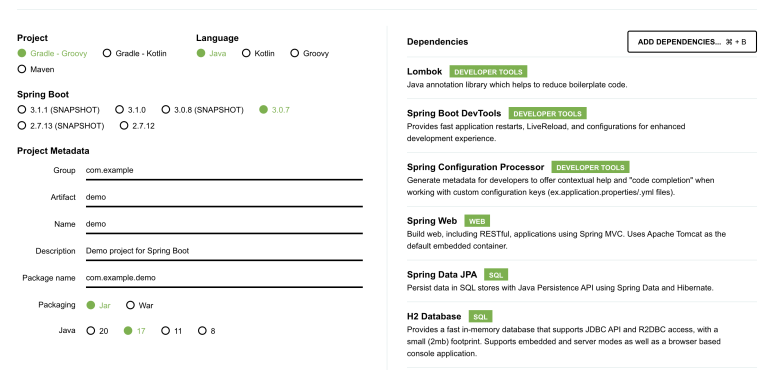
SpringBoot3 프로젝트를 생성하는 방법이 여러개 있지만, 그중에 나는 웹페이지에 접속해서 생성하는 방법을 선호했다.
dependency나 project 설정이나 dependency를 화면상에서 설정하기 편리하기 때문이다.
하지만 계속 사용하다 보니 은근 불편하게 느껴지기했다. 어차피 내가 선호하는 dependency를 비슷한데 매번 같은걸 선택하는게 귀찮게 느껴졌다. 그러던중 CLI를 지원한다는 것을 알게되었다.
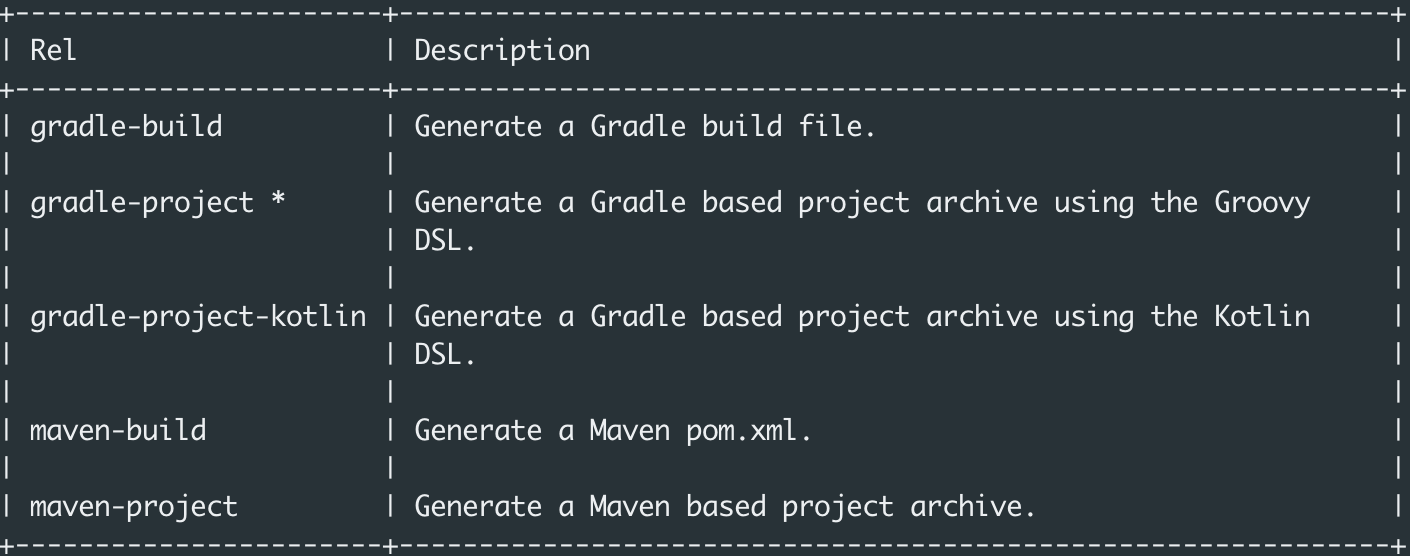
- Command line support
- Command line support You can also generate a project in a shell using cURL or HTTPie . To discover the available options of a particular instance, simply "curl it", i.e. if you have curl installed invoke curl start.spring.io on the command-line (or alternatively http start.spring.io if you prefer...
SpringBoot3 CLI
console에서 start 웹페이지에서 제공하는 기능을 제공한다. 실제 명령이 있는건 아니고 프로젝트를 생성하는 API를 호출하는 방식이다.
지원하는 명령들은 다음처럼 확인할 수 있다.
$ curl https://start.spring.io
지정할 수 있는 파라미터는 크게 3가지로 구분되는데
- build system
- project settings
- dependencies
build system
type 파라미터를 통해서 지정할 수 있다.
$ curl https://start.spring.io -d type=gradle-project 지원하는 옵션은 다음과 같다.
project settings
gradle project에 설정값들을 지정한다.
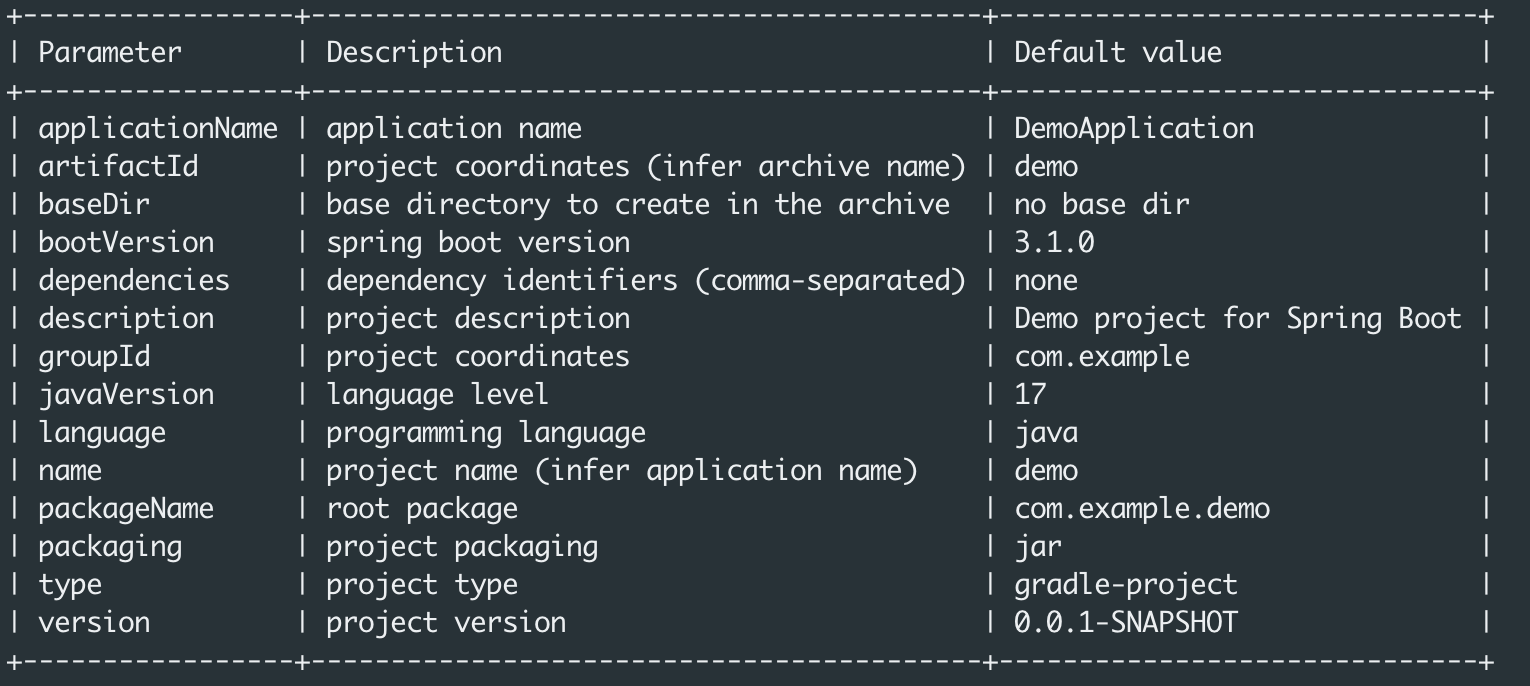
다음과 같이 사용할 수 있다.
 $ curl https://start.spring.io/starter.tgz \
       -d type=gradle-project \
       -d language=java \
       -d javaVersion=17 \
       -d bootVersion=3.0.7 \
       -d baseDir=springbootdemo
dependencies
사용하는 라이브러리를 dependencies param에 지정한다. 지원하는 목록은 너무 길어서 일부만 작성한다.
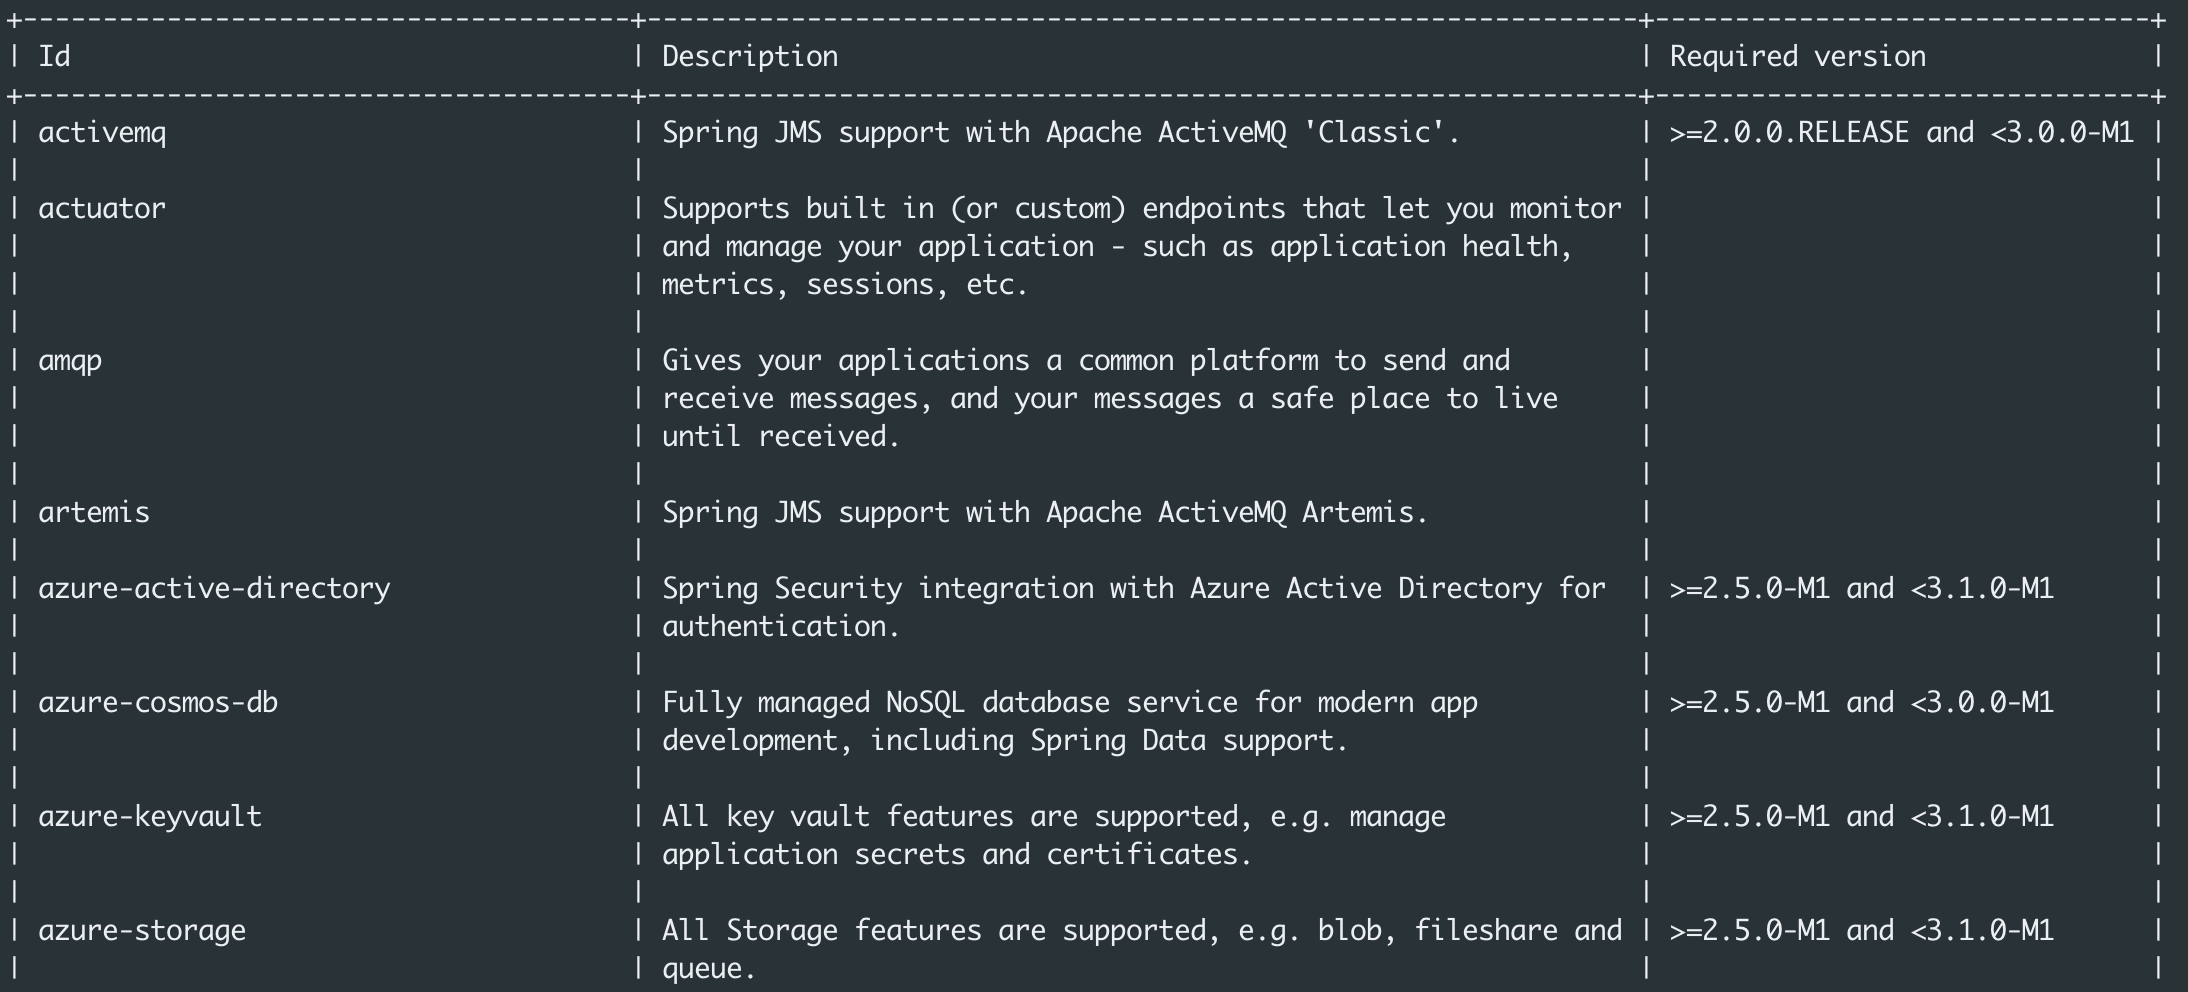
다음과 같이 사용할 수 있다.
curl https://start.spring.io/starter.tgz \
       -d type=gradle-project \
       -d language=java \
       -d javaVersion=17 \
       -d bootVersion=3.0.7 \
       -d baseDir=springbootdemo \
       -d dependencies=web,devtools,lombok,h2,data-jpa,configuration-processor,actuator
마무리
SpringBoot 프로젝트를 생성할 때 start 웹페이지에서 매번 동일한 작업을 할 필요가 없다. 이제 CLI를 사용하자.
그래서 지금 사용하고 있는 java web project script
curl https://start.spring.io/starter.tgz \
    -d language=java \
    -d javaVersion=17 \
    -d type=gradle-project \
    -d dependencies=web,devtools,lombok,h2,data-jpa,configuration-processor,actuator \
    -d bootVersion=3.0.7 \
    -d baseDir=$PROJ \
    -d groupId=$GROUPID \
    -d artifactId=$ARTIFACT\
    -d applicationName="$APPNAME" \
    -o $PROJ.tgz
EOF

coder,maker,custom