This post is about setting up GraphQL Yoga in your next project.
1. Create a New Next.js Project
First, start by creating a new Next.js project. I’m using Bun as my package manager, and the version of Next.js I’m working with is v14.
Here’s what my directory structure looks like:
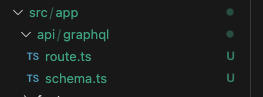
2. Set Up the GraphQL Folder
Next, create a graphql folder under src/app. Inside this folder, we’ll define our typeDefinitions and resolvers.
Type Definitions: These are the definitions for your Query types.
Resolvers: These are the actual implementations (the code/logic) of your GraphQL schema.
Schema: This combines the GraphQL SDL and the resolvers.
Here’s what my schema.ts file looks like:
import { createSchema } from 'graphql-yoga'

const typeDefinitions = /* GraphQL */ `
  type Query {
    hello: String!
  }
`

const resolvers = {
  Query: {
    hello: () => 'Hello World!',
  },
}

export const schema = createSchema({
  resolvers: [resolvers],
  typeDefs: [typeDefinitions],
})
3. Create a Route File
Now, let’s create a route.ts file. We’ll use this file to access our queries.
import { createSchema, createYoga } from 'graphql-yoga'
import { schema } from '@/app/api/graphql/schema'

const { handleRequest } = createYoga({
  schema,
  // Since we’re using Next.js file conventions for routing, we need to set the correct endpoint for Yoga
  graphqlEndpoint: '/api/graphql',

  // Yoga needs to know how to create a valid Next response
  fetchAPI: { Response },
})

export { handleRequest as GET, handleRequest as POST, handleRequest as OPTIONS }
4. Test Your Query
You can now access your query with this URL:
http://localhost:3001/api/graphql?query=query+MyQuery+%7B%0A++hello%0A%7D
Here’s what the response should look like:

//References
Getting Started with GraphQL Yoga
Integration with Next.js