WSL2(Windows Subsystem for Linux 2)는 그 자체만으로도 훌륭하지만 커널 소스도 제공한다. 이번에는 WSL2용 커널을 스스로 빌드하고 적용까지 해보도록 하자.
Kernel Source 받기
위 링크에서 WSL2 커널 소스를 받는다.
git clone --depth=1 --branch linux-msft-wsl-5.4.y https://github.com/microsoft/WSL2-Linux-Kernel.git
linux-msft-wsl-5.4.y 브런치를 선택. --depth=1 옵션으로 마지막 1번째 커밋까지만 받도록 해서 최대한 workspace를 가볍게 하고자 했다. 이 옵션을 붙이지 않으면 모든 커밋을 다 받기 때문에 엄청나게 무거워진다.
.config 세팅하기
.config 파일 얻기
WSL2-Linux-Kernel 디렉토리에 들어가면 일반적인 소스와 달리 Microsoft 폴더가 보인다.
ruby@DESKTOP-B0U1OLC:~/WSL2-Linux-Kernel$ ls -al Microsoft/
total 176
drwxr-xr-x  2 ruby ruby  4096 May 12 06:05 .
drwxr-xr-x 26 ruby ruby  4096 May 12 06:05 ..
-rw-r--r--  1 ruby ruby 84068 May 12 06:05 config-wsl
-rw-r--r--  1 ruby ruby 83712 May 12 06:05 config-wsl-arm64
이 속에는 WSL용 커널 빌드를 위한 .config파일이 마련되어 있다. 여기서는 x86 시스템용 커널을 빌드한다고 생각하겠다.
cp Microsoft/config-wsl .config
.config-wsl을 루트 디렉토리로 복사하자.
.config 세부세팅하기
이건 여러분의 자유다. 자신이 마음에 드는 툴로 .config를 적절히 수정해본다.
vi .config
nano .config
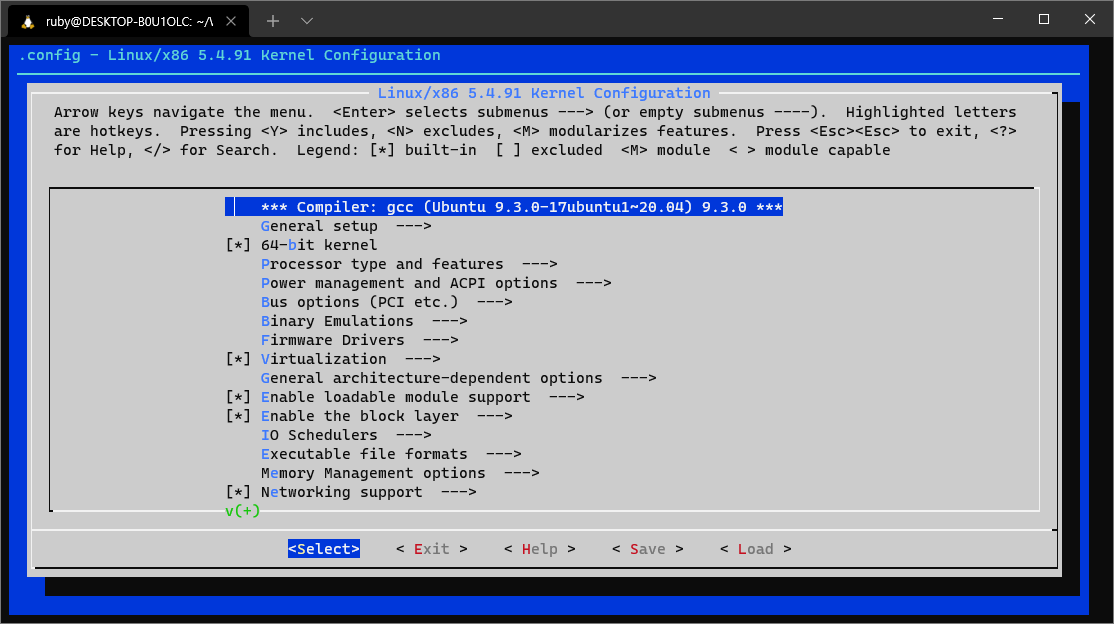
make menuconfig
물론 난 menuconfig를 쓸거다. vi는 별로..
 .config - Linux/x86 5.4.91 Kernel Configuration
 ──────────────────────────────────────────────────────────────────────────────────────────────────────────────────────
  ┌───────────────────────────────────── Linux/x86 5.4.91 Kernel Configuration ─────────────────────────────────────┐
  │  Arrow keys navigate the menu.  <Enter> selects submenus ---> (or empty submenus ----).  Highlighted letters    │
  │  are hotkeys.  Pressing <Y> includes, <N> excludes, <M> modularizes features.  Press <Esc><Esc> to exit, <?>    │
  │  for Help, </> for Search.  Legend: [*] built-in  [ ] excluded  <M> module  < > module capable                  │
  │                                                                                                                 │
  │ ┌─────────────────────────────────────────────────────────────────────────────────────────────────────────────┐ │
  │ │                       *** Compiler: gcc (Ubuntu 9.3.0-17ubuntu1~20.04) 9.3.0 ***                            │ │
  │ │                       General setup  --->                                                                   │ │
  │ │                   [*] 64-bit kernel                                                                         │ │
  │ │                       Processor type and features  --->                                                     │ │
  │ │                       Power management and ACPI options  --->                                               │ │
  │ │                       Bus options (PCI etc.)  --->                                                          │ │
  │ │                       Binary Emulations  --->                                                               │ │
  │ │                       Firmware Drivers  --->                                                                │ │
  │ │                   [*] Virtualization  --->                                                                  │ │
  │ │                       General architecture-dependent options  --->                                          │ │
  │ │                   [*] Enable loadable module support  --->                                                  │ │
  │ │                   [*] Enable the block layer  --->                                                          │ │
  │ │                       IO Schedulers  --->                                                                   │ │
  │ │                       Executable file formats  --->                                                         │ │
  │ │                       Memory Management options  --->                                                       │ │
  │ │                   [*] Networking support  --->                                                              │ │
  │ └───────────────────v(+)──────────────────────────────────────────────────────────────────────────────────────┘ │
  ├─────────────────────────────────────────────────────────────────────────────────────────────────────────────────┤
  │                            <Select>    < Exit >    < Help >    < Save >    < Load >                             │
  └─────────────────────────────────────────────────────────────────────────────────────────────────────────────────┘```
menuconfig가 잘 나타났다.
		      ┌─────────────── Local version - append to kernel release ────────────────┐
                      │  Please enter a string value. Use the <TAB> key to move from the input  │
                      │  field to the buttons below it.                                         │
                      │ ┌─────────────────────────────────────────────────────────────────────┐ │
                      │ │-happy-ruby                                                          │ │
                      │ └─────────────────────────────────────────────────────────────────────┘ │
                      │                                                                         │
                      ├─────────────────────────────────────────────────────────────────────────┤
                      │                         <  Ok  >      < Help >                          │
                      └─────────────────────────────────────────────────────────────────────────┘```
Local version도 바꿔줬다. 이렇게 하면 우리가 빌드한 커널이 잘 적용되었는지 쉽게 파악할 수 있다.
.config - Linux/x86 5.4.91 Kernel Configuration
Kernel hacking > Tracers ───────────────────────────────────────────────────────────────────────────────────────────
  ┌──────────────────────────────────────────────────── Tracers ────────────────────────────────────────────────────┐
  │  Arrow keys navigate the menu.  <Enter> selects submenus ---> (or empty submenus ----).  Highlighted letters    │
  │  are hotkeys.  Pressing <Y> includes, <N> excludes, <M> modularizes features.  Press <Esc><Esc> to exit, <?>    │
  │  for Help, </> for Search.  Legend: [*] built-in  [ ] excluded  <M> module  < > module capable                  │
  │                                                                                                                 │
  │ ┌─────────────────────────────────────────────────────────────────────────────────────────────────────────────┐ │
  │ │                   --- Tracers                                                                               │ │
  │ │                   -*-   Kernel Function Tracer                                                              │ │
  │ │                   [*]     Kernel Function Graph Tracer                                                      │ │
  │ │                   [*]   Enable trace events for preempt and irq disable/enable                              │ │
  │ │                   [*]   Interrupts-off Latency Tracer                                                       │ │
  │ │                   [*]   Scheduling Latency Tracer                                                           │ │
  │ │                   [*]   Tracer to detect hardware latencies (like SMIs)                                     │ │
  │ │                   [*]   Trace syscalls                                                                      │ │
  │ │                   -*-   Create a snapshot trace buffer                                                      │ │
  │ │                   -*-     Allow snapshot to swap per CPU                                                    │ │
  │ │                         Branch Profiling (No branch profiling)  --->                                        │ │
  │ │                   [*]   Trace max stack                                                                     │ │
  │ │                   [*]   Support for tracing block IO actions                                                │ │
  │ │                   [*]   Enable kprobes-based dynamic events                                                 │ │
  │ │                   [ ]     Do NOT protect notrace function from kprobe events                                │ │
  │ │                   [*]   Enable uprobes-based dynamic events                                                 │ │
  │ └───────────────────v(+)──────────────────────────────────────────────────────────────────────────────────────┘ │
  ├─────────────────────────────────────────────────────────────────────────────────────────────────────────────────┤
  │                            <Select>    < Exit >    < Help >    < Save >    < Load >                             │
  └─────────────────────────────────────────────────────────────────────────────────────────────────────────────────┘```
난 마지막으로 ftrace 관련 세팅도 활성화해줬다.
이제 저장하고 나간다.
커널 빌드하기
make -j8
-j[n]의 n은 자신의 프로세서 환경에 맞게 지정하면 된다. 자세한 사항은 여기를 참고하자.
잠시 기다리면 빌드가 완료된다.
빌드 중 에러가 발생한다면
중간에 에러가 난다면 필요 패키지가 설치되어있는지 잘 확인해보자.
보통 아래와 같이 설치하면 무난하다.
sudo apt install git bc build-essential flex bison libssl-dev libelf-dev
커널 적용하기
커널을 적용하는 데에는 두가지 방법이 있다. 개인적으로는 두 번째 방법을 추천한다.
직접 커널 이미지 교체하기
빌드된 커널 이미지는 arch/x86/boot/bzImage이다. 이걸 적절한 곳에 복사해둔다.
wsl --shutdown
이제 WSL2 인스턴스를 종료하자.
C://Windows/System32/lxss/
위 디렉토리를 찾아가면 kernel파일이 있을 것이다. 이걸 교체하면 된다.
기존 파일을 kernel.old로 바꾸고 우리가 만든 파일을 kernel로 붙여넣는다.
.wslconfig 파일 생성하기
빌드가 끝나면 루트 디렉토리에 vmlinux라는 파일이 생성되어 있을 것이다. 이 파일을 적절한 곳에 복사해두자.
C://Users/[UserName]/wsl-kernel/vmlinux
나는 이 경로에 파일을 뒀다.
wsl --shutdown
이제 WSL2 인스턴스를 종료하자.
사용자 폴더 디렉토리 (`C://Users/[UserName]/)에 .wslconfig파일을 작성하자. 내용은 아래처럼 하면 된다.
[wsl2]
kernel=C:\\Users\\[UserName]\\wsl-kernel\\vmlinux
실행해보기
bash 터미널을 열어보자. 에러 없이 $가 나타나면 이미 절반은 성공이다.
uname -a를 해본다.
ruby@DESKTOP-B0U1OLC:/mnt/c/Users/ruby$ uname -a
Linux DESKTOP-B0U1OLC 5.4.91-happy-ruby+ #1 SMP Wed May 12 06:44:37 KST 2021 x86_64 x86_64 x86_64 GNU/Linux
Local Version이 내가 커스텀해두었던 문자열로 지정되었다. 내가 빌드한 커널이 잘 적용된 것이다.
