이번에는 너무나 익숙하게 사용하고 싶었던 react-dragzone을 활용해서 이미지를 드래그해서 supabase에 저장하는 프로젝트를 했습니다!!
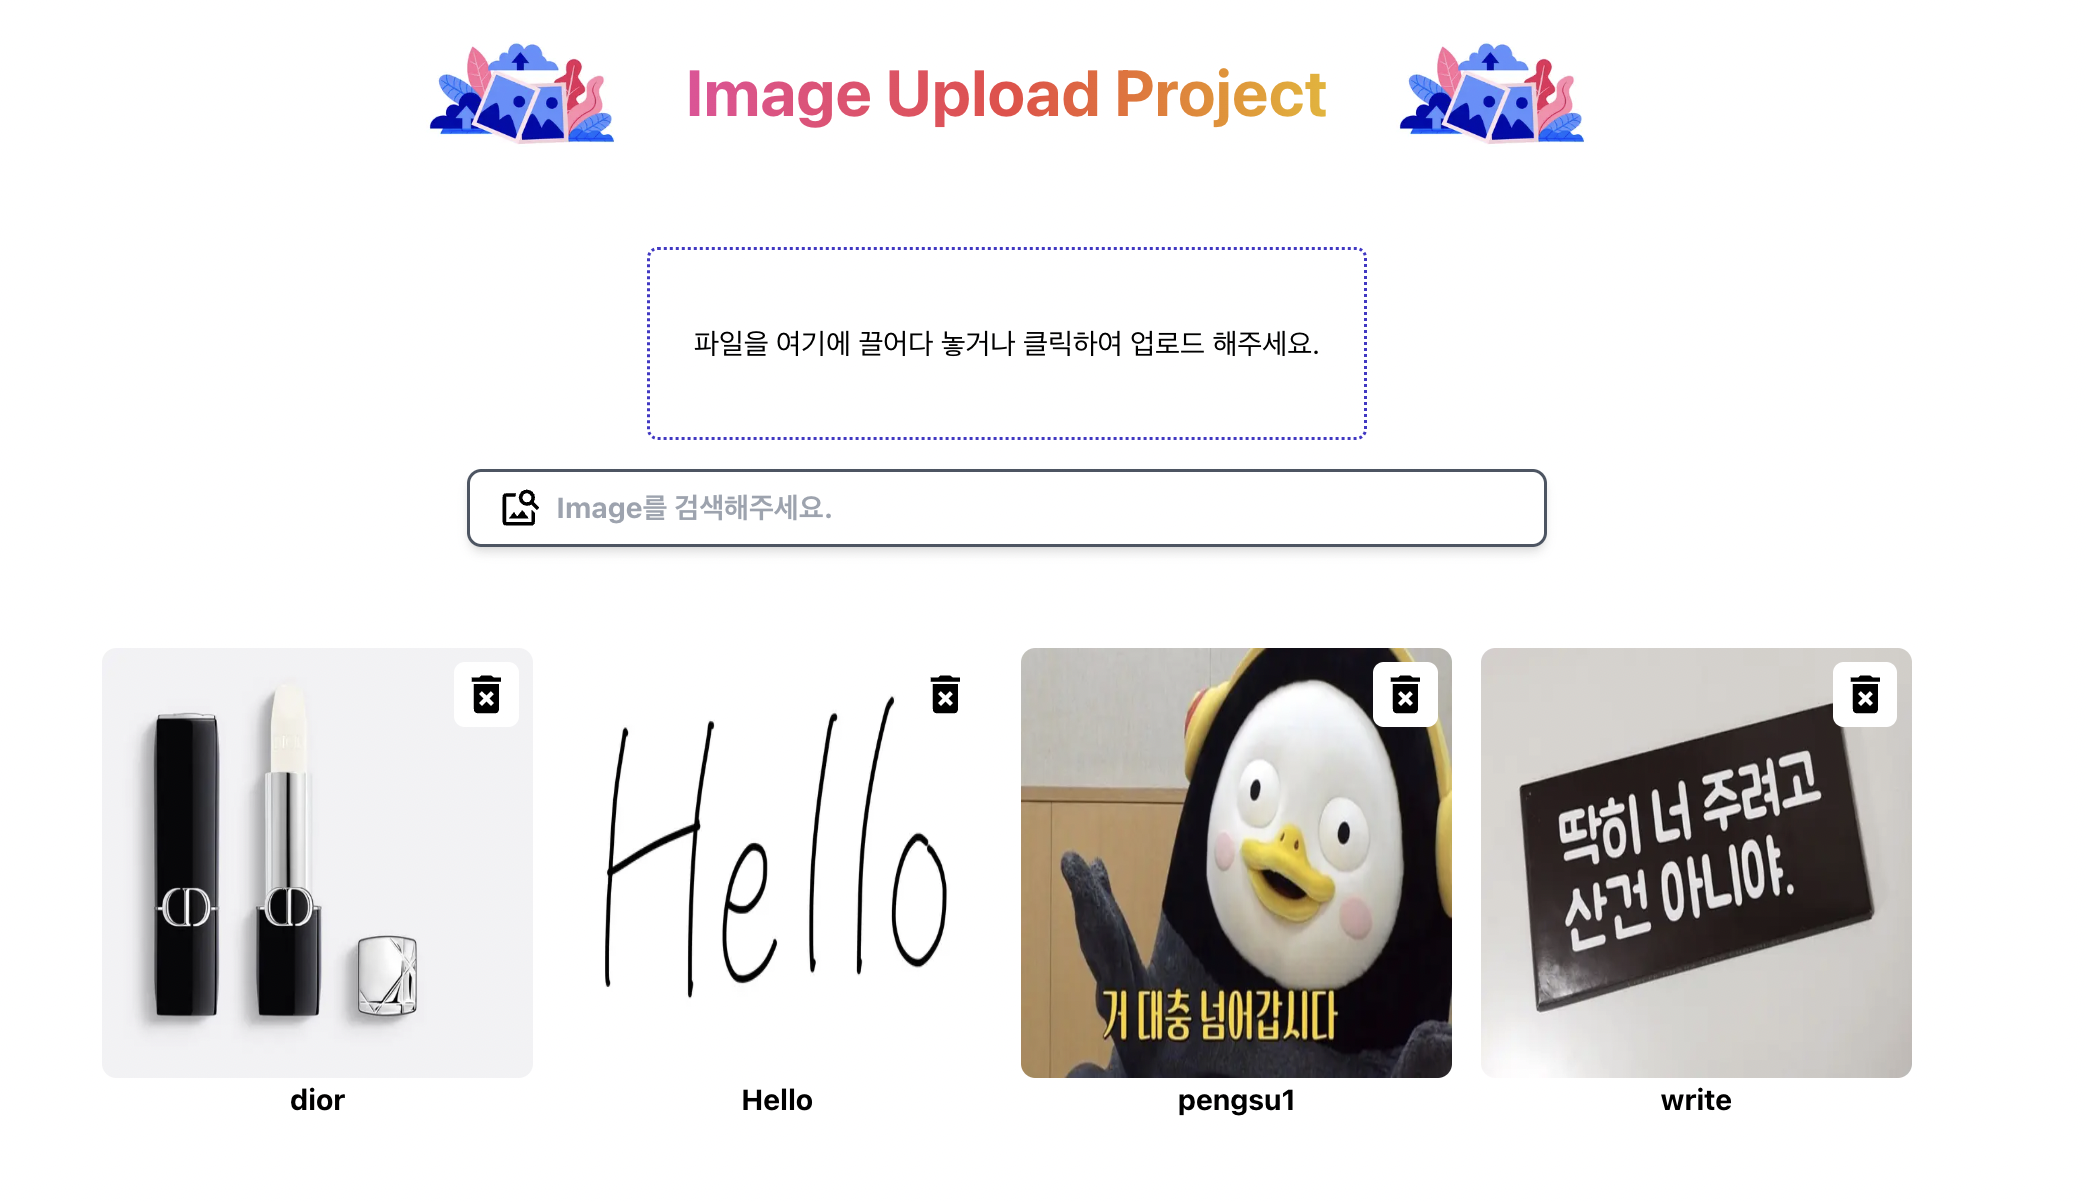
프로젝트 화면
아래 사진처럼 간단하게 이미지를 드래그해서 저장하고
저장된 이미지를 삭제 및 검색 할 수 있는 프로젝트입니다.
이번에도 Github Action + GCP Cloud run으로 CI/CD했습니다.
취준생으로써 클라우드를 사용할 줄 알면서 CI CD를 신경쓴다를 보여줄 수 있어서 애용하는 방식입니다!!
사실 단순히 useState를 사용하고 무식하게 작성했다면 쉬웠겠지만
어떻게 하면 더 나은 ux와 그리고 코드의 명확함을 보여줄 수 있을지를 최대한 고민했습니다 -> gpt와 함께...
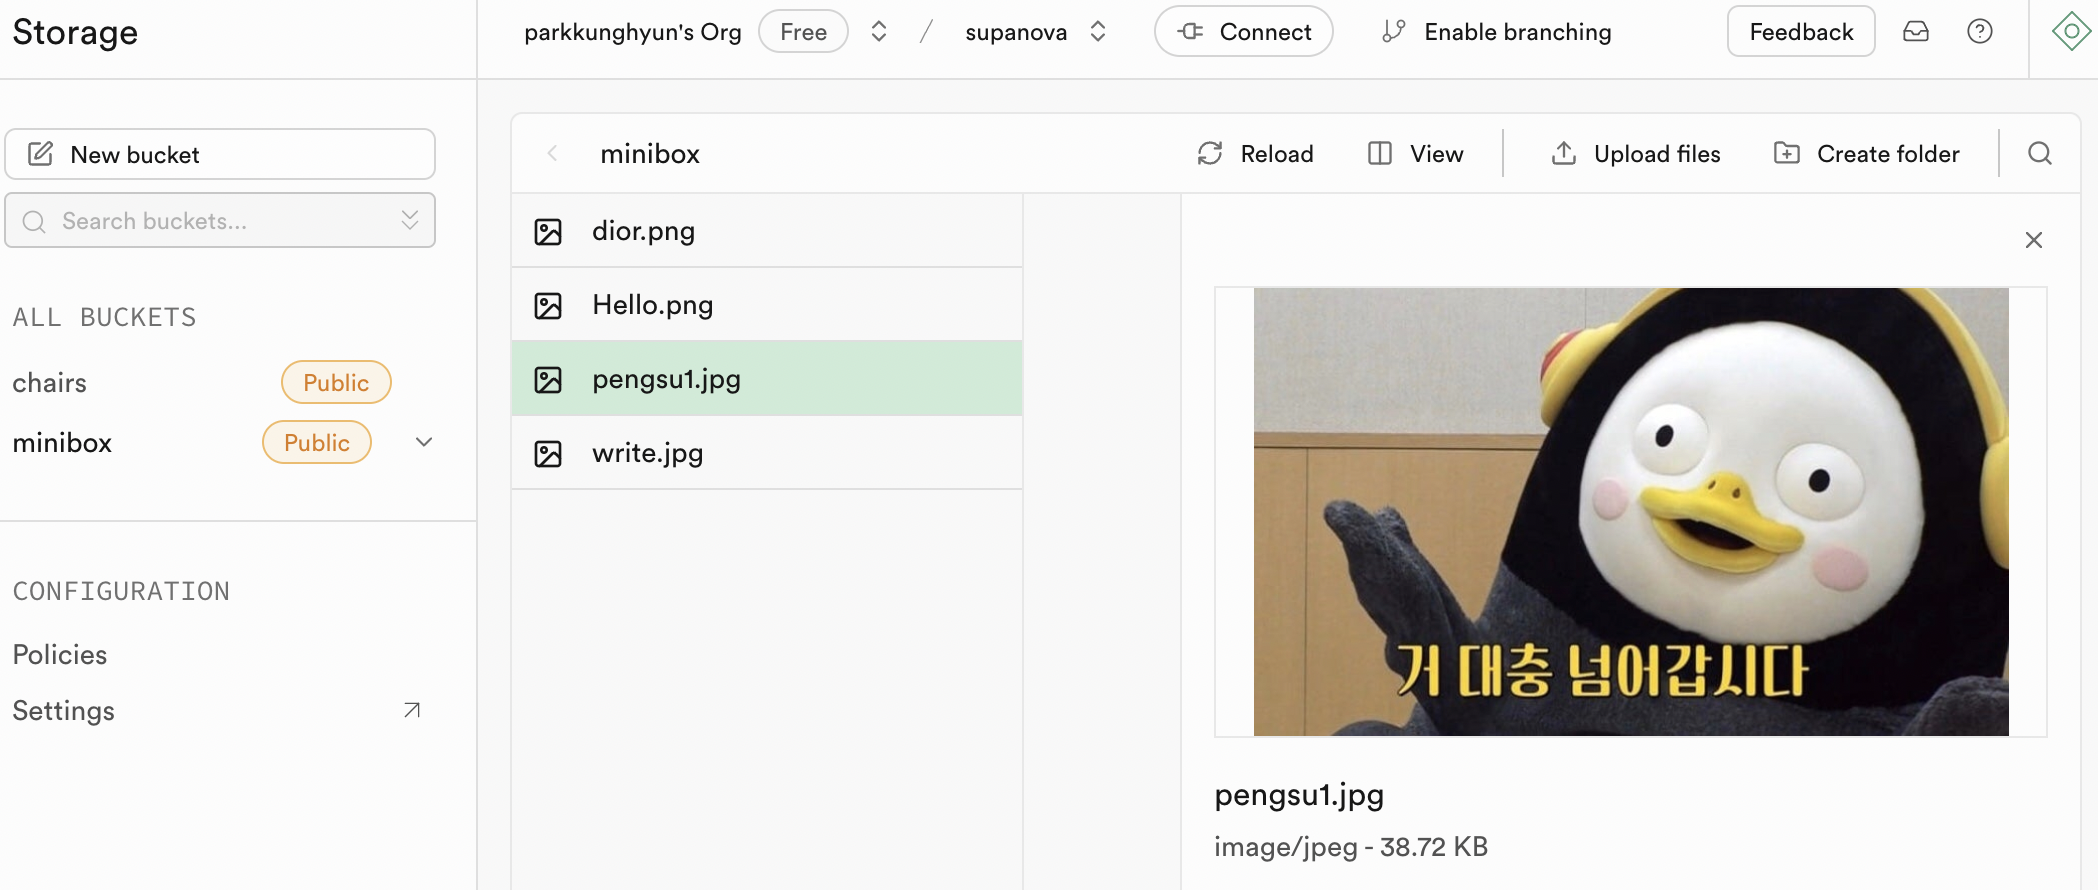
해당 부분은 실제 Supabase에 데이터가 들어가있는 모습입니다.
React Query + server Action의 장점은?
server action = 서버에서 실행되는 함수를 클라이언트에서 직접 호출할 수 있게 해줍니다!!
그래서 ReactQuery에 데이터를 가져오기 위해서 원래 Rest API형태로 fetch를 해야하지만
Next js내부에서 간단히 함수로 정의하고 불러올 수 있습니다.
const { mutate, isLoading, isError } = useMutation({
    mutationFn: uploadFile, // 서버 액션 호출
    onSuccess: () => {
        queryClient.invalidateQueries({ queryKey: ["files"] }); // 데이터 갱신
    },
});

if (isLoading) return <p>Loading...</p>;
if (isError) return <p>Error occurred!</p>;
즉 코드가 훨씬 더 명확해지고 서버액션으로 데이터를 그대로 받을 수 있어 파싱이나 매핑작업을 안해도 됩니다!!
코드 설명
next.config.mjs에 image url을 지정해주자!
Next js에는 몇가지 특화된 태그가 있습니다 ex) Image, Link...
이때 Image는 최적화된 이미지 관리를 제공해줍니다
크기 최적화: 뷰포트 크기에 따라 적절한 이미지 크기를 제공합니다
Lazy Loading: 필요할때만 이미지를 불러서 초기 로딩 속도를 개선합니다
그렇지만 이렇게 사용하기 위해서는 해당 image의 src의 url을 설정해줘야 불러올 수 있습니다!!
const nextCofig= {
	images: {
    	domains: ['hvqztsrkpebbzelbdnbo.supabase.co'], // 내 supabase Url
    }
}
supabase storage를 Image태그에서 부를 수 있는 형태로 변환하자!!
supabase storage는 https부터 시작하는 url로 저장하지 않기 때문에
storage에서 이미지를 받고 https~~를 붙여주는 작업을 한 뒤 src로 불러올 수 있습니다.
이때 저 path 인자가 바로 storage에서 받은 file의 name입니다!!
export function getImageUrl(path) {
    return `${process.env.NEXT_PUBLIC_SUPABASE_URL}/storage/v1/object/public/minibox/${path}`;
}
supabaseStorageActions.js -> server Action을 정의하자
따로 actions/supabaseStorageActions.js라는 파일을 만들어서 서버액션을 지정했습니다.
이제 서버 데이터에 대해 접근 및 수정을 하기 위해서 적혀있는 함수를 불러다가 사용하면 됩니다!!
// 검색한 내용을 보여주는 함수
export async function searchFiles(search="") {
	const {data, error} = await supabase.storage
    	.from("mini-box")
        .list(null, {search});
    if (error) throw new Error;
    console.log("search success");
    return data;
}

// 이미지 업로드 함수
export async function uploadFile(formData) {
	const file = formData.get("file");
    const {data, error} = await supabase.storage
    	.from("mini-box")
        .upload(file.name, file, {upsert: true});
   	if (error) throw new Error(error);
    console.log("upload success");
    return data;
}

// 이미지 삭제 함수
export async function deleteFile(fileName) {
    const { data, error } = await supabase.storage
        .from("minibox")
        .remove([fileName]);

    if (error) throw new Error(error);
    console.log("delete success");
    return data;
}
ImageCardList.jsx -> storage에서 image들을 불러오자!
Get을 사용해서 불러올때는 useQuery를 사용해서 서버 데이터를 불러오고 관리해줍니다.
이때 search에 따라 데이터를 불러옵니다
const ImageCardList = ({search}) => {
	const {data, isLoading, isError} = useQuery({
    	queryKey: ["images", search],
        queryFn: () => searchFiles(search)
    });
    if (isError) <p>Error가 떴습니다. 서버를 확인해주세요.</p>
    if (isLoading) {
        return (
            <div className="flex  justify-center h-screen">
                <p className="font-bold text-4xl text-transparent bg-clip-text bg-gradient-to-r from-blue-700 via-red-500 to-yellow-500 ">
                    image를 Loading중입니다...
                </p>
            </div>
        );
    }
    return (
      <div className='mx-auto w-4/5 grid grid-cols-2 md:grid-cols-3 lg:grid-cols-4 gap-4 '>
          {data && data.map((image) => (
              <ImageCard key={image.id} image={image} />
          ))}
    </div>
  )
}
이미지 파일을 드래그 해서 저장하자!!
다른 블로그에 자세하고 잘 나와있어서
짧게만 react-dragzone 사용법에 대해서 적어보자면
getRootProps -> 이걸로 드래그해서 올릴 전체 영역을 지정합니다.
isDragActive -> Drag를 활성화하고 올렸을때 함수를 실행합니다.
onDrop -> 실행될 콜백함수를 정의합니다.
const FileDragDrop = () => {
	const uploadImageMutation = useMutation({
    	mutationFn: uploadFile,
        onSuccess: () => {
        	queryClient.invalidateQueries({queryKey: ["images"]})
        }
    });

    const onDrop = useCallback(async (acceptedFiles) => {
    	const file = acceptedFiles?.[0];
        if (file) {
        	const formData = new FormData();
            formData.append("file", file);
            const result = await uploadImageMutation.mutateAsync(formData);
            console.log(result);
        }
    }, []);

    const {getRootProps, getInputProps, isDragActive} = useDropzone({onDrop})
      return (
    <div
        {...getRootProps()}
        className="cursor-pointer w-[400px] py-10 rounded-md flex flex-col items-center border-2 border-dotted border-indigo-700"
    >
        <input {...getInputProps()} />
        {uploadImageMutation.isPending ?
            (<AiOutlineLoading3Quarters className="text-4xl" />)
        : (isDragActive ? (
            <p>파일을 여기에 놓아주세요</p>
        ) : (
            <p>파일을 여기에 끌어다 놓거나 클릭하여 업로드 해주세요.</p>
        ))}
    </div>
	);
}
export default FileDragDrop
피드백
지금 사람들끼리 이미지를 공유할 수 있는 거대한 프로젝트를 해보는 중인데 벽에 조금 막혀서;;
이걸 꼭 성공해서 올려보자!!