properties나 yml 설정 파일 등에 입력된 데이터베이스 정보가 GitHub에 업로드된다면, 데이터가 악의적으로 사용될 수 있다.
민감한 정보를 안전하게 관리하기 위해 Jasypt를 사용하여 간단하게 암호화하는 방법을 정리해본다.
1. build.gradle > 의존성 추가
dependencies {
	implementation 'com.github.ulisesbocchio:jasypt-spring-boot-starter:3.0.5'
}
2. VM options > Secret Key 설정
암호화 및 복호화에 사용되는 Secret Key는 본인만이 알고 있는 문자열로 정하고,
VM options에 추가해 외부에 노출되지 않게 한다.
Secret Key가 노출된다면, 누구나 복호화할 수 있게 되므로 암호화의 의미가 없어진다.
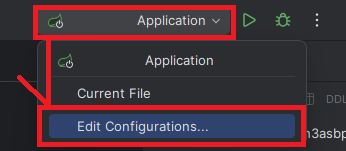
1) Run/Debug Configurations > Edit Configurations 클릭
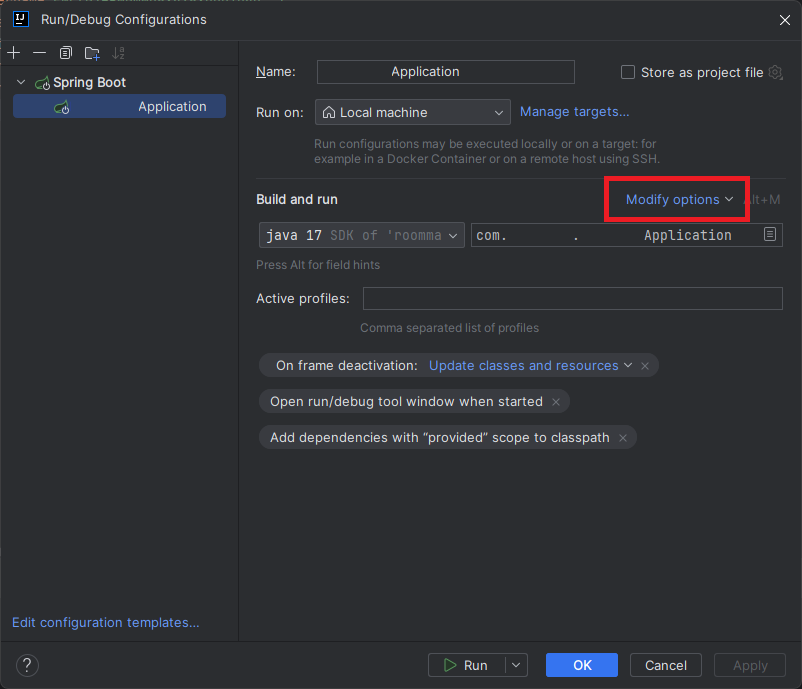
2) Modify options 클릭
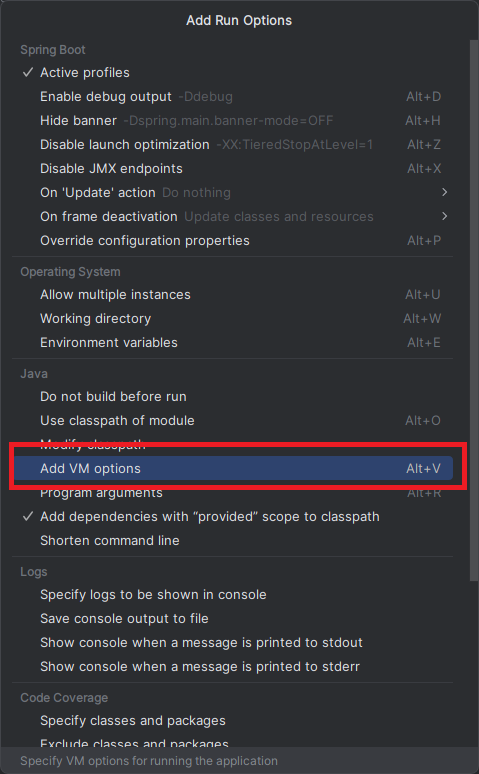
3) Add VM options 클릭
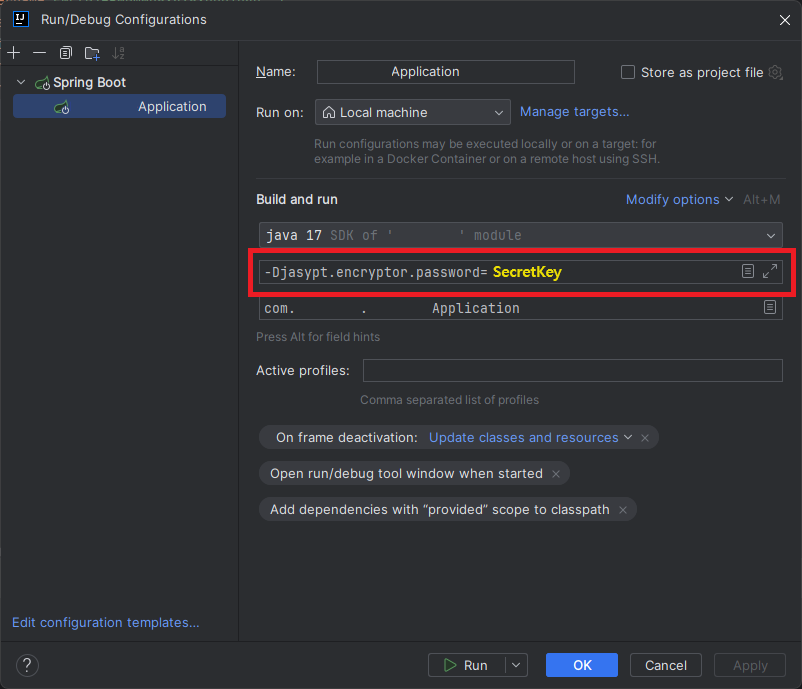
4) -Djasypt.encryptor.password=[Secret Key로 사용할 문자열] 입력 후 OK
3. JasyptConfig 파일 작성
* @EnableEncryptableProperties 어노테이션은 Jasypt 버전에 따라 사용이 불가할 수도 있다.
(예제에서 사용한 버전은 3.0.5)
// import 주의
import com.ulisesbocchio.jasyptspringboot.annotation.EnableEncryptableProperties;
import org.jasypt.encryption.pbe.PooledPBEStringEncryptor;
import org.springframework.beans.factory.annotation.Value;
import org.springframework.context.annotation.Bean;
import org.springframework.context.annotation.Configuration;


@Configuration
@EnableEncryptableProperties
public class JasyptConfig {

	// VM options에서 추가한 Secret Key 설정 값을 읽어서 변수로 사용
    @Value("${jasypt.encryptor.password}")
    private String key;

    @Bean
    public PooledPBEStringEncryptor jasyptStringEncryptor() {
        PooledPBEStringEncryptor encryptor = new PooledPBEStringEncryptor();
        encryptor.setPoolSize(8); // 코어 수
        encryptor.setPassword(key);
        encryptor.setAlgorithm("PBEWithMD5AndDES"); // 암호화 알고리즘

        return encryptor;
    }
}
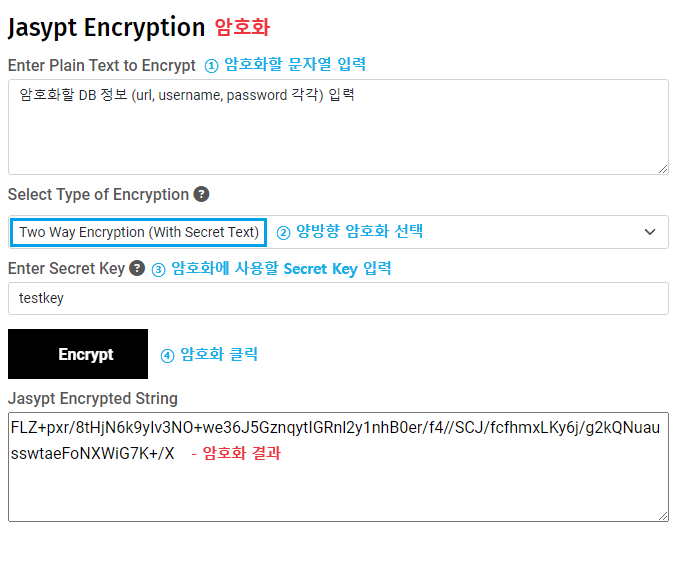
4. DB 정보 암호화
아래 사이트에 접속해 DB 정보 암호화를 진행한다.
https://www.devglan.com/online-tools/jasypt-online-encryption-decryption
🔐 암호화
🔓 복호화

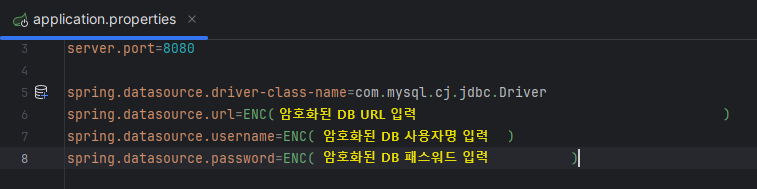
5. application.properties > 프로퍼티 값 수정
- DB 정보 프로퍼티의 값을 ENC([암호화된 문자열])로 수정한다.
끝 ! 서버를 실행해보자
- 서버가 정상적으로 실행된다면 성공이다.
References

학습용 커스터마이징 간단 개발자 사전